Table of Contents
Advertisement
Introduction
Contents
Introduction.................................................................... EN-6
FCC Compliance Statement for American Users ....................................... EN-6
Handling Precautions ................................................................................... EN-7
Caution and Warning Symbols............................................................................ EN-7
A World of Possibilities .............................................................................. EN-14
System Map ...................................................................................................... EN-16
Nomenclature .............................................................................................. EN-17
Names of the Menus and Icons Shown on the Screen............................ EN-21
LED Displays ............................................................................................... EN-25
Self-timer LED (red) .......................................................................................... EN-25
Card access LED (orange)................................................................................ EN-25
Caution LED (red) ............................................................................................. EN-26
Getting Ready............................................................... EN-27
Inserting the Battery Pack.......................................................................... EN-27
Removing the Battery Pack........................................................................ EN-28
Charging the Battery................................................................................... EN-29
Inserting the Memory Card......................................................................... EN-30
Write-Protect Switch *SD Memory Cards only ............................................. EN-31
Removing the Memory Card ...................................................................... EN-32
Turning the Camera On .............................................................................. EN-33
Viewing the battery level and charging guide ............................................... EN-33
Setting the Date and Time .......................................................................... EN-34
Date display format....................................................................................... EN-34
Using the Accessories................................................................................ EN-36
Using the USB Cradle ....................................................................................... EN-36
Attaching the Strap............................................................................................ EN-37
Using the Camera Case.................................................................................... EN-37
Using the Cleaning Pad .................................................................................... EN-38
Attaching the Filter Adapter............................................................................... EN-38
Contents
Glossary
Getting Ready
A Important
BNote
• In this manual, the digital camera is referred to simply as "the camera". Also, SD memory
cards and MultiMedia cards are referred to generically as "memory cards".
Index
This indicates important information that must always be observed
when using the camera.
These provide supplementary explanations or references to further
information on the same topic.
EN-1
Nomenclature
Set Up
NEXT
Menus and Settings
Troubleshooting
Advertisement
Table of Contents

Related Manuals for Contax U4R


Summary of Contents for Contax U4R
-
Page 1: Table Of Contents
Introduction Getting Ready Taking Pictures Playback Set Up Contents A Important This indicates important information that must always be observed when using the camera. BNote These provide supplementary explanations or references to further information on the same topic. • In this manual, the digital camera is referred to simply as "the camera". Also, SD memory cards and MultiMedia cards are referred to generically as "memory cards". - Page 2 Introduction Getting Ready Taking Pictures Playback Set Up Taking Pictures ............EN-39 Taking Still Images..................EN-40 Avoiding camera shake ................EN-40 Holding the camera ..................EN-41 Pressing the shutter release button half way..........EN-42 When the Memory Card is Full ..............EN-42 Using Continuous Shooting Mode ............
- Page 3 Introduction Getting Ready Taking Pictures Playback Set Up Playback ............... EN-85 Viewing Still Images..................EN-86 Viewing Your Images Enlarged................. EN-87 Viewing Image Information (File No/INFORMATION)........EN-88 [O] Viewing Multiple Images..............EN-90 Displaying multiple images................EN-90 Using the MULTI playback / GROUP playback screen ........ EN-92 To return to normal playback (SINGLE playback)..........
- Page 4 [SHUTTER VOL] Adjusting the Volume of the Shutter Sound ....EN-170 [START SCREEN] Selecting the Startup Screen........EN-171 To set the CONTAX logo screen (SINGLE/MULTI) ........EN-171 To set a user-defined screen (SINGLE)............EN-172 To set a user-defined screen (MULTI) ............EN-174 Turning the startup screen off .................
- Page 5 Introduction Getting Ready Taking Pictures Playback Set Up Troubleshooting..................EN-187 Problems and Solutions .................. EN-187 Messages and Responses................EN-190 Basic Digital Camera Glossary ..............EN-192 Index................EN-196 BACK EN-5 Contents Glossary Index Nomenclature Menus and Settings Troubleshooting...
-
Page 6: Introduction
Playback Set Up Introduction FCC Compliance Statement for American Users DIGITAL STILL CAMERA CONTAX U4R Tested To Comply With FCC Standards FOR HOME OR OFFICE USE FCC Statement This device complies with Part 15 of the FCC Rules. Operation is subject to the following two conditions: (1) This device may not cause harmful interference, and (2) this device must accept any interference received, including interference that may cause undesired operation. -
Page 7: Handling Precautions
Introduction Getting Ready Taking Pictures Playback Set Up Handling Precautions Caution and Warning Symbols This Instruction Manual features the following caution and warning symbols to ensure that you use the camera safely. Read the contents of these warnings carefully and use the corresponding features correctly. This symbol indicates procedures which have a high likelihood of resulting in FDANGER death or serious personal injury if not followed properly. - Page 8 • This camera is not designed to be waterproof, and cannot be used in the rain or under water. If the camera should inadvertently be exposed to water, it should be taken quickly to a Contax Service Center for inspection.
-
Page 9: Storing The Camera
• When using a lens cleaner, keep the cleaner away from the leather. <Accessories> For best performance, we recommend the use of genuine Contax accessories. Contax is not responsible for any accidents or damage caused by the use of accessories made by other manufacturers or fashioned by the user. -
Page 10: Lcd Monitor
Introduction Getting Ready Taking Pictures Playback Set Up <LCD Monitor> • Rubbing or pressing strongly on the LCD monitor screen can result in damage or malfunctions. If there is dust or dirt on the LCD monitor, blow it off with a blower brush. - Page 11 Introduction Getting Ready Taking Pictures Playback Set Up • Never place batteries in a microwave oven or other container exposed to high-voltage, since battery liquid may leak, or the battery pack may generate heat, emit smoke or flame, or rupture. •...
- Page 12 Damage to the cords can cause fires and electrical shock. If cords become so damaged that their wire cores are exposed, discontinue use and consult your dealer or Contax Service Center. • Do not attempt to remove covers, disassemble, repair or modify AC adapter, since dangerous electrical shock could result.
-
Page 13: Copyright Information
Make it a practice to take test shots before beginning any photography session to confirm that images are being recorded properly. Contax will not be held responsible for failure of photographs to be recorded or transmitted to a computer due to defects in the recording media (SD memory card or MultiMedia Card (MMC)). -
Page 14: A World Of Possibilities
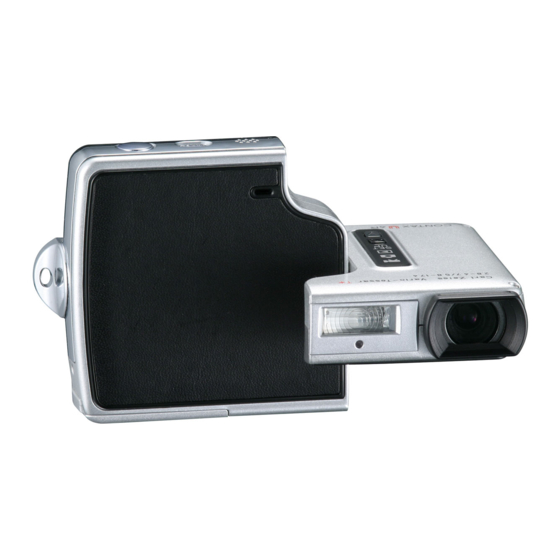
Stylish Slimline Body The ultra-slim body of the CONTAX U4R is only 18 mm thick. You can conveniently put the camera in your pocket and take it with you to take photos whenever you like. - Page 15 Introduction Getting Ready Taking Pictures Playback Set Up Flat body makes it easy to put down If you rotate the lens unit and LCD monitor back to their original positions, the flat camera body offers superb stability. This is really useful when you need the camera to be stable so you can take pictures using the self-timer or the macro function while you check the image by looking at the LCD monitor from above.
-
Page 16: System Map
Set Up System Map Output Print processing store DPOF-compatible printer Memory Card D-connector Digital camera cable (third- CONTAX U4R party product) Video cable (supplied accessory) Television that supports D3 or higher video input (Japan only) USB Cradle (supplied accessory) AC adapter... -
Page 17: Nomenclature
Introduction Getting Ready Taking Pictures Playback Set Up Nomenclature POWER buttonH Speaker p.33 Microphone Shutter release button p.41 Lens hood Lens/cover glass Strap lug p.37 Flash unit Self-timer LED Flash button Y p.63 Continuous shooting button p.44 SCENE buttonI p.53 Caution LED Selector lever udlr / E l: Zoom W (Wide-angle) -
Page 18: Nomenclature
Introduction Getting Ready Taking Pictures Playback Set Up USB Cradle Use the USB cradle to charge the battery pack and to connect to a computer, printer, television or television that supports D3 or higher video input (Japan only). Camera Connection VIDEO OUT port Terminal POWER IN port... -
Page 19: Camera Functions
Introduction Getting Ready Taking Pictures Playback Set Up Camera Functions You can access a wide variety of camera functions by pressing the mode buttons to change the camera mode. The buttons on the LCD monitor unit offer a range of settings to suit photography in a variety of situations. Shooting (Movies) SCENE button Flash button... - Page 20 Introduction Getting Ready Taking Pictures Playback Set Up Digital cameras also offer the user a range of other options, including connecting to a computer and getting your images printed at a print processing store. Connecting to a computer Digital printing Connecting your camera to a computer using the You can either print out your images directly dedicated USB cradle and USB cable gives you access...
-
Page 21: Names Of The Menus And Icons Shown On The Screen
Introduction Getting Ready Taking Pictures Playback Set Up Names of the Menus and Icons Shown on the Screen "C" Still image, "M" Movie mode display Display in the normal screen C Still image mode M Movie mode 1234 00:00 2 2 7 2 X2 . - Page 22 Introduction Getting Ready Taking Pictures Playback Set Up Display when the MENU button K is pressed C Still image mode EXP.COMP. FOCUSING q w e r t y u i o M Movie mode PIXELS q w !0 e r u q SELF TIMER p.58 y METERING...
-
Page 23: P" Playback Mode Display
Introduction Getting Ready Taking Pictures Playback Set Up "P" Playback mode display Display when the MENU button K is pressed RESIZE DISPLAY MODE y u i o !0 q w e r t ROTATE RETURN * When playing back on a television that supports D3 or higher video input. -
Page 24: Getting Ready
Introduction Getting Ready Taking Pictures Playback Set Up Display when the selector lever is moved up u File No Display Information Display (Move the selector lever up u once) (Move the selector lever up u twice) 100–KICX0001.JPG INFORMATION 100–KICX0001.JPG 1600KB 2272X1704 1/125 F2.8... -
Page 25: Led Displays
Introduction Getting Ready Taking Pictures Playback Set Up LED Displays There are 3 LEDs on the camera. The LEDs indicate the status of the camera by either lighting or flashing. Self-timer LED (red) While using the self-timer Flashes When a movie is being shot When the shutter operates and shooting has ended (does not light for continuous shots) When the camera is set to Playback mode... -
Page 26: Caution Led (Red
Introduction Getting Ready Taking Pictures Playback Set Up Caution LED (red) Take particular care to avoid camera shake because a slow shutter speed is being used. Still image Flashes rapidly mode Movie mode The flash is currently charging. Wait until the light stops flashing before taking your next shot. -
Page 27: Inserting The Battery Pack
Introduction Getting Ready Taking Pictures Playback Set Up Getting Ready Inserting the Battery Pack Open the card/battery cover. Slide the card/battery cover in the direction of the arrow E to open it. Insert the battery pack (BP-1100S) Battery Stopper supplied with the camera. Ensure that the t on the camera matches the on the battery pack, as shown in the illustration, then insert the battery pack until the battery... -
Page 28: Removing The Battery Pack
Introduction Getting Ready Taking Pictures Playback Set Up Removing the Battery Pack Check that the camera is turned off and then open the card/ battery cover. Slide the catch that holds the battery pack in place to the open position with the tip of your finger. -
Page 29: Charging The Battery
Introduction Getting Ready Taking Pictures Playback Set Up Charging the Battery A Important Ensure that the battery pack is inserted in the camera before charging. Place the camera in the USB cradle. BNote Refer to "Using the USB Cradle" ( p.36) for details on attaching the USB cradle. -
Page 30: Inserting The Memory Card
Introduction Getting Ready Taking Pictures Playback Set Up Inserting the Memory Card Check that the camera is turned off and then open the card/battery cover. Slide the card/battery cover in the direction of the arrow E to open it. Insert the memory card. Insert the memory card with the labeled side facing the LCD monitor. - Page 31 Introduction Getting Ready Taking Pictures Playback Set Up Write-Protect Switch *SD Memory Cards only SD Memory Cards come with a write-protect switch (although some cards may not have this switch). Write-Protect Switch Sliding this switch downward prevents any more files from Slide this switch being recorded onto the card and protects the images and down to write-...
-
Page 32: Removing The Memory Card
Introduction Getting Ready Taking Pictures Playback Set Up Removing the Memory Card Check that the camera is turned off and then open the card/battery cover. Slide the card/battery cover in the direction of the arrow E to open it. A Important When the card access LED is blinking, images are being recorded onto the memory card. -
Page 33: Turning The Camera On
Introduction Getting Ready Taking Pictures Playback Set Up Turning the Camera On A Important Check that a memory card is inserted in the camera before turning the camera on. Press the POWER button H. The startup screen is displayed for a few seconds and then the normal screen for the selected camera mode appears. -
Page 34: Setting The Date And Time
Introduction Getting Ready Taking Pictures Playback Set Up Setting the Date and Time The first time you use your digital camera, you should set the date and time. Your date and time settings may be cleared when you remove the battery pack or if you leave the camera unused for a long period. - Page 35 Introduction Getting Ready Taking Pictures Playback Set Up Move the selector lever up u or down d to change the date or select the display DATE/TIME ADJUSTMENT format. 2004 09. 01 00:00 Y.M.D CANCEL Press E. SET UP(1/3) This completes the settings and the SET UP menu reappears. AF MODE FORMAT EXECUTE...
-
Page 36: Using The Accessories
Introduction Getting Ready Taking Pictures Playback Set Up Using the Accessories Using the USB Cradle Use the USB cradle to charge the battery pack and to connect to a computer, printer, television or television that supports D3 or higher video input (Japan only). -
Page 37: Attaching The Strap
Introduction Getting Ready Taking Pictures Playback Set Up Attaching the Strap Attach the supplied strap as shown in the illustration. Using the Camera Case Use the camera case as shown in the illustration. BACK NEXT EN-37 Contents Glossary Index Nomenclature Menus and Settings Troubleshooting... -
Page 38: Using The Cleaning Pad
Introduction Getting Ready Taking Pictures Playback Set Up Using the Cleaning Pad Attach the cleaning pad to the strap as shown in the illustration. Clean the lens and LCD monitor with the side to which the cleaning cloth is attached. When cleaning the lens, remove the lens hood before wiping the lens with the cleaning pad. -
Page 39: Taking Pictures
Introduction Getting Ready Taking Pictures Playback Set Up Taking Pictures This chapter explains how to shoot still images and movies. Click on the section you want to read. Taking Still Images Using Continuous Shooting Movies Shooting Mode Quickly Checking Your Using Scene Modes Using Self-Timer Shots (Quick View) -
Page 40: Taking Still Images
Introduction Getting Ready Taking Pictures Playback Set Up Taking Still Images «Applicable mode: C» You can use this camera in various ways. You can take still images, shoot a sequence of consecutive shots (continuous shooting), and shoot movies. This chapter begins by explaining how to shoot photos (still images). Press the POWER button H to turn the camera on, then press the mode buttons UD until "C"... -
Page 41: Holding The Camera
Introduction Getting Ready Taking Pictures Playback Set Up Holding the camera With the LCD monitor facing towards you, hold the lens unit with your left hand and the section with the LCD monitor in your right hand. Take care that your fingers do not obstruct the lens or flash. The camera is easier to hold if the lens unit and LCD monitor unit are at an angle of between 30°... -
Page 42: Pressing The Shutter Release Button Half Way
Introduction Getting Ready Taking Pictures Playback Set Up Pressing the shutter release button half way Not pressed When you press the shutter release button, it stops at a point on the way down to the fully pressed position. At this point, it is said to be pressed half way and the camera Pressed half way determines the focus in readiness for taking a picture. - Page 43 Introduction Getting Ready Taking Pictures Playback Set Up A Important • Press the shutter release button lightly with the soft pad of your fingertip. Pressing the button too hard will result in camera shake. ( "Avoiding camera shake" p.40) • When the shutter speed is low, the warning LED flashes relatively fast and the camera shake warning icon [H] is displayed on the screen.
-
Page 44: Using Continuous Shooting Mode
Introduction Getting Ready Taking Pictures Playback Set Up Using Continuous Shooting Mode «Applicable mode: C» This camera is capable of taking a series of consecutive shots at up to approximately 3.3 frames per second.* This feature is useful for photographing moving subjects and for situations where you do not want to miss a snapshot opportunity. - Page 45 Introduction Getting Ready Taking Pictures Playback Set Up Compose the shot. Press the shutter release button down Pipip half way to set the focus. Press the shutter release button down fully. The camera shoots pictures continuously for as long as you hold the button down.
- Page 46 Introduction Getting Ready Taking Pictures Playback Set Up B Note • When used in combination with the self-timer, a series of 3 continuous shots are taken after either 10 seconds or 2 seconds. ( "[k] Using the Self-Timer" p.58) • You cannot switch to AF continuous shooting in Twilight, Night View or Landscape modes.
-
Page 47: Shooting Movies
Introduction Getting Ready Taking Pictures Playback Set Up Shooting Movies «Applicable mode: M» You can use the camera to shoot movies with sound. Turn the camera on and press the mode button U until "M" lights up on the mode select LED. - Page 48 Introduction Getting Ready Taking Pictures Playback Set Up Press the shutter release button down fully. The camera starts shooting the movie. During movie shooting, the shooting mark (a red "Z") appears and the self-timer LED lights. The elapsed shooting time is displayed in the upper right of the screen and the focus frame disappears.
-
Page 49: N] Setting The Frame Rate For Movies (Frames Per Second)
Introduction Getting Ready Taking Pictures Playback Set Up [N] Setting the Frame Rate for Movies (frames per second) «Applicable mode: M» The frame rate refers to the number of frames shot per second in a movie. The available frame rate settings are 30 frames per second [30fps] and 15 frames per second [15fps]. - Page 50 Introduction Getting Ready Taking Pictures Playback Set Up Press the MENU button K. 30fps The selected frame rate appears on the LCD monitor. A Important This setting is retained when you turn the camera off. BACK EN-50 Contents Glossary Index Nomenclature Menus and Settings Troubleshooting...
-
Page 51: Quickly Checking/Erasing Your Shots (Quick View)
Introduction Getting Ready Taking Pictures Playback Set Up Quickly Checking/Erasing Your Shots (Quick View) «Applicable mode: C/M» This function lets you quickly check the images you have just taken and erase unwanted images when the camera is in "C" or "M" mode. Checking your images If the camera is ready to shoot in either "C"... -
Page 52: Erasing Images
Introduction Getting Ready Taking Pictures Playback Set Up A Important Quick View cannot be used in the following situations: • When there is no memory card inserted • When the card/battery cover is open • When there are no images stored on the memory card Erasing images While an image is displayed, move the selector lever down d. -
Page 53: Selecting Scenes To Automatically Set The Focus And Flash
Introduction Getting Ready Taking Pictures Playback Set Up Selecting Scenes to Automatically Set the Focus and Flash The camera can be set to the optimal shooting settings for any subject. Selecting the Scene Mode «Applicable mode: C» Turn the camera on and press the mode buttons UD until "C"... -
Page 54: Portrait Mode
Introduction Getting Ready Taking Pictures Playback Set Up The following 8 scene modes are available. j Sports Action mode This is the best scene mode for shots of moving subjects, such as at sporting events. e Portrait mode This scene mode is suitable for taking pictures of people. The white balance is optimized to give exquisite skin tones when using this scene mode. -
Page 55: Cancelling Scene Modes
Introduction Getting Ready Taking Pictures Playback Set Up d Night View mode This is the best scene mode for shots of nighttime scenes. The flash is turned off and the focus is fixed at infinity. M Black and White mode This mode gives the same colors as photographs taken using monochrome film. -
Page 56: Switching Between Macro And Landscape Mode
Introduction Getting Ready Taking Pictures Playback Set Up Switching Between Macro and Landscape Mode «Applicable mode: C/M» Macro and Landscape modes help you select the best possible camera settings for shots of close-up subjects and distant scenery. With the camera ready to shoot in "C" or "M"... -
Page 57: Using Macro Mode
Introduction Getting Ready Taking Pictures Playback Set Up Using Macro Mode Compose the shot and press the shutter release button half way. The camera gives a short double-beep, the green shooting mark "Z" lights on the LCD monitor and the focus frame turns green to indicate that the focus has been set. -
Page 58: K] Using The Self-Timer
Introduction Getting Ready Taking Pictures Playback Set Up [k] Using the Self-Timer «Applicable mode: C/M» The self-timer is useful for shots where you want to include the photographer in the shot, such as commemorative photographs. In this mode, the shutter releases either 2 seconds or 10 seconds after you press the shutter release button. - Page 59 Introduction Getting Ready Taking Pictures Playback Set Up Press the shutter release button. The self-timer runs for the selected delay time and then releases the shutter. When you are shooting a movie, movie shooting starts when the specified self-timer delay has elapsed. A Important •...
-
Page 60: Using Zoom (Wide-Angle And Telephoto)
Introduction Getting Ready Taking Pictures Playback Set Up Using Zoom (Wide-angle and Telephoto) «Applicable mode: C/M» Use zoom to take pictures when you are at events such as sports meets or school plays where you want to zoom in on a distant subject, or when you want to compose a wide-angle shot of distant scenery. -
Page 61: Switching The Digital Zoom On And Off
Introduction Getting Ready Taking Pictures Playback Set Up When the image is fully zoomed in, X1 . 3 X1 . 3 1 . 3 release the selector lever and then move the selector lever right rT again. This camera can zoom from x1.3 to x6.0 in 15 steps of 1/3 zoom. (Digital Zoom) When shooting still images, the range of magnification available using digital zoom depends on the image size (... - Page 62 Introduction Getting Ready Taking Pictures Playback Set Up Move the selector lever up u or down d SET UP(2/3) to select the desired setting, then press BEEP SHUTTER VOL SHUTTER VOL DIGITAL ZOOM DIGITAL ZOOM START SCREEN START SCREEN The selected setting is applied. REC REVIEW REC REVIEW 2SEC...
-
Page 63: Using The Flash
Introduction Getting Ready Taking Pictures Playback Set Up Using the Flash «Applicable mode: C» This camera has an Automatic Flash mode in which the camera determines whether or not to fire the flash based on the ambient light level. However, there is also a range of other flash modes that you can use to achieve particular effects in your shots. -
Page 64: Setting The Flash Mode
Introduction Getting Ready Taking Pictures Playback Set Up Setting the Flash Mode Turn the camera on and press the mode buttons UD until "C" lights up on the mode select LED. Press the flash button Y to select the icon for the mode you want to set. The flash mode icon changes in the cycle shown below each time you press the flash button Y. -
Page 65: Flash Settings For Each Modes
Introduction Getting Ready Taking Pictures Playback Set Up Flash settings for each modes There are limitations on flash settings when using Scene modes ( p.53) or Macro/Landscape mode ( p.56). B Note It is recommended that you use the default flash settings in each of these modes. Scene mode Scene mode Available flash modes... -
Page 66: Effective Flash Range
Introduction Getting Ready Taking Pictures Playback Set Up Effective flash range The effective flash range varies depending on parameters such as zoom and ISO sensitivity ( p.69) settings. When taking pictures, refer to the distances shown in the figure at the right. Wide-Angle : Approx. -
Page 67: Adjusting The Brightness
Introduction Getting Ready Taking Pictures Playback Set Up Adjusting the Brightness [M] Using Exposure Compensation «Applicable mode: C/M» Use exposure compensation to adjust the brightness of your images. This function is especially useful for shots where you did not get the ideal exposure because the brightness of the subject and background were very different. - Page 68 Introduction Getting Ready Taking Pictures Playback Set Up Press the MENU button K. +2 . 0 The specified value appears on the LCD monitor. A Important • The exposure compensation setting does not change after a shot is taken. • This setting reverts to the default value when you turn the camera off. •...
-
Page 69: Iso] Changing The Iso Sensitivity To Shoot Fast Moving Subjects
Introduction Getting Ready Taking Pictures Playback Set Up [ISO] Changing the ISO Sensitivity to Shoot Fast Moving Subjects «Applicable mode: C» The [ISO] setting corresponds to the ISO value of conventional film and indicates sensitivity to light. The ISO sensitivity options in this mode are [AUTO], [50], [100], [200] and [400]. - Page 70 Introduction Getting Ready Taking Pictures Playback Set Up Press the MENU button K. ISO200 The icon for the specified value appears on the LCD monitor. A Important This setting is retained when you turn the camera off. B Note [AUTO] is used in Sports Action, Portrait, Sunset, Night Portrait, Twilight and Night View modes.
-
Page 71: Metering] Selecting The Area Used For Setting The Exposure
Introduction Getting Ready Taking Pictures Playback Set Up [METERING] Selecting the Area Used for Setting the Exposure «Applicable mode: C» In this mode, you can select the area that the camera uses to set the exposure. The available settings are [EVALUATION], [CENTER] and [SPOT AREA]. - Page 72 Introduction Getting Ready Taking Pictures Playback Set Up Move the selector lever left l or right r to select METERING [L] and press E. METERING Move the selector lever up u or down d to select the desired setting and press E. EVALUATION The metering mode is now set.
-
Page 73: Setting The Focus
Introduction Getting Ready Taking Pictures Playback Set Up Setting the Focus [FOCUSING] Selecting the Focusing Method «Applicable mode: C/M» You can select either of 2 automatic focusing modes: [MULTI AF] or [SPOT AF]. [MULTI AF] : The camera automatically chooses the location to focus on from multiple points on the screen. - Page 74 Introduction Getting Ready Taking Pictures Playback Set Up Move the selector lever left l or right r to select FOCUSING [J] and press E. FOCUSING Move the selector lever up u or down d to select the desired mode and press E. The focusing frame is now set.
-
Page 75: Focusing Off-Center (Focus Lock)
Introduction Getting Ready Taking Pictures Playback Set Up Focusing Off-Center (Focus Lock) «Applicable mode: C/M» Use Focus Lock in situations where the subject you want to focus on is not in the center of the image, or when you want to compose a shot where the focal point is not in the center of the shot. -
Page 76: Subjects That Are Difficult To Focus On
Introduction Getting Ready Taking Pictures Playback Set Up Subjects That Are Difficult to Focus On The camera has difficulty focusing on the following types of subject. Lock the focus on another object at the same distance from the camera as the desired subject and then take the picture. •... -
Page 77: Af Mode] Still And Moving Subjects
Introduction Getting Ready Taking Pictures Playback Set Up [AF MODE] Still and Moving Subjects «Applicable mode: C/M» This setting selects the method the camera uses to automatically set the focus. [SAF] : (Single Auto Focus) (Default): Best for normal photography. The camera sets the focus when you press the shutter release button half way. -
Page 78: V] Selecting The Number Of Pixels
Introduction Getting Ready Taking Pictures Playback Set Up [V] Selecting the Number of Pixels «Applicable mode: C/M» The number of pixels refers to the number of individual dots used to make up the image. The larger this number, the better the image quality. However, this also increases the size of the image file so that fewer pictures can be taken. -
Page 79: Guide To Selecting The Number Of Pixels
Introduction Getting Ready Taking Pictures Playback Set Up Guide to Selecting the Number of Pixels For high-quality printing or to give priority to image quality, choose a large number of pixels (image size). For files you want to send as e-mail attachments, choose a small image size to keep the file size small. The number of shots that can be taken is smaller if the number of pixels is large, and larger if the number of pixels is small. -
Page 80: Adjusting Image Colors And Other Settings
Introduction Getting Ready Taking Pictures Playback Set Up Adjusting Image Colors and Other Settings [s] Selecting the Light Source (White Balance) «Applicable mode: C/M» The color of a subject varies depending on the light source used. Setting the white balance is the process by which image colors are calibrated to ensure that photographed objects appear in their true colors regardless of the light source used. -
Page 81: Configuring White Balance Manually
Introduction Getting Ready Taking Pictures Playback Set Up Press the MENU button K. The icon for the selected white balance setting appears on the LCD monitor. A Important This setting is retained when you turn the camera off. B Note In Sunset mode, Twilight mode, Black and White mode, and Sepia mode, the white balance is automatically configured as suitable for the mode and cannot be changed. - Page 82 Introduction Getting Ready Taking Pictures Playback Set Up Position your prepared white sample so PRESET WB? that it fills the frame on the screen. CANCEL Adjust the subject to fill the frame on the screen. White subject, such as paper. Move the selector lever up u to select [SET], then press E.
-
Page 83: Chroma] Changing The Color Intensity
Introduction Getting Ready Taking Pictures Playback Set Up [CHROMA] Changing the color intensity «Applicable mode: C» The [CHROMA] setting lets you take pictures in which the intensity of the colors is increased (brighter colors) or decreased (paler colors). Turn the camera on and press the mode buttons UD until "C"... -
Page 84: Sharpness] Enhancing The Image Outlines
Introduction Getting Ready Taking Pictures Playback Set Up [SHARPNESS] Enhancing the Image Outlines «Applicable mode: C» This setting enables you to take pictures in which the subject's outline is sharpened or softened. Turn the camera on and press the mode buttons UD until "C"... -
Page 85: Playback
Introduction Getting Ready Taking Pictures Playback Set Up Playback This chapter explains how to use your camera's playback modes to check your images. Click on the section you want to read. Viewing Still Images Viewing Multiple Viewing Continuous Images Shooting Images Viewing Movies Viewing Images Erasing Unwanted... -
Page 86: Viewing Still Images
Introduction Getting Ready Taking Pictures Playback Set Up Viewing Still Images «Applicable images: Still images only» Turn the camera on and press the mode buttons UD until "P" lights up on the mode select LED. The last image shot appears on the LCD monitor. Move the selector lever left l or right r to select the image to view. -
Page 87: Viewing Your Images Enlarged
Introduction Getting Ready Taking Pictures Playback Set Up Viewing Your Images Enlarged «Applicable images: Still images only» You can move the selector lever lr to enlarge an image during playback. Turn the camera on and press the mode buttons UD until "P" lights up on the mode select LED. -
Page 88: Viewing Image Information (File No/Information)
Introduction Getting Ready Taking Pictures Playback Set Up Press E to display the zoom area movement screen. CHANGE AREA X4.0 X4.0 X4.0 Move the selector lever up, down, left or right udlr to scroll the image in that direction. Press E again to accept the selected magnification and area and CHANGE return to the playback screen (zoomed playback). - Page 89 Introduction Getting Ready Taking Pictures Playback Set Up B Note • Refer to p.24 for details of the screen displayed. • Press the MENU button K when information is displayed to return to the normal playback screen. BACK EN-89 Contents Glossary Index Nomenclature...
-
Page 90: O] Viewing Multiple Images
Introduction Getting Ready Taking Pictures Playback Set Up [O] Viewing Multiple Images «Applicable images: Still images / movies» In addition to the standard SINGLE playback mode, the camera has MULTI playback and GROUP playback modes that show multiple thumbnail images. •... - Page 91 Introduction Getting Ready Taking Pictures Playback Set Up Move the selector lever left l or right r to select DISPLAY MODE [O] and press E. DISPLAY MODE Move the selector lever up u or down d DISPLAY MODE to select [MULTI] or [GROUP], then press SINGLE MULTI GROUP...
-
Page 92: Using The Multi Playback / Group Playback Screen
Introduction Getting Ready Taking Pictures Playback Set Up Using the MULTI playback / GROUP playback screen MULTI Playback TDPOF icon: Indicates that print settings have Current frame number/Total number of frames: been specified for the image. Shows the position of the selected image relative to the total number of photographed images. -
Page 93: To Return To Normal Playback (Single Playback)
Introduction Getting Ready Taking Pictures Playback Set Up To return to normal playback (SINGLE playback) In MULTI playback / GROUP playback 4/18 mode, move the selector lever up, down, left or right udlr to select the image to be viewed in the normal playback mode. -
Page 94: Viewing Continuous Shooting Images
Introduction Getting Ready Taking Pictures Playback Set Up Viewing Continuous Shooting Images «Applicable images: Continuous shooting images only» Each series of continuous shooting images (image group) is automatically played back continuously. Turn the camera on and press the mode buttons UD until "P" lights up on the mode select LED. - Page 95 Introduction Getting Ready Taking Pictures Playback Set Up Press the continuous shooting button N. BNote Press the continuous shooting button N again or press the MENU button K to stop the playback of continuous shooting images. A Important When you erase a single image from within a group of continuous images, the group splits into 2 groups of continuous images.
-
Page 96: Viewing Movies
Introduction Getting Ready Taking Pictures Playback Set Up Viewing Movies «Applicable images: Movies only» While playing movies, you can pause playback, move forward one frame at a time (frame advance) and adjust the volume. Turn the camera on and press the mode buttons UD until "P"... - Page 97 Introduction Getting Ready Taking Pictures Playback Set Up Operation Description Selector lever right r Move selector lever once to stop the movie, and then begin scanning forwards through the movie frame by frame each time you move the selector lever. Hold the lever right for 1 second to scan forward through the movie at twice the playback speed.
-
Page 98: O] Viewing Images Automatically As A Slideshow (Auto Play)
Introduction Getting Ready Taking Pictures Playback Set Up [o] Viewing Images Automatically as a Slideshow (Auto Play) «Applicable images: Still images / movies» The camera's [AUTO PLAY] (slideshow) function displays your images at set intervals in the order in which they were photographed. AUTO PLAY can playback sound for movies and for images with postrecorded messages. - Page 99 Introduction Getting Ready Taking Pictures Playback Set Up Move the selector lever up u or down d SETTING AUTO PLAY to select [INTERVAL], then move the lever START EXECUTE right r. INTERVAL 2SEC START FRAME THIS FRAME RECORD/MOVIE PLAYBACK EFFECT RETURN Move the selector lever up u or down d SETTING AUTO PLAY...
- Page 100 Introduction Getting Ready Taking Pictures Playback Set Up Move the selector lever up u or down d SETTING AUTO PLAY to select the playback method, then press START START EXECUTE INTERVAL 2SEC START FRAME THIS FRAME RECORD/MOVIE PLAYBACK [PLAYBACK] : Postrecorded voice messages and movies are EFFECT NOPLAYBACK included in the slideshow.
-
Page 101: Starting And Ending An [Auto Play] Slideshow
Introduction Getting Ready Taking Pictures Playback Set Up Starting and Ending an [AUTO PLAY] Slideshow See p.98 for more information on the [AUTO PLAY] settings. Turn the camera on and press the mode buttons UD until "P" lights up on the mode select LED. - Page 102 Introduction Getting Ready Taking Pictures Playback Set Up The table below lists the operations you can perform while a movie or a still image with a postrecorded message is being played back. Description Operation Still image with postrecorded Movies message Selector lever up Increases the volume.
-
Page 103: J]/[I] Erasing Unwanted Images
Introduction Getting Ready Taking Pictures Playback Set Up [J]/[I] Erasing Unwanted Images «Applicable images: Still images / movies» There are 3 methods for erasing images recorded on a memory card: • [ERASE] : Erases just one image. • [SELECT AND ERASE] : Erases the images you have selected. •... -
Page 104: Erasing A Selection Of Images (Select And Erase)
Introduction Getting Ready Taking Pictures Playback Set Up Move the selector lever left l or right r to select the image you want to erase. Move the selector lever up u to select ERASE IMAGE? [EXECUTE], then press E. The image is erased and the next image appears. If there are no further images, the "NO IMAGE"... - Page 105 Introduction Getting Ready Taking Pictures Playback Set Up Move the selector lever left l or right r to select ERASE MULTIPLE [I] and press The multiple erase screen appears. ERASE MULTIPLE Move the selector lever up u to select ERASE MULTIPLE [SELECT AND ERASE], then press E.
-
Page 106: Erasing All The Images (Erase All)
Introduction Getting Ready Taking Pictures Playback Set Up Erasing all the images (ERASE ALL) You can use the procedure below to erase all the images recorded on a memory card. A Important • You cannot erase protected images ( p.107). •... -
Page 107: U] Protecting Images From Accidental Erasing (Protect)
Introduction Getting Ready Taking Pictures Playback Set Up [U] Protecting Images from Accidental Erasing (PROTECT) «Applicable images: Still images / movies» This feature enables you to protect important images to ensure that they are not inadvertently erased. B Note These settings can also be changed in MULTI playback / GROUP playback ( p.90) and QuickView ( p.51) modes. -
Page 108: Unprotecting An Image
Introduction Getting Ready Taking Pictures Playback Set Up Press the MENU button K. A Important [ERASE ALL] ( p.106) does not erase protected images. However, [FORMAT] p.163) erases all of the images on the card, including protected images. B Note In SINGLE playback mode, press the SCENE button I to view the protection settings screen. -
Page 109: Tips For Erasing Images Using [Protect] And [Erase All]
Introduction Getting Ready Taking Pictures Playback Set Up Tips for Erasing Images Using [PROTECT] and [ERASE ALL] For example, if you have 100 recorded images and you only want to keep 5 or 6 of them, using [ERASE] or [SELECT AND ERASE] to erase individual images can be very time-consuming. In a situation like this, where you have a large number of recorded images and you only want to keep a few of them, you can accomplish it in just a few steps using [PROTECT] and [ERASE ALL]. -
Page 110: P] Adding Sounds To Still Images (Postrecording)
Introduction Getting Ready Taking Pictures Playback Set Up [p] Adding Sounds to Still Images (POSTRECORDING) «Applicable images: Still images only» This feature allows you to add recorded voice messages to photographed images. B Note • These settings can also be used in MULTI playback / GROUP playback modes p.90). - Page 111 Introduction Getting Ready Taking Pictures Playback Set Up Move the selector lever up u to select 00:30 RECORD SOUND? [EXECUTE], then press E. Voice recording begins. When you speak into the microphone on the front of the camera, the EXECUTE camera records your voice.
-
Page 112: Playing Back A Recorded Message
Introduction Getting Ready Taking Pictures Playback Set Up Playing back a recorded message Use the procedure below to play back a postrecorded voice message. Turn the camera on and press the mode buttons UD until "P" lights up on the mode select LED. -
Page 113: Erasing A Recorded Message
Introduction Getting Ready Taking Pictures Playback Set Up Erasing a recorded message Use the procedure below to erase a postrecorded voice message. Turn the camera on and press the mode buttons UD until "P" lights up on the mode select LED. Press the MENU button K to display the menu icons. -
Page 114: V] Resizing And Trimming Images (Resize)
Introduction Getting Ready Taking Pictures Playback Set Up [V] Resizing and Trimming Images (RESIZE) «Applicable images: Still images only» You can use the procedure below to change the number of pixels (resize) in a photographed image and trim off any unwanted portions (trimming). You can select "320 x 240"... -
Page 115: Resizing An Image
Introduction Getting Ready Taking Pictures Playback Set Up Resizing an image Turn the camera on and press the mode buttons UD until "P" lights up on the mode select LED. Press the MENU button K to display the menu icons. Move the selector lever left l or right r to select RESIZE [V] and press E. - Page 116 Introduction Getting Ready Taking Pictures Playback Set Up Set the area to be resized and then press SELECT AREA To simply change the number of pixels, press E. To enlarge an area, press the SCENE button I to enlarge the image ZOOM AREA: CHANGE AREA: by 2x or 4x.
-
Page 117: Checking And Erasing Resized Images
Introduction Getting Ready Taking Pictures Playback Set Up Checking and erasing resized images While you can use normal playback to view resized images, the procedure below enables you to view and erase only the resized images. Turn the camera on and press the mode buttons UD until "P"... -
Page 118: Resizing All The Images
Introduction Getting Ready Taking Pictures Playback Set Up Press the MENU button K. Resizing all the images You can use this procedure to resize all the images recorded on a memory card. Turn the camera on and press the mode buttons UD until "P"... - Page 119 Introduction Getting Ready Taking Pictures Playback Set Up Move the selector lever up u or down d SELECT IMAGE SIZE to select the image size, then press E. 320X240 E-MAIL ( S ) 160X120 THUMB NAIL The number of resized images is displayed. RETURN [320x240 E-MAIL(S)] : Resizes the image to a smaller size that is...
-
Page 120: Erasing All Resized Images
Introduction Getting Ready Taking Pictures Playback Set Up Erasing all resized images This procedure erases all resized images. Turn the camera on and press the mode buttons UD until "P" lights up on the mode select LED. Press the MENU button K to display the menu icons. Move the selector lever left l or right r to select RESIZE [V] and press E. -
Page 121: W] Rotating An Image
Introduction Getting Ready Taking Pictures Playback Set Up [W] Rotating an Image «Applicable images: Still images only» Use the procedure below to rotate an image 90° left or right. Turn the camera on and press the mode buttons UD until "P" lights up on the mode select LED. - Page 122 Introduction Getting Ready Taking Pictures Playback Set Up Press the MENU button K. A Important • You cannot rotate groups of continuous shots, protected images or resized images. • You may not be able to rotate images shot with another camera. •...
-
Page 123: T] Using Dpof To Specify Print Settings
Introduction Getting Ready Taking Pictures Playback Set Up [T] Using DPOF to specify print settings «Applicable images: Still images only» DPOF (Digital Print Order Format) is a printing standard for images shot on digital cameras that simplifies the printing of images on a consumer printer or at a print processing outlet. - Page 124 Introduction Getting Ready Taking Pictures Playback Set Up Move the selector lever left l or right r to select the image for which you want to specify the print settings. Move the selector lever up u to select SELECT PRINT IMAGE [OK], then press E.
-
Page 125: Specifying Index Print Settings
Introduction Getting Ready Taking Pictures Playback Set Up Move the selector lever up u or down d PRINTING DETAILS to select [PRINT SETS], then move the PRINT QTY. lever right r. DATE NOT PRINT PRINT SETS EXECUTE RETURN The DPOF specifications are set and the print settings screen reappears. -
Page 126: Resetting All The Dpof Print Settings
Introduction Getting Ready Taking Pictures Playback Set Up Move the selector lever up u or down d PRINT SETTINGS to select [INDEX], then move the lever PRINT SEL IMAGE right r. INDEX ALL RESET EXECUTE RETURN DPOF 2 PRTS INDEX SET Move the selector lever up u to select INDEX PRINT SETTINGS [SET UP INDEX PRINT] and press E. - Page 127 Introduction Getting Ready Taking Pictures Playback Set Up Move the selector lever up u or down d PRINT SETTINGS to select [ALL RESET], then move the PRINT SEL IMAGE lever right r. INDEX ALL RESET EXECUTE RETURN DPOF 2 PRTS INDEX SET Move the selector lever up u to select CLEAR DPOF SETTINGS?
-
Page 128: Connecting The Camera To The Printer
Introduction Getting Ready Taking Pictures Playback Set Up [G] Printing by Connecting the Camera Directly to a Printer (PictBridge) «Applicable images: Still images only» By connecting the camera to a printer that supports PictBridge, you can print your images quickly and simply direct from the camera. You can also use this method to print images with DPOF settings ( p.123) on printers that support DPOF. - Page 129 Introduction Getting Ready Taking Pictures Playback Set Up Move the selector lever left l or right r to select PictBridge [G] and press E. The printer connection screen appears. PictBridge CONNECT TO PRINTER RETURN Use the USB cable supplied with the camera to connect the USB cradle holding the camera to the printer.
-
Page 130: Specifying The Print Settings
Introduction Getting Ready Taking Pictures Playback Set Up The print menu screen appears. PRINT MENU SINGLE PRINT PRINT MULTIPLE IMAGES DPOF PRINTING PRINT SETTINGS Specifying the print settings In the print menu screen, move the PRINT MENU selector lever down d to select [PRINT SINGLE PRINT SETTINGS] and then press E. - Page 131 Introduction Getting Ready Taking Pictures Playback Set Up Move the selector lever up u or down d PRINT SETTINGS to select the paper size, then press E. PRINT QTY. PAPER SIZE The paper size is set. PAPER TYPE PRTER SETS BORDERLESS BNote The paper sizes displayed are determined by the...
-
Page 132: Printing Individual Images
Introduction Getting Ready Taking Pictures Playback Set Up Move the selector lever up u or down d PRINT SETTINGS to select [DATE], then move the lever right PRINT QTY. PAPER SIZE PAPER TYPE PHOTO BORDERLESS DATE NOT PRINT RETURN Move the selector lever up u or down d PRINT SETTINGS to select the desired printing style, then PRINT QTY. -
Page 133: Printing Multiple Images
Introduction Getting Ready Taking Pictures Playback Set Up Move the selector lever up u to select EXECUTE PRINT? [EXECUTE], then press E. PRINT QTY. PAPER SIZE PAPER TYPE PHOTO Printing begins, and when printing is successfully completed, the print BORDERLESS completion screen appears. -
Page 134: Printing Using Dpof Settings
Introduction Getting Ready Taking Pictures Playback Set Up Press the SCENE button I. A message appears asking you to confirm that you want to print the images. To change print settings, see "Specifying the print settings" ( p.130). BNote Press the MENU button K to display the print menu screen. -
Page 135: Ending Pictbridge
Introduction Getting Ready Taking Pictures Playback Set Up Move the selector lever up u to select DPOF PRINTING [EXECUTE], then press E. DPOF 3 PRTS A message appears asking you to confirm that you want to print the INDEX SET images. -
Page 136: Connecting To A Windows Pc
Introduction Getting Ready Taking Pictures Playback Set Up Connecting to a Windows PC You can view images you have shot with this camera on a PC, copy the images to the PC and edit them, and then send them from the PC via e-mail. First check the operating system software on your PC and then read the relevant sections for your software. -
Page 137: Install The Usb Driver (Windows 98, Windows 98Se Only)
Introduction Getting Ready Taking Pictures Playback Set Up Install the USB driver (Windows 98, Windows 98SE Only) If you are using Windows 98 or Windows 98SE, you will need to install the USB drivers. A USB driver is included on the CD-ROM ("Instruction Manual"... - Page 138 Introduction Getting Ready Taking Pictures Playback Set Up If you no longer need the USB drivers Turn the PC on and start up Windows. Double-click [My Computer]. Double-click [Control Panel]. Double-click [Add/Remove Programs] and select [Digital Camera USB Device3]. Click [Add/Remove]. When the [Do you want to completely remove the selected application and all of its components?] message appears, click [OK].
-
Page 139: Viewing Images On A Windows Pc
Introduction Getting Ready Taking Pictures Playback Set Up Viewing images on a Windows PC A Important • If you are using Windows 98 or Windows 98SE, install the USB drivers before connecting the USB cable. ( p.137) • If you are using Windows Me, Windows 2000 or Windows XP, you do not need to install the USB drivers. - Page 140 Introduction Getting Ready Taking Pictures Playback Set Up Press the POWER button H to turn the camera on. [PC MODE] appears on the LCD monitor and you can check the images stored on the camera's memory card from your PC and copy the images to your PC.
-
Page 141: Memory Card Folder Structure
Introduction Getting Ready Taking Pictures Playback Set Up Memory card folder structure On Windows PCs, the folders in a camera memory card are configured as shown below. Removable Disk DCIM Still Image / Movie / Audio 100CXBOX The same file name cannot be used twice in the same folder. -
Page 142: Disconnecting The Usb Cable From A Windows Pc
Introduction Getting Ready Taking Pictures Playback Set Up Disconnecting the USB cable from a Windows PC Use the procedure below when disconnecting the USB cable from a Windows PC. For Windows Me users Double-click the [Unplug or Eject Hardware] icon in the task bar in the lower-right corner of the desktop. - Page 143 Hardware] icon in the task bar in the lower-right corner of the desktop. Select [USB Mass Storage Device] and then click [Stop]. Select [CONTAX U4R USB Device] and then click [OK]. When the message saying [The 'USB Mass Storage Device' device can now be safely removed from the system] appears, click [OK].
-
Page 144: Deleting The Device (Windows 98 And Windows 98Se Only)
Introduction Getting Ready Taking Pictures Playback Set Up Deleting the Device (Windows 98 and Windows 98SE only) If the driver software is not installed successfully, the PC will be unable to recognize the camera. If this occurs, use the procedure below to delete the device. Then use the procedure on p.137 to re-install the drivers. - Page 145 Right-click [My Computer] and select [Properties]. When the [System Properties] window opens, click the [Device Manager] tab. Select [CONTAX U4R] marked with a question mark in [Other devices] and then click [Remove]. When the device deletion confirmation message appears, click [OK].
-
Page 146: Connecting To A Macintosh
Introduction Getting Ready Taking Pictures Playback Set Up Connecting to a Macintosh You can view images you have shot with this camera on a Macintosh, copy the images to the Macintosh and edit them, and then send them from the Macintosh via e-mail. -
Page 147: Viewing Images On A Macintosh
Introduction Getting Ready Taking Pictures Playback Set Up Viewing images on a Macintosh A Important • You do not need to install the USB drivers on a Macintosh computer. Connect the USB cable without installing the drivers. • To view images on your Macintosh, you must have image-viewing software already installed. - Page 148 Introduction Getting Ready Taking Pictures Playback Set Up Press the POWER button H to turn the camera on. [PC MODE] appears on the LCD monitor and you can check the images stored on the camera's memory card from your Macintosh and copy the images to your Macintosh.
-
Page 149: Memory Card Folder Structure
Introduction Getting Ready Taking Pictures Playback Set Up Memory card folder structure On Macintosh computers, the folders in a camera memory card are configured as shown below. untitled DCIM Still Image / Movie / Audio 100CXBOX The same file name cannot be used twice in the same folder. -
Page 150: Disconnecting The Usb Cable From A Macintosh
Introduction Getting Ready Taking Pictures Playback Set Up Disconnecting the USB cable from a Macintosh Drag the [untitled] (Mac OS 9) or [NO_NAME] (Mac OS X) folder on the desktop to the Trash. Check that the "It is now safe to disconnect the device"... -
Page 151: Connecting To A Television
Introduction Getting Ready Taking Pictures Playback Set Up Connecting to a Television «Use the VIDEO OUT port to connect to the television» You can view the images taken with the camera on a television. You can view images you have taken on a television while you are traveling or at your home. - Page 152 Introduction Getting Ready Taking Pictures Playback Set Up A Important • Set the television to video input mode. • The LCD monitor turns off while the video cable is connected. • Images may sometimes not be displayed correctly on a television. B Note The video output format of the camera can be selected from NTSC and PAL formats.
-
Page 153: Playback On A Television That Supports D3 Or Higher Video Input"
Introduction Getting Ready Taking Pictures Playback Set Up «Playback on a television that supports D3 or higher video input» You can view the pictures taken with the camera on a television that supports D3 or higher video input. You can get clearer images by connecting the television to the D3 video output connector instead of the VIDEO OUT port. -
Page 154: Displaying Information (File No Display)
Introduction Getting Ready Taking Pictures Playback Set Up Use the D-connector cable to connect the USB cradle holding the camera to the television, then turn the television on. A Important Push the D3 connector cable on until the clips on the right and left sides of the D3 video connector click into place. -
Page 155: W] Rotating An Image
Introduction Getting Ready Taking Pictures Playback Set Up [W] Rotating an Image «Applicable images: Still images only» Use the procedure below to rotate an image 90° left or right. Press the MENU button K during playback to display the menu icons. Move the selector lever up u to select ROTATE [W] and press E. -
Page 156: O] Viewing Images Automatically As A Slideshow (Auto Play)
Introduction Getting Ready Taking Pictures Playback Set Up [o] Viewing Images Automatically as a Slideshow (Auto Play) «Applicable images: Still images / movies» Images are displayed at fixed intervals in the order that they were shot. You can configure the effect used for the transition between images. [AUTO PLAY] settings You can specify the following settings for an [AUTO PLAY] slideshow: •... - Page 157 Introduction Getting Ready Taking Pictures Playback Set Up Move the selector lever up u or down d to select the desired value, then press E. The available intervals are 2, 10, 15 and 30 seconds. SETTING AUTO PLAY INTERVAL 2SEC START FRAME 10SEC EFFECT...
-
Page 158: Menu Icons
Introduction Getting Ready Taking Pictures Playback Set Up Move the selector lever up u or down d to select the desired effect, then press E. [OFF] : No effect is set. SETTING AUTO PLAY FADE INTERVAL OVERLAP START FRAME [FADE] : The current image gradually darkens (fades out) SHUTTER EFFECT... -
Page 159: U] Protecting Images From Accidental Erasing (Protect)
Introduction Getting Ready Taking Pictures Playback Set Up [U] Protecting Images from Accidental Erasing (PROTECT) «Applicable images: Still images / movies» This feature enables you to protect important images to ensure that they are not inadvertently erased. Protecting an image Press the MENU button K during playback to display the menu icons. - Page 160 Introduction Getting Ready Taking Pictures Playback Set Up Unprotecting an image Press the MENU button K during playback to display the menu icons. Move the selector lever up u or down d to select PROTECT [U] and press RETURN PROTECT Move the selector lever left l or right r to select the image to be unprotected.
- Page 161 Introduction Getting Ready Taking Pictures Playback Set Up [J] Erasing individual images (ERASE) «Applicable images: Still images / movies» Use the procedure below to erase a single image. A Important • You cannot erase protected images ( p.107). • When you erase an image with a postrecorded voice message ( p.110), the sound file is also erased.
- Page 162 Introduction Getting Ready Taking Pictures Playback Set Up Set Up This chapter describes how to set up some of the camera's more advanced functions. Click on the section you want to read. Formatting Memory Adjusting the LCD Adding the Date to Card Monitor Brightness Images...
-
Page 163: Format] Initializing A Memory Card
Introduction Getting Ready Taking Pictures Playback Set Up [FORMAT] Initializing a Memory Card You should use this function to format new memory cards before you use them or when you want to erase all the files (including images) on a card. A Important •... -
Page 164: Bright Cntrl] Adjusting The Lcd Monitor Brightness
Introduction Getting Ready Taking Pictures Playback Set Up [BRIGHT CNTRL] Adjusting the LCD Monitor Brightness You can adjust the LCD monitor brightness through 5 levels. Set the brightness to your preferred level. Turn the camera on and press the mode button D until "G"... -
Page 165: Insert Date] Adding The Date To Images
Introduction Getting Ready Taking Pictures Playback Set Up [INSERT DATE] Adding the Date to Images You can choose to imprint the date on images. 2004.09.01 Turn the camera on and press the mode button D until "G" lights up on the mode select LED. -
Page 166: Power Save] Having The Camera Turn Off Automatically To Save Power
Introduction Getting Ready Taking Pictures Playback Set Up [POWER SAVE] Having the Camera Turn Off Automatically to Save Power Forgetting to turn the camera off can cause the camera's battery charge to fall to a low level. For this reason, the camera features a power save function that automatically turns the camera off after several minutes if it is left turned on. - Page 167 Introduction Getting Ready Taking Pictures Playback Set Up Move the selector lever up u or down d SET UP(1/3) to select the desired time, then press E. AF MODE FORMAT NO PWR OFF The selected setting is applied. BRIGHT CNTRL 15SEC DATE 30SEC...
- Page 168 Introduction Getting Ready Taking Pictures Playback Set Up Notes on using the power save function (in "C" or "M" mode) Depending on the power save setting, the camera operates as follows: • When [POWER SAVE] is set to [15SEC], [30SEC], [1MIN.] or [3MIN.]. If the camera is left turned on for the configured time or longer, the LCD monitor automatically goes blank for two minutes (sleep mode).
-
Page 169: Beep] Adjusting The Volume Of The Camera Button Beep
Introduction Getting Ready Taking Pictures Playback Set Up [BEEP] Adjusting the Volume of the Camera Button Beep Use this procedure to adjust the volume of the beep emitted when a camera button is pressed or the camera is turned on. Turn the camera on and press the mode button D until "G"... -
Page 170: Shutter Vol] Adjusting The Volume Of The Shutter Sound
Introduction Getting Ready Taking Pictures Playback Set Up [SHUTTER VOL] Adjusting the Volume of the Shutter Sound Use this procedure to adjust the volume of the shutter sound. Turn the camera on and press the mode button D until "G" lights up on the mode select LED. -
Page 171: Start Screen] Selecting The Startup Screen
Use this procedure to select one of the following as the startup screen that is displayed when you turn the camera on: • CONTAX logo (SINGLE) : The CONTAX logo screen is displayed for approximately 1 second. (Default) • CONTAX logo (MULTI) : The CONTAX logo animation is displayed for approximately 1 second. -
Page 172: To Set A User-Defined Screen (Single)
Move the selector lever left l to select SELECT START SCREEN the CONTAX logo screen, then press E. RESET The CONTAX logo screen is configured, and an example of the startup SELECT IMAGE screen is displayed for 1 second before returning to the SET UP menu screen. - Page 173 Introduction Getting Ready Taking Pictures Playback Set Up Move the selector lever up u to select SELECT START SCREEN [SINGLE], then press E. SINGLE MULTI Move the selector lever left l or right r SELECT START SCREEN to select the center location, then move the lever down d.
-
Page 174: To Set A User-Defined Screen (Multi)
Introduction Getting Ready Taking Pictures Playback Set Up To set a user-defined screen (MULTI) A Important Check that the memory card containing the images you want to use is inserted into the camera. Turn the camera on and press the mode button D until "G"... - Page 175 Introduction Getting Ready Taking Pictures Playback Set Up Move the selector lever left l or right r SELECT IMAGE to select an image and press E. 0001/0051 A number is displayed in the lower left of the selected image. Repeat this procedure to select more images for the startup screen.
-
Page 176: Turning The Startup Screen Off
Introduction Getting Ready Taking Pictures Playback Set Up Turning the startup screen off Turn the camera on and press the mode button D until "G" lights up on the mode select LED. Move the selector lever up u or down d SET UP(2/3) to select [START SCREEN], then move the BEEP... -
Page 177: Rec Review] Checking Images Right After You Shoot Them
Introduction Getting Ready Taking Pictures Playback Set Up [REC REVIEW] Checking Images Right After You Shoot Them «Applicable mode: C» Use this procedure to have the camera display images for several seconds immediately after you shoot them. Turn the camera on and press the mode button D until "G"... -
Page 178: Zlanguage] Selecting The Menu Language
Introduction Getting Ready Taking Pictures Playback Set Up [ZLANGUAGE] Selecting the Menu Language You can choose one of the following as the language displayed on the camera's screens: • Japanese (Default) • English • French • German • Spanish • Chinese (Simplified) Turn the camera on and press the mode button D until "G"... -
Page 179: Video Out] Setting The Output Format For A Tv Connection
Introduction Getting Ready Taking Pictures Playback Set Up [VIDEO OUT] Setting the Output Format for a TV Connection You can choose between NTSC and PAL video output formats when the camera is connected to a television through the VIDEO OUT port on the USB cradle. -
Page 180: Startup Mode] Setting The Mode The Camera Starts In
Introduction Getting Ready Taking Pictures Playback Set Up [STARTUP MODE] Setting the Mode the Camera Starts In The camera can be set to always start in still image mode when turned on, or to start in the same mode as the last time it was turned off. Turn the camera on and press the mode button D until "G"... -
Page 181: Display Info] Choosing The Information Displayed On The Screen
Introduction Getting Ready Taking Pictures Playback Set Up [DISPLAY INFO] Choosing the Information Displayed on the Screen In "C" and "M" modes, a large number of icons are displayed on the LCD monitor. If you find the icons annoying when you are shooting, it is possible to change the display to make the screen easier to view. -
Page 182: File No.] Starting Image File Numbers From 0001
Introduction Getting Ready Taking Pictures Playback Set Up [FILE NO.] Starting Image File Numbers from 0001 Images shot on the camera are assigned file names that consist of sequential numbers before being saved in a folder called "100CXBOX". Executing [FILE NO.] creates a new folder "101CXBOX" and new images are stored in this folder. - Page 183 Introduction Getting Ready Taking Pictures Playback Set Up Move the selector lever up u to select RESET NUMBER? [EXECUTE], then press E. The image file numbers are reset and the SET UP menu screen EXECUTE CANCEL reappears. B Note • Folders "100CXBOX" to "999CXBOX" can be created. •...
-
Page 184: Mode Reset] Resetting Function Settings
Introduction Getting Ready Taking Pictures Playback Set Up [MODE RESET] Resetting Function Settings Use this function when you want to reset the modes and menu settings that you have changed, back to their default settings. Turn the camera on and press the mode button D until "G"... -
Page 185: List Of Menu Items And Default Values
Introduction Getting Ready Taking Pictures Playback Set Up List of Menu Items and Default Values After Mode Menu Default Page Flash mode Default Auto Flash Still image Continuous Shooting Previous Single-shot mode mode Movie mode Scene mode Previous Normal Macro/Landscape Default Normal mode... -
Page 186: Mode Menu
INSERT DATE Previous NO DATE POWER SAVE Previous 1MIN. BEEP Previous SHUTTER VOL Previous DIGITAL ZOOM Previous START SCREEN Previous CONTAX logo screen (SINGLE) REC REVIEW Previous 2SEC ZLANGUAGE Previous Japanese VIDEO OUT Previous NTSC STARTUP MODE Previous STILL DISPLAY INFO Previous FILE NO. -
Page 187: Troubleshooting
Introduction Getting Ready Taking Pictures Playback Set Up Troubleshooting Check the items listed below before deciding that your camera is faulty. Problems and Solutions Problem Cause Solution Page Nothing appears The batteries are flat, or the Insert the Lithium Ion battery on the LCD Lithium Ion battery pack is pack into the camera and... - Page 188 Introduction Getting Ready Taking Pictures Playback Set Up Problem Cause Solution Page The number of This is because the erased This is dependent on factors available shots image size was small. such as the number of pixels did not increase and the subject and is not a after I erased an problem.
- Page 189 Introduction Getting Ready Taking Pictures Playback Set Up Problem Cause Solution Page The picture The image is overexposed. Set the exposure compensation came out to a negative value, or execute completely mode reset. white. There is a lot of Noise is more likely to occur Use the flash or reduce the ISO 'noise' in the if high ISO settings are used.
-
Page 190: Messages And Responses
Introduction Getting Ready Taking Pictures Playback Set Up Messages and Responses Message Cause Solution Page "MEMORY CARD There is not enough Insert a new memory card or FULL" recording space available erase some unwanted images. on the memory card. There are 9999 or more images recorded on the memory card. - Page 191 Introduction Getting Ready Taking Pictures Playback Set Up Message Cause Solution Page "COVER OPENED" The card/battery cover is Close the card/battery cover. open. "LOW BATTERY" There is no charge left in Charge the battery pack or use the battery. the AC adapter. "PRINTER ERROR"...
-
Page 192: Aperture Setting
Introduction Getting Ready Taking Pictures Playback Set Up Basic Digital Camera Glossary AE (Auto Exposure) Automatic exposure is the function by which the camera automatically adjusts the exposure (the shutter speed and aperture settings) to suit the brightness of the subject. AF (Auto Focus) The function by which the camera automatically focuses images. -
Page 193: Focal Length
Introduction Getting Ready Taking Pictures Playback Set Up DPOF (Digital Print Order Format) DPOF is a standard used for printing images photographed using a digital camera on a home printer or at a commercial print processing store. Provided a DPOF-compatible printer or a commercial print processing store that provides a DPOF print service is used, prints specified on this (DPOF-compatible) camera will be produced in the quantities and formats specified in the DPOF settings. -
Page 194: Shutter Speed
Introduction Getting Ready Taking Pictures Playback Set Up Infinity Once the subject of a photograph is further than a set distance away from the camera lens, moving still further away requires no adjustment to the focus. The distance at which the subject is so far away that no change in the focus occurs is referred to as "infinity". -
Page 195: White Balance
Introduction Getting Ready Taking Pictures Playback Set Up TFT (Thin Film Transistor) color LCD monitor The type of LCD monitor used in this camera. TFT panels provide good resolution and excellent responsiveness. White Balance The light emitted by fluorescent tubes or incandescent light bulbs differs slightly in color. Without any adjustment, the colors in shots taken under such light sources differ from the actual colors you see. - Page 196 Introduction Getting Ready Taking Pictures Playback Set Up Index AC adapter 29 ERASE 103 AE 192 ERASE ALL 106 AE Lock 75 ERASE MULTIPLE 105 AF 192 SELECT AND ERASE 104 AF continuous 44 EV 193 AF MODE 77 Exposure 193 CAF 77 Exposure compensation 67 SAF 77...
- Page 197 Introduction Getting Ready Taking Pictures Playback Set Up PROTECT 107 Unprotecting an image 108 Landscape Mode 57 LANGUAGE 178 Quick View 51 BRIGHT CNTRL 164 LCD monitor 17, 21 LED 25 REC REVIEW 177 Card access LED 17 Red-eye effect 194 Caution LED 17 RESIZE 114 Self-timer LED 17...
- Page 198 Introduction Getting Ready Taking Pictures Playback Set Up Television 151 Television that supports D3 or higher video input 153 TFT 195 Twilight mode 54 USB cable 129, 139, 147 USB driver 137 USB port 18 USB Cradle 18, 36 USB Cradle Connector 17 Video cable 151 VIDEO OUT 179 VIDEO OUT port 18...