Table of Contents
Advertisement
Quick Links
01-1BC(E)_Cover
11/15/01
7:26 PM
Page 1
Optical Equipment Group
2-14-9 Tamagawadai, Setagaya-ku, Tokyo 158-8610 Japan
Tel:(03) 3708-4506
http://www.kyocera.co.jp/
KYOCERA OPTICS, INC.
2301-200 Cottontail Lane, Somerset, New Jersey 08873, U.S.A.
Tel:(732) 560-0060
KYOCERA OPTICS, INC.
6020 Irwindale Avenue, Unit A-C, Irwindale, California 91706, U.S.A.
Tel:(626) 812-8888
KYOCERA OPTICS, INC.
6200 Dixie Road, Unit 11 Mississauga, Ontario, L5T 2E1, Canada
Tel:(905) 564-9385
YASHICA Kyocera GmbH Eiffestraße 76, D-20537 Hamburg, F.R.Germany
Tel:(040) 25 15 07 0
YASHICA Handelsges. mbH Rustenschacherallee 38, A-1020 Wien, Austria
Tel:(01) 728 09 260
YASHICA AG. Z ü rcherstraße 73, CH-8800 Thalwil, Switzerland
Tel:(01) 720 34 34
KYOCERA YASHICA (U.K.) Ltd. Unit 7, Suttons Industrial Park, Sutton Park
Avenue, Earley Reading, RG6 1AZ, U.K. Tel:(0118) 935 6300
KYOCERA YASHICA (FRANCE) S.A. ZAC de Paris Nord l l -13, rue de la perdrix
B.P. 40067 Tremblay en France 95913 Roissy CDG Cedex France Tel: (01) 49 89 38 60
KYOCERA YASHICA DO BRASIL-INDUSTRIA E COMERCIO LTDA.
Av. Bernardino de Campos No. 98, 5-Andar Paraiso,S ão Paulo CEP: 04004-000,
Brazil Tel: (011) 889-8055
UNIVERSAL OPTICAL INDUSTRIES LTD. 14/FL. Piazza Industrial Building,
133 Hoi Bun Road, Kwun Tong, Kowloon, Hong Kong Tel: 2343 5151
Instruction manual • Bedienungsanleitung
GB /D
RI110010
Printed in Japan
Advertisement
Table of Contents

Related Manuals for Contax NX


Summary of Contents for Contax NX
- Page 1 01-1BC(E)_Cover 11/15/01 7:26 PM Page 1 Optical Equipment Group 2-14-9 Tamagawadai, Setagaya-ku, Tokyo 158-8610 Japan Tel:(03) 3708-4506 http://www.kyocera.co.jp/ KYOCERA OPTICS, INC. 2301-200 Cottontail Lane, Somerset, New Jersey 08873, U.S.A. Tel:(732) 560-0060 KYOCERA OPTICS, INC. 6020 Irwindale Avenue, Unit A-C, Irwindale, California 91706, U.S.A. Tel:(626) 812-8888 KYOCERA OPTICS, INC.
-
Page 2: Safety Warnings
ENGLISH We greatly appreciate your purchase of this Contax NX camera. The Contax NX is an autofocus single lens reflex camera based on the Contax' fundamental principle of "building cameras for creating works of art". Automatic or manual focus can be selected according to the subject and setting so that the user can achieve the desired results with accuracy. - Page 3 02-1BC(E)_P003-007 11/15/01 7:27 PM Page 3 • Clean the camera thoroughly after use at the beach or in dusty areas. Salt spray may corrode metal components, and may result in damage to, and short-circuit of, electronic components, with the possibility of smoke or fire. The presence of sand in the mechanism of the camera will cause problems in operation.
- Page 4 02-1BC(E)_P003-007 11/15/01 7:27 PM Page 4 • Do not take photographs while moving. In particular, do not move while looking through the viewfinder. Use in such situations may result in a fault in the camera. • Do not pay excessive attention to the subject at the expense of your surroundings during photography.
-
Page 5: Table Of Contents
“P” (program auto exposure) mode> ...53 1. Taking photographs using the internal flash ...72 FLASH PHOTOGRAPHY 2. Taking photographs using a Contax TLA flash..76 CUSTOM FUNCTIONS 1. List of custom functions ...87 1. Basic information on photography ...91 REFERENCE 1. -
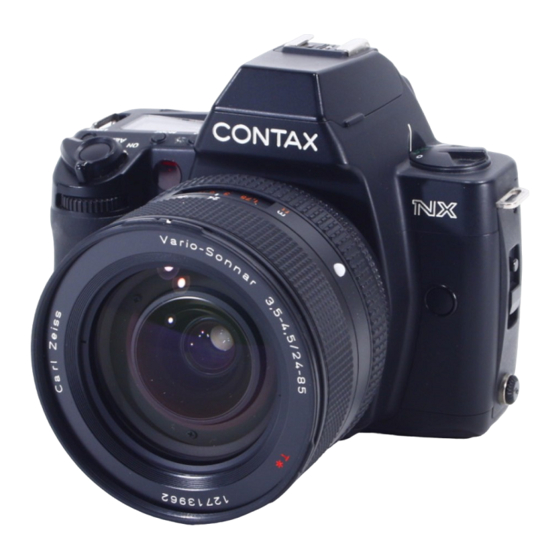
Page 6: Names Of Parts
03-1BC(E)_P008-012 11/15/01 7:27 PM Page 8 Names of Parts Internal flash (page 72) ABC Exposure/ button (page 62,75) Dedicated flash contact (page 76) Mode button (page 30) Display panel (page 10) R dial (page 29) Light button (page 12) Strap lug (page 14) Shutter release button (page 27) Main switch... -
Page 7: Display Panel And Viewfinder Display
03-1BC(E)_P008-012 11/15/01 7:27 PM Page 10 Display Panel and Viewfinder Display <Display panel> Focusing mode (page 30) • “ • “ Exposure counter (page 21) • “ Selftimer remaining time (page 65) Exposure mode (page 30) ABC shooting order (page 62) •... - Page 8 03-1BC(E)_P008-012 11/15/01 7:27 PM Page 12 The display in the viewfinder incorporates a variety of information - as well as the focus, aperture, and shutter speed, it also shows the exposure meter and exposure counter. The viewfinder display turns on when the operations below are performed, then automatically turns off after 16 seconds to save power.
-
Page 9: Basic Operations Prior To Shooting
04-1BC(E)_P013-024 11/15/01 7:27 PM Page 13 BASIC OPERATIONS PRIOR TO SHOOTING This section describes procedures that should be taken prior to photographing and includes basic operations of this camera. If you already have basic knowl- edge on handling a camera and wish to start taking photographs immediately, proceed to “SIMPLE SHOOTING PROCEDURE”... -
Page 10: Fitting The Eye Cup/Diopter Correction Lens
04-1BC(E)_P013-024 11/15/01 7:27 PM Page 14 1. Fitting the strap and viewfinder shade adapter First pass the strap through the viewfinder shade adapter supplied with the camera, and then attach the strap to the camera as shown below. When using the selftimer, light entering the viewfinder when the eye is moved away may interfere with a correct reading of incident light. - Page 11 04-1BC(E)_P013-024 11/15/01 7:27 PM Page 16 3. Inserting the batteries and checking the battery power <Inserting the batteries> Turn the main switch off before inserting the batteries. Open the battery compartment cover. Battery compart- ment cover Use a coin to turn the battery cover in the direction of the arrow.
- Page 12 • Use Contax N-mount lenses. • Contax 645 system lenses can be used by mounting on an NAM-1 mount adapter. (page 102) <Removing lenses>...
- Page 13 04-1BC(E)_P013-024 11/15/01 7:27 PM Page 20 6. Loading film Open the camera back by lifting Camera back release knob the camera back release knob while sliding the camera back open- ing lever downwards. • The first time you use the camera be sure to remove the protective sheet inside the cam- era before loading film.
- Page 14 04-1BC(E)_P013-024 11/15/01 7:27 PM Page 22 <Automatic setting of the ISO film speed> When “DX” is displayed on the dis- play panel, the camera reads the DX code and sets the film speed auto- matically. The automatic film speed settings range from ISO 25 to 5000.
-
Page 15: Removing Film
04-1BC(E)_P013-024 11/15/01 7:27 PM Page 24 8. Removing film Once the film has been fully exposed it is automatically rewound. The numbers on the exposure counter decrease while the film is rewinding. Once the film is completely rewound, the motor stops and “00” flashes on the exposure counter. - Page 16 05-1BC(E)_P025-034 11/15/01 7:27 PM Page 25 BASIC OPERATIONS...
-
Page 17: Main Switch
05-1BC(E)_P025-034 11/15/01 7:27 PM Page 26 1. Main switch The main switch is used to turn the power on and off and to activate the AEL (AE lock) mode. “OFF” • Set the main switch at the click position to prevent accidental operation. -
Page 18: Position Dial
05-1BC(E)_P025-034 11/15/01 7:27 PM Page 28 3. Position dial The position dial may be set at any one of five positions - “ “ ” (green), “SET”, “ISO”, or “CF”. Position dial <1. Photography> The “ ” (white) and “ ”... - Page 19 05-1BC(E)_P025-034 11/15/01 7:27 PM Page 30 5. Mode button and mode details The mode button is used to select the focusing mode, exposure mode, metering mode, or drive mode. Press the “MODE” button and set with the F or R dial as necessary. Mode button [Mode details] <1.
- Page 20 05-1BC(E)_P025-034 11/15/01 7:27 PM Page 32 Turn the R dial in the direction of the arrow to display “Metering mode details”. “Metering mode details” appears on the display panel, and the current metering mode flashes. Turn the F dial to the desired metering mode.
- Page 21 05-1BC(E)_P025-034 11/15/01 7:27 PM Page 34...
-
Page 22: Simple Shooting Procedure
06-1BC(E)_P035-37 11/15/01 7:27 PM Page 35 SIMPLE SHOOTING PROCEDURE USING THE “ ” (GREEN) SETTING ON THE POSITION DIAL Used the “ ” (green) position for simple photography. This setting is recom- mended if you are using a camera for the first time, or if you wish to take pho- tographs without worrying about aperture and shutter speed settings. -
Page 23: Position Dial
06-1BC(E)_P035-37 11/15/01 7:28 PM Page 36 Using the “ ” (green) setting on the position dial Set the main switch to “ON”, and turn the position dial to “ (green). The camera is set to the following Position dial modes when shipped from the factory. Focusing mode : Exposure mode : Metering mode :... -
Page 24: Focusing
07-1BC(E)_P038-46 11/15/01 7:28 PM Page 38 FOCUSING This camera offers two types of focusing: autofocus (AF), in which the camera adjusts the focus automatically, and manual focus (MF) in which the user adjusts the focus manually. There are two AF modes: “SAF” (single AF) which is convenient for general photography when photographing stationary subjects, and “CAF”... - Page 25 07-1BC(E)_P038-46 11/15/01 7:28 PM Page 40 2. Focusing in the autofocus mode The autofocus mechanism is activated when the shutter button is half-pressed while the focus dial is at the “SAF” or “CAF” position. The focusing frame selected when the shutter button is half-pressed lights red momentarily.
- Page 26 07-1BC(E)_P038-46 11/15/01 7:28 PM Page 42 <Focus lock> If the subject is not within a focusing frame with the desired composition, use the procedure described below to lock the focus on that subject. Example: Center focus frame selected. Half-press ❖ In the “SAF” (single autofocus) mode Point the camera at the subject on which you want to focus, position the subject within a focusing frame, then half-press the shutter button.
- Page 27 07-1BC(E)_P038-46 11/15/01 7:28 PM Page 44 3. Focusing manually Picture is in focus. Picture is not in focus. <Adjusting the focus> Set the focus dial to “MF” (see page 31 for details). Adjust the focus by turning the lens' focus ring manually. The image on the matte surface is clearly visible when the subject is in focus, blurry when subject is out of...
- Page 28 It is not necessary to set both the lens and the camera to MF when using manu- al focus on a lens incorporating an AF/MF select switch with the NX. When set- ting the camera to AF (SAF or CAF) AF or MF may be selected immediately with the switch on the lens.
-
Page 29: Selecting The Metering Mode
08-1BC(E)_P047-49 11/15/01 7:28 PM Page 47 SELECTING THE METERING MODE This camera is equipped with three metering modes: evaluative metering, cen- ter-weighted average metering, and center divided partial metering. See page 31 for setting details. To achieve highly effective photographs with higher precision, read “Types of metering modes and their features”... -
Page 30: Types Of Metering Modes And Their Features
08-1BC(E)_P047-49 11/15/01 7:28 PM Page 48 1. Types of metering modes and their features <Evaluative metering ( Evaluative metering With evaluative metering, the picture is divided into Image field top five sections, as illustrated. The autoexposure sys- tem calculates the appropriate exposure based on an analysis of subject conditions and positioning. -
Page 31: Autoexposure Photography
09-1BC(E)_P050-70 11/15/01 7:28 PM Page 50 APPLIED PHOTOGRAPHIC TECHNIQUES This camera allows for a wide range of creative possibilities. 1. Autoexposure photography <1. Taking photographs with the aperture priority mode “Av” (aperture priority auto exposure)> (Av is the abbreviation of “Aperture value”, and is the degree of aperture) for “Aperture value”.) In this mode, when the aperture is set the camera automatically sets the shutter speed for a correct exposure. -
Page 32: Exposure) Mode
09-1BC(E)_P050-70 11/15/01 7:28 PM Page 52 <2. Taking photographs with shutter speed priority settings “Tv” (shutter priority auto exposure) mode> (“Tv” stands for “Time value”.) When the shutter speed is set the camera automatically sets the aperture in accordance with the brightness of the subject. Suitable for photography of moving subjects. - Page 33 09-1BC(E)_P050-70 11/15/01 7:28 PM Page 54 <Warnings displayed with auto exposure> < > < > Over-exposure Over-exposure warning warning “4000” flashes “Minimum aperture” flashes Under-exposure Under-exposure warning warning “32" ” flashes “Maximum aperture” flashes Over-exposure warning Shutter speed “4000” flashes during aperture priority auto photography, “Minimum aperture value”...
- Page 34 09-1BC(E)_P050-70 11/15/01 7:28 PM Page 56 [Taking photographs with exposure compensation in the manual exposure mode] The exposure compensation appears on the display panel. Exposure compensation display The “+/-” exposure compensation mark flashes in the viewfinder. The exposure difference obtained with the aperture and shutter speed combination set for the camera is dis- Display panel...
- Page 35 09-1BC(E)_P050-70 11/15/01 7:28 PM Page 58 3. Taking photographs with exposure compensation When the correct exposure cannot be obtained for the primary subject due to extreme differences in brightness between the subject and back- ground, or when deliberate over or under-exposure is required, exposure can be compensated using the three methods described below.
- Page 36 09-1BC(E)_P050-70 11/15/01 7:28 PM Page 60 <2.Taking photographs with the AE lock> AE lock allows you to hold a certain exposure value even if the light changes or the composition is altered. It allows you to customize exposure in autoexposure modes. Use it when the subject is lit from behind or when you want to take a series of photographs of a moving subject with a constant expo- sure.
- Page 37 09-1BC(E)_P050-70 11/15/01 7:28 PM Page 62 <3. Taking photographs with the Autobracketing Exposure Mode (ABC Exposure mode)> The ABC Exposure mode can be used to take a series of three pho- tographs with three exposures: standard, overexposed, and underex- posed. This mode allows photography under very subtle lighting condi- tions without the need to determine exposure.
- Page 38 09-1BC(E)_P050-70 11/15/01 7:28 PM Page 64 Standard Over For example, if the ABC Exposure is used at the 18th frame, the exposure counter is as follows: 1st frame 2nd frame Focus position Standard Over Counter Display Both left and Left flashing Right flashing right flashing •...
- Page 39 MODE select button The date and time may be imprinted during photography in cameras fitted with the data back. The separately available Contax Data Back D-11 may be fitted to cameras not supplied with this option. • The data back contains a battery when shipped from the factory.
- Page 40 09-1BC(E)_P050-70 11/15/01 7:28 PM Page 68 6. Checking the depth of field When a lens is focused on the subject, objects within a range in front of, and behind, the subject are also in focus. This range is referred to as the “depth of field”.The aperture remains fully open in the viewfinder, however when the aper- ture stop-down button is pressed the...
- Page 41 09-1BC(E)_P050-70 11/15/01 7:28 PM Page 70...
-
Page 42: Flash Photography
1/30 second or shorter. The camera incorporates the “TTL direct metering” function for controlling the built-in flash automatically from the camera when it is used together with a Contax TLA flash system. When using the TLA360 flash, be sure to read “2. Taking photographs using a Contax TLA360 flash”... -
Page 43: Taking Photographs Using The Internal Flash
10-1BC(E)_P071-85 11/15/01 7:29 PM Page 72 1. Taking photographs using the internal flash <1. Taking photographs using the TTL auto flash function with the internal flash> The amount of light from the flash reflected off the subject onto the film is mea- sured (TTL direct metering) to control the flash intensity. - Page 44 In such cases, use an external Contax TLA flash with a high guide number. • The built-in flash cannot be used simultaneously with a Contax TLA flash fitted on the accessory shoe.
-
Page 45: Taking Photographs Using A Contax Tla Flash
Page 76 2. Taking photographs using a Contax TLA flash A Contax flash unit is controlled from the camera in the same way as an internal flash to permit simple flash photography. A flash unit separated from the camera is recommended when pho- tographing subjects at a distance beyond the range available with the internal flash. - Page 46 The flash system is not automatically set when it is used off the accessory shoe and through the TLA extension code or TLA lighting system. • With Contax TLA flashes equipped with the auto flash function, the flash mount has five contacts.
- Page 47 10-1BC(E)_P071-85 11/15/01 7:29 PM Page 80 Flash intensity compensation This is available only in the TTL auto flash photography mode. Compensation is not possible in other modes. • The flash intensity can be compensated within the range of -3 EV to +1 EV in 1/3 EV steps.
- Page 48 10-1BC(E)_P071-85 11/15/01 7:29 PM Page 82 4. Flash photography techniques Slow synchronization photography <1. Slow synchronization photography> Slow synchronization with the shutter speed set at 1/30 second or slower less can be effective for shooting evening or night views using a flash. Slow synchronization often adds more ambient light to the final picture.
- Page 49 Normally with flash photography the flash is emitted directly after the shutter’s front curtain has finished traveling (first curtain synchronization). When an internal flash or a Contax flash equipped with the second curtain syn- chronization function is used, the flash can be triggered immediately before the shutter's rear curtain begins movement (second curtain synchronization).
-
Page 50: Custom Functions
11-1BC(E)_P086-89 11/15/01 7:29 PM Page 86 CUSTOM FUNCTIONS The functions of this camera can be customized to match your shooting style. As you work with this camera you will develop your own personal approach. 1. List of custom functions This camera is equipped with the 20 custom functions, shown on the table below. -
Page 51: (Manual Exposure) Mode
11-1BC(E)_P086-89 11/15/01 7:29 PM Page 88 Detail number Standard set- Changed set- Changed set- ting (0) ting (1) Function number Superimpose when focused Rewind auto return Auto return on Auto return off Leave film tip Film tip not left Film tip left when rewinding Aperture switches Selection of aper-... - Page 52 12-1BC(E)_P090-94 11/15/01 7:29 PM Page 90 1. Basic information on photography <Exposure> Exposure is the act of exposing the film to light, thus converting brightness val- ues in a scene to tonal values on film. Exposure is composed of the size of the opening in the lens (the aperture) and the duration of time in which the light passes through the lens to strike the film (the shutter speed.) REFERENCE...
-
Page 53: Mode (Abc Exposure Mode)
12-1BC(E)_P090-94 11/15/01 7:29 PM Page 92 2. Troubleshooting If there seems to be a problem, check the following table before assuming the camera is malfunctioning. Symptom Cause Solution 1. Nothing appears • No battery is • Insert battery. on the display loaded. -
Page 54: Shutter Speed And Aperture Value Display
12-1BC(E)_P090-94 11/15/01 7:29 PM Page 94 3. Shutter speed and aperture value display The shutter speed and aperture value are displayed as described below. • The shutter speed display indicates shutter speeds between “4000” (1/4000 second) and “32" ” (32 seconds). When the camera's exposure mode is set to “Av” or “P”, the shutter speed value with respect to the aperture is displayed in steps of 1/2, and when the expo- sure mode is set to “Tv”... - Page 55 13-1BC(E)_P095-107 11/15/01 7:29 PM Page 95 MAIN ACCESSORIES This section describes the main accessories for expanding the range of photo- graphic possibilities.
- Page 56 SELECT button The D-11 is a quartz clock-controlled LCD data back mounted on the camera in place of the Contax NX camera back. The auto date mechanism allows automatic imprinting of the date and time on the film. <Fitting to the camera>...
-
Page 57: Mount
The Power pack P-8D is an external power supply using four 1.5V D-size NiH batteries. Use it as required when large numbers of photographs are to be taken. * The separately available GP-1 Contax power pack adapter is required when using the P- 8D in conjunction with the Contax NX. <Mounting>... - Page 58 Approx. 8 rolls I P-8D specifications Approx. 5 rolls Type: Contax camera external power supply, cord (1.5m) Power supply: Four 1.5V D-size dry batteries, or four 1.2V D-size NiH batteries (D-size manganese batteries have insufficient capacity and should not be used).
- Page 59 7:29 PM Page 102 5. Contax Mount adapter NAM-1 This adapter allows the use of Contax 645 System lenses with the Contax NX. Usable with all NX models. <Mounting the mount adapter and lens> 1. Line up the body mount mark on the mount adapter with the camera’s lens...
-
Page 60: Main Specifications
Single frame, continuous, 10 sec. delay selftimer Winding speed: Up to approximately 2.3 frames/sec. continuous shooting (“C” mode) (using a new battery, at normal temperature, and based on Contax test- ing standards) Exposure counter:Auto reset additive type for display panel and viewfinder... -
Page 61: Aperture Stop-Down Button
13-1BC(E)_P095-107 11/15/01 7:29 PM Page 106 Number of films: Using a new battery based on Contax testing standards Lens: VS28-80/3.5-5.6 Film: 24-exposure cartridge Condition A: Close-up → → close-up, single shutter release, leave for 16 seconds. Normal temperature (20°C) Not using flash Approx.