
Related Manuals for TRENDnet TE100-S88


Summary of Contents for TRENDnet TE100-S88
- Page 1 TE100-S44 TE100-S88 10/100 Fast Ethernet Switch User’s Guide Rev. 01 (May, 1997) 6ETHFS8…01 Printed In Taiwan RECYCLABLE...
-
Page 2: Wichtige Sicherheitshinweise
Hersteller zugelassen sind. Das Gerät is vor Feuchtigkeit zu schützen. Bei der Aufstellung des Gerätes ist auf sichern Stand zu achten. Ein Kippen oder Fallen könnte Verletzungen hervorrufen. Verwenden Sie nur sichere Standorte und beachten Sie die Aufstellhinweise des Herstellers. -
Page 3: Fcc Warning
FCC Warning This equipment has been tested and found to comply with the limits for a Class A digital device, pursuant to Part 15 of the FCC Rules. These limits are designed to provide reasonable protection against harmful interference when the equipment is operated in a commercial environment. -
Page 5: Table Of Contents
ABLE OF ONTENTS ABOUT THIS GUIDE ................VII ..................... URPOSE .................... ERMS SAGE ’ ............. VERVIEW OF THIS UIDE VIII INTRODUCTION..................1 ..............1 THERNET ECHNOLOGY ................2 WITCHING ECHNOLOGY ..................... 3 EATURES Performance features................4 UNPACKING AND SETUP..............6 .................... - Page 6 10/100 Fast Ethernet Switch User’s Guide CONNECTING THE SWITCH ............. 18 .................... 18 WITCH ..................19 UB TO WITCH 10Base-T Hub ..................20 100Base-T Hub ..................20 (MDI-II) ............21 UB WITHOUT PLINK PORT Using straight cable................21 Using crossover cable................21 ) ............
-
Page 7: About This Guide
For simplicity and brevity, this manual discusses two 10/100 Fast Ethernet Switch models. The TE100-S44 is a four port model, and the TE100-S88 is an eight port model. These models are similar in every respect except for the number of ports. Therefore, all... -
Page 8: Overview Of This User's Guide
Switch. ♦ Chapter 3, Identifying External Components. Describes the front panel and LED indicators of the Switch. ♦ Chapter 4, Connecting the Switch. Tells how you can connect the TE100-S44/ TE100-S88 to your Ethernet network. -
Page 9: Introduction
Fast Ethernet solutions in the years to come. 100Mbps Fast Ethernet is a new standard specified by the IEEE 802.3 LAN committee. It is an extension of the 10Mbps Ethernet standard with the ability to transmit and receive data at 100Mbps, while maintaining the CSMA/CD Ethernet protocol. -
Page 10: Switching Technology
For Fast Ethernet networks, a switch is an effective way of eliminating problems of chaining hubs beyond the “two-repeater limit.” A switch can be used to split parts of the network into different collision domains, making it possible to expand your Fast Ethernet network beyond the 205 meter network diameter limit for 100BASE-TX networks. -
Page 11: Features
The Switches are expandable by cascading two or more switches together. As all ports support 200 Mbps full duplex, the Switches can be cascaded from any port and to any number of switches. The Switches are a perfect choice for site planning to upgrade to Fast Ethernet in the future. -
Page 12: Performance Features
♦ Uplink/ MDI-II (media dependent interface) port for uplink to another switch, hub or repeater. Please note that if you are using the uplink port, you will be unable to use port one as these two ports are logically connected. - Page 13 10/100 Fast Ethernet Switch User’s Guide ♦ Data filtering rate at 148,800 pps per port, eliminates all error packets at 100% wire speed. ♦ 8K active MAC address entry table per device with self learning and table aging. ♦ 8 MB packet buffer per device.
-
Page 14: Unpacking And Setup
♦ This User’s Guide ♦ Four rubber self-adhesive pads ♦ Wall Mount Kit (TE100-S44 only) which includes: two tapping screws and two plastic anchors If any item is missing or damaged, please contact your local re- seller for replacement. Unpacking and Setup... -
Page 15: Setup
The setup of the Switch can be performed using the following steps: ♦ Make sure that the surface supports at least 1.2 Kg for the TE100-S44 and 2.5 KG for the TE100-S88. ♦ The power outlet should be within 1.82 meters (6 feet) of the device. -
Page 16: Wall Installation (Te100-S44)
Figure 1, 10/100 Fast Ethernet Switch installed on a Desktop or Shelf Wall Installation (TE100-S44) The TE100-S44 comes with a wall mount kit. This kit includes two screws and two plastic anchors. For a proper placement on the wall, follow these steps: ♦... -
Page 17: Rack Installation (Te100-S88)
10/100 Fast Ethernet Switch User’s Guide ♦ Drill two 2” deep holes on the wall. The distance between the holes should be the same as the screw support holes located on the bottom of the Switch. ♦ Insert the plastic anchors into the holes in the wall and secure them with gentle taps of a hammer. - Page 18 10/100 Fast Ethernet Switch User’s Guide Figure 2A, Attaching the mounting brackets to the 10/100 Fast Ethernet Switch Then, use the screws provided with the equipment rack to mount the Switch in the rack. Figure 2B, Installing the 10/100 Fast Ethernet Switch on the...
-
Page 19: Power On
The TE100-S44 Switch can be used with AC power sources 100 - 240 VAC, 50 - 60 Hz. To turn the Switch on, plug one end of the power cord into the AC power connector of the Switch and the other end into the local power source outlet. -
Page 20: Power Failure
♦ The power LED indicator will remain ON. Power Failure As a precaution, the Switch should be turned OFF in case of a power failure. For the TE100-S44, disconnect the power cord from the local power source, and for the TE100-S88, press the power switch to the off or “0”... -
Page 21: Identifying External Components
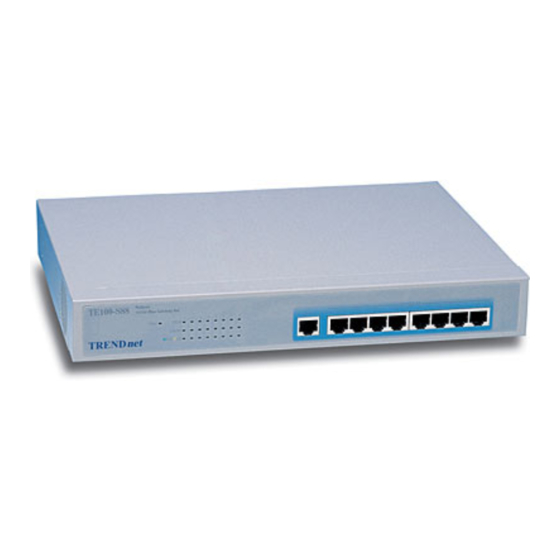
This chapter describes the front panel, rear panel and LED indicators of the Switch. Front Panel The front panel of the Switch consists of 4 (10/100 Mbps MDI-X) ports— TE100-S44 or 8 (10/100 Mbps MDI-X) ports— TE100-S88, 1 Uplink (MDI-II) port and LED indicators. A description of the ports appear in the Introduction of this User’s Guide (see Features,... -
Page 22: Rear Panel
Rear Panel TE100-S44 The rear panel of the TE100-S44 consists an AC power connector. The system fan for the Switch is located at the sides of the device. Figure 5, Rear panel view of the TE100-S44 switch TE100-S88 The rear panel of the TE100-S88 consists of a power switch, an AC power connector and a system fan. - Page 23 100 ~ 240 VAC at 50 ~ 60 Hz. ♦ Power Switch. (TE100-S88 only) This turns the Switch on and off. To turn on the system, press the switch to the “1” position. To turn the power off, press the switch to the “0”...
-
Page 24: Led Indicators
Figure 8, The TE100-S88 Switch LED indicators ♦ Power. This indicator operates when the Switch is turned on. If this indicator is not lit, make sure the AC power cable is connected properly and the power switch is at the ON position. - Page 25 LED indicator is OFF. ♦ Link/Act. These LED indicators are lighted up green when there is a secure connection (or link) to a device at any of the ports. The LED indicators blink green whenever there is reception or transmission (i.e. Activity—Act) of data occurring at a port.
-
Page 26: Connecting The Switch
TE100-S44. PC to Switch A PC can be connected to the Switch via a two-pair Category 3, 4, 5 UTP /STP straight cable. The PC (equipped with a RJ-45 10/100 Mbps jack) can be connected to any of the ports on the Switch except the up-link port. -
Page 27: Hub To Switch
The following are the possible LED indications for a PC to Switch connection: 1. The 100 M LED indicator comes on for a 100 Mbps and stays off for 10 Mbps. 2. The Link/Act LED indicator illuminates upon hookup. -
Page 28: 10Base-T Hub
The connection is accomplished from the hub’s uplink (MDI-II) port to any of the Switch’s (MDI-X) ports: 1x - 4x for the TE100-S44 or 1x - 8x for the TE100-S88. Figure 10, TE100-S88 Switch connected to a 10 or 100Base-T 10Base-T Hub If the Switch is connected to a 10 Base-T hub, the Switch’s LED... -
Page 29: Hub Without Uplink (Mdi-Ii) Port
(MDI-II) port of the Switch to any port of the Hub (see figure 11). Using crossover cable When using crossover cable, the connection can be made from any (1x - 8x) port of the Switch to any port of the Hub (see figure 11). Connecting The Switch... -
Page 30: Switch To Switch (Other Devices)
Using straight cable When using straight cable, this is done from the uplink (MDI-II) port of the Switch (Switch A) to any of the 10 Mbps or 100 Mbps (MDI-X) port of the other switch (switch B) or other devices (see figure 12). - Page 31 10/100 Fast Ethernet Switch User’s Guide Mbps (MDI-X) port of the other switch (switch B) or other devices (see figure 12). Switch A’s LED status for the respective connected ports should indicate the following: ♦ 100 M is ON for 100Base-T, otherwise OFF.
-
Page 33: Technical Specifications
General Standards: IEEE 802.3 10Base-T Ethernet IEEE 802.3u 100 Base-TX Fast Ethernet ANSI/IEEE Std 802.3 N-way auto-negotiation IEEE 802.3 Frame types: Transparent IEEE 802.3 MAC layer frame size: 64 - 1518 Bytes Protocol: CSMA/CD Data Transfer Rate: Ethernet: Fast Ethernet:... -
Page 34: Physical And Environmental
TE100-S88: 8 x 10/100 Mbps ports Media Interface MDI-II RJ-45 shared with port 1x Exchange: Physical and Environmental AC inputs: 100 - 240 VAC, 50/60 Hz (internal universal power supply) Power Consumption: 40 watts maximum DC fans: 1 built-in 40x40 mm fan Operating 32 °... - Page 35 10/100 Fast Ethernet Switch User’s Guide Physical and Environmental Weight: TE100-S44: 1.2 Kg TE100-S88: 2.5 Kg EMI: FCC Class A, CE Mark Class A, VCCI Class I Safety: UL (UL 1950), CSA (CSA950), TUV/GS (EN60950) Performance Transmission Method: Store-and-forward RAM Buffer:...
-
Page 36: Pin Specification
RJ-45 P PECIFICATION When connecting the TE100-S44/ TE100-S88 Switch to another switch, a bridge or a hub, a modified crossover cable is necessary. Please review these products for matching cable pin assignment. The following diagrams and tables show the standard RJ-45... - Page 37 The standard Category 3 cable, RJ-45 pin assignment The following shows straight cable and crossover cable connection: Straight cable for Switch (uplink MDI-II port) to switch/Hub or other devices connection Crossover cable for Switch (MDI-X port) to switch/hub or other...
-
Page 38: Index
10/100 Fast Ethernet Switch User’s Guide NDEX 100 M (speed indicator) LAN card 100Base-T LED Indicators Link/Act AC inputs AC Power Connector MAC address entry table AC power cord MAC Address Learning Auto polarity MAC address level Crossover cable N-way Auto-negotiation... - Page 39 10/100 Fast Ethernet Switch User’s Guide straight cable switch Switch to Switch (other devices) Unpacking Switching LAN technology Uplink/ MDI-II Switching Technology System Fan ventilation Transmission Method Wall Installation (DES-1004) Weight Index...