
Related Manuals for Canon ES8600


Summary of Contents for Canon ES8600
-
Page 1: Instruction Manual
8mm VIDEO CAMCORDER ENGLISH Instruction Manual CAMESCOPE ET LECTEUR VIDEO 8 mm FRANÇAIS Mode d’emploi VIDEOCAMARA Y GRABADORA DE VIDEO 8mm ESPAÑOL Manual de instrucciones NTSC... -
Page 2: Important Usage Instructions
8mm Video Camcorder, ES8600A This device complies with Part 15 of the FCC Rules. Operation is subject to the following two conditions: (1) This device may not cause harmful interference, and (2) this device must accept any interference received, including interference that may cause undesired operation. -
Page 3: Important Safety Instructions
Adapter should be operated only from the type of its accessories. power source indicated on the marking label. If you are not sure of the type of power supply to 1. Read Instructions — All the safety and operating your home, consult your product dealer or local instructions should be read before the product is power company. - Page 4 19. Replacement Parts — When replacement parts 15. Overloading — Do not overload wall outlets and are required, be sure the service technician has extension cords as this can result in a risk of fire used replacement parts that are specified by or electric shock.
-
Page 5: Table Of Contents
Searching and Reviewing While Recording ........ -
Page 6: Thank You For Choosing A Canon
First, we’d like to thank you for buying this Check that this package contains the following Canon camcorder. Its advanced technology accessories: makes it very easy to use — you will soon be BP-911K Battery Pack SS-500 making high-quality home videos which will Shoulder Strap give you pleasure for years to come. -
Page 7: Introducing The Camcorder
Canon’s Lithium ion power supply FlexiZone Control is a completely new way to use a A small but powerful battery pack that can be video camera. charged at any time. Image stabilizer Custom Keys... -
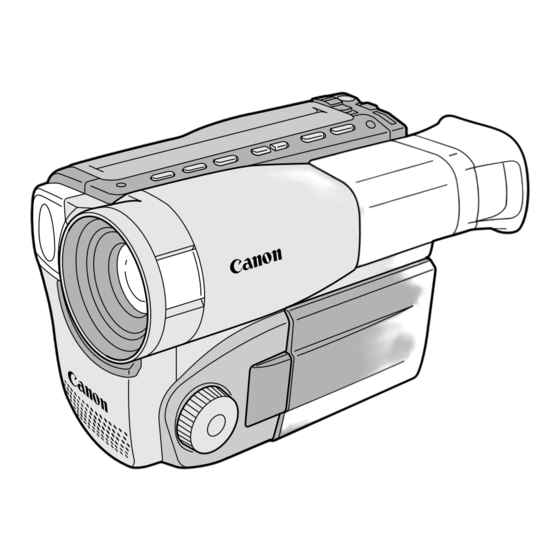
Page 8: Finding Your Way Around The Es8600
Finding Your Way Around the ES8600 EJECT button (p. 13) C. (counter) RESET button (p. 71) (fast forward) button (p. 22) REC SEARCH + button (p. 38) (rewind) button (p. 22) REC SEARCH – and (record review) button (p. 38) (play) button (p. - Page 9 BATTERY RELEASE button (p. 11) Viewfinder (p. 54, 64) Battery pack (p. 11–12, 56–57) Manual focus dial (p. 42) Speaker volume dial (p. 23) Selector dial (p. 28) Tripod socket Viewfinder Backup battery (p. 25) focusing holder (p. 58) switch (p. 54) Strap attachment bar PHOTO button (p.
-
Page 10: Powering Your Camcorder
• The power adapter converts current from a household power socket (100–240 V AC, 50/60 Hz) to the DC current used by your camera. • If the adapter is used next to a TV, it may cause noise bars to appear on the TV— move the adapter away from the TV or the antenna cable. -
Page 11: Charging And Attaching Battery Pack
• Always turn the camera off before removing the power source. Note: • You can find detailed notes for using the batteries in the “Notes on Using the Batteries” on p. 56. These notes include charging and recording times and how to install the backup battery. - Page 12 * Continuous recording time will be reduced by approx. 50% with continued use of the video light. • These times vary — the safest policy is always to have 2 or 3 times as many battery packs as you think you will need.
-
Page 13: Loading A Cassettes
(This switch position is usually labeled SAVE or ERASE OFF.) If you load this cassette and power on the camera, “v” flashes in the display. If you want to record on the cassette again, slide the red switch back so the hole is open. (This position is usually labeled REC or ERASE ON.) - Page 14 • After loading a cassette, use record search (p. 38) to find the point where you want to start recording. • Do not leave the cassette in the camera after use — return it to its case and store it in a cool, clean, dry place.
-
Page 15: Basic Recording
• You can stop and restart recording as often as you like by pressing the start/stop button. • The camera will turn itself off if you leave it in record pause mode for more than about 5 minutes. To return to record pause mode, turn the STANDBY lever to LOCK and back to... - Page 16 • The LCD screen uses more power than the viewfinder, so possible recording time will be less than if you were to use the viewfinder. • Be sure to close the LCD panel flush to the camera body when you have finished recording with the LCD screen.
-
Page 17: Zooming
You can also control the speed of zooming: • Move the control slightly to zoom slowly. • Turn it farther to zoom more quickly. (The farther you turn the zoom control, the faster the zoom speed.) Turning the 800× digital zoom on/off Turn the digital zoom on/off by pressing the D.ZOOM button, to magnify the camera’s zoom range... - Page 18 • The zoom display stays lit for approximately 4 seconds following an adjustment to the picture angle. • Overuse of the zoom may make recordings seem too busy. It is generally better to use it sparingly, or in order to reframe between shots.
-
Page 19: Using The Lcd Screen
90° 180° If you rotate the panel around to 180° so that it faces the direction of the lens you can allow the subject to monitor the shot in the LCD screen or you can include yourself in the picture (p. - Page 20 Doing so could cause damage. • Bright light falling on the LCD screen may cause glare that makes it difficult to view the image. In this case, switch to using the viewfinder. You are also able to adjust the brightness of the screen (see “Adjusting the LCD screen”...
- Page 21 Allowing the subject to monitor recording When you turn the LCD panel so that it faces the opposite direction (see diagram below), you can watch yourself during recording or let your subject monitor recording. 1. Open the LCD panel (p. 19).
-
Page 22: Playing Back A Cassette
Special playback Still playback To view the video as a still picture press the a button. To resume normal playback, press it again, or press the e button. The camera automatically goes into stop mode after about 5 minutes’ playback pause. - Page 23 High-speed search To play back the recording at about 19 times normal speed, press and hold the 1 button during normal fast forward. For reverse playback at about 19 times normal speed, press and hold the ` button during normal rewind.
-
Page 24: Connecting For Playback On A Tv Screen
• If you are connecting the camera to a VCR, set the input selector on the VCR to LINE. Note: • If you are going to use the TV as a monitor while you are shooting, remember to keep the TV volume turned down as long as the camera’s audio terminals are connected. If the sound from the TV speakers is picked up by the microphone, an unpleasant high-pitched squeal, called feedback, may be produced. -
Page 25: Tips For Making Better Videos
Leave some space on the side of the frame that the subject is facing or moving towards. Don’t cut off the top of the subject’s head, and don’t cut people off at the neck, hips or knees (move a little bit above or below). - Page 26 Long shot your picture angle before you begin. A good way to tell a story with video is to begin with a long shot that establishes the situation, and then move in with medium shots and close-ups to show the details.
-
Page 27: Selecting From The Menus
Selecting from the Menus The menus let you choose settings for a wide range of functions. There are 2 separate menus, for recording (camera menu) and playback (play menu). Camera menu While the camera is in record pause mode, press the MENU button. - Page 28 2. Use the SELECT dial to move the cursor up or down the screen. • In camera mode, when the cursor reaches the bottom of the screen 1, screen 2 of the menu appears, and when the cursor reaches the top of the screen 2, screen 1 appears.
-
Page 29: Setting Custom Keys
The Custom Keys let you choose the functions you want at your fingertips. The 2 keys on the left side of the camera body can easily be set to operate a number of functions. When you buy the camcorder, they should be set as follows:... -
Page 30: Custom Key Info On
4. Close the menu. Notes: • If it takes you more than about 5 minutes to select the Custom Key information, the camera may turn itself off automatically before you finish. This can be avoided by removing the cassette before you begin. -
Page 31: Image Stabilizer
• If a digital effect is turned on first, the image stabilizer becomes inoperable: • When you open the menu, IMAGE S.i shows “- - -”. • When Custom Key 2 is set to the image stabilizer and you press it, the i mark blinks for 4 seconds in the display then disappears. -
Page 32: Setting The Date And Time
The date and time are recorded continuously. If you set the date display to AUTO–10S or CONT. but have not yet set the date and time, –:– – will appear in the display during Record Pause mode. This will not be recorded. - Page 33 • The display can be set to any year between 2002 and 2050. • In addition, you can assign CUSTOM KEY 1 to choose whether to add the date and time to your recordings (see p. 29). Once assigned, press the CUSTOM KEY to choose between auto–10s, off, and continuous display styles (each in turn).
-
Page 34: Adding Titles
(each in turn). • When you turn the camera off, the TITLE setting is reset to OFF. • If you change the date/title color, the date and title will be displayed and recorded in the selected color. - Page 35 2. Turn the SELECT dial to move through the list of preset titles until the title you wish to use is displayed. • Each time you turn the SELECT dial the preset titles will be displayed in order one by one. HAPPY BIRTHDAY...
- Page 36 • The list of display colors appears, and current color is shown in parentheses. 2. Turn the SELECT dial to select the color you wish. • Each time you turn the SELECT dial and move the cursor to a color, that color name will be displayed the color it represents.
-
Page 37: Fade
3. Release the FADE button. Notes: • In addition, you can assign CUSTOM KEY 1 to operate the fade (see p. 29). Once assigned, press the CUSTOM KEY to fade in or out in the same way as detailed above. -
Page 38: Searching And Reviewing While Recording
• The camera returns to record pause mode. Record review When the camera is in record pause mode, you can use record review to play back the last few seconds of your recording and then return automatically to record pause mode. You can quickly make sure that a scene has recorded properly and then go on to shoot the next scene. -
Page 41: Focusing
Focusing POWER The camera can focus automatically. All you have to do is point it, and whatever is in the center of the display will usually be in sharp focus. It also has 2 functions which give you more control over focusing. - Page 42 • When you turn the camera off, manual focus is canceled. • If you turn the program selector to w position while using manual focus, the focus remains locked. You may release it and activate the FlexiZone AF by pressing the FOCUS button.
- Page 45 Exposure lock When you are recording in situations where the lighting or light reflected by the subject may change suddenly, you can lock the exposure at the current level. 1. Turn the program selector to Auto Recording program. 2. Press the center of the FlexiZone controller in straight.
-
Page 46: Taking Still Pictures (Photo Mode)
STANDBY lever and ON SCREEN button). They do not respond until recording is complete. • If you want to use an effect other than ghost or strobe, make sure you set it before you take the picture. If you have already set the ghost or strobe effect, you cannot use the PHOTO mode. -
Page 47: Using Digital Effects
Using Digital Effects You can add a variety of digital effects to your recording, during recording and playback (negative-positive conversion, mirror, mosaic. 16:9, cinema, strobe and ghost effects can be used only during recording). The soundtrack is not affected. • The digital effects marked with asterisks can be used only during camera recording. - Page 48 Mirror* The image will be as if you have placed a mirror in the middle of the screen. • If you select Mirror after the image stabilizer has already been turned on, the image stabilizer automatically turns off and i flashes and then disappears after 4 seconds.
- Page 49 Strobe* This effect converts on-screen action to a series of still images, giving an effect similar to slow- motion. If you select Strobe after the image stabilizer has already been turned on, the image stabilizer automatically turns off and i flashes and then disappears after 4 seconds.
- Page 50 • The display starts flashing again. You can now select a different effect. Notes: • Choosing EFFECT | deselects all digital effects. • In play mode, you can select a digital effect in stop mode or without a cassette loaded, however you cannot turn it on until you play the tape.
-
Page 51: Using The Built-In Video Light
• Continuous recording time is reduced with continued use of the video light. For longer recordings you may prefer to use a power adapter. • The light becomes hot during use — keep it away from plastic or flammable materials, and do not touch it. -
Page 52: Simple Editing To A Vcr
2. Prepare the TV and VCR. • Turn on the TV and set it to the video channel, or set the TV/VIDEO selector to VIDEO. • Turn on the VCR, and set its input selector to LINE. Load a blank cassette, and put the VCR in record pause mode. -
Page 53: Pal Tv Playback
7. Press the e (play) button. Notes: • When a cassette recorded with this camera is played back in PAL60 mode, the image in the viewfinder appears in black and white. • The camera sometimes might not operate correctly, owing to the condition of the recorded... -
Page 54: Preparing The Camera
Preparing the Camera You should already have attached a power source to the camera and loaded a cassette. When you have completed the following steps, you will be ready to start recording. Fasten the grip belt • Release the Velcro fastening and hold the camera with your right hand while you adjust the belt with your left. - Page 55 Note: • Be careful not to leave the viewfinder exposed to bright sunlight, or it will melt. (The light is concentrated by the viewfinder lens.) You may be able to move the viewfinder out of direct sunlight by pushing it upright, or by moving it back down to horizontal.
-
Page 56: Notes On Using The Batteries
For example, when you attach 2 BP-945 battery packs, the ES8600 can record up to 12.5 hours continuously (using viewfinder). • These times vary — the safest policy is always to have 2 or 3 times as many battery packs as you think you will need. - Page 57 However, as the battery pack will naturally discharge itself over time, it is best to charge it the same day you plan to use it, or the day before.
- Page 58 Cautions: • Do not pick up the battery using tweezers or other metal tools — this will cause a short circuit. • Wipe the battery with a clean, dry cloth to ensure proper contact.
-
Page 59: Video System
Video System (Availability differs from area to area.) 8mm video cassette SS-500 Shoulder Strap SA-1 Adapter Bracket VL-10Li Battery Video Light WS-20 Wrist Strap DC-905 CB-920 Car Battery DC Coupler Adapter BP-900 Series Battery Pack CA-920 Compact Power Adapter WD-46 Wide-converter... -
Page 60: Optional Accessories
Optional Accessories Call or visit your local retailer/dealer for genuine Canon video accessories. You can also obtain genuine accessories for your Canon camcorder by calling: 1-800-828-4040, Canon U.S.A. Information Center. Battery Packs The battery pack BP-911K is not available as an option. When you need extra battery packs, select from the following: BP-915, BP-930 and BP-945. - Page 61 WD-46 Wide-converter This lens decreases focal length by a factor of 0.7, giving you a wide perspective for indoor shots or panoramic views — and you can still use both zoom and autofocus. • As the ES8600 is already designed to record wide angle, vignetting occurs at the extreme wide angle position.
- Page 62 WS-20 Wrist Strap Provides an extra measure of protection for active shooting. This mark identifies genuine Canon video accessories. When you use Canon video equipment, we recommend Canon-brand accessories or products bearing this same mark.
-
Page 63: Cautions And Maintenance
• Do not take the camera into a humid room. Avoid sudden changes in temperature. • If you take the camera from a cold place to a warm place, condensation may form on the lens and internal parts (see p. 65). - Page 64 • Do not use a wet-type cleaning cassette as this can cause damage. Storage If you do not intend to use the camera for some time, store it in an area which is free of dust and moisture, and where the temperature is no higher than 86°F (30°C). After storage, check each...
- Page 65 Wait until the camera reaches room temperature before you take it out of the bag. • When the surface of the video camera is wet, do not use it. Wait for hours until the whole video camera dries.
- Page 66 Using the camera abroad Power sources • You can use the compact power adapter to operate your camera and charge battery packs in any country where the electricity supply is between 100 and 240 V AC, 50/60 Hz. Contact your Canon dealer for information about plug adapters for overseas use.
-
Page 67: Troubleshooting
— turn to the page numbers in parentheses for more information. Make sure that the camera is properly connected if you are using it with a TV or VCR. Consult your dealer or service outlet if problems persist. - Page 68 • Some subjects are not suitable for autofocus. Note: • Some subjects are not suitable for autofocus. In these situations, you will often get better results using manual focus (see p. 42). Focus on something which is about the same distance away, lock the focus, and then point the camera at your original, hard-to-focus subject.
-
Page 70: Screen Displays
Screen Displays Use the menu’s TV SCREEN function to choose whether or not the displays appear on the TV screen. They are not recorded to the tape if you start recording with the camera..TV SCREEN (see p. 27) indicates a flashing display. - Page 71 Digital zoom (p. 17) D . Z OOM I MAGE S . i Image stabilizer D . E . S E L E C T (p. 31) D . E . ON / O F F Specialized AE programs AU T O (p.
-
Page 72: Specifications
4.1 W (LCD screen OFF), Video terminal : 1 Vp-p/75 ohms 5.3 W (LCD screen ON) unbalanced Television system: S-video terminal: 1 Vp-p (Y signal), 0.286 EIA standard (525 lines, 60 fields) Vp-p (C signal) NTSC color signal Audio terminal: –10dBV, less than 2.2... -
Page 73: Index
Fade, 37 Accessories, 6, 60–62 Fast forward/Fast Forward Playback, 22 Adapter, AC, 10–11 Feed back, 24 AE programs, 39–40 Finding Your Way Around the ES8600, 8–9 Art, 47 FlexiZone AE, 44 Audio/Video Terminal, 24 FlexiZone AF, 41 Auto Recording, 39 FlexiZone Recording, 39 Focusing, 41–42... - Page 74 Photo Mode, 46 Playback, 22 Playback Connection, 24 Portrait, 40 Power Sources, 10 Preparing the Camera, 54–55 ‰ Recharging the Battery Pack, 56 Record Pause Mode, 15 Record Review, 38 Record Search, 38 Recording, 15–16 Recording Programs, 39–40 Rewind/Rewind Playback, 23 Í...
- Page 75 SURAMÉRICA CANON LATIN AMERICA, INC. 703 Waterford Way, Suite 400, Miami, FL 33126 USA ASIA CANON HONGKONG COMPANY LTD. 9/F, The Hong Kong Club Building, 3A Chater Road, Central, Hong Kong PUB.DIM-529 © CANON INC. 2003 PRINTED IN KOREA DY8-9120-370-000...