Table of Contents
Advertisement
Advertisement
Table of Contents

Related Manuals for Acer ICONIA Tab A500 16GB


Summary of Contents for Acer ICONIA Tab A500 16GB
-
Page 1: User Guide
User Guide... - Page 2 © 2011 All Rights Reserved Acer ICONIA TAB User Guide Model: A500 First issue: 03/2011 Acer ICONIA TAB Model number: __________________________________ Serial number: ___________________________________ Date of purchase: ________________________________ Place of purchase: ________________________________...
-
Page 3: Table Of Contents
Connecting a Bluetooth device ........25... - Page 4 Adjusting Bluetooth settings ........
-
Page 5: End User License Agreement
Sublicense or otherwise make the Software available to third parties, except that you may, after prior written notification to Acer, transfer the Software as a whole to a third party so long as you do not retain any copies of the Software and such third party accepts the terms of this Agreement. - Page 6 This Agreement may only be modified by a written document signed by both parties. If any provision of this Agreement is held by a court of competent jurisdiction to be contrary to law that provision will be enforced to the maximum extent permissible and the remaining provisions of this Agreement will remain in full force and effect.
-
Page 7: Features And Functions
You can: • Connect to the Internet. • Access your email while on the move. • Keep in touch with your friends via your Contacts and social networking applications. • Listen to rich, full-impact audio via Dolby Mobile. Product registration When using your product for the first time, it is recommended that you immediately register it. -
Page 8: Unpacking Your Tablet
Setting Up Unpacking your tablet Your new tablet comes packed in a protective box. Carefully unpack the box and remove the contents. If any of the following items is missing or damaged, contact your dealer immediately: • Acer ICONIA TAB •... -
Page 9: Back View
3.5 mm headphone jack Connect to stereo headphones. Power button Long press to turn the tablet on, press briefly to turn the screen on/off or enter sleep mode; press and hold to turn the tablet off. Getting to know your tablet... -
Page 10: Bottom View
1 2 3 Item Description Reset button Insert a small thin object (such as a paperclip) to reset power to the tablet. USB connector (Host) Connects USB devices to your tablet. Micro USB connector Connects to a computer with a USB cable. -
Page 11: Charging Your Tablet
24. Charging your tablet For first-time use, you need to charge your tablet for four hours. After that you can recharge the battery as needed. Connect the DC-in jack to your tablet and plug the AC adapter into any AC outlet. -
Page 12: Using Your Tablet
During the start-up process, you may create or sign in to an account, which will be used to synchronize your contact list, email, calendar and other information. If you do not yet have Internet access, or do not want to use this feature, then tap Skip. -
Page 13: Locking Your Tablet
Apps > Settings > Screen > Timeout. Waking your tablet If the screen is off and the tablet does not react to any taps on the screen, then it has been locked and is in sleep mode. -
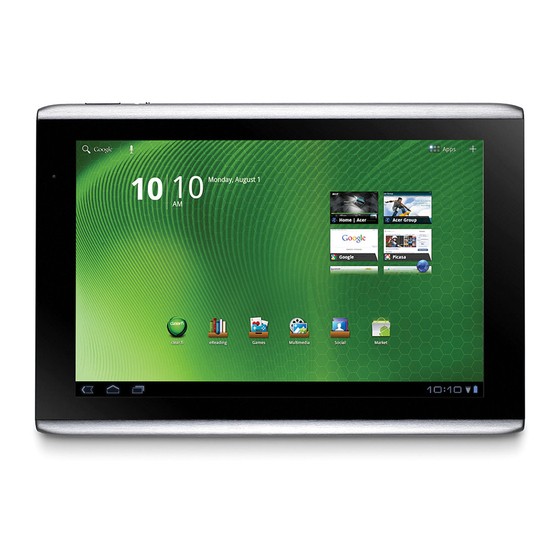
Page 14: The Home Screen
Tap and hold: Tap and hold an item to see a list of actions available for that item. On the pop-up menu that appears, tap the action you want to perform. Scroll: To scroll up or down the screen, simply drag your finger up or down the screen in the direction that you want to scroll. - Page 15 Back Tap this icon to go to the previous page, or to go up one level in a hide menu. This icon may be replaced with the icon in certain cases (such as if the keyboard or list of recent applications is shown).
-
Page 16: Status And Notification Area
Swipe the outline towards the center of the screen to switch pages. Tap and hold an icon to add a shortcut to one of your Home screens. While a shortcut is selected, thumbnails of the Home screens are shown below the list of applications, simply drag the shortcut to a screen. -
Page 17: Status And Notification Icons
Tap the status icons to view more status information and a summary of events. Tap the status area again to view more controls. While viewing a notification, tap the summary to see more information, if available. Some event summaries include controls, such as media controls if music is playing. - Page 18 GPS is on Upcoming event Receiving location data from Song is playing More status notifications SD card or USB storage is full Syncing data Tablet is connected to PC via Sync is on Application update available Problem with sign-in or sync...
-
Page 19: Personalizing The Home Screen
To move any item on the Home screen, tap and hold the item until it is selected. You may drag the item to any free area on the screen. To move the item to a different home screen, drag it to the side of the screen, the Home screen will switch to the screen in that direction. -
Page 20: The Onscreen Keyboard
You can add shortcuts to the Home screen directly from the application menu. Open the Application menu then tap and hold an icon until an image of the Home screens appears. Drag the icon to a Home screen to create a shortcut. -
Page 21: Xt9 Text Input
The word list changes after every key press. If the word you need is displayed, you can tap on it to insert it into your text. -
Page 22: Editing Text
Inserting text 1. Tap the text you want to select. If you can select this text, a cursor is inserted below the text. Note: The cursor indicates where text you type or paste will be inserted. - Page 23 The selected text is highlighted, with a tab at each end of the selection. 2. Drag either tab to expand or reduce the amount of selected text, or tap Select all. 3. To cut or copy the text, tap the Cut or Copy button.
-
Page 24: Connecting Devices To Your Tablet
Check card capacity in the External SD card section of Apps > Settings > Storage. Note: Ensure that the micro SD card is inserted all the way into the card slot. Transferring files from a microSD card to your PC Remove the card from the tablet and use a card reader or USB adapter to access the card as an external storage device. -
Page 25: Connecting A Usb Device To Your Tablet
You can access media files (photos, music and video) on USB storage devices with your tablet's multimedia apps. Caution: Before removing USB storage, make sure your device is not using data on the USB storage device. Note: Please check for updates to the tablet's software that may add support for additional USB devices. -
Page 26: Connecting To A Television With Hdmi
Bluetooth devices. Visit www.acer.com/support. Connecting to a television with HDMI Connect a micro HDMI (Type D) cable to your tablet then plug the other end of the HDMI cable into a TV or monitor with an HDMI port. -
Page 27: Going Online
Alternatively, tap the Wi-Fi status icon in the bottom-right corner of the screen. If Wi-Fi is not on, tap Turn on Wi-Fi, and wait for your tablet to detect nearby networks. Tap the name of your network and enter a security password, if needed. -
Page 28: Setting Up Gmail (Google Mail)
Simply tap one of the tabs across the top of the screen to switch pages. New tab Pinch to zoom in or out of pages. Tap and hold an item on a page to open a contextual menu. Voice Search With voice actions, you can send emails, find directions to locations, search the Internet and even send a note to yourself using your voice. -
Page 29: Setting Up The Email Application
Setting up the Email application The Email application enables you to access email from most popular email providers. Most accounts can be set up in two steps. Open the application menu and then tap Email to start setting up your email access. -
Page 30: Acer Socialjogger
Select Sign in to enter your account information. When you are finished press Start. Slide the disc, located on the right, up and down to cycle through the status updates. Tap on a status to view more details and make a comment. - Page 31 You can browse the market by category or tap the search icon to search for a specific application. Once you have selected an application, tap the DOWNLOAD button to download and install the application. You will be told which services (contact information, wireless access, GPS, etc.) the application requires access in order...
-
Page 32: Google Talk
Note: You need to activate a Google account before you can use Google Talk. Tap Talk from application menu to open Google Talk. Here you can see a list of your contacts connected to Google Talk services. Tap on a contact to open a chat session. -
Page 33: Acer Content Folders
Your tablet includes content folders that allow you to easily organize and access your favorite applications. Choose one of the four categories on the Home screen or application menu: eReading, Games, Multimedia or Social. Tap the shortcut to open a screen containing applications from that category. - Page 34 Moving or removing Tap and hold an item to select it. Drag it to an new position to change the order, or to the trash can in the top right corner to remove the shortcut from the screen.
-
Page 35: Playing Music And Video
Acer clear.fi will automatically detect devices that are connected to a wireless network and display them at the bottom of the screen, with your tablet as the default device on the leftmost corner. Tap any of the connected devices and then tap Photo, Video, or Music to browse media files on that connected device. - Page 36 Drag the bar on left side for more viewing options. clear.fi photos Tap the photo album to view the thumbnails. Tap and hold an album or photo thumbnail to view the menu panel. You can view photos found on any of the connected devices and save them.
- Page 37 YouTube, tap and hold a photo thumbnail, then tap Share. clear.fi music Tap a folder to list the audio files. Tap and hold a folder or audio file to view the menu panel. You can listen to any audio file found on any of the connected devices and save them.
-
Page 38: Media Server
To set up the media server, open the application menu and tap Media server. You will need to enable Share contents before you can start using the service. You may select to share Video, Photo or Music. Tap a category to control which files are shared. -
Page 39: Managing Contacts
Google account. Tap Contacts from the application menu to view your contacts. If you don’t have any contacts stored on your tablet, you can sync with your Google account contacts, import contacts from a contact data file (vCard or csv) or add a new contact. -
Page 40: Editing A Contact
Simply tap on a box and type the appropriate information. Click on the arrow next to the name entry to see options, such as adding a name prefix or phonetic name. To enter multiple entries, such as separate entries for mobile and home phone numbers, tap the plus sign to create a second entry. -
Page 41: Starred Contacts
Tap on an entry (such as an email address) to open the application linked to that type of entry. For example, tap an email address to open the Gmail application. To add or change information, tap the pencil icon. Tap Done to save changes, or Cancel to discard them. -
Page 42: Using The Camera
Tip: The recommended use for the front-facing camera is for video chat. Use the camera so the person you call can see you while you can see them on the screen. Normally, the video chat software you are using will provide controls for switching between the front and rear facing cameras. -
Page 43: Taking A Photo
Internal memory Saves photos to the tablet’s internal memory (this is the default). Memory card Saves photos to the memory card in the micro SD card slot (only available if a micro SD card has been inserted). Taking a photo 1. -
Page 44: Shooting A Video
1. Ensure you the options described above are set to your preferences. 2. Frame your subject and steady your tablet and zoom in or out as needed. 3. Press the camera button down fully to begin recording. -
Page 45: Supported Formats
After you have taken your photo or video, it is automatically saved; normally to internal memory. After taking a photo or video, you can view it in the Gallery by tapping the thumbnail in the bottom-left corner of the screen. Alternatively, open the application menu and tap Gallery, then Camera. -
Page 46: Reading An Ebook
Favorites / tags As you add books to your tablet, you may find it difficult to find the book you need. You may either search for a specific title or author, add books to your Favorites, or choose only to display books with a certain tag, to reduce the number of books displayed at one time. -
Page 47: Opening A Book
Normally All books are displayed, but you can select a tag. If a tag has been selected, only books with that tag will be displayed. Available tags are: All, Favorites, Fiction, Romance, Fantasy, Crime, Historical, Horror, Business, Life, Outdoor, Science. Tap the Settings icon and select Tags to edit or create new tags. - Page 48 Rights Management). Before you can read them, you must enter an Adobe ID to activate your tablet. Only one activation is required, as it covers all purchases. If you already have an Adobe ID, you may use this to activate your tablet. To create an Adobe ID:...
- Page 49 4. Tap Create an Adobe Account. 5. Enter the information requested to create login information for your account. Note: The email adress you enter will be your Adobe ID. Make sure you remember your password. 6. Select Continue. Your Adobe ID is now registered.
-
Page 50: Advanced Settings
Access Settings from the Application menu. Tap Apps, then Settings. Sound Adjust the volume of your tablet using the volume buttons on the side of the tablet. Alternatively, you can adjust your tablet sound settings by tapping Apps > Settings > Sound. -
Page 51: Putting Your Tablet In Airplane Mode
Putting your tablet in Airplane mode You can enter Airplane mode (also known as flight mode) to turn off network and Bluetooth functions and use your tablet during a flight. Check with your airline to make sure this is permitted onboard. -
Page 52: Connecting To A Pc
To connect to a device, tap the device in the list of available devices. You may be asked to enter a PIN on both devices to establish the connection. Note: Only A2DP stereo headsets (without microphone) are supported. Please check for updates to the tablet's software which may add support for additional Bluetooth devices. -
Page 53: Setting The Date And Time
To set the date and time, tap Apps > Settings > Date & time. Tip: If you travel frequently or live in an area that uses daylight saving time, and have mobile network access, activate Automatic date & time from this menu. Your tablet will set the date and time based on information it receives from the network. -
Page 54: Updating Your Tablet's Operating System
You may have to perform a reset if your tablet fails to respond when buttons are pressed or the screen is tapped. To reset your tablet use a small thin object (such as a paperclip) to press the recessed reset button. See “Bottom view” on page 10. - Page 55 Open Settings from the application menu, then tap Privacy > Factory data reset; click Reset tablet and then Erase everything to format your tablet. If your tablet still does not respond, refer to “FAQ and troubleshooting” on page 56. Resetting your tablet...
-
Page 56: Appendix
Appendix FAQ and troubleshooting This section lists frequently asked questions that may arise during the use of your tablet, and gives easy answers and solutions to these questions. Aspect Question Answer Audio Why is there no If the headset is plugged into the... -
Page 57: Other Sources Of Help
See “Clean boot“ on page 54. Heat The tablet heats up It is normal for the device to heat up when charging or when charging. When charging is operating for a long complete, it will return to its normal period. -
Page 58: Specifications
Formats supported: Type Formats Audio recording AAC-LC, AMR-WB Audio playback AAC-LC, AAC, AAC+ (Not raw AAC), AMR-NB, AMR-WB, MP3, OGG Vorbis, WAV Video recording H.264 BP, MPEG-4 SP, H.263 Video playback H.264 BP, H.264 MP, H.264 HP, MPEG-4 SP, H.263 USB connectors •... - Page 59 • microSD memory card slot (up to 32 GB) Battery • Rechargeable high density Li-polymer batteries: 3260 mAh x 2 (24.1 Wh) Note: Length of battery operation will depend on power consumption which is based on system resource use. For example, constantly using the backlight or using power-demanding applications will shorten battery life between charges.
-
Page 60: Safety
Parts of the device are magnetic. Metallic materials may be attracted to the device, and persons with hearing aids should not hold the device to the ear with the hearing aid. Do not place credit cards or other magnetic storage media near the device, because information stored on them... -
Page 61: Medical Devices
For vehicles equipped with an air bag, remember that air bags inflate with great force. Do not place objects, including installed or portable wireless equipment in the area over the air bag or in the air bag deployment area. If in-vehicle wireless equipment is improperly installed, and the air bag inflates, serious injury could result. -
Page 62: Emergency Calls
• Is kept at least 30 centimetres (one foot) away from a mobile phone. • Is not in a dusty or damp environment. • Is not used near water. Never spill liquids of any kind on or into your device. -
Page 63: Battery Information
For safety reasons, and to prolong the lifetime of the battery, charging will not occur at low (below 0 °C/32 °F) or high (over 40 °C/104 °F) temperatures. - Page 64 °C and 25 °C (59 °F and 77 °F). A device with a hot or cold battery may not work temporarily, even when the battery is fully charged. Battery performance is particularly limited in temperatures well below freezing. Do not dispose of battery or devices with embedded batteries in a fire as they may explode.
- Page 65 Glass parts Some of parts of your device may be made of glass. This glass could break if the product is dropped on a hard surface or receives a substantial impact. If glass breaks, do not touch or attempt to remove. Stop using your device until the glass is replaced by a qualified service center.
-
Page 66: Disposal And Recycling Information
Use of connectors and ports Never force a connector into a port. Check for obstructions on the port. If the connector and port don’t join with reasonable ease, they probably don’t match. Make sure that the connector matches the port and that you have positioned the connector correctly in relation to the port. -
Page 67: Rohs Compliance
RoHS compliance This product is in compliance with Directive 2002/95/EC of the European Parliament and of the Council of 27 January 2003, on the restriction of the use of certain hazardous substances in electrical and electronic equipment (RoHS) and its amendments. - Page 68 Ministry of Defense, with maximum authorized power of 100 mW in the 2446.5 - 2483.5 MHz band. Use outdoors on public property is not permitted.
-
Page 69: Fcc Regulations
If this equipment does cause harmful interference to radio or television reception, which can be determined by turning the equipment off and on, the user is encouraged to try to correct the interference by one or more of the following measures: •... - Page 70 Hävitä käytetty paristo valmistagan ohjeiden mukaisesti. ATTENTION ! Il y a danger d’explosion s’il y a remplacement incorrect de la batterie. Remplacer uniquement avec une batterie du mêre type ou d’ un type équivalent recommandé par le constructeur. Mettre au rebut les batter- ies usagées conformément aux instructions du fabricant.
- Page 71 Commission of the U.S. Government. The exposure standard for wireless devices employs a unit of measurement known as the Specific Absorption Rate, or SAR. The SAR limit set by the FCC is 1.6 W/kg. Tests for SAR are conducted using standard operating positions accepted by the FCC with the device transmitting at its highest certified power level in all tested frequency bands.
- Page 72 EN 62209-2 for use with accessories that contain no metal and that position the handset a minimum of 1.5 cm from the body. Use of other accessories may not ensure compliance with ICNIRP exposure guidelines. If you do not use a body- worn accessory and are not holding the device at the ear, position the handset a minimum of 1.5 cm from your body when the device is switched on.
-
Page 73: Declaration Of Conformity
Acer Incorporated Date: March 2, 2011 Declaration of Conformity We, Acer Incorporated, of 8F., No. 88, Sec. 1, Xintai 5th Rd., Xizhi Dist, New Taipei City, 22181, Taiwan Declare under sole responsibility that the product: Model: A500 Description: Tablet Computer...