Acer ICONIA TAB A500 User Manual
Hide thumbs
Also See for ICONIA TAB A500:
- User manual (73 pages) ,
- User manual (64 pages) ,
- Quick manual (13 pages)
Table of Contents
Advertisement
Quick Links
Advertisement
Table of Contents

Related Manuals for Acer ICONIA TAB A500


Summary of Contents for Acer ICONIA TAB A500
- Page 1 Acer ICONIA TAB A500/A501 User Guide...
- Page 2 © 2011 All Rights Reserved Acer ICONIA TAB A500/A501 User Guide First issue: 03/2011 Acer ICONIA TAB A500/A501 Model number: __________________________________ Serial number: ___________________________________ Date of purchase: ________________________________ Place of purchase: ________________________________...
-
Page 3: Table Of Contents
Online applications ..........30 Acer libraries Playing music and video Multimedia playback . - Page 4 Media server ..........42 Dolby Mobile 2 .
-
Page 5: End User License Agreement
Sublicense or otherwise make the Software available to third parties, except that you may, after prior written notification to Acer, transfer the Software as a whole to a third party so long as you do not retain any copies of the Software and such third party accepts the terms of this Agreement. - Page 6 Your use of the Third Party Software and Third Party Services is also subject to additional terms and conditions and policies which can be accessed through our global website. Privacy policy During registration you will be asked to submit some information to Acer. Please refer to Acer’s privacy policy at http:// www.acer.com or your local Acer website. ®...
-
Page 7: Features And Functions
To register your Acer product, please visit mobile.acer.com. Click Product Registration and follow the simple instructions. You can also register directly from your tablet by tapping the Acer Registration icon. After we receive your product registration, you will be sent a confirmation email with important data that you should keep in a safe place. -
Page 8: Unpacking Your Tablet
Your new tablet comes packed in a protective box. Carefully unpack the box and remove the contents. If any of the following items is missing or damaged, contact your dealer immediately: • Acer ICONIA TAB A500/A501 • Quick Guide • USB cable •... -
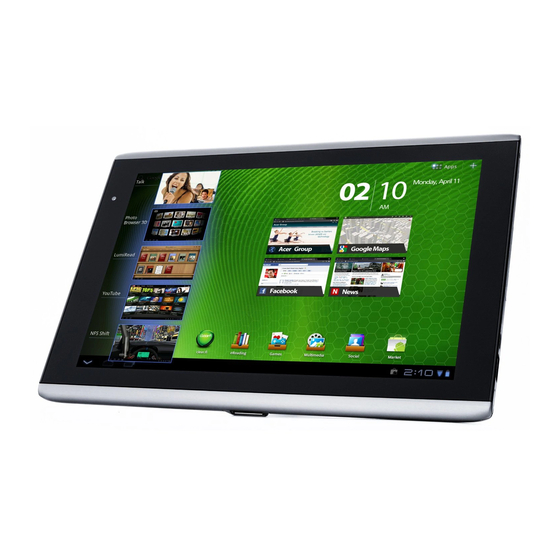
Page 9: Getting To Know Your Tablet
Getting to know your tablet Front view Item Description Touchscreen 10.1-inch, 1280 x 800 pixel capacitive touchscreen. Front-facing camera A 2-megapixel camera for video chatting and self-portrait images. Light sensor Detects ambient light and automatically adjusts the screen brightness. Getting to know your tablet... - Page 10 Back view Item Description LED flash Lights to illuminate images. 5 MP camera A 5-megapixel camera for taking high- resolution images. Speakers Emits stereo audio view Item Description Micro HDMI (Type D) Connects to an HDMI cable with a Type D connector connector.
- Page 11 Bottom view 1 2 3 Item Description Reset button Insert a small thin object (such as a paperclip) to reset power to the tablet. USB connector (Host) Connects USB devices to your tablet. Micro USB connector Connects to a computer with a USB cable. (Slave) DC-in jack Connects to the DC power supply.
-
Page 12: Using The Sim Card Slot (Optional)
Item Description Card slot cover Insert a micro SD Card into the slot under this cover. See “Inserting a micro SD card (optional)” on page 25. An optional SIM card slot allows you to access the Internet if you have a cellular data subscription. -
Page 13: Using Your Tablet
Using Your Tablet Important: Certain tablets include a SIM slot for internet access. Install a SIM before card with data subscription turning on your tablet. See “Installing a SIM card (optional)” on page 54. Turning on for the first time To turn on your tablet for the first time, press and hold the power button for a few seconds. -
Page 14: Locking Your Tablet
Creating multiple Google accounts You can create and easily access multiple Google accounts. Tap Apps > Settings > Accounts & sync > Add account. Activating a new SIM card and PIN (3G models only) If you are using a SIM card for the first time, it may require activation. Contact your network operator for details on how to do this. -
Page 15: Using The Touchscreen
in the correct order). Open the Home screen and tap Apps > Settings > Location & security > Configure lock screen. Note: If you forget an unlock pattern or PIN, please refer to “Unlock pattern“ on page 63. Using the touchscreen Your tablet uses a touchscreen for selecting items and entering information. - Page 16 Simply enter the text you want to find. Tap the arrow or Enter key to search the Internet, or tap one of the suggestions, applications or files shown in the list. Note: In order to search or browse the Internet, you must be connected to a cellular data or wireless network.
- Page 17 A total of five pages are available, two to the left and two to the right. To change or add widgets on any of the screens see “Personalizing the Home screen“ on page 20. Home screen The application menu The application menu displays applications installed on your tablet. Two categories are available All and My apps.
- Page 18 Notification area The Notification area is in the bottom-right corner of the screen. This area contains a variety of icons to inform you of your tablet’s status. The icons on the right side Time Wireless Battery indicate connectivity and battery status. The left reception charge status...
- Page 19 Icon Description Icon Description Connected to EDGE network SIM card is invalid or not installed EDGE in use Vibrate mode Connected to 3G network Speaker is silenced 3G in use Tablet microphone is off Cellular signal strength Battery is very low Connected to a wireless Battery is low network...
- Page 20 Personalizing the Home screen You may personalize your Home screen by adding or removing application shortcuts or widgets, and by changing the wallpaper. Adding or removing shortcuts or widgets To add shortcuts or widgets, tap and hold anywhere on the Home screen to open the Add to Home screen.
-
Page 21: The Onscreen Keyboard
Adding shortcuts from the Application menu You can add shortcuts to the Home screen directly from the application menu. Open the Application menu then tap and hold an icon until an image of the Home screens appears. Drag the icon to a Home screen to create a shortcut. The onscreen keyboard When you tap a text box to enter text, an onscreen keyboard will appear. - Page 22 settings. These settings include Auto-correction and keyboard sounds and vibration. Predictive text or auto correction The Android keyboard can provide predictive text input. As you tap the letters of a word, a selection of words are displayed that continue the sequence of letters tapped, or are a close match allowing for errors.
-
Page 23: Editing Text
Text assistance The standard XT9 keyboard has various features that assist you to enter correct text. To use these features, tap the Keyboard notification icon; this will open a menu listing the text input methods available on your tablet. Tap the settings icon next the XT9 Text Input entry. - Page 24 Note: The cursor is a blinking vertical bar that indicates where text you type or paste will be inserted. 2. If the cusor is not in the desired position, simply drag it to the correct position Paste If you previously copied (see below) text, a button appears briefly above the cursor.
-
Page 25: Connections
Connecting to a PC with USB Download and install the latest USB driver on your computer before connecting your tablet to the computer. Visit www.acer.com/worldwide/ support/download.htm for the latest driver. This allows you to transfer your personal data to the PC. Plug the... -
Page 26: Connecting A Usb Device
Connecting a USB device USB devices are supported, such as a keyboard, through the Host USB port. Access media files on USB storage with installed photo, music or video applications. Caution: Before removing USB storage, make sure your device is not using data on the USB storage device. -
Page 27: Connecting To The Dock (Optional)
Connecting to the dock (optional) The optional dock holds your tablet and allows you to easily charge the battery with a single connection. The dock provides extra connectors that replace your tablet's built-in connectors while it is docked. Please check the dock’s specifications for the exact features provided. -
Page 28: Going Online
Going Online Browsing the Internet In order to browse the Internet with your tablet, you must be connected to a cellular data or wireless network. Using the browser To start browsing, tap a bookmark from the bookmark widget on the Home screen, or open the Application menu and select Browser. -
Page 29: Setting Up Your Google Email
Voice Search With voice actions, you can send text messages, place calls, send emails, find directions to locations, automatically call establishments, search the Internet and even send a note to yourself using your voice. Tap the microphone on the Home screen or open Voice Search from the applications tab. When the “Speak now”... -
Page 30: Online Applications
Your tablet provides a variety of preinstalled applications. Many of these require some form of Internet access. These applications may include: • Acer Sync: Sync your data between your tablet, your computer and the Google servers. • SocialJogger: View updates to your social networks in one location.