Table of Contents
Advertisement
Advertisement
Table of Contents

Related Manuals for Pioneer DJM 600 - DJ Mixer 4 Channel


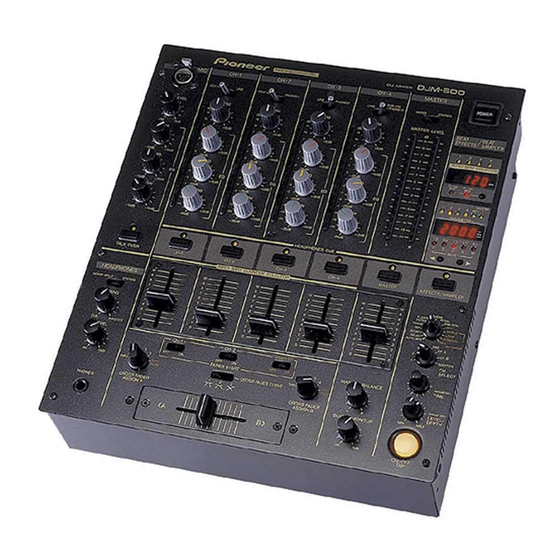
Summary of Contents for Pioneer DJM 600 - DJ Mixer 4 Channel
- Page 1 DJ MIXER DJM-600 Operating Instructions <DRB1251>...
-
Page 2: Safety Instructions
RETAIN INSTRUCTIONS — The safety and operating the other), it will fit into the outlet only one way. This that could result in a fire or electric shock. Never spill instructions should be retained for future reference. - Page 3 This equipment has been tested and found to comply with the limits for a Class B digital device, pursuant to Part 15 of the FCC Rules. These limits are designed to provide reasonable protection against harmful interference in a residential installation.
-
Page 4: Cautions Regarding Handling
÷ Do not install the unit in a location which is exposed to sharply, condensation may form inside, and the unit may not direct rays of the sun, or near stoves or radiators. -
Page 5: Table Of Contents
The peak level meter provided is equipped with 15-bit LED Enhanced Input/Output Terminals indicators for all channels. In addition to the 10 inputs for the 2 CD, 3 LINE, 3 PHONO (for MM only) and 2 microphone systems, outputs for 2 Fader Start/Stop... -
Page 6: Connections
CONNECTIONS When connecting or changing the connection of units, make sure to first turn off the power switch and disconnect the power cord from the outlet. 1. Connection of Input Equipment CDJ-100S/ CDJ-100S/ CD 2 CD 1 CDJ-700S/ CDJ-700S/ CDJ-500 II CDJ-500 II DAT, etc. - Page 7 (Master output-level attenuator knob) Connect this to the external effector’s output terminal. This knob is used to decrease the output level to protect When using a monaural output effector, connect it to the connected amplifiers and speakers from excessive input.
-
Page 8: Control Panel Features
At the center position, sound is flat. Main Microphone Input Terminal: Turn to the right to increase sound (to +12dB at 100Hz). For connecting a microphone that has a cannon-type Turn to the left to decrease sound (to –12dB at 100Hz). - Page 9 (This applies only when the master was selected using fader. HEADPHONES CUE.) Display range: –24dB to +14dB. Turn all the way to the left for the sound from the channel (other than the master) selected with 3 MONO/STEREO (Master Output Monaural/ HEADPHONES CUE.
- Page 10 CDJ-100S, CDJ-700S or similar CD player, this is the ON/OFF switch for the function to automatically Used to adjust the level of the BOOTH MONITOR output start playing of the CD player using the channel fader or terminal on the rear panel. cross fader .
- Page 11 1 for source BPM will be displayed in terms ÷ Functions as the effect’s ON/OFF switch if DELAY, of a beat. It will light if the beat is 1/2 or 4/1. Pressing ECHO, PAN, TRANS, FILTER, FLANGER, REVERB, the (2) effect beat selector switch will change beats PITCH, or SEND/RETURN has been selected.
-
Page 12: Using The Effect/Sampler Functions
Thus, BPM can now be checked not only aurally, as was conventional, but also visually, enabling quicker, simpler mixing of music with different tempos. Use of the TAP switch to input the beat manually makes it possible to set BPM for music for which it is difficult to measure (a capella, improvisation, etc.). - Page 13 5. FILTER 10. SAMPLER REC Changes the tone greatly by shifting the filter’s Recognizes music BPM and samples in terms of the set frequency in units of 1/2, 1, 2, 4, 8, 16, and 32 beats. beat. Example Example 1 / 2...
-
Page 14: Measuring Bpm
Measuring BPM Measurement and display of the BPM of channels selected with the auto BPM counter selector and of channels selected with the effect/sampler channel selector switch make it easy to mix music of different tempos. (Range of measurement: 70.0 to 180.0 BPM) Example: Displaying the BPM of music for auto BPM counter selector CH-1 and effect/sampler channel selector switch 2 (CH-2). - Page 15 If auto BPM measurement is not possible, use the tap Counter switch for manual input. AUTO BPM COUNTER ÷ When the tap switch is pressed in time to the music’s BPM measurement beat, the light in both BPM measurement range range selector...
-
Page 16: Delay, Echo, Auto Pan, Auto Trans, Filter, And Flanger Operations
USING THE EFFECT/SAMPLER FUNCTIONS Delay, Echo, Auto Pan, Auto Trans, Filter, and Flanger Operations Items Set for Each Effect Effect Effect/sampler parameter 1 (TIME) Effect/sampler parameter 2 (LEVEL/DEPTH) DELAY Delay time Effect mix ratio Setting range: 1 to 3500mSec, (Balance between original and delayed sound levels) - Page 17 4 / 1 ÷ More precise delay times can be set with the effect/ Beat display sampler parameter 1 knob (TIME). ÷ As “1/2” will light on the beat display if delay time is set BEAT Effect beat selector “1/2” will light...
-
Page 18: Operating Reverb And Pitch Shifter
÷ Pressing 3 on the effect beat selector switch will output. increase the pitch setting +33%, +50% or +100%, ÷ If the switch is pressed once more, the effect will turn while pressing 2 will decrease it –33%, –50% or off. -
Page 19: Using An External Effector
÷ If the channel has been changed with the effect/sampler AUTO BPM COUNTER channel selector switch when delay, echo (pages 16 and 17), reverb and similar effects have been turned on, all of the reverberation of the prior channel’s effects will be output. -
Page 20: Using Sampler Recording
USING THE EFFECT/SAMPLER FUNCTIONS Using Sampler Recording The unit’s built-in sampler recognizes the BPM of music to be recorded and automatically records the specified number of beats (1, 2, 4, 8, or 16) only. The maximum recording time is eight seconds. -
Page 21: Using Sampler Playback Functions
Based on the BPM of the music to be mixed, repeatedly plays the sound recorded within the set number of beats (1, 2, 4, 8, or 16). The recorded sound will be played stretched to match the set number of beats. -
Page 22: Using The Fader Start Function
Fader start play will be possible when the unit has been connected with control cables to the CDJ-100S, CDJ-700S, and CDJ- 500 II CD players for DJs. In other words, when the mixer’s channel fader or cross fader volume controls are turned up, the CD player’s pause function will be released, and the music will start automatically and instantly. -
Page 23: Starting With The Channel Fader
CH-1 way to the bottom. Fader start switch 3 Set the cue point of the CD player and set the player to standby at it. Channel fader volume control 4 When you want to start the player, push up the... -
Page 24: Troubleshooting
Sometimes the trouble may originate from another component. Thus, also check the other electrical appliances also in use. If the trouble cannot be rectified even after checking the following items, contact your dealer or nearest PIONEER service center. Problem... -
Page 25: Specifications
MAIN MIC ..........–54dBV (2mV)/3k Operating humidity ..........5% to 85% SUB MIC ..........–60dBV (1mV)/3k External dimensions .... 320 (W) x 372 (D) x 107 (H) mm RETURN ......... –14dBV (200mV)/22k 12-19/32 (W) x 14-5/8 (D) x 4-7/32 (H) in Weight ................ - Page 26 <DRB1251>...
- Page 27 <DRB1251>...
- Page 28 PIONEER CORPORATION 4-1, Meguro 1-Chome, Meguro-ku, Tokyo 153-8654, Japan PIONEER NEW MEDIA TECHNOLOGIES, INC. Multimedia and Mass Storage Division: 2265 East 220th Street, Long Beach, CA 90810, U.S.A. TEL: 800-444-OPTI (6784) PIONEER ELECTRONICS OF CANADA, INC. Industrial Products Department: 300 Allstate Parkway, Markham, Ontario L3R 0P2, Canada TEL: 905-479-4411 <DRB1251>...