Pioneer CDJ 1000MK3 - Professional CD/MP3 Turntable Operating Instructions Manual
Owner's manual
Hide thumbs
Also See for CDJ 1000MK3 - Professional CD/MP3 Turntable:
- Operating instructions manual (124 pages) ,
- Service manual (116 pages) ,
- Operating instructions manual (35 pages)
Table of Contents
Advertisement
Advertisement
Table of Contents

Related Manuals for Pioneer CDJ 1000MK3 - Professional CD/MP3 Turntable


Summary of Contents for Pioneer CDJ 1000MK3 - Professional CD/MP3 Turntable
- Page 1 COMPACT DISC PLAYER CDJ-1000MK3 Operating Instructions...
- Page 2 In some countries or regions, the shape of the power plug and power outlet may sometimes differ from that shown in the explanatory drawings. However the method of connecting and operating the unit is the same.
-
Page 3: Table Of Contents
Weight ..............4.2 kg (9.26 lb) ÷ Limited warranty ..............1 Dimensions ......320 (W) x 370 (D) x 105 (H) mm 12 – 5/8 (W) x 14 – 9/16 (D) x 4 – 1/8 (H) in NOTE: 2. Audio section Specifications and design are subject to possible modification without notice. -
Page 4: Features
This function simplifies setting and releasing loops. This func- is done, search will be performed faster than the normal search, tion lets you set a loop while you are playing a track. A loop can track search, or folder search operations. -
Page 5: Handling Precautions
Take special care when using the player while it is in- densation may form inside the unit and impair its performance. stalled in a carrying case. In such cases, allow the unit to stand for about an hour or raise the room temperature gradually. Cleaning the player Do not place on or To clean the player wipe with a polishing or a soft, dry cloth. -
Page 6: Discs Usable With This Unit
CDJ-1000MK3 does not support Packet Write recorded discs. * CDJ-1000MK3 is not equipped with a File Sort function; tracks will be played in the order in which they were recorded. * Plays MP3 files stored on CD-ROM. Cannot play MP3 files stored on SD memory cards or MultiMedia cards (MMC). -
Page 7: Handling Discs
I When holding discs, do not touch their signal surfaces. Hold by the edges, or by one edge and the center hole. I Do not affix gummed labels or tape to the disc surface. Also, do not scratch or damage the label. -
Page 8: Connections
Using the auxiliary audio cable, connect the white plug to the L (left) jack, and the red plug to the R (right) jack. In addition, by connecting the furnished control cord, the DJ mixer can be used to control this unit for fader start play and back cue operations. -
Page 9: Connecting The Power Cord
4. Connecting the power cord After completing all other connections, connect one end of the accessory power cord to the AC inlet on the rear side of the player, and connect the other end to a standard AC wall outlet, or to the auxiliary power outlet on your amplifier. -
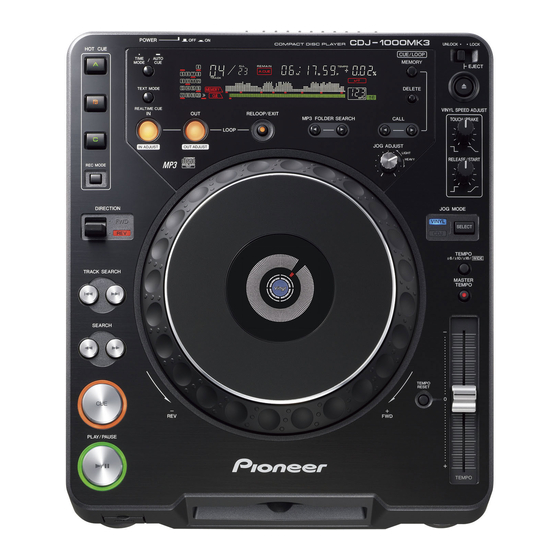
Page 10: Names And Functions Of Parts
If the EJECT UNLOCK/LOCK switch is set to the [LOCK] position, 3. LOOP IN/REALTIME CUE (IN ADJUST) button/indicator the disc will not be ejected unless the unit is set to the pause mode Realtime cue P. 15 before pressing the EJECT button. -
Page 11: Rear Panel
CONTROL connector on a Pioneer DJ mixer, When the VINYL SPEED ADJUST TOUCH/BRAKE dial is rotated the DJ mixer can be used to control the CD player for fader start play counterclockwise, play stops quickly; when the dial is rotated clock- and back cue. -
Page 12: Display Section
When the indicator is flash- 59. Time (seconds) display (S) ing, it may not be possible to record real time cue points, or hot cue 60. Frame display (F) points. The indicator also flashes when memory insufficiency oc- Seventy-five frames equal one second. -
Page 13: Loading And Removing Discs
¶ The disc may be damaged due to the disc clamp’s ¶ Only one disc can be loaded at a time. Do not attempt to load two rotating in an unstable condition. or more discs simultaneously, or to load a second disc when an- other disc is already loaded. -
Page 14: Dj Player Operation
100 minutes, the disc rotation will automatically stop. In this event, ¶ It can choose from –36 dB, –42 dB, –48 dB, –54 dB, –60 dB, –66 dB, pressing the PLAY/PAUSE button will cause playback to resume. –72 dB and –78 dB. -
Page 15: Track Search
¶ During super-fast folder search, the search direction is determined by ¶ As long as the CUE button is held depressed, the sound at the set the direction the jog dial is rotated. The direction indicated by the cued point can be heard. -
Page 16: To Change The Playing Speed
±6 %/±10 %/±16 %/WIDE. When ±6 % is se- canceled. lected, the unit of change is 0.02 %; when ±10 % is selected, the unit of ¶ When playing MP3, search is performed only within the same change is 0.05 %;... -
Page 17: Mixing Different Tracks
A to track B, and the operation is complete. 7 Long mix play If the BPM rates match, mixing of tracks A and B will sound good even if the CROSS FADER slider is in the middle position. -
Page 18: Advanced Operations
Scratch play ready been set as the loop start point. When jog mode is set to [VINYL], pressing the top surface of the jog dial 3. When playback reaches the desired loop-out point, press and turning it causes playback to occur in proportion to the speed and the LOOP OUT button. -
Page 19: To Perform Hot Cue
To perform hot cue Relay play using two players Up to three hot-cue points (A, B, C, including loop data) can be set in When the accessory control cord is used to connect the CONTROL jacks advance. In this way, playback can be started from either of those points of this player and another Pioneer CDJ series CD player, the two players instantly. -
Page 20: Operations Using Memory Cards
Recording to memory cards ¶ Up to 100 points (total of both cue and loop points) can be stored for I Loading a memory card each disc. When 100 points have been stored, attempts to record... -
Page 21: To Call Up Recorded Data
¶ The display will show the [READING] message; after several min- HOT CUE buttons A, B, C will flash green or orange. To call up one of the recorded hot cue points, press the corresponding button A, B, or C. The utes, the [CARD B IN] message will appear. -
Page 22: Troubleshooting
Incorrect operations can be mistaken as malfunctions. If you believe the unit is not operating correctly, consult the chart below. Sometimes incorrect operation may be due to a malfunction in another component. If the problem is not fixed, check the other components used with the player. If the problem still persists, contact your nearest Pioneer authorized service center or dealer for service. -
Page 23: Error Message Display
When the unit is unable to operate properly, an error code is displayed on the display panel. Check the error code displayed against the following table and take the recommended action to correct the error. If an error code other than any of the error codes listed in the table below is displayed or if the same error code is displayed even after corrective action has been taken, contact your nearest Pioneer Service Station or contact the store from which you purchased your player for assistance. -
Page 24: Limited Warranty
Supply of this product only conveys a license for private, non-com- mercial use and does not convey a license nor imply any right to use this product in any commercial (i.e. revenue-generating) real time broadcasting (terrestrial, satellite, cable and/or any other me-...