Table of Contents

Related Manuals for Aiwa LCX-301


Summary of Contents for Aiwa LCX-301
- Page 1 COMPACT DISC STEREO SYSTEM SISTEMA ESTEREOFONICO DE DISCO COMPACTO CHAINE STEREO AVEC LECTEUR DE DISGWES COMPACTS LCX=300 LCX-301 For Assistance And Information Call Toll Free I-800-BUFAIWA (United States and Puerto Rico) LCX-300 LCX-301...
- Page 2 (you will find them on the rear of your set) in the space provided below. Please refer to them when you contact yourAIWA dealer in case of difficulty. LCX-300 U, K, LH, LCX-301 CAUTION (K model) Use of controls or adjustments or performance...
- Page 3 If you should lose the fuse cover, please contact AIWA dealer. DO NOT CUT OFF THI: PLUG FROM THIS APPLIANCE. plug fitted is not suitable for the power points in your home, or...
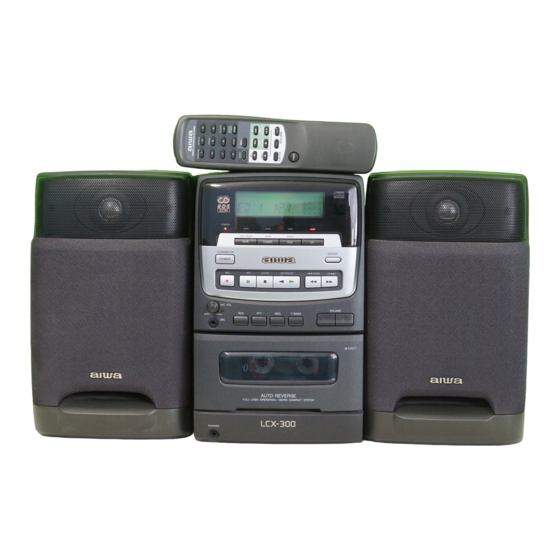
- Page 4 To optimize the performance of this system, please take the time to read through these Operating Instructions with the operating procedures, About your system Your system LCX-300/301 is composed supplied with the accessories @-@l as follows. @) Compact disc stereo cassette receiver @ Speakers @ Remote control...
- Page 5 d&w&#a#udt%& za+wdid d@-3oo/’o? &@?#za Para optimizar Ias preslaciones de este sistema, tome el tiempo necesario para leer este manual de Instrucclones con Ios procedimientos de funcionamlento. Acerca de su sistema EL sistema LCX-300/301 se compone de Ias unidades @l , y se suministra con 10s accesonos @ a @ sigun se muestra.
-
Page 6: Table Of Contents
TABLE OF CONTENTS PREPARATIONS PRECAUTIONS ... 8 CONNECTIONS ...m ... BEFORE OPERATION ...l2 CLOCK ... 14 SETTING SOUND SIMPLE AUDIO ADJUSTMENT ... 16 EQUALIZER ... 16 RADIO RECEPTION MANUAL TUNING ... 18 PRESETTING STATIONS ... 20 PRESET NUMBER TUNING ... 20 CD PLAYING BASIC OPERATIONS ... - Page 7 INDHX PREPARATIVES PREcAucloNEs ..l...m ...m ...m ...m ...9 CONEXIONES ... 9 ANTES DE LA OPERACION ... 13 PUESTA EN HORA DEL RELOJ ... 15 SONIDO AJUSTE SENCILL(I DEL SONIDO ... 17 ECUALIZADOR ... 17 RECEPCION DE LA RADIO SINTONIZACION MANUAL ... 19 PREAJUSTE DE EIWISORAS ...
-
Page 8: Precautions
Position to find the best direction and position for radio reception. operation. or car battery selector hot, cold, space around it so Allow 10 cm (4 in.) rack. period of time, to flow to the or an Aiwa or repair. connecting Both speakers and fix its ends to reception. -
Page 9: Precauclones
Si el cable de alimentacion de CA esta estropeado, en contacto con su concesionario o centro Aiwa para que se 10 cambien o reparen inmedlatamente. Si se produce algtin fallo, desconecte el cable de CA y el cable de la bateria para automovil y pongase en contacto con el serwclo tecnico. - Page 10 CONNECTIONS See the illustration below which corresponds complete connections. f Connect the speaker cords with the main unit. The cords with stripes should be connected and the other ones to the @ terminals, 2 Connect the supplied antennas. U, LH models: AM antenna @), and FM antenna...
- Page 11 Consulte la ilustracion siguiente que correspond a 3 a fin de realizar Ias conexiones. Conecte Ios cables del altavoz principal. Los cables rayados deben conectarse Ios demas a Ios terminals Conecte Ias antenas suministradas Modelos U, LH: antena de AM @) y antena de FM @.+ Modelo K: antena de MW/LW @) y antena de FM @.+ Conecte el cable de CA en un tomacorriente...
-
Page 12: Before Operation
,,--—----- C2C2 —0 SHIFT Caao :C3C2C2 FUNCTION ‘..__ ---- 0 >.:___ BEFORE OPERATION To turn the unit on Press one of the function buttons (TAPE, TUNER, CD). Playback of the inserted disc or tape begins, tuned station is received (Direct Play Function). -
Page 13: Antes De La Operacion
ANTES DE LA OPERACION Para encender la unidad Pulse uno de Ios botcmes de funcion (TAPE, VIDEO, CD). La reproduction del dl$co o de la cinta Insertada reciblra la emisora previamente sintonizada reproducclon directs). Tambien podra utlhzarse el boton POWER SI utlllza el cable de la bateria para automovil el boton POWER... -
Page 14: Setting The Clock
2 144 DOWN UP W 144 DOWN UP - SETTING THE CLOCK When the AC cord is just connected, the clock display the time as follows while the power is off. Press the II SET button. The hour flashes. Press the W DOWN or UP M... -
Page 15: Puesta En Hora Del Reloj
PUESTA EN HORA DEL RELOJ Inmediatamente desl~ues de conectar visualization del relo] destella. Ponga la hors como se indica a continuation, la alimentacion este desconectada. Pulse el boton II SET. La hors parpadeara. Pulse el boton DOWN designar la hors. Pulse el boton II SET para poner la hors. -
Page 16: Sound
VOLUME SIMPLE AUDIO ADJUSTMENT VOLUME CONTROL + E! Press the VOLUME control on the main unit or on the remote control. Selected volume level (O-1 will be displayed SUPER T-BASS SYSTEM -+ El The T-BASS system enhances the realism sound. Press the T-BASS button on the main unit, T-BASS (I!W) will light up on the display. -
Page 17: Ajuste Sencill
AJUSTE SENCILLO DEL SONIDO CONTROL DE VOLUMEN + Pulse el control VOLUME en la unldad principalo en el mando a distancia. El volumen seleccionado (0-16) se visual lzara durante 2 segundos. SISTEMA SUPER T-BASS+ El sistema T-BASS realza el realismo frecuencia. -
Page 18: Manual Tuning
BAND MANUAL TUNING Press the TUNEF?IBAND button to select the band repeatedly. U and LH models: ~M~AM K model: rFM~Mw —--+LW1 If the power was off, the previously tuned station will be played (Direct Play Function). When using the remote control Press the BAND button. -
Page 19: Sintonizacion Manual
SINTONIZACION MANUAL Pulse repetidamente el boton TUNER/BAND seleccionar la banda. Modelos U y LH: FM~AM Modelo K: ~FM~Mw~Lw7 Si la alimentacion esta desconectada previamente sintonizada (funcion de reproduction Cuando utilice el control remoto Preslone el boton BAND. Pulse el boton DOWN seleccionar una emisora. -
Page 20: Presetting Stations
PRESETTING STATIONS + EI The unit can store a total of 32 preset stations. is stored, a preset number is assigned to the station. preset number to tune into a preset station directly. Press the TUNEFUBAND button to select a band, and press the W DOWN or UP M select a station. -
Page 21: Preajuste De Eiwisoras
P’REAJUSTE DE EMISORAS + EI Esta unidad puede almacenar un total de 32 emisoras. ahmacene una emlsora, a esa emlsora se Ie aslgnara de preajuste. Utlllce el numero de preajuste directamente una emisora preajustada. Pulse el boton TUNER/BAND para seleccionar una banda, y pulse H+ DOWN o UP FM seleccionar... -
Page 22: Basic Operations
13 . DIR/PRESET BASIC OPERATIONS LOADING DISC + El Press the CD button, then press the OPEN button to open the disc compartment. the label side up and close the disc compartment. DISPLAY Total playing time of the disc @ Total number of tracks on the disc @ Music calendar (only the first 16 tracks are displayed) PLAYING DISC + El... -
Page 23: Operaclones Basicas
OPERACIONES BASICAS HJTRODUCCION DE DISCO+ Pulse el boton CD, y Iuego pulse el boton OPEN para abrir e! compartimiento del disco. Cargue un disco con la cara de la etiqueta hacia arriba y cierre el compartimiento de disco. VKHJALIZACION @ Tiempo de reproduction total del disco @ Ntimero total de canciones... - Page 24 SHIFT REPEAT .. . BASIC OPERATIONS RANDOM PLAY -+ Use the remote control. RANDOM play All the tracks on the disc can be played randomly. Press the RANDOM button while pressing To cancel random play, repeat this procedure. Even if the < button is pressed, a previously...
- Page 25 OPERAClONES RIEPRODUCCION ALEATORIA + Utilice el control remoto. Reproduction aleatoria Todas Ias pistas del disco pueden reproducirse Pulse el boton RANDOM manteniendo SHIFT. Para cancelar la reproduction aleatoria, prc)cedimiento. Aunque se pulse el boton una cancion reproducida no podra ser omitida durante unidad volvera solamente...
-
Page 26: Programmed Play
DIR/PRESET PROGRAMMED PLAY Up to 20 tracks can be programmed from the inserted Use the remote control. Press the PRGM button while pressing the SHIFT button in stop mode. The PRGM indicator flashes in the display. Press numeric buttons program a track. -
Page 27: Reproduction F~Rogramada
RIEPRODUCC1ON PROGRAMADA Se podra programar un maximo de 20 canciones del disco introducidos. Utilice el control remoto. 7 Pulse el boton PRGM manteniendo el boton SHIFT estando en el modo de parada. El indicador PRGM parpadea en el visor. lPulse Ios botones numericos prograrnar una cancion. -
Page 28: Recording
BASIC OPERATIONS INSERTING TAPES You can select a reverse mode to play back one or both sides. Use normal (type I), Crop (type II) or metal (type IV) tapes for playback. Press the TAPE button and press the A EJECT mark to open the cassette holder. -
Page 29: Operaclones Basicas
OIPERACIONES BASICAS ~SERCIC)N DE CINTAS Podra seleccionar el modo de inversion dos caras. U :illce cintas normales (tipo I), de CrOz (ttpo II) o de metal (tipo IV) para la reproduction. Pulse el boton TAPE y la marca A EJECT para abrir el portacassette. -
Page 30: Basic Recording
VIDEO BAND TUNER BASIC RECORDING Preparation Wind up the tape to the point where recording will start. Only normal (type I) tapes can be recorded. Insert the tape to be recorded on into the deck. Insert the tape with the side to be recorded out from the unit and the exposed Press the TAPE/REV MODE button to select the reverse mode. -
Page 31: Grabacion
GIRABACION BASICA Preparation Bobine la cinta hasta el punto donde grabacion. S 510 es posilcle grabar cintas normales (tipo I). Inserte la cinta que vaya a grabar en la platina. Inserte la cinta con el Iado que se va a grabar hacia afuera de la unidad y el Iado expuesto hacia abajo. -
Page 32: Microphone Mixing
In this case, hold the microphone or decrease the sound level using the MIC the microphone is extremely loud, it may be microphone type microphone is recommended Contact your local Aiwa dealer for details. away MIN. -
Page 33: Mezcla Microfonica
I’enceinte ou baisser Ie niveau sonore a I’aide MIC VOL. est extr~mement fort, il peut &re tourner la commande MIC VOL vers recommande microphone de type unidirectionnel pour eviter Ie hurlement. Pour plus de details, Aiwa local. a cet... -
Page 34: Connecting Optional Equipment
. The connecting cords are not supplied, connecting cords. Consult your local Aiwa dealer for recommended VIDEO/AUX JACKS Sound signals can be input to this unit through Use a cable with RCA phono plugs to connect (turntables, LD players with analog output jacks, VCRs, etc.). -
Page 35: Conexion De Equipo Opcional
CC pour la tension CA, vous Ie reglage de I’heure. un cordon pour batterie Aiwa DCW-50. est aiimente sur une prise d’allume-cigare la touche POWER de la telecommande pas. Appuyez sur la touche POWER de I’appareil... -
Page 36: Care And Maintenance
CARE AND MAINTENANCE Occasional care and maintenance of the unit and the software are needed to optimize the performance of your unit. To clean the cabinet Use a soft cloth lightly moistened with mild detergent Do not use strong solvents, such as alcohol, benzine or thinner. -
Page 37: Cuidados Y Mantenimiento
CUIDADOS Y MANTENIMIENTO El mantenimiento y el cuidado ocaslonal software resultan necesarios para optimizar su unidad. Para Iimpiar la caja Utlllce un paric} blando humedecido un poco en una solution detergence suave. No utilice nunca disolventes alcohol, benclna o diluyente. Para Iimpiar Ias cabezas y Ios puntos... - Page 38 SPECIFICATIONS Total harmonic distortion 0.1 % (2.6 W, 1 kHz, 6 ohms) Inputs VIDEO/AUX: 0.5 V SUPER WOOFER: 1.1 V outputs SPEAKERS: accepts speakers of 6 ohms or more PHONES (stereo head~hones of 32 ohms or more Cassette deck section 4 tracks, 2 channels stereo Track format CrOz tape: 50 Hz –...
- Page 39 ESPECIFICACIONES Distortion armonica total 0,1 % (2,6 W, 1 kHz, 6 ohmios) Entradas VIDEOIAUX: O 5 V Salidas SUPER WOOFER: SPEAKERS’ acepta altavoces ohmios o mas PHONES (minltoma estereo): acepta auriculares de 32 ohmios o mas Seccion de la platina Formato de pistas 4 pistas, 2 canales estereo Respuesta de Ifrecuencia Clnta de Cr02 50 Hz –...
-
Page 40: Troubleshooting Guide
TROUBLESHOOTING GUIDE Iftheunit fails toperform as described instructions, check the following guide. GENERAL There is no sound. Is the AC cord connected properly? 1s there a bad connection? (+ page 10) There may be a short circuit in the speaker Disconnect cord, then... -
Page 41: Guia Para La Solucion De Averias
GUIA PARA LA SOLUCION DE AVERIAS Si la unidad nc) funciona como se describe instrucciones, oompruebe la gufa slgulente: GENERALIDADES No hay sonido. . LEst~ b,en conectado el cable de alimentaci~n LHay alguna conexlon mal hecha? (+ pagina 11) . ~Hay un cortocircuito en Ios terminals + Desconecte el cable de alimentacion... -
Page 42: Parts Index
PARTS INDEX Main instructions about each part are indicated. -
Page 43: Indice De Las Partes
INDICE DE LAS PARTES Se indican Ias instrucciones principals de cada parte. *To use the function, press the button while pressing * Para utilizar la funcion, pulse et boton manteniendo * Pour utiliser cette fonction, tenir la touche SHIFT enfoncee NOMENCLATURE Les principals instructions...