Table of Contents
Advertisement
Available languages
Available languages
Advertisement
Table of Contents

Related Manuals for Danby DAC5200DB


Summary of Contents for Danby DAC5200DB
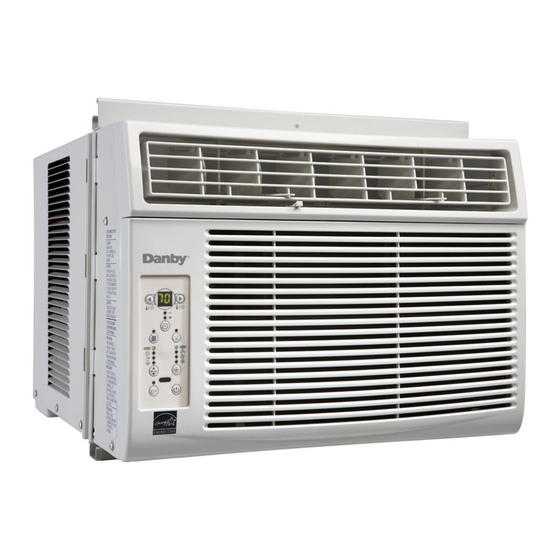
- Page 1 • Owner’s Use and Care Guide • Guide d’utilisation et d'entretien AIR CONDITIONER CLIMATISEUR Model • Modèle • DAC5200DB Danby Products Limited, Ontario, Canada N1H 6Z9 Danby Products Inc., Findlay, Ohio, USA 45840 V1 11.10 DM...
-
Page 2: Table Of Contents
Contents CAUTION: AIR CONDITIONER Read and follow all safety rules and operat- 2-17 Owner’s Use and Care Guide ......ing instructions before first use of this prod- • Welcome uct. • Important Safety Information • Features • Installation PRECAUTION: • Operation Instructions •... -
Page 3: Welcome
For easy reference, may we suggest you attach a copy of your sales slip/receipt to this page, along with the following information, located on the manufacturers nameplate on the right side of the unit. -
Page 4: Important Safety Information
(available at most local hardware stores). 6) The rating plate on the unit contains electrical and other technical data. The rating plate is located on the right side of the unit, above the power cord. TABLE 1... -
Page 5: Features
1) Select a thermostat setting that suits your comfort needs and leave at that chosen setting. 2) The air filter is very efficient in removing airborne particles. Keep the air filter clean at all times. (usually cleaned every 2 weeks depending on indoor air quality). -
Page 6: Installation
Side Curtain LH (1) Regular Foam Seal(1) A) This room air conditioner is designed to fit easily into a single or double LOCATION hung window. However, since window designs vary, it may be necessary to make some modifications for safe, proper installation. -
Page 7: Location
The shutters are identified (on frame) as left and right. 3) Completing the Installation • Cut the foam (non adhesive) sealing strip to fit the area of the window sill that the air conditioner will rest on. 3/8” screws Fig. - Page 8 (top) “L” shaped mounting bracket (See Fig. 5). • Expand the shutter frames (fully) on each side and secure the top of the frames to the window sash using one 3/4” screw on each side and one in the “L”...
-
Page 9: Key Pad Features
POWER: Turns unit On/Off. MODE: Allows you to scroll through and select the desired operating mode; Cool , Dry , Fan Only and *Auto .The selected mode will be denot- ed by the adjacent indicator light.*‘Auto’is a pre-set factory program that automatically defines the mode (Cool or Dry) and fan speed based on the set temperature. -
Page 10: Using The Remote
• Prevent any liquid from falling into the remote controller. Do not expose the remote controller to direct sunlight or heat. • If the infrared signal receiver on the indoor unit is exposed to direct sunlight, the air conditioner may not function properly. Use curtains to prevent the sunlight from falling on the receiver. -
Page 11: Remote Controller
BUTTONS ON/OFF button MODE button Operation starts when Each time you press this button is pressed this button, a mode is and stops when the selected in a sequence button is pressed again. that contain AUTO, COOL,DRY,FAN and back to AUTO. - Page 12 2. In the Auto mode, you can not switch the fan speed. It has already been automatically controlled. 3. If the Auto mode is not comfortable for you, the desired mode can be selected manually.
- Page 13 10 hours,each press will increase the selected time by 1 hour increments,up to 24 hours. 3. The time can be set in a range of 0~24 hours. 4. After the desired time has established, wait for about 10 seconds until the setting temperature reverts back in the display window of the air conditioner.
- Page 14 This indicates the program is set. NOTE: To cancel the TIMER setting, push the TIMER button until 0 hour is displayed on the LCD window of the air conditioner. ENERGY SAVER OPERATION In this mode, the fan will continue to run for 3 minutes after the compressor shuts off.
- Page 15 Keep the control panel receiver out of interference, limiting the ability to program direct sunlight. the main unit. If the remote control will not be used for extended periods of time (vacations etc.), batteries should be removed. Do not mix old and new batteries.
-
Page 16: Care And Maintenance
AIR FILTER REMOVAL: The air filter is located behind the air intake front grill. To remove the air filter, grasp the filter handle on the front of the gril and slide it out to the right. To reinstall the air filter, reverse the above procedures. The air filter must be vacuumed or washed by hand in warm water. -
Page 17: Troubleshooting
Troubleshooting Occasionally a problem may arise that is minor in nature, and a service call may not be neccessary. Use this trou- bleshooting guide for a possible solution. If the unit continues to operate improperly, call an authorized service depot or Danby’s Toll Free Number 1-800-263-2629 for assistance. -
Page 18: Warranty Service
Danby under this warranty shall be void. Nothing within this warranty shall imply that Danby will be responsible or liable for any spoilage or damage to food or other contents of this appliance, whether due to any defect of the appliance, or its use, whether proper or improper. -
Page 19: Bienvenue
À titre de référence, vous pouvez agrafer à cette page une copie de votre fiche d’achat de l’appareil. Inscrivez les ren- seignements suivants fournis (sur la plaque signalétique du fabricant sur le côté droit de l’appareil au-dessus du cordon d’alimentation). -
Page 20: Consignes De Sécurité Importantes
à la masse adéquatement, veuillez consulter un électricien qualifié. 5) La prise murale doit correspondre à la fiche à 3 broches sur le cordon de service fourni avec l’appareil. N’utilisez PAS de fiches d’adaptation. -
Page 21: Caractéristiques
économie de l’énergie. Pour le rendement maximal, observer les recom- L’ÉNERGIE mandations qui suivent. 1) Choisir un réglage du thermostat qui répond à vos besoins de confort et le laisser au réglage choisi. 2) Le filtre à air est très efficace pour éliminer les particules qui flottent dans l’air. - Page 22 Tenez l’appareil aussi loin que possible de tout obstacle ou obstruction et à au moins 30 po au-dessus du plancher ou du sol. Il ne faut pas que les rideaux ou d’autres objets à l’intérieur de la pièce puissent bloquer le flux d’air.
- Page 23 L’appareil doit être installé de telle sorte que l’écoule- ment de la condensation ne se déverse pas sur des passants ou sur des proriètés avoisinantes. Fig. 2...
- Page 24 (supérieur). Voir Fig. 5. • Étendez les cadres des volets (complètement) de chaque côté, et fixez le haut des structures au cadre de la fenêtre en utilisant une vis de 3/4 po et une rondelle de sécurité sur chaque côté. Fig. 5 •...
- Page 25 Minuterie Vérifiez le Filtre: L’afficheurau-dessus du bouton s’allumine pour indi- Mode quer le filtre à air doit être nettoyé (voir la page 20). Une fois que le filtre a Sommeil Verifiez été nettoyé et remplacé, enfoncent le bouton. Vérifiez le Filtre pour contin- le Filtre ué...
- Page 26 • Ne laissez pas de liquides tomber sur la télécommande. N’exposez pas la télécommande à la chaleur ou à la lumière directe du soleil. • Si le récepteur du signal infrarouge qui se trouve sur l’unité intérieure est exposé à la lumière directe du soleil, il est possible que le climatiseur ne fonctionne pas correctement.
- Page 27 Bouton MODE (MARCHE/ARRÊT) Le climatiseur se met en Chaque fois que vous marche lorsque l’utilisateur appuyez sur ce bouton, un appuie sur ce bouton et s’ar- mode est sélectionné dans la rête lorsque l’utilisateur séquence Automatique. appuie dessus à nouveau. Refroidissement, Déshumidification et...
- Page 28 En mode Ventilateur, la température réglée ne s’affiche pas sur la télécom- mande et il n’est pas non plus possible de contrôler la température de la pièce. Dans ce cas, seules les étapes 1, 2 et 4 peuvent être effectuées.
- Page 29 Mode Sommeil • Dans ce mode, la température sélectionnée augmente (en mode refroidissement) ou diminue de 2 °F 1 heures après la sélection du mode. • La température augmentera ensuite de 2 °F supplémentaires au bout de 1 autres heures.
-
Page 30: Consignes D'utilisation
Cela indique que le programme est réglé. REMARQUE : Pour annuler le réglage du minuteur, appuyez sur le bouton TIMER jusqu’à ce que 0 apparaisse sur l’afficheur ACL du climatiseur. ÉCONOMISEUR D’ÉNERGIE Dans ce mode, le ventilateur continue à... - Page 31 1. Appuyez légèrement sur la position « A » avec l’index, dans la direction indiquée par la flèche 1. 2. Appuyez sur la position « B » avec le pouce et tirez dessus dans la direction indiquée par la flèche 3.
-
Page 32: Soins Et Entretien
(vers l’extérieur) à droite. Pour réinstaller le filtre à air, faites l’inverse des procédures ci-dessus. Le filtre à air peut être passé à l’aspirateur ou lavé à la main dans de l’eau chaude. Séchez-le bien avant de l’installer. -
Page 33: Dépannage
• Enlevez et nettoyez le filtre à air. REMARQUES: 1) Si le disjoncteur se déclenche à maintes reprises, ou si le fusible a grillé plus d’une fois, contactez un technicien qualifié. 2) Quand l’appareil est installé en suivant les étapes d’installation adéquates, l’appareil est incliné de façon appropriée... - Page 34 à des fins commerciales, toutes les obligations de Danby en vertu de cette garantie seront annulées. Cette garantie indique en aucun temps la responsabilité de Danby de l’avarie ou dommage de la vin ou autre contenu, soit par les vices de l’appareil, ou soit parl’utilisation convenable ou inexacte.
-
Page 35: Model • Modèle Dac5200Db
AIR CONDITIONER CLIMATISEUR The model number can be found on the serial plate located Le numéro de modèle se trouve sur la plaque d'information on the back panel of the unit. sur le panneau arrière de l’appareil. All repair parts are available for purchase or special order Toutes les pièces de rechange ou commandes spéciales...