Table of Contents
Advertisement
Advertisement
Table of Contents

Related Manuals for TRENDnet TPL-405E


Summary of Contents for TRENDnet TPL-405E
- Page 1 Cover Page TRENDnet User’s Guide...
-
Page 2: Table Of Contents
Powerline Utility System Requirements ................ 9 Software Installation....................10 Using the Utility ......................13 Powerline Utility Overview ..................14 Add adapters in the utility and create a customized encryption key ..... 18 Upgrade Firmware ....................20 Technical Specifications..............22 Troubleshooting ................23 Appendix .................. -
Page 3: Product Overview
Connect one 500Mbps adapter to your network (such as TRENDnet’s TPL-401E) and plug *** Networked Powerline devices need to be plugged into power outlets that are on the same in the TPL-405E at your media center to stream HD video through the four Gigabit ports electrical system. -
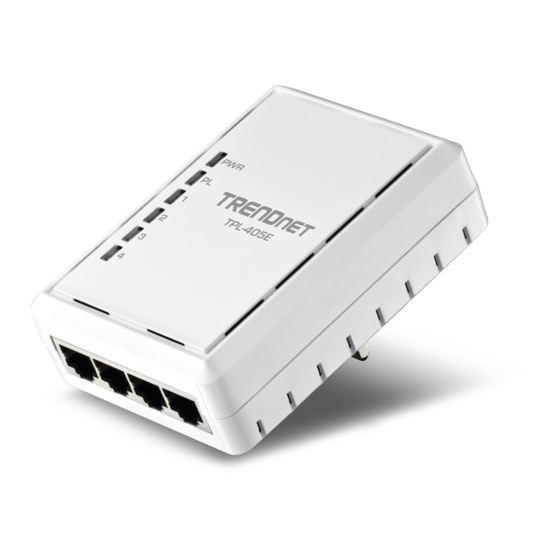
Page 4: Product Hardware Features
Powerline (PL) LED Product Model Gigabit Ethernet Device Serial Number Connection (1-4) LEDs Device MAC Address Device Password (DPW) Hardware Version Firmware Version Gigabit Ethernet Ports (1-4) Power Prong Reset Button Sync Button © Copyright 2012 TRENDnet. All Rights Reserved. - Page 5 Diagnostic LEDs – Indicates the device status and connectivity. household electrical wiring may also cause additional noise on your electrical system. Note: Powerline (PL) LED color indicates the strength and quality of the Powerline • Distance – Long lengths of electrical wiring through your electrical system connection through the electrical system.
-
Page 6: Application Diagram
Diagram Explanation: The first Powerline unit is networked to a router which is in turn connected to a modem (typically from your Internet Service Provider (ISP)) which provides Internet connectivity. A second Powerline adapter is plugged into a wall power outlet near a media center and is connected to a network game console and another network enabled media device such as a network enabled media player to provide Internet connectivity. -
Page 7: Installing Your Powerline Adapters
3. Once the Powerline adapter is installed and connected to your router, verify that the Power (PWR) LED is on or blinking and the Ethernet Connection (ETH) LED is on or Note: The TPL-405E package only includes a single Powerline adapter. Please blinking. -
Page 8: Add Adapters To Your Network
Powerline (PL) LED to turn on. After the Powerline (PL) LED turns on, verify that the Power (PWR) LED is on, the Powerline (PL) LED is on or blinking, and the Ethernet Connection (ETH) LED is on or blinking. -
Page 9: Securing Your Powerline Network
In order for your Powerline devices to connect to the same Powerline network, the same encryption key must be assigned to all Powerline devices in that network. Powerline devices that are not assigned the same encryption key will not be able to Note: The default encryption key assigned to TRENDnet Powerline adapters is connect to the Powerline network. -
Page 10: Add Adapters Using The Sync Button
2. On one of your connected Powerline adapters, push and hold the Sync button for 15 your existing Powerline network. seconds and release it. All LEDs will turn off and turn back on. This will erase the current encryption key assigned to the first Powerline adapter. -
Page 11: Using The Powerline Utility
• View the Powerline adapters connected to your network (using the MAC and release it. All LEDs will turn off and turn back on. This will erase the current address) and the approximate connection quality and speed of each Powerline encryption key assigned to the additional Powerline adapter. -
Page 12: Software Installation
1. Insert the included CD-ROM into your computer’s CD-ROM drive. 2. At the CD Autorun Prompt window, click Run Autorun.exe . Note: If the Autorun prompt does not appear automatically, open the CD contents and double-click Autorun.exe. 3. At the CD-ROM main menu, click Install Utility. - Page 13 9. Wait for the WinPcap installation to complete. 10. After the process is completed, click Finish. 8. In the Install Options window, leave the option Automatically start the WinPcap driver at boot time checked and click Install. © Copyright 2012 TRENDnet. All Rights Reserved.
- Page 14 11. At the Powerline Configuration Utility installation window, click Next. 13. In the Select Installation Folder window, click Next. 12. In the License Agreement window, check the radio button I Agree, and click Next. 14. In the Confirm Installation window, click Next.
-
Page 15: Using The Utility
16. At the Installation Complete window, click Close. Upon completing the software installation, a desktop shortcut is automatically created. Double-click the icon to start the utility or open the utility if it is already running. Closing the utility will exit the application. -
Page 16: Powerline Utility Overview
(Remote Device). Close automatically detected and network that is Device)***THIS Closes and exits appear in the list. If not, you MUST BE ENTERED not listed the Powerline will need to add them FOR ALL DEVICES TO (Remote Device). Utility manually. - Page 17 DPW for all Powerline Closes and exits adapters in your Powerline network the Powerline before applying this setting. If you do not, Utility the encryption key will not change for application. any Powerline adapters without the DPW entered.
- Page 18 Powerline listed in the System System Utility Remote Device Information Information application. History (Log) window to a text window. file on your (Remote Device). computer. © Copyright 2012 TRENDnet. All Rights Reserved.
- Page 19 Close feature for automatically discovering Closes and exits Powerline adapter or devices (Remote the Powerline Device) connected to your Powerline Utility network. application. Note: It is recommended to keep this option checked (Enabled). © Copyright 2012 TRENDnet. All Rights Reserved.
-
Page 20: Add Adapters In The Utility And Create A Customized Encryption Key
Powerline adapters already connected to your Powerline network. If your Powerline adapters have already been installed and connected using the same encryption key, If you have not written down the Device Password (DPW) and MAC address for each of they should appear in the Remote Device list. - Page 21 To create a customized encryption key Note: Match the Device Password (DPW) to the corresponding MAC address. 1. In the Powerline Utility Privacy window, under Private Network Name, enter the new encryption key for your Powerline network. 2. After you have entered your new Powerline encryption key, click Set All Devices.
-
Page 22: Upgrade Firmware
Note: The firmware can only be upgraded when your computer is directly connected to device will help you to easily identify which Powerline adapter you are monitoring in the the Powerline adapter Ethernet port (also called network port) using an Ethernet cable utility. - Page 23 TRENDnet User’s Guide 4. Launch the Powerline Utility by double-clicking the icon. 6. Click Browse next to the PIB field and navigate to the unzipped folder with the firmware files. Select the PIB file. (Ex. TPL-401E-PIB-v50100.pib) 5. The device should appear in the Main window of the utility under Local Device. Click Upgrade Firmware.
-
Page 24: Technical Specifications
** 500Mbps is the maximum theoretical Powerline data rate. Actual throughput will vary depending on environment. Security 128-Bit AES (Advanced Encryption Standard) *** Networked Powerline devices need to be plugged into power outlets that are on the same Power (PWR) electrical system. Powerline (PL) with Connection Quality Indication **** GFCI outlets and AFCI circuit breakers may degrade Powerline network signals. -
Page 25: Troubleshooting
Reset button. • Using a pin or paperclip; press and hold the Reset button for 1 second on each Powerline adapter. All LEDs will turn off then turn back on. This will reset the Powerline adapters to their default settings. -
Page 26: Appendix
Powerline performance. 1. Push and hold the Sync button on Adapter B for 15 seconds and release it. All LEDs will turn off and turn back on. This will erase the current encryption key assigned to Adapter B and disconnect from Adapter A and Adapter C. - Page 27 This equipment has been tested and found to comply with the limits for a Class B digital destination. The firmware setting is not accessible by the end user.
- Page 28 TPL-405E TRENDnet User’s Guide noteikumiem. Česky TRENDnet tímto prohlašuje, že tento TPL-405E je ve shodě se Lietuvių Šiuo TRENDnet deklaruoja, kad šis TPL-405E atitinka esminius [Czech] základními požadavky a dalšími příslušnými ustanoveními [Lithuanian] reikalavimus ir kitas 2004/108/EB Direktyvos nuostatas. směrnice 2004/108/ES.
- Page 29 Download section limited to, duty, tax, and other fees. and look for the desired TRENDnet product to access to the GPL Code or LGPL Code. These codes are distributed WITHOUT WARRANTY and are subject to the copyrights of WARRANTIES EXCLUSIVE: IF THE TRENDNET PRODUCT DOES NOT OPERATE AS the developers.