Table of Contents
Advertisement
Quick Links
Advertisement
Table of Contents

Related Manuals for Sennheiser SKM 5200-II


Summary of Contents for Sennheiser SKM 5200-II
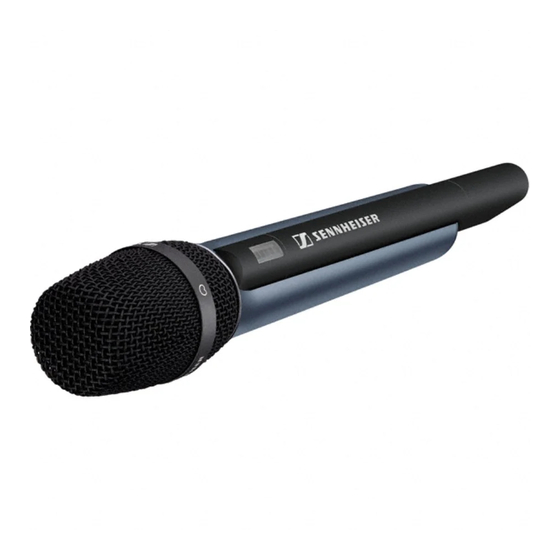
- Page 1 SKM 5200-II Instruction manual...
-
Page 2: Table Of Contents
Overview of the SKM 5200-II radio microphone ..................7 Putting the radio microphone into operation ..........9 Inserting, removing and changing the power pack ......9 Changing the microphone head .............. 11 Using the radio microphone ................13 Switching the radio microphone on/off ..........13 Doing a frequency check ................ -
Page 3: Safety Instructions
• Use only a cloth for cleaning the product. • Do not place the product near any heat sources such as radiators, sto- ves, or other devices (including amplifiers) that produce heat. • Only use attachments/accessories specified by Sennheiser. - Page 4 • using the product within the operating conditions and limitations described in this instruction manual. “Improper use” means using the product other than as described in this instruction manual, or under operating conditions which differ from those described herein.
-
Page 5: The Skm 5200-Ii Radio Microphone
The SKM 5200-II radio microphone The SKM 5200-II is a professional hand-held radio microphone trans-mit- ter that is easy to use and is easily adaptable to a wide variety of applica- tions: • Suitable for all-purpose use, e.g. for reporting, stage and studio appli- cations. - Page 6 The SKM 5200-II radio microphone The channel bank system The transmitter is available in four UHF frequency ranges with up to 184 MHz switching bandwidth: Range 2 (N-US) 614–697,9 MHz Range 2 (N) 614 – 798 MHz Range 1 (L) Range 3 (P) 776–...
-
Page 7: Delivery Includes
EM 3731, EM 3732, EM 3732 COM • EM 3731-II, EM 3732-II, EM 3732 COM-II Delivery includes radio microphone transmitter body (microphone head and power pack to be ordered separately) MZQ 3072 quick release clamp color-coded identification markers instructions for use frequency table... -
Page 8: Product Overview
“RF” – appears when an (not included in the delivery) RF signal is transmitted Battery compartment Lock mode icon locking mechanism “MHz” – appears when the fre- Antenna quency is displayed LC display “dB” – appears when the micro- Multi-function switch with three... - Page 9 Product overview Display backlighting When the lock mode is deactivated, the display remains backlit for approx. 20 seconds after pressing a button. Operation and battery status indication The LED ON/LOW BATT provides information on the current operating state of the radio microphone:...
-
Page 10: Putting The Radio Microphone Into Operation
For powering the radio microphone, you can either use the Sennheiser B 5000-2 battery box (1.5 V AA size batteries) or the rechargeable Senn- heiser BA 5000-2 battery pack. For regular use, we recommend using the environmentally friendly rechargeable BA 5000-2 battery pack. - Page 11 LOW BATT Recharging the BA 5000-2 battery pack Before using the BA 5000-2 battery pack for the first time or if you have not used it for several weeks, you must charge the battery pack comple- tely.
-
Page 12: Changing The Microphone Head
The battery pack is carefully charged using the U-method. For further details, please refer to the user manual of the L 50 charger. LC display shown on the example of the BA 5000-2 battery pack •... - Page 13 Pull off the microphone head Put on the new microphone head. Screw tight the microphone head by tur- ning it against the direction indicated by the arrow. Different microphone heads ensure suitability for a wide variety of appli- cations: Model Type Pick-up pattern SPL...
-
Page 14: Using The Radio Microphone
Remove the batteries or the battery pack when the radio micro- phone will not be used for extended periods of time. The radio microphone can only be switched off when the lock mode is deactivated (see page 15). To switch the radio microphone off:... -
Page 15: Doing A Frequency Check
The radio microphone has a lock mode that prevents that the radio micro- phone is accidentally programmed while operating. When the autolock function is activated via the “LOCK” menu (see page 27) the lock mode is automatically activated 10 seconds after pressing the last button and remains activated. -
Page 16: Identifying The Radio Microphone
Using the radio microphone Deactivating the autolock function temporarily To be able to make changes to the settings via the operating menu, you must temporarily deactivate the lock mode. To achieve this, either press the ON/OFF button or the multi-function switch (switch position SET). -
Page 17: The Operating Menu
(with activated autolock function): Immediately activating the lock mode • Briefly pressing the button (with activated lock mode): Calling up the lock mode for deacti- vation • Pressing the button for 3 sec. (with deactivated lock mode):Swit- ching the radio microphone off... -
Page 18: Overview Of The Operating Menu
– even when the lock mode is activated. • Selection mode In selection mode, you can select the menu whose setting you want to change. To change to the selection mode, the lock mode must be deac- tivated. - Page 19 Displaying the menu settings in display mode In display mode, and with the lock mode activated, you can display the cur- rent menu settings one after the other (see “Overview of the operating menu”...
- Page 20 DOWN other. Changing to the selection mode To change from display mode to selection mode, you have to deactivate the lock mode. Deactivate the lock mode (see “Deactivating the autolock function temporarily” on page 15). You can now select the menu whose set- tings you want to adjust.
- Page 21 The operating menu “TUNE” menu, the cycling of the display is continuously accelerated. The “fast search” function allows you to get fast and easily to your desired setting. Storing a setting Press the multi-function switch (switch position SET) to permanently store a set- ting.
-
Page 22: Overview Of The Operating Menu
Deactivate the lock mode before adjusting the settings (see “Deactivating the autolock function temporarily” on page 15). Pressing the ON/OFF but- will cancel your entry (ESC function) and return you to the display mode. Display mode Selection mode Setting mode 776.000... - Page 23 1-dB- steps, -40...0 dB Current attenuation STORED LOWCUT Adjusting the Current Current FLAT, low cut frequency low-cut-frequency low-cut-frequency 120 Hz, 190 Hz STORED VIEW NAME CHAN FREQ Selecting the Current FREQ, FREQ, standard display standard display CHAN, NAME...
-
Page 24: Adjustment Tips For The Operating Menu
Selecting the frequencies to be stored in the channel bank “VAR” – “TUNE” Via the “TUNE” menu, you can freely select the frequencies to be stored in the channel bank “VAR” (variable bank). The radio microphone is not transmitting while this adjustment is being made. - Page 25 (UP) or (DOWN). Store your setting. • You can change to a different channel and set a new frequency for the new channel: Press the multi-function switch for a longer time (switch position SET). The current channel flashes on the display.
-
Page 26: Entering A Name - "Name
Store your setting. Entering a name – “NAME” Via the “NAME” menu, you can enter a freely selectable name for the radio microphone. This name can be displayed on the standard display and can consist of up to six characters such as: •... -
Page 27: Adjusting The Microphone Sensitivity - "Atten
“LOWCUT” To reduce unwanted low-frequency noise such as engine, wind and rumble noise, you can activate a low-cut filter. The low-cut frequency can be set to 190 Hz or 120 Hz. If you do not want to reduce low-frequency signal portions, select the set- ting “FLAT”. -
Page 28: Loading The Factory-Preset Default Settings - "Reset
– “LOCK” The radio microphone has an autolock function (automatic lock mode) that can be activated or deactivated via the “LOCK” menu. When the auto- lock function is activated, the lock mode is automatically activated 10 seconds after pressing the last button. The lock mode protects the radio microphone from accidental programming. -
Page 29: Adjusting The Output Power - "Power
In “Low Intermodulation mode”, the output power is reduced to 10 mW; the operating time will be about the same as using an output power of 50 mW. Displaying the software revision –... -
Page 30: If Problems Occur
Reduce the line output adjusted too high level If problems occur that are not listed in the above table or if the problems cannot be solved with the proposed solutions, please contact your local Sennheiser agent for assistance. To find a Sennheiser partner in your country, search at www.sennheiser.com... -
Page 31: Accessories
008534 Neumann KK 104 S microphone head 005273 B 5000-2 battery box 005274 BA 5000-2 battery pack incl. charging adapter for the L 50 charger 003554 L 50 charger (for BA 5000-2 battery pack) 051662 Charging adapter for L 50 charger... -
Page 32: Specifications
Specifications Specifications Modulation wideband FM Frequency range range 1 (L): 470 to 638 MHz range 2 614 to 798 MHz/ (N/N-US): 614 to 697.9 MHz range 3 (P): 776 to 866 MHz Switching bandwidth up to 184 MHz Transmission frequencies frequency bank “FIX”... - Page 33 Operating conditions Ambient temperature –10 °C to +55 °C Relative humidity max. 90 % (non condensing) Power supply B 5000-2 battery box (1.5 V AA size batteries) or rechargeable Sennheiser BA 5000-2 battery pack Storage and transport conditions Ambient temperature –25 °C to +70 °C...
-
Page 34: Manufacturer Declarations
This equipment has been tested and found to comply with the limits for a Class B digital device, pursuant to Part 15 of the FCC Rules. These limits are designed to provide reasonable protection against harmful interference in a residential installation. - Page 35 Manufacturer Declarations • Connect the equipment into an outlet on a circuit different from that to which the receiver is connected. • Consult the dealer or an experienced radio/TV technician for help. This class B digital device complies with the Canadian ICES-003.
- Page 36 Sennheiser electronic GmbH & Co. KG Am Labor 1, 30900 Wedemark, Germany Publ. 03/10 www.sennheiser.com 532899/A01...