Table of Contents
Advertisement
Quick Links
Advertisement
Table of Contents

Related Manuals for Sennheiser SK 5212-II - MANUAL 2


Summary of Contents for Sennheiser SK 5212-II - MANUAL 2
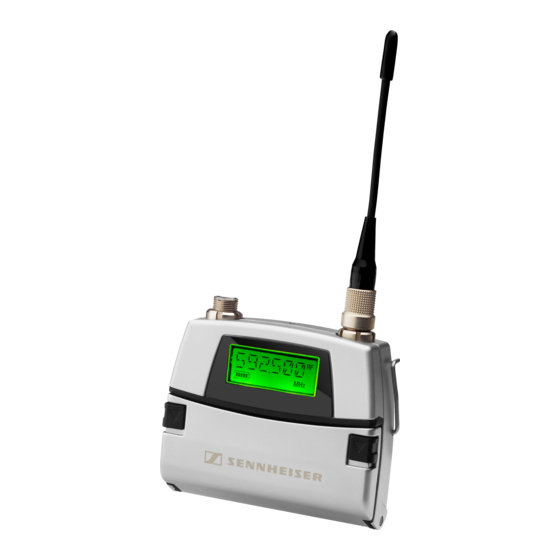
- Page 1 SK 5212-II Instruction manual...
-
Page 2: Table Of Contents
Adjustment tips for the operating menu ................... 20 Selecting a channel – “CHAN“ ......................20 Selecting the frequencies to be stored in the frequency bank “VAR” – “TUNE” ....20 Entering a name – “NAME” ......................22 Adjusting the microphone sensitivity – “ATTEN” ............... 22 Adjusting the bass roll-off frequency –... -
Page 3: Important Safety Instructions
Heed all warnings and follow all instructions in this instruction manual. • Use only a cloth for cleaning the product. • Do not place the product near any heat sources such as radiators, stoves, or other devices (including amplifiers) that produce heat. • Only use attachments/accessories specified by Sennheiser. -
Page 4: The Sk 5212-Ii Bodypack Transmitter
The SK 5212-II bodypack transmitter The SK 5212-II bodypack transmitter The SK 5212-II is a professional bodypack transmitter that is easy to use and is easily adaptable to a wide variety of applications. The SK 5212-II bodypack transmitter has the following features: •... - Page 5 The SK 5212-II bodypack transmitter The frequency bank system The transmitter is available in five UHF frequency ranges with up to 184 MHz switching bandwidth: Range N-GB 606 – 790 MHz Range N-US 614.075 – 697.925 MHz Range N 614 – 798 MHz...
-
Page 6: Delivery Includes
Delivery of the bodypack transmitter includes: 1 SK 5212-II bodypack transmitter 1 AA size battery, 1.5 V antennas for different frequency ranges 1 belt clip 1 instruction manual 1 frequency table 1 supplement “Legal requirements for the use of radiomicrophones”... -
Page 7: Product Overview
Product overview Product overview Overview of the SK 5212-II bodypack transmitter Microphone input Battery compartment catches Red LED for operation and battery status Type plate indication Multi-function switch with three switch (ON/LOW BATT/PEAK) positions: Antenna socket (DOWN), (UP) and LC display, backlit... -
Page 8: Overview Of The Displays
Product overview Overview of the displays Display backlighting When the lock mode is deactivated, the LC display remains backlit for approx. 20 seconds after pressing a button. Alphanumeric display “MHz” – appears when the transmission frequency is displayed Level display for audio signal “AF”... -
Page 9: Putting The Bodypack Transmitter Into Operation
Close the battery compartment. Connecting the microphone The transmitter is designed for use with Sennheiser lavalier microphones and headmics. The power supply of these microphones is via the microphone input of the transmitter. Connect the microphone to the microphone input the transmitter. -
Page 10: Connecting The Antenna
Putting the bodypack transmitter into operation Connecting the antenna The transmitter is supplied with plug-on antennas: Choose the antenna that matches the frequency range used. Connect the antenna to the antenna socket of the transmitter. Screw down the coupling ring. -
Page 11: Using The Bodypack Transmitter
; after a short pause, “RF” appears on the LC display panel. Remove the battery when the transmitter will not be used for extended periods of time. The transmitter can only be switched off when the lock mode is deactivated (see page 11). -
Page 12: Doing A Frequency Check
The transmitter has an autolock function (automatic lock mode) that can be activated or deactivated via the “LOCK” menu (see page 24). When the autolock function is activated, the lock mode is automatically activated 10 seconds after pressing the last button. - Page 13 Using the bodypack transmitter Deactivating the autolock function temporarily To make changes to the settings via the operating menu, you can temporarily deactivate the lock mode. Press the ON/OFF button or the multi-function switch (switch position SET). “LOCK” appears on the LC display panel...
-
Page 14: Using Operating Menu
Changes to the previous parameter ( ) or changes to the (DOWN) next parameter ( ) Selection mode Changes to the previous menu ( ) or changes to the next menu ( ) Setting mode Increases ( ) or reduces ( ) the setting of the selected... -
Page 15: Overview Of The Operating Menu
Overview of the operating menu Menu Function of the menu “CHAN” Selects a channel “TUNE” Sets transmission frequencies for the frequency bank “VAR” (variable bank) “NAME” Enters a name “ATTEN” Adjusts the microphone sensitivity “LOWCUT” Adjusts the bass roll-off frequency “VIEW”... -
Page 16: Working With The Operating Menu
Working with the operating menu The operating menu has three modes: • Display mode: In display mode, you can display the current menu settings one after the other – even when the lock mode is activated. • Selection mode: In selection mode, you can select the menu whose setting you want to change. To change to the selection mode, the lock mode must be deactivated. - Page 17 Displaying the menu settings in display mode In display mode, and with the lock mode activated, you can display the current menu settings one after the other (see “Overview of the menus” on page 18). After a few seconds, the display returns to the standard display.
- Page 18 (UP) or (DOWN), the display jumps either forwards or backwards to the next setting. In the “ATTEN”, “CHAN”, “TUNE” and “NAME” menu and when slid to the position (UP) or (DOWN), the multi-function switch features a “fast search” function, i.e. the display cycles continuously.
-
Page 19: Overview Of The Menus
Using operating menu Overview of the menus Deactivate the lock mode before adjusting the settings (see “Deactivating the autolock function temporarily” on page 12). Pressing the ON/OFF button will cancel your entry (ESC function) and return you to the display mode. - Page 20 Selection mode Setting mode ATTEN IIIIIIII Adjusting the Current Adjust the Current modulation attenuation attenuation attenuation in 1-dB setting steps from –30 to +40 dB STORED Current attenuation LOWCUT FLAT Adjusting the Current low-cut Current low-cut FLAT, low-cut frequency frequency...
-
Page 21: Adjustment Tips For The Operating Menu
Selecting the frequencies to be stored in the frequency bank “VAR” – “TUNE” Via the “TUNE” menu, you can freely select the frequencies to be stored in the frequency bank “VAR” (variable bank). The RF signal is deactivated while this adjustment is being made. - Page 22 (UP) or (DOWN). Store your setting. • You can change to a different channel and set a new frequency for the new channel: Press the multi-function switch (switch position SET) for a DOWN longer time. The current channel flashes on the LC display panel.
-
Page 23: Entering A Name - "Name
Adjustment tips for the operating menu Entering a name – “NAME” Via the “NAME” menu, you can enter a freely selectable name for the transmitter. This name can be displayed on the standard display and can consist of up to six characters such as: •... -
Page 24: Adjusting The Bass Roll-Off Frequency - "Lowcut
Adjustment tips for the operating menu Adjusting the bass roll-off frequency – “LOWCUT” To reduce unwanted low-frequency noise such as wind and handling noise, you can activate a low-cut filter. The low-cut frequency is 120 Hz. If you do not want to reduce low-frequency signal portions, select the setting “FLAT”. -
Page 25: Activating/Deactivating The Automatic Lock Mode - "Lock
In “Low Intermodulation mode”, the output power is reduced to 10 mW; the operating time will be about the same as using an output power of 50 mW. Displaying the software revision – “SW--REV“... -
Page 26: Exiting The Operating Menu - "Exit
Cleaning the bodypack transmitter Exiting the operating menu – “EXIT” Via the “EXIT” menu, you can exit the operating menu and return to the standard display. When in the operating menu, briefly pressing the ON/OFF button will cancel your entry (ESC function) and return you to the standard display without saving any changes. -
Page 27: If A Problem Occurs
Reduce the line output level too high If a problem occurs that is not listed in the above table or if the problem cannot be solved with the proposed solutions, please contact your local Sennheiser partner for assistance. To find a Sennheiser partner in your country, search at www.sennheiser.com under “Service &... -
Page 28: Accessories
Accessories Accessories ………… MKE 1 clip-on microphone, omni-directional, available in different versions ………… MKE 2 Gold clip-on microphone, omni-directional, available in different versions ………… MKE Platinum clip-on microphone, omni-directional, available in different versions 003876 ME 102-ant clip-on microphone, omni-directional, anthracite... -
Page 29: Specifications
60 to 20,000 Hz Noise reduction system Sennheiser HiDynplus™ Input sensitivity at nominal deviation –40 dBu = 7.75 mV Low-cut frequency (–3 dB) adjustable (flat, 120 Hz) Sensitivity adjustable in steps of 1 dB from – 30 to +40 dB... - Page 30 1 AA size battery, 1.5 V Storage and transport conditions Ambient temperature –25°C to +70°C Relative humidity max. 90% Shock test shock test according to IEC 68 or EN 60068, T2-27 In compliance with Europe: EN 301489-1/-9 Radio EN 300422-1/-2 Safety EN 60065...
- Page 31 Audio sensitivity The transmitter’s audio sensitivity can be adjusted over a range of 70 dB (+40 dB to –30 dB) in steps of 1 dB. The diagram below shows the sensitivity range of the SK 5212-II in comparison to the earlier product generations SK 50 and SK 5012.
-
Page 32: Manufacturer Declarations
If this equipment does cause harmful interference to radio or television reception, which can be determined by turning the equipment off and on, the user is encouraged to try to correct the interference by one or more of the following measures:... - Page 33 Reorient or relocate the receiving antenna. • Increase the separation between the equipment and receiver. • Connect the equipment into an outlet on a circuit different from that to which the receiver is connected. • Consult the dealer or an experienced radio/TV technician for help.
- Page 34 Sennheiser electronic GmbH & Co. KG Am Labor 1, 30900 Wedemark, Germany www.sennheiser.com Printed in Germany, Publ. 11/10, 542646/A01...