Table of Contents
Advertisement
Advertisement
Table of Contents

Related Manuals for Airstream CLASSIC TRAILER


Summary of Contents for Airstream CLASSIC TRAILER
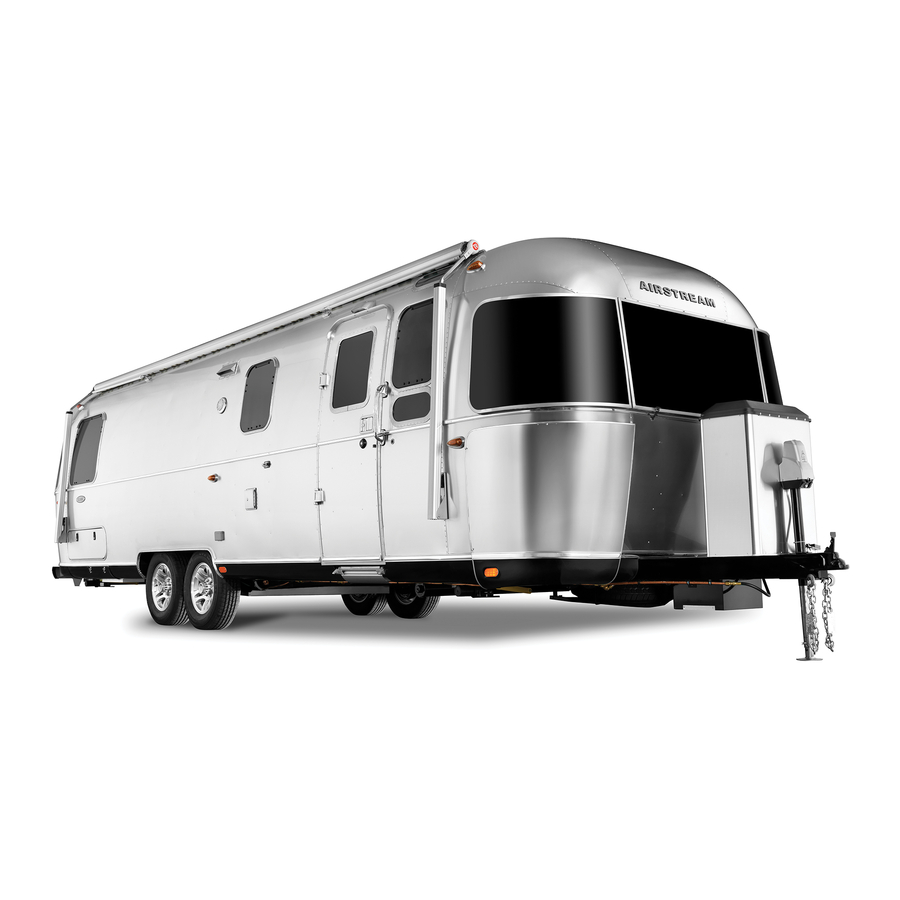
- Page 1 OWNERS AIRSTREAM MANUAL CLASSIC TRAILER A TRAILERING GUIDE...
- Page 2 INTRODUCTION 2008 MODEL The Owners Manual for your new Airstream trailer is designed to respond to the most frequent inquiries regarding the operation, function and care of the many systems that make modern trailering a joy. Airstream realizes our customers possess varying degrees of expertise in the area of repairing and maintaining the appliances in their trailer.
- Page 3 CAUTION indicates a potentially hazardous situation that, if not avoided, could result in minor or moderate injury. NOTICE used without the safety alert symbol indicates a potentially hazardous situation that, if not avoided, could result in property damage. NOTE: Important information regarding the maintenance of your recreational vehicle. (Optional) This denotes items that may be an option on all or particular models.
- Page 4 INTRODUCTION with and practice. Inadequate and/or inappropriate wheel nut torque (tightness) is a major reason that lug nuts loosen in service. Loose lug nuts can rapidly lead to a wheel separation with potentially serious safety consequences. Be sure to follow the instructions in this manual.
- Page 5 INTRODUCTION Ventilation To reduce or lessen exposure to chemicals from off-gassing it is of utmost importance that you ventilate your recreational vehicle. Ventilation should occur frequently after purchase and at times when the temperatures and humidity are elevated. Remember off-gassing is accelerated by heat and humidity. Open windows, exhaust vents, and doors.
- Page 6 INTRODUCTION 2008 MODEL NOTES...
- Page 7 A. WARRANTY AND SERVICE Warranty Warranty Explanation Service Reporting Safety Defects Maintenance Schedule Maintenance Parts & Supplies B. TOWING Tow Vehicles Brakes Loading Weighing Hitching Up C. CAMPING Pre-Travel Check List Camping Safety Overnight Stop/Extended Stay Slide Out Room Leveling & Stabilizing Hook Ups Winter Traveling D.
-
Page 8: Warranty And Service
Airstream trailer purchased from an authorized Airstream dealer in the United States or Canada for a period of twenty-four (24) months from the date the trailer is first delivered to the original retail purchaser. -
Page 9: Obtaining Warranty Service
Airstream repair facilities, loss of time, loss of pay, loss of use, inconvenience, commercial loss (including lost profits), towing charges, bus fares, vehicle rental, service call charges, gasoline expenses, incidental charges such as telephone calls and facsimile transmissions, and expenses for lodging. - Page 10 E-mail: www.airstream.com EXPLANATION OF AIRSTREAM LIMITED WARRANTY The Airstream Limited Warranty is detailed on a Warranty Card. It is filled out by the dealer and presented to the owner during delivery of a new unit. The Limited Warranty must be presented to a dealer to obtain warranty service. It should be kept in the trailer during the warranty period.
-
Page 11: Reporting Safety Defects
Airstream war- ranty. For additional information on the loading of your trailer, consult your Owner’s Manual or gross vehicle weight rating plate. The Dexter axle is manufactured to a tolerance of 1-degree camber and 1/8” toe- in. -
Page 12: Maintenance Schedule
WARRANTY AND SERVICE MAINTENANCE SCHEDULE WARNING : FAILURE TO MAINTAIN YOUR COACH CAN CAUSE PREMATURE AND UNEXPECTED PARTS BREAKAGE AND/OR ERRATIC OPERATION THAT MAY BE HAZARDOUS. Note: See appliance manufacturer’s literature for further information. SUGGESTED MAINTENANCE EVERY 1,000 MILES OR 60 DAYS Escape Window Check operation of latches and upper hinge. -
Page 13: Every Year
EVERY 10, 000 MILES OR 6 MONTHS Brakes Inspect, adjust or replace as necessary Wheel Bearings Clean and repack Tires Inspect and rotate Spare Tire Carrier Lubricate moving parts. Seals, Windows & Door Clean with mild detergent and coat with “Slipicone”. TV Antenna Lubricate all moving parts with silicone lubricant. - Page 14 WARRANTY AND SERVICE BULBS, EXTERIOR Taillight Back Up License Plate # 53, wedge base Hitch Light # 53, wedge base Clearance Light # 67 Door Light # 1003 Hitch Light # 193, wedge base Compartment Light #1141 BULBS, INTERIOR Two-Bulb Pin Up Light #1076 3 Arm Dinette Light #921...
- Page 15 TOWING YOUR AIRSTREAM TOW VEHICLE EQUIPMENT If you plan to buy a new vehicle to tow your trailer we suggest that you include in your purchase the towing options offered by most vehicle manufacturers. These include such things a heavy-duty alternator and radiator, heavy-duty springs, (See Note:) shock absorbers, transmission cooler, heavy-duty fan and flasher unit and others,...
- Page 16 TOWING e. Calipers and Brake Lines – for evidence of brake fluid leak. Preventive Maintenance 1. Visually check brakes before each trip. See item 4 in safety Information. 2. After each hook-up, always check trailer brake operation before attaining normal driving speed.
- Page 17 Breakaway Protection The breakaway system is required to supply power to the ActiBrake system in the event the trailer becomes uncoupled from the towing vehicle. Failure to maintain adequate charge in the breakaway battery will result in the breakaway system not functioning properly. This may result in physical injury and/or property damage in the event of a breakaway! The breakaway battery is the trailer batteries.
- Page 18 TOWING will hear the motor engage if the tow vehicle and trailer are properly connected. If the ActiBrake does not function, immediately discontinue operation. Determining and Setting Proper Trailer Braking Force Become Familiar with Braking of the Coupled Tow Vehicle and Trailer. After the system installation has been verified, the operator should take the trailer to an empty parking lot to become familiar with the operation of the braking action of the combined tow vehicle-trailer.
- Page 19 Which Tow vehicle Controller Is Best? IMPORTANT This trailer is equipped with an electric-hydraulic brake actuator. Before you plug the trailer’s electrical connector in to your tow vehicle ensure the following: 1) Verify that an approved brake controller is properly installed in the tow vehicle, per the brake controller manufacturer’s instructions.
- Page 20 TOWING Settings and Use of Tow vehicle Controllers The settings of the tow vehicle controller are set by the driver. When properly set, the braking force of the trailer will provide sufficient braking so the brakes of the towing vehicle are not required to provide any braking force for the trailer. Variations in the controller settings may be required for different road conditions and for changes in trailer load.
- Page 21 Failure to maintain proper charge in the breakaway battery will result in the breakaway system not functioning properly. This may result in physical injury and/or property damage in the event of a breakaway! Charge Battery When Necessary If battery’s charge is low, or if the trailer has been parked for a prolonged period, charge the battery by connecting the trailer 110-volt shoreline or running the tow vehicle with the 7-way cord connected.
- Page 22 TOWING NOTES B - 8...
- Page 23 LOADING Below is a sample of the weight information chart provided in all Airstream vehicles. This information can be found in your vehicle on the back of the first wardrobe door on the curbside of the vehicle about 60” up from the floor.
-
Page 24: Weighing Your Trailer
TOWING WEIGHING YOUR TRAILER The diagram shows how to weigh the trailer on scales. The allowable personal cargo must be distributed in your trailer in such a manner that the Gross Axle Weight Rating is not exceeded. To determine this it is necessary to load all of your allowable personal cargo and variable weights. - Page 25 Your hitch installer should provide your hitch rating information to you. Sway Control Device Although Airstream has not intruded into the hitch manufacturers field of expertise and preformed formal testing, we find the vast majority of Airstream owners purchases sway-control devices.
-
Page 26: Towing Tips
TOWING TOWING TIPS We want every owner to be a safe and courteous driver. A few hours of towing practice in a large empty supermarket lot will make pulling your trailer over the road much easier. Line out two corners for left and right turns. You may also use these corners to practice backing and parking. - Page 27 speed. It is both courteous and sensible to signal, pull onto the shoulder, and let them pass. Your trailer is designed to be towed easily at any legal speed, so if you are not careful you may be inclined to forget it is there. Passing ON FREEWAYS OR EXPRESSWAYS try to pick the lane you want and stay in it.
- Page 28 TOWING Backing Up In BACKING UP the important thing to remember is to DO EVERYTHING SLOWLY and to correct immediately if you see the trailer turning the wrong way. Concentrate on the rear of the trailer. With your tow vehicle and trailer in a straight line back up slowly and turn the bottom of the steering wheel in the direction you want the trailer to go.
- Page 29 Controlling Sway or Fishtailing Sway or fishtailing is the sideways action of a trailer caused by external forces. It is common for travel trailers to sway in response to strong winds or crosswinds or when passed by or passing a semi-tractor and trailer or driving downhill. WARNING: Excessive sway or fishtailing of your travel trailer can lead to the rollover of the trailer and tow vehicle.
-
Page 30: Suggested Pre-Travel Check List
CAMPING SUGGESTED PRE-TRAVEL CHECK LIST Interior Turn off water pump switch. Check battery water level. Close windows and vents. Lock all interior cabinet doors. Latch refrigerator door. (Seal containers first.) Hold down or stack securely all loose, hard and sharp objects. Fasten sliding and foldette doors. - Page 31 Trailer Equipment and Accessories Water hose, 5/8 in. high pressure, tasteless, odorless, non-toxic, (2 -- 25 ft. sections). “Y” connection -- water hose. The sewer hose with clamp. Drain cap with hose drain. Holding tank cleaner and deodorizer. Power cord adapter 30 --amp Capacity. 50 ft.
- Page 32 CAMPING SAFETY As always, safety should be one of your top priorities. Make sure you, and everyone traveling with you, can operate the main door and emergency exit window rapidly without light. Contemplate other means of escape in case the designated exits are blocked.
-
Page 33: Overnight Stop-Extended Stay
Unless the tow vehicle is needed for transportation, it is not necessary to unhitch. All you need to do to enjoy the self-contained luxury of your Airstream is to turn on the LP gas and light any appliances with pilots. - Page 34 CAMPING Leveling and Stabilizing When you plan to stay in the same place for several days, weeks or months, you will want your trailer to be as level and steady as possible. Check the attitude with a small spirit level set on the inside work counter or the trailer hitch “A-Frame”. (See Diagram Below) If a correction is necessary then YOU MUST LEVEL FROM SIDE TO SIDE FIRST This can he done easily by backing the trailer up one or more 2”...
- Page 35 HOOK UPS City Water Hookup HOOK UP TO CITY WATER by attaching a minimum 1/2” high- Water pressure water hose to the city water service. The 110-volt shoreline cord is stored in the rear storage compartment. Remove the cord and plug the trailer end into the receptacle on the side of the trailer.
-
Page 36: Winter Traveling
CAMPING WINTER TRAVELING Traveling in sub-freezing temperatures will require certain precautions to protect the plumbing system and your personal belongings from being damaged by freezing. Whenever possible the heat should be kept on at a constant temperature. It is easier for the furnace to keep a constant room temperature than for the trailer temperature to be allowed to drop to 50 degrees Fahrenheit then attempt to raise it to room temperature. -
Page 37: Tips To Controlling Condensation
TIPS TO CONTROLLING CONDENSATION To avoid condensation problems, try to follow these tips to help alleviate excess moisture. • Allow excess moisture to escape to the outside when bathing, washing dishes, hair drying, laundering, and using appliances and non- vented gas burners. Always use the vent hood when cooking. -
Page 38: Slide Out Room
CAMPING SLIDE OUT ROOM The trailer should be level prior to extending the slide out room. The front stabilizing jacks MUST be deployed. If the front jacks aren’t down when the room is extended the side to side imbalance will twist the body of the trailer if it’s only supported by the front hitch jack. - Page 39 If a substance is found on the coating that cannot be removed by normal washing procedures, Airstream recommends using DX 330 Acryli-Clean made by PPG Industries. Follow all directions and warnings on the product container. Acryli-Clean should be used by trained personnel only, using the proper equipment under controlled conditions.
- Page 40 finger, working it into the surface. This is a good practice for all rubber seals in your trailer. For replacement of a damaged window contact an Airstream Service Center. Your PLASTIC SCREENS are easy to maintain. Clean occasionally with a damp cloth.
- Page 41 COUPLER The standard RECOMMENDED HITCH BALL HEIGHT for an Airstream is 18” on all models except the slide outs which are 19.75”. If you plan long trips with the trailer heavily loaded you should check your trailer, after loading, to determine the optimum height.
-
Page 42: Power Jack
EXTERIOR POWER JACK A switch located on the bottom of the housing operates the power jack. When the jack is fully extended or retracted internal limit switches automatically shut off the motor. Another switch operated the convenience light. Should an electrical failure occur, remove the power head by loosening the two Allen set screws. - Page 43 TIRES Your trailer is equipped at the factory with name brand trailer tires. Airstream dealers cannot make adjustments to tires. A dealer who handles that particular brand must do this. If you ever have tire problems check the local telephone directory for the nearest dealer.
-
Page 44: Tire Rotation
AXLE AND RUNNING GEAR ASSEMBLY Each Airstream RUBBER TORSION axle is aligned during manufacturing, and double- checked on a random basis. Alignment after delivery is the customer’s responsibility. Hitting chuck holes or rough railroad tracks while going straight will only cause misalignment after the tire has been struck many repetitive times. -
Page 45: How Overloading Affects Your Tires
TIRES Load/Inflation Information for Your Tires Maintaining proper tire inflation pressure is essential for both tire safety and performance. Proper Tire Inflation The level of air in your tires affects your vehicle’s overall performance. Not even the highest quality tire will perform well if it’s not inflated properly. - Page 46 Bearing end play inspection, drum removal/installation, and bearing replacement procedures are described in the Dexter Operation Maintenance Manual enclosed in you owner’s packet. Airstream recommends that these procedures are pre- formed by a qualified Dexter service technician due the need of specialized tools and training.
- Page 47 EXTERIOR NOTES D - 9...
-
Page 48: Tire Care
EXTERIOR WEIGHING YOUR TRAVEL TRAILER OR TOWED VEHICLE Since a trailer or towed vehicle adds to the load on your RV’s tires, it is crucial to properly weigh towed vehicles. A travel trailer should first be weighed with the tongue, while detached from the pulling vehicle. The actual weight of the trailer must be less than or equal to the GVWR for safe operation, otherwise contents must be removed until the weight is within maximum GVWR... - Page 49 The Importance of Proper Air Pressure The amount of air pressure in a tire determines the load that can be carried safely. Every tire will have the maximum load and inflation molded into the sidewall of the tire. This load and inflation ratio should never be exceeded since this can cause handling problems, irregular wear, and component failure.
- Page 50 EXTERIOR actual loaded conditions. Under inflation of a tire can cause poor handling, irregular wear, and decreased fuel economy. It also causes extreme heat build up within the components of the tire, which can lead to failure. Over inflation of the tire causes a deformation of the contact patch resulting in crowning of the center tread.
- Page 51 Proper Inspection and Storage of Tires Before taking your RV on a trip or when removing from an extended storage period, make it a practice to inspect the overall condition of your tires. Check for any type of condition or damage that might result in failure. A thorough check should include both inside and outside sidewalls, tread area and the condition of hardware such as valve stems, valve caps, and wheels.
- Page 52 EXTERIOR Lug Nut Torquing WARNING : WHEEL SEPARATION CAN OCCUR 1. On first trip, tighten wheel lugs at start and at 10, 25, and 50 miles. 2. Thereafter, check wheel lugs before each trip. 3. Following winter storage, check before beginning a trip. 4.
- Page 53 Customers replacing original equipment that has not been tested for compatibil- ity must ensure the replacements are compatible to the hub and drum assembly installed. Such elements of compatibility include, but are not limited to: · Diameter of the hub-mounting surface. ·...
- Page 54 INTERIOR INTERIOR The interior of all Airstream trailers has been designed for comfort, convenience, durability and appearance. How you use it and how you take care of it naturally depends on you. However, if you learn to operate the interior components and take care of them and the trailer properly, this knowledge will add to your pleasure as well as the long life of your trailer.
- Page 55 The leaf then unfolds and rests against the leg support. Airstream recommends that during travel the table be folded up and stored. It has pressure catches to hold it in place during travel.
- Page 56 INTERIOR Water Pump Switch Fresh water pump switches are located on the monitor panel and in the lavatory. Once the switch is turned on the pump will run until the water pressure reaches about 65 psi. At this point an internal pressure switch will shut it off.
- Page 57 Storage The kitchen cabinet should have the heaviest items on the bottom and lighter items overhead. After loading you should have the skillets and can goods on the floor or bottom shelf, and the cereals and crackers in the overhead roof locker. Use the unbreakable type plates and saucers, and consider storing your dish towels around them.
-
Page 58: Carbon Monoxide Alarm
INTERIOR CARBON MONOXIDE ALARM The following information is highlights from the folder provided by the alarm manu- facturer. The folder, with more detailed information, is contained in your Owners’ Packet. CAREFULLY READ AND UNDERSTAND THE CONTENTS OF THIS INSTRUCTION MANUAL BEFORE USING THE ALARM. STORE THE MANUAL IN A SAFE PLACE FOR FUTURE REFERENCE. -
Page 59: Symptoms Of Carbon Monoxide Poisoning
Alarm should be tested once per week. If further details are required which do not appear in this manual contact BRK Brands Inc. First Alert. Introduction This alarm is designed to detect the presence of carbon monoxide. This manual contains information on operation of the CO alarm. The green light flashes at ap- proximately 60-second intervals to indicate the alarm is operating correctly. -
Page 60: Operation
The battery must immediately be replaced with a fresh one. WARNING: Alarm battery is shipped deactivated. Check your alarm for proper battery installation. To activate battery, new Airstream owner must install included battery to proper orientation. LP GAS DETECTOR In the kitchen area of your unit, approximately six inches above the floor, is the LP... - Page 61 flexible. Spread the lubricant evenly with a brush or finger, working it into the surface. This is a good practice for all rubber seals in your Airstream. For replacement of a damaged window contact an Airstream Service Center or the factory.
-
Page 62: Fill Valve
PLUMBING PLUMBING SYSTEMS LIQUID PETROLEUM GAS (LPG) FILL VALVE Your trailer is equipped with LP tank fill valves called “RV Type I Acme” connection. The large, green, nylon swivel nut is a right hand thread and is designed for hand operation only. The valve features an internal spring-loaded module that will not allow gas to flow from the cylinder until a positive seal has been made at the connection. -
Page 63: Automatic Gas Regulator
AUTOMATIC GAS REGULATOR All models are equipped with a two stage automatic change over gas regulator that offers the convenience of automatic changeover from empty to full gas cylinders. Both tanks are connected to this regulator. Make sure there is propane in both tanks before you start. -
Page 64: Basic Rules For Safety
PLUMBING BASIC RULES FOR SAFETY Many things can be construed as safety related, but the most important is your common sense. If you are careless with matches, cigarettes, flammable material or any other hazardous material, we are sure you realize your potential for accidents is greatly increased. -
Page 65: Water System-Self Contained
WATER SYSTEM-SELF CONTAINED Fill the water tank by opening the exterior access door and remove screw cap. A garden hose can now be inserted. It’s a good idea to let the water run through the hose for a short time to flush it out. Experienced RVers usually fill their tanks with “home” water to avoid strange water that may be distasteful to them. - Page 66 PLUMBING SANITIZING Potable water systems require periodic maintenance to deliver a consistent flow of fresh water. Depending on use and the environment the system is subject to, sanitizing is recommended prior to storing and before using the water system after a period of storage.
-
Page 67: City Water Hook-Up
CITY WATER HOOK-UP The city water hook-up is found in the underbelly untility compartment on the trailer. A short piece of hose has been provided to extend the city water hookup. Use a high-pressure hose of at least 1/2” diameter. It should be one that is tasteless, odorless and non-toxic designed for RV use. - Page 68 PLUMBING GALLEY DRINKING WATER SPOUT W/ FILTRATION SYSTEM Delta 211 Series 1-800-345-DELTA (3358) www-deltafaucet.com This section is highlights of the manual provided by Delta and included in your owner’s packet. Please read and follow all directions in that manual. Quality drinking water is important.
- Page 69 Battery Replacement Instructions: 2 AA Batteries -Battery life is approximately one year. Batteries are required to operate the light indicator. A. Remove the battery holder (1) from the top of the filter head (2). B. Replace the old batteries with 2 new AA batteries. C.
-
Page 70: Galley Faucet
PLUMBING GALLEY FAUCET Delta 473 Series 1-800-345-DELTA (3358) www-deltafaucet.com This section is highlights of the manual provided by Delta and included in your owner’s packet. Please read and follow all directions in that manual. MAINTENANCE: If faucet leaks from under handle - Remove handle and tighten adjusting Ring (1). -
Page 71: Drain Valves
WATER VALVES Your Airstream has 6 in-line water shut off valves. One is for the water purifier, two are for shutting off the cold water supply to the toilet and exterior water service, three are for bypassing the water heater when winterizing using the anti-freeze method as explained in the winterizing section of this manual. -
Page 72: Winterizing And Storage
PLUMBING WINTERIZING AND STORAGE When storing your trailer for short or long periods use the same precautions as you would in your own home in regard to perishables, ventilation and rain protection. In addition, for prolonged storage periods flush out all the drain lines and the holding tanks. -
Page 73: Drain And Waste System
14. Remove any items (food, cosmetics, etc.) from trailer interior that might be damaged by freezing - or might damage the trailer if containers break. For additional winterizing protection add a non-toxic antifreeze (approved for drinking water system) to the water lines using the following procedure. 1. - Page 74 PLUMBING Monitor Panel Check your monitor panel frequently. When the BLACK WATER HOLDING TANK is completely full, sewage cannot be emptied from the toilet bowl. If the GRAY WATER HOLDING TANK is overfilled, drain water will “backup” into the tub and cause an unpleasant cleaning job.
- Page 75 313-769-6000 1-800-321-9866 The RV toilet in your Airstream is a design that has been used for many years. There are two pedals. The large pedal opens and closes the slide mechanism, and the smaller pedal opens and closes a water valve.
- Page 76 ELECTRICAL ELECTRICAL The major portion of electrical power in your Airstream is 12-volt. The 12-volt current powers the fans, furnaces, water pump, and water heater ignition. The exception would be the air conditioner and microwave oven. All 12-volt current comes through the battery system in the front of your trailer.
-
Page 77: Volt System
12-VOLT SYSTEM BATTERY The battery (batteries) are located inside doors on the exterior front plate of the trailer or insidie battery boxes in the trailer A-frame. NOTICE: A normal battery can discharge by itself in 30 to 40 days when not in use, therefore, IT IS NECESSARY TO PERIODICALLY CHECK THE BATTERY AND CHARGE IT AS IS NECESSARY. -
Page 78: Power Circuits
ELECTRICAL WARNING : The gases generated within a storage battery cell may be ignited by an open flame or spark in the vicinity of the battery. Do not use a match or flame to provide light for checking the level of the water. During the winter the battery should be removed from the trailer and stored in a cool, dry place, where there is no danger of freezing. - Page 79 12-VOLT EXTERIOR 7-Way Harness and Plug The diagram on this page matchs the tow vehicle plug on an Airstream trailer. The 7-way wire is spliced to the main harness on the interior front wall of the trailer. The connection is accessed behind the furniture in the front of the trailer. One of these wires is not spliced onto a wire of the same color.
- Page 80 ELECTRICAL Wire Routing, 7-Way Plug , Battery Charge Line, Distribution Panel 12 ga. Red Hitch jack 12-V Distribution Panel Optional Stabilizing Jacks 6 ga. White 50 Amp Converter 12 ga. Blue 12 ga. White Break Away Switch 12 ga. Blue Trailer Brake System 12 ga.
- Page 81 Wire Routing, 7-Way Plug, Battery Charge Line, Distribution Panel, Slide out Models 12 ga. Red Hitch jack 12-V Distribution Panel 12 ga. Blue Optional Stabilizing Jacks 6 ga. Red 50 A. Type 2 Breaker 6 ga. Red 6 ga. White 50 Amp Converter 12 ga.
- Page 82 ELECTRICAL 12-VOLT INTERIOR Distribution Panel, USA The kill switch, 12-volt distribution panel, and converter are located under the front sofa on most rear bed models. Open the drawer under the sofa seat and look on the roadside of the storage area. The kill switch and distribution panel are mounted on a hinged panel that lowers to access the converter.
- Page 83 110-VOLT ELECTRICAL SYSTEM City Power The Airstream converter system enables you to use the lights and appliances whether operating on self- contained battery power or hooked up to 110-volt city power. The 12-volt light bulbs give off the same light...
- Page 84 Outlet, Dinette, Lounge Circuit 6, 20 Amps, Rear A/C Circuit 7, 20 Amps, Bedroom TV Airstream installs a ground fault circuit interrupter to protect several outlets on the trailer. When properly installed, the GFCI circuit breaker provides reliable overload and short circuit protection PLUS protection from Ground Faults that might result from contact with a “HOT”’...
- Page 85 WARNING : The GFCI circuit breaker provides protection only to the circuit to which it is connected. It does NOT provide protection to any other circuit. OCCUPANT: GFCI Breaker GFCI s are proven lifesavers, however, consumers need to take a few minutes each month to do this simple test.
- Page 86 ELECTRICAL SATELLITE ANTENNA WIRING If you compare the two drawings you’ll see wiring for a satellite dish an- tenna is relatively simple. Units have a faceplate with two coax cable hook- ups. The faceplate has a small coax cable jumper running between the hook-ups to complete the cable TV circuit when in use.
-
Page 87: Solar Panel
The Cat 5 wire plugs into it also. The following drawing is the way Airstream wires the system on factory installed units and is the recom- mended wiring for use of the pre-wire system. - Page 88 ELECTRICAL TV ANTENNA Manufacturer: Winegard Company, 3000 Kirkwood Street, Burlington, Iowa 52601 Phone: 800-843-4741 MANUAL ANTENNA Raising Antenna to Operating Position Turn elevating crank in “UP” direction until some resistance to turning is noted. Antenna is now in operating position. Rotating Antenna Make sure antenna is in “UP”...
- Page 89 FAN-TASTIC VENT CORP. 2083 S. Almont Ave. Imlay City, MI 48444 1-313-742-0330 1-800-521-0298 Airstream installs two types of fans. One has the switch mounted on the fan, the other has the switch mounted on the wall. The optional High-volume roof vent system is designed to quickly exhaust stale, hot air and draw in fresh air.
-
Page 90: Monitor Panel
The monitor system has been calibrated at the factory and should never need another calibration. If you feel the system is not operating correctly, please contact CATCON Products or a local Airstream dealer. The following instructions are provided for qualified service technicians. -
Page 91: Air Conditioner
APPLIANCES All appliances are delivered to Airstream Inc. with in depth Owner’s Manuals. Those manuals are included in the delivery case supplied by your dealer. The manuals may contain warnings, cautions, and operating instruction that should be read and followed before operating the appliances. -
Page 92: Microwave Ovens
Operating instructions are located in your Owners Packet. If they should become misplaced new literature can be ordered direct from the manufacturer or your Airstream dealer. The manufacturer also offers a detailed service guide for your furnace. - Page 93 REFRIGERATOR Manufacturer: Dometic Sales Corporation 2320 Industrial Parkway P.O. Box 490 Elkhart, Indiana 46514 Phone: 219-295-5228 Review all Dometic Literature supplied in your Owner’s Packet or stored in the refrigerator prior to operating. In an absorption refrigerant system ammonia is liquefied in the finned condenser coil at the top rear of the refrigerator.
-
Page 94: Water Heater
APPLIANCES WATER HEATER Manufacturer: Atwood Mobile Products 4750 Hiawatha Drive P.O. Box 1205 Rockford, Illinois 61105 Phone: 815-877-7461 Note: Review the water heater literature supplied in your Owner’s Packet before proceeding, 110 Volt WARNING : Hydrogen gas can be produced in a hot water system served by this heater that has not been used for a long period of time (generally two weeks or more). -
Page 95: Specifications
SPECIFICATIONS Note: All weights were made on prototype vehicles. Your production trailer may vary. For the weight specifications of your specific trailer read the weight label and check the manufacturing tag on the side of your trailer. For label location, see information under “Loading”... - Page 96 SPECIFICATIONS MODEL EXTERIOR LENGTH EXTERIOR WIDTH INTERIOR WIDTH EXTERIOR HEIGHT W / AC INTERIOR HEIGHT W / AC HITCH BALL HEIGHT FRESH WATER (GAL.) GRAY WATER (GAL.) BLACK WATER (GAL) HITCH WEIGHT (LBS.) GVWR (LBS.) UBW (LBS.) 25’ FB 27’ FB 30’...
- Page 97 Air Conditioner ... H-1 Alignment ... D-6, I-1 Antennas ... G11, G-13, I-1 Appliances... H-1 Axles...A-3, D-6 Awning...D-2 Backing ...B-14 Back up camera pre-wire ... G-14 Battery ... G-2, I-1 Bath Exhaust ... G-14 Bathroom...E-2 Bearing ...D-8 Black Tank Flush ... F-13 Bottles, LP...
- Page 98 Tank ... F-6, F-4, I-2 Valves ... F-4, F-10, F-12 Waxing...D-1 Weight ...B-9 Weight Distribution ...B-9 Wheel Torque...A-5, D-5 Alignment ... D-6, I-1 Bearings ...D-8 Windows... D-2, E-8 Winter Traveling... C-7 Winterizing... F-11 Wiring ...See Electrical Classic Trailer Owner’s Manual ©AIRSTREAM INC. 2007...