Sony BDV-T79 Operating Instructions Manual
Blu-ray disc/dvd home theatre system
Hide thumbs
Also See for BDV-T79:
- Specifications (4 pages) ,
- Operating instructions manual (68 pages) ,
- Service manual (4 pages)

Related Manuals for Sony BDV-T79


Summary of Contents for Sony BDV-T79
- Page 1 4-418-130- Blu-ray Disc™/ DVD Home Theatre System Operating Instructions BDV-N790W/BDV-T79...
- Page 2 Do not install the appliance in a confined space, such as a bookcase or built-in cabinet. NOTE: To reduce the risk of fire, do not This equipment has been tested and cover the ventilation opening of the found to comply with the limits for...
-
Page 3: Important Safety Instructions
If the provided and meets the FCC radio frequency • As the main plug is used to plug does not fit into your (RF) Exposure Guidelines in disconnect the unit from the outlet, consult an electrician for Supplement C to OET65. -
Page 4: Copyrights And Trademarks
LLC in the United States and videos and their soundtracks. other countries. When a prohibited use of an • Java is a trademark of Oracle and/ unauthorized copy is detected, a or its affiliates. message will be displayed and • “BD-LIVE” and playback or copying will be ®... - Page 5 • All other trademarks are your license terminates, you agree compliance with safety and trademarks of their respective to cease any and all use of the regulatory standards. Please note owners. Gracenote Data, the Gracenote that the use of this accessory with •...
-
Page 6: About These Operating Instructions
Gracenote may • Some illustrations are provide in the future and is free to presented as conceptual discontinue its services at any time. drawings, and may be GRACENOTE DISCLAIMS ALL... -
Page 7: Table Of Contents
Panel Display and Power Step 2: Connecting the System... 14 Indicator ......... 38 Connecting the speakers ..14 Saving Power in Standby Mode ... 38 Connecting the TV .....16 Browsing Websites ....... 39 Connecting the other components Further Settings for the Wireless (Set-top box, etc.) ....17... -
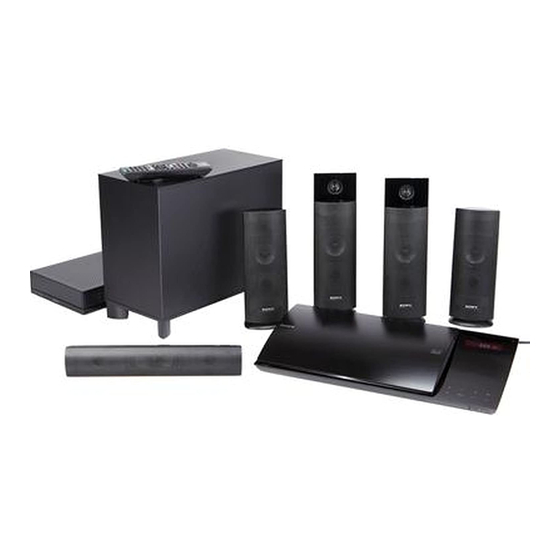
Page 8: Unpacking
Unpacking • Front speakers (2) • FM wire antenna (aerial) (1) • Video cord (1) • High Speed HDMI cable (1) • Remote commander (BDV -T79 only) (remote) (1) • Surround speakers (2) • R6 (size AA) batteries (2) • Surround amplifier (1) •... -
Page 9: Index To Parts And Controls
Index to Parts and Controls For more information, refer to the pages indicated in parentheses. Front panel FUNCTION Slot USB 2 A Disc slot (page 25) About soft-touch buttons/ indicators B Front panel display These buttons function when the soft-touch (remote sensor) button indicators are lit. -
Page 10: Front Panel Display
D Lights up when muting is on. item being decoded. E Lights up when the HDMI (OUT) jack is correctly connected to an HDCP (High- bandwidth Digital Content Protection) compliant device with HDMI or DVI (Digital Visual Interface) input. - Page 11 A "/1 (Power) C Wireless transceiver (EZW-RT50) slot B LINK/STANDBY indicator (page 21) D SPEAKERS jacks You can check the status of wireless E SECURE LINK button (page 40) transmission between the main unit and Starts the Secure Link function.
-
Page 12: Remote Control
(The location returns to standby mode differs based on the selected function.) If any button on the unit or remote is not pressed RETURN within 30 minutes, the system automatically Returns to the previous display. - Page 13 E SOUND MODE +/– (page 23) G MUTING Selects the sound mode. Turns off the sound temporarily. HOME (pages 22, 34, 35, 36, 39, 40, 42) VOL +/– (page 34) Enters or exits the system’s home menu. Adjusts the volume.
-
Page 14: Getting Started
FRONT L SUBWOOFER CENTER • Do not lean or hang on a speaker, as it may fall down. • The speaker of this set is not anti-magnetic. This may result in color unevenness when it is placed near a CRT TV or projector. - Page 15 To the surround amplifier Blue Gray (Surround right (Surround left speaker (R)) speaker (L)) IMPEDANCE USE 3-16 SPEAKERS...
-
Page 16: Connecting The Tv
High Speed HDMI cable If the HDMI IN jack of your TV is compatible with the ARC (Audio Return Channel) function, an HDMI cable connection can also send a digital audio signal from the TV. For setting the Audio Return Channel function, see [Audio Return Channel] (page 46). -
Page 17: Connecting The Other Components (Set-Top Box, Etc.)
Signal flow : Video signal : Audio signal System * This connection is unnecessary for connection A (HDMI connection). Select one of the following connection methods according to the jack type of the component. AUDIO USB 1 OPTICAL ANTENNA VIDEO OUT... - Page 18 “HDMI2” function is selected. • To send an audio signal from the HDMI (IN 1/2) jacks to the HDMI (OUT) jack, you may need to change the audio output setting. For details, see [Audio Output] in [Audio Settings] (page 44).
-
Page 19: Connecting The Antenna (Aerial)
Connect to the network by making a LAN cable connection as follows. FM wire antenna (aerial) (supplied) Rear panel of the unit • Be sure to fully extend the FM wire antenna (aerial). • After connecting the FM wire antenna (aerial), keep USB 1 OPTICAL VIDEO OUT it as horizontal as possible. -
Page 20: Step 4: Setting Up The Wireless System
• If security is set on your wireless network, the Step 4: Setting up the security key (WEP key, WPA key)**. Wireless System * SSID (Service Set Identifier) is a name that identifies a particular wireless network. ** You need to check the settings of your wireless... - Page 21 The surround amplifier turns on automatically when the main unit is turned on and wireless transmission is activated. Connect the AC power cord (mains lead) of the surround amplifier.
-
Page 22: Step 5: Performing The Easy Setup
• HDMI cable connection: Follow the Easy Setup instructions that are displayed on the TV screen. Follow the Steps below to make the basic • Video cord connection: Select [16:9] or adjustments and network settings for the system. [4:3] so that the picture is displayed Displayed items vary depending on the country correctly. -
Page 23: Step 6: Selecting The Source
The system provides the (“MOVIE”) optimized sound for watching movies. [Music] The system provides the Some functions may be changed via the TV screen by (“MUSIC”) optimized sound for listening to pressing FUNCTION, X/x, and music. [Audio Enhancer] The system optimizes 2-channel (“ENHANCER”) - Page 24 (“DEMO SND”) sound, suitable for presentations, etc. • If you set the sound mode to [Auto] and play Internet content of the Berlin Philharmonic, the system enters to “BERLIN PHILHARMONIC HALL” mode automatically (only for areas that are offered the service).
-
Page 25: Playback
• To delete data in the USB memory, select [Erase BD Playback Data] in [Video], and press . All data stored in the buda folder will be deleted. Playing a Disc Enjoying Blu-ray 3D For playable discs, see “Playable Discs”... -
Page 26: Playing From A Usb Device
• Do not remove the USB device during C The currently selected audio setting operation. To avoid data corruption or damage D Available functions ( to the USB device, turn the system off before angle, audio, connecting or removing the USB device. -
Page 27: Enjoying An Ipod/Iphone
USB 1 port or USB 2 port of the unit • To change a system setting, such as the sound mode setting, while viewing images from your iPod/iPhone on your TV, select the input on your TV for this system before operating the system. -
Page 28: Playing Via A Network
You can play video/music/photo files on other • Some Internet content requires registration via a PC DLNA-certified components by connecting before it can be played. For further details, visit the them to your home network. following website: http://www.sony.com/blurayhtsupport/ This unit can be used as a player and renderer. -
Page 29: Operating Instructions
STREAMING) [Music], or [Photo] in the home menu, then select the file that you want to play. You can play the same music at the same time Server across all Sony components which are compatible with the PARTY STREAMING function and connected to your home network. -
Page 30: Available Options
A Content details Displays a list of related information, such as • If content that is not compatible with the PARTY title, cast, track, or artist. STREAMING function is played, the system closes PARTY automatically. B [Playback History] Displays a list of previously played BD-ROM/ To use the system as a PARTY DVD-ROM/CD-DA (music CD) titles. - Page 31 3D video automatically. beautifully reproduced black tones. • 3D video from the HDMI [Pause] Pauses playback. (IN 1) or HDMI (IN 2) jack [Top Menu] Displays the BD’s or DVD’s is output regardless of this Top Menu. setting. [Menu/Popup Menu] Displays the BD-ROM’s...
- Page 32 Press C/c to adjust the delay between [Slideshow Effect] Sets the effect when playing a the picture and sound. slideshow. You can adjust from 0 ms to 300 ms in 25 [Slideshow BGM] • [Off]: Turns off the ms increments. function.
-
Page 33: Sound Adjustment
With a CD, you can select the sound from the (DUAL MONO) right or left channel and listen to the sound of the You can enjoy multiplex broadcast sound when selected channel through both the right and left the system receives or plays a Dolby Digital speakers. -
Page 34: Tuner
The setting is made. • You can select the preset station number directly • You can set [FM Mode] to each preset station by pressing the number buttons. separately. • Each time you press DISPLAY, the display in... -
Page 35: Other Operations
HDMI input to which the system is connected. System Power Off You can turn the system off in sync with the TV. Calibrating the • The system does not turn off automatically while playing music or when set to the “FM” function. -
Page 36: Setting The Speakers
Confirm the result of [Auto position to the speakers. Calibration]. You can set the parameters from 0 to 23 feet (0.0 The distance and level for each speaker to 7.0 meters). appear on the TV screen. -
Page 37: Using The Sleep Timer
[Surround Left/Right] 0.0 dB: Set the surround (OUT) jack. speaker level. [Subwoofer] 0.0 dB: Set the subwoofer level. • To adjust the volume of all the speakers at one time, press VOL +/–. x [Relocation] You can correct the speaker position virtually to improve the surround effect. -
Page 38: Deactivating The Buttons On The Unit
“UNLOCK” appears in the front panel Changing the Brightness display. of the Front Panel • When you operate the buttons on the unit while the child lock function is on, “LOCKED” flashes in the Display and Power front panel display. -
Page 39: Browsing Websites
Press C/c to select [Network]. Press X/x to select [Internet Browser], then press The [Internet Browser] display appears. • Some websites may not display correctly, or not function. A Page title To enter a URL B Page address Select [URL entry] from the options menu. -
Page 40: Further Settings For The Wireless System
[Secure Link] browser cookies. • [SSL Alarm Display]: Sets You can specify the wireless connection to link whether to enable or disable the main unit to the surround amplifier using the SSL. Secure Link function. [Input] Displays the software This function can help prevent interference if... - Page 41 For the main unit Select [Off] on Step 6 above. For the surround amplifier Press and hold SECURE LINK on the rear of the surround amplifier until the LINK/STANDBY indicator turns green or flashes green. If wireless transmission is...
-
Page 42: Settings And Adjustments
You can setup the following options. turns off. Please wait for the software update to complete; do not turn the main unit on or off, or Icon Explanation operate the main unit or TV. -
Page 43: [Screen Settings]
[Off]: Select this to display all contents in 2D. video-based material will always be selected regardless of the material. • 3D video from the HDMI (IN 1) or HDMI (IN 2) jack is output regardless of this setting. x [Output Video Format] [HDMI]: Normally select [Auto]. -
Page 44: [Audio Settings]
Normally select this position. [Frame]: The picture, including subjects that do • When [Control for HDMI] is set to [On] (page 46), not move dynamically, is output in high [Audio Output] is set to [Speaker + HDMI] resolution. -
Page 45: [Bd/Dvd Viewing Settings]
Scenes may be blocked or replaced with display for entering the language code appears. different scenes. Follow the on-screen Enter the code for your language by referring to instructions and enter your four-digit password. “Language Code List” (page 60). x [BD Parental Control]/[DVD Parental... -
Page 46: [Music Settings]
[Audio Return Channel] [Music Settings] This function is available when you connect the system to a TV’s HDMI IN jack that is compatible with the Audio Return Channel function. x [Super Audio CD Playback Layer] [Super Audio CD]: Plays the Super Audio CD [Auto]: The system can receive the digital audio layer. -
Page 47: [External Input Settings]
[Wired Setup]: Select this when you connect to a broadband router using a LAN cable. [External Input [Wireless Setup(built-in)]: Select this when you use the wireless LAN that is built into the system Settings] for wireless network connection. [View Network Status]: Displays the current The skip setting is a convenient feature that network status. -
Page 48: [Easy Setup]
Follow the on-screen instructions. [Resetting] x [Reset to Factory Default Settings] You can reset the system settings to the factory default by selecting the group of settings. All the settings within the group will be reset. x [Initialize Personal Information] You can erase your personal information stored in the system. -
Page 49: Additional Information
On operation • To prevent fire or shock hazard, do not place objects • If the system is brought directly from a cold to a warm filled with liquids, such as vases, on the system, or location, or is placed in a very damp room, moisture place the system near water, such as near a bathtub or may condense on the lenses inside the unit. -
Page 50: Notes About Discs
If you leave the still video image or on-screen display image displayed • To keep the disc clean, handle the disc by its on your TV for an extended period of time you risk edge. Do not touch the surface. -
Page 51: Troubleshooting
In the event of a problem with the wireless t Press "/1 to turn off the system, and check the sound function, have a Sony dealer check the following items after “STANDBY”... - Page 52 Select the input on your TV for this system. resolution selected in [Output Video Format] is incorrect. Sound t Press and hold N and VOL – on the unit for more than 5 seconds to reset the video output There is no sound. resolution to the lowest resolution.
- Page 53 Wireless transmission is not activated or t Do not install the unit and surround amplifier there is no sound from the surround in a closed rack, on a metal rack, or under a speakers. table. t Check the status of the LINK/STANDBY indicator on the surround amplifier.
-
Page 54: Usb Device
(USB) port. t The system cannot play a recorded disc that is t Check if the USB device or a cable is damaged. t Check if the USB device is on. not correctly finalized (page 55). t If the USB device is connected via a USB hub, File names are not displayed correctly. -
Page 55: Playable Discs
The system cannot connect to the network or postscripts are recordable. the network connection is unstable. A CD or DVD disc will not play if it has not been t Check if the wireless LAN router is on. correctly finalized. For more information, refer to the... -
Page 56: Playable Types Of Files
The system does not play these files via the DLNA function. The system plays SD resolution only via the DLNA function. The system does not play animated PNG or animated GIF files. For MPO files other than 3D, the key image or the first image is displayed. -
Page 57: Supported Audio Formats
Audio a: Supported format. –: Unsupported format. • HDMI (IN 1) and HDMI (IN 2) do not input sound in the case of an audio format that contains copy protections such as Super Audio CD or DVD-Audio. • For LPCM 2ch format, the supported sampling frequency of the digital signal is up to 96 kHz when using the “HDMI1”... -
Page 58: Specifications
0.7 kg (1 lb 9 oz) than 1% total harmonic Surround (SS-TSB111) distortion from 250 milli Dimensions (approx.) 98 mm × 255 mm × 91 mm watts to rated output. in × 10 in × 3 POWER OUTPUT (reference) (w/h/d) - Page 59 Mass (approx.) 10 g ( Design and specifications are subject to change without notice. • Standby power consumption 0.3W (Main Unit), 0.2W (Surround Amplifier). • Over 85% power efficiency of amplifier block is achieved with the full digital amplifier, S-Master.
-
Page 60: Language Code List
Language Code List The language spellings conform to the ISO 639: 1988 (E/F) standard. Parental Control/Area Code List... -
Page 61: Index
Network Settings 47 D.C.A.C. (Digital Cinema Auto Network Update 42 Calibration) 35 Test Tone 37 DLNA 28, 47 TV Screen Size Setting for 3D Dolby Digital 33 OSD Language 46 DTS 33 Output Video Format 43 TV Type 43 DVD 55... - Page 62 WEP 20 Wireless Sound Connection 46 WPA2-PSK (AES) 20 WPA2-PSK (TKIP) 20 WPA-PSK (AES) 20 WPA-PSK (TKIP) 20...
- Page 64 The software of this system may be updated in the future. To find out details on any available updates, please visit the following URL. http://www.sony.com/blurayhtsupport/ ©2012 Sony Corporation Printed in Malaysia...