Advertisement
Table of Contents
- 1 Table of Contents
- 2 Instructions for Use
- 3 General Instructions
- 4 Safety Precautions
- 5 Environmental Responsibility
- 6 Get to Know Your Oven
- 7 Available Accessories
- 8 Front Panel
- 9 Using the Oven
- 10 Cooking with the Oven
- 11 Cleaning and Maintenance
- 12 Extraordinary Maintenance
- 13 Installing the Appliance
- 14 Instructions for the Installer
- Download this manual
1.
INSTRUCTIONS FOR USE ......................................................................... 44
2.
SAFETY PRECAUTIONS ............................................................................ 46
3.
ENVIRONMENTAL RESPONSIBILITY ........................................................ 48
4.
GET TO KNOW YOUR OVEN...................................................................... 49
5.
AVAILABLE ACCESSORIES ....................................................................... 50
6.
FRONT PANEL ............................................................................................ 53
7.
USING THE OVEN ...................................................................................... 56
8.
COOKING WITH THE OVEN....................................................................... 59
9.
CLEANING AND MAINTENANCE ............................................................... 68
10. EXTRAORDINARY MAINTENANCE ........................................................... 75
11. INSTALLING THE APPLIANCE ................................................................... 79
INSTRUCTIONS FOR THE USER: these instructions contain user
recommendations, a description of the controls and the correct
procedures for cleaning and maintenance of the appliance.
technician who must install the appliance, set it functioning and carry out
an inspection test.
Contents
43
Advertisement
Table of Contents

Related Manuals for Smeg SC436X-8


Summary of Contents for Smeg SC436X-8
-
Page 1: Table Of Contents
INSTRUCTIONS FOR THE INSTALLER: these are intended for the qualified technician who must install the appliance, set it functioning and carry out an inspection test. -
Page 2: Instructions For Use
General instructions 1. INSTRUCTIONS FOR USE THIS MANUAL IS AN INTEGRAL PART OF THE APPLIANCE. IT MUST BE KEPT IN ITS ENTIRETY AND IN AN ACCESSIBLE PLACE FOR THE WHOLE WORKING LIFE OF THE APPLIANCE. CAREFUL READING OF THIS MANUAL AND ALL THE INSTRUCTIONS THEREIN BEFORE USING THE APPLIANCE IS ESSENTIAL. -
Page 3: General Instructions
FATS AND OILS MAY CATCH FIRE. DO NOT COVER THE BOTTOM OF THE OVEN WITH ALUMINIUM OR TINFOIL SHEETS DURING COOKING AND DO NOT PLACE PANS OR TRAYS ON IT TO AVOID DAMAGE TO THE ENAMELLED SURFACE. IF THE SURFACES ARE STILL VERY HOT DURING COOKING, DO NOT POUR WATER DIRECTLY ONTO THE TRAYS. -
Page 4: Safety Precautions
BEFORE CARRYING OUT INSTALLATION/MAINTENANCE WORK, MAKE SURE THAT THE APPLIANCE IS NOT CONNECTED TO THE POWER GRID. THE PLUG TO BE CONNECTED TO THE POWER SUPPLY CABLE AND ITS SOCKET MUST BE OF THE SAME TYPE AND CONFORM TO THE REGULATIONS IN FORCE. - Page 5 General instructions DO NOT LET CHILDREN GO NEAR THE APPLIANCE WHEN IT IS IN OPERATION OR PLAY WITH IT AT ANY TIME. DO NOT INSERT POINTED METAL OBJECTS (CUTLERY OR UTENSILS) INTO THE SLITS IN THE APPLIANCE. DO NOT USE STEAM JETS FOR CLEANING THE APPLIANCE.
-
Page 6: Environmental Responsibility
Therefore, at the end of the product’s... -
Page 7: Get To Know Your Oven
Instructions for the user 4. GET TO KNOW YOUR OVEN Control panel Oven light Drawn runners (on some models only) Rack and tray support frames (on some models only) Roof liner (on some models only) Self-cleaning side panels (on some models only) -
Page 8: Available Accessories
NOTE: accessories. Rack: for holding cooking containers. Tray rack: to be placed over the top of the oven tray; for cooking foods which may drip. Oven tray: for collecting fat from foods placed on the rack above. Pizza plate: specially designed for cooking pizza and similar dishes. - Page 9 Using the rack or tray The racks and trays are equipped with a mechanical safety lock which prevents them from being taken out accidentally. To insert the rack or tray correctly, check that the lock is facing downwards (as shown in the figure).
- Page 10 If you wish to add oil to your pizza, it is best to add it after removing it from the oven since oil stains on the pizza plate are unsightly and may reduce its efficiency.
-
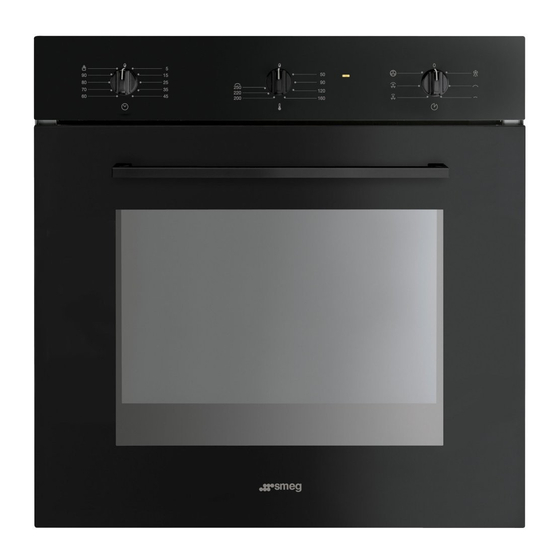
Page 11: Front Panel
Instructions for the user 6. FRONT PANEL All the controls and indicator lights can be seen on the front panel. The tables below describe the symbols used. - Page 12 To set the cooking time, turn the knob clockwise until it reaches the “90” position and then set the desired cooking time. The numbers from 5 to 90 correspond to minutes.
- Page 13 Instructions for the user FUNCTION SELECTOR KNOB (on some models only) Turn the knob clockwise or anti-clockwise to select a function from the following options (some functions are not present on all models): LARGE FAN-ASSISTED GRILL STATIC OVEN FUNCTION FUNCTION...
-
Page 14: Using The Oven
• Before using the appliance for the first time, remove all accessories from the oven compartment and wash them as indicated in “9. CLEANING AND MAINTENANCE”. - Page 15 7.2.3 Oven inside lights The oven lights come on when the door is opened (only on some models) or any function is selected, except for (where present).
- Page 16 During cooking, do not cover the bottom of the oven with aluminium or tin foil and do not place pans or oven trays on it as this may damage the enamel coating. If you wish to use greaseproof paper, place it so that it will not interfere with the hot air circulation inside the oven.
-
Page 17: Cooking With The Oven
STATIC: As the heat comes from above and below at the same time, this system is particularly suitable for certain types of food. Traditional cooking, also known as static or thermal radiation cooking, is suitable for cooking just one dish at a time. - Page 18 FAN-ASSISTED GRILL: The air produced by the fan softens the strong heatwave generated by the grill, giving perfect grilling results even with very thick foods. Perfect for large cuts of meat (e.g. shin of pork). FAN-ASSISTED BOTTOM (on some models only): The combination of the fan with just the lower heating element allows cooking to be completed more rapidly.
- Page 19 We recommend using a meat thermometer for meat when roasting it. Alternatively, simply press on the roast with a spoon: if it is hard, it is ready; if not, it needs another few minutes cooking.
- Page 20 When defrosting meat, we recommend using a rack positioned on the second runner with the food on it and a tray positioned on the first runner. In this way, the liquid from the defrosting food drains away from the food.
- Page 21 Instructions for the user To save energy To save energy during use of the appliance, the following instructions may be followed: • Stop cooking a few minutes before the time normally used. Cooking will continue for the remaining minutes with the heat which has accumulated inside the oven.
- Page 22 Instructions for the user Cooking process information table DISHES WEIGHT FUNCTION FIRST COURSES LASAGNE 3 kg Static OVEN-BAKED PASTA Static MEAT ROAST VEAL 1 kg Fan-assisted static LOIN OF PORK 1 kg Fan-assisted static SHOULDER OF PORK 1 kg Turbo / Circular...
- Page 23 Instructions for the user RUNNER POSITION TEMPERATURE TIME IN MINUTES FROM BOTTOM °C 1 or 2 220 - 230 40 - 50 1 or 2 220 - 230 180 - 190 70 - 80 180 - 190 70 - 80...
- Page 24 Turbo / Circular PARADISE CAKE Fan-assisted static PARADISE CAKE Static ECLAIR Turbo / Circular LIGHT SPONGE CAKE Circular RICE PUDDING Turbo / Circular RICE PUDDING Static CROISSANTS Circular APPLE PIE Static CROISSANTS (on multiple runners) SHORT PASTRY BISCUITS (on multiple runners)
- Page 25 Instructions for the user RUNNER POSITION TEMPERATURE TIME IN MINUTES FROM BOTTOM °C 190 - 200 30 -35 180 - 190 15 -20 160 - 170 50 - 55 160 - 170 30 - 35 35 - 40 160 - 170...
-
Page 26: Cleaning And Maintenance
To clean and preserve the stainless steel surfaces, always use only specific products that do not contain abrasives or chlorine-based acids. How to use: pour the product onto a damp cloth and wipe the surface, rinse thoroughly and dry with a soft cloth or a microfibre cloth. - Page 27 The oven should be operated at the maximum temperature for about 15-20 minutes after the use of specific products, to burn off the residues left inside the oven. On pizza models only, to clean the bottom of the oven, the following operations...
- Page 28 When the operation is complete, damp parts should be dried thoroughly. 9.5.1 Removing the guide frames (on some models only) Removing the guide frames makes it easier...
- Page 29 The stone must be cleaned after every use. Do not heat it again if it has any encrustations. To clean, pour 55 cc of vinegar onto the stone, leave it to act for 10 minutes, then remove it by wiping with a metallic mesh or abrasive sponge.
- Page 30 VAPOR CLEAN is an assisted cleaning procedure which facilitates the removal of dirt. Thanks to this process, it is possible to clean the inside of the oven very easily. The dirt residues are softened by the heat and water vapour for easier removal afterwards.
- Page 31 (the coloured zone on the figure to the side shows where the solution can be sprayed). Do not spray excessive amounts of the water and washing up liquid solution. We recommend spraying approx. 20 times at the most. •...
- Page 32 You are advised to wear a pair of gloves during these processes. At the end of the cleaning cycle, open the door and wipe away the less stubborn dirt with a microfibre cloth. Use an anti-scratch sponge with brass filaments on tougher encrustations.
-
Page 33: Extraordinary Maintenance
Replace the bulb with one of the same type (25W). Replace cover correctly, so that the moulded part of the glass is facing the door. Press the cover down as far as it will go so that it attaches completely to the bulb support. - Page 34 10.2.1 With pins Open the door completely. Insert two pins into the holes indicated A in the two hinges towards the back of them until they engage. Grasp the door on both sides with both hands, lift it forming an angle of around 30°...
- Page 35 The glass in the door should always be kept thoroughly clean. To facilitate cleaning, it is possible to remove the door (see 10.2 Removing the door) and place it on a canvas, or open it and lock the hinges in order to extract the glass panels.
- Page 36 Replace the panels in the reverse of the order in which they were removed. • Reposition the internal glass panel, taking care to centre and insert the 4 pins attached to the glass into their slots in the oven door by applying slight pressure.
-
Page 37: Installing The Appliance
The appliance must be connected to earth in compliance with electrical system safety regulations. If a fixed connection is being used, fit the power line with an omnipolar circuit- breaker in accordance with the installation rules, located in a position which is easy to reach and near the appliance. -
Page 38: Instructions For The Installer
2, bearing in mind that the top/rear of the unit must have an opening 35-40 mm deep. Remove the screw covers on the frame and screw in the 2 screws A (fig. 5) to fix the appliance to the unit. Replace the screw covers. For installing beneath a countertop hob, allow for a rear and bottom clearance as shown in figure 1 (ref. - Page 39 Instructions for the installer FIG.1 Measurements 583 ÷ 585 554 ÷ 564 490 ÷ 500 560 min. 35 ÷ 40 (mm)
- Page 40 Instructions for the installer FIG. 2 FIG. 3 FIG. 4 FIG. 5...