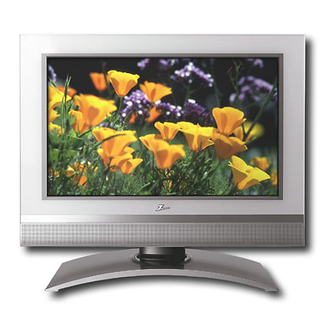
Zenith L17W36 Operating Manual
Lcd tv/monitor
Hide thumbs
Also See for L17W36:
- Service manual (24 pages) ,
- Installation and operating manual (32 pages)

Related Manuals for Zenith L17W36


Summary of Contents for Zenith L17W36
- Page 1 Operating Guide | Warranty Model Numbers | L17W36, L23W36 | LCD TV/Monitor © Copyright 2004, LG Electronics USA, Inc.
-
Page 2: Warnings
- Connect the equipment into an outlet on a circuit different from that to which the receiver is connected. - Consult the dealer or an experienced radio/TV technician for help. Any changes or modifications not expressly approved by the party responsible for compliance could void the user’s authority to operate the equipment. -
Page 3: Safety Instructions
Safety Instructions Safety Instructions Important safeguards for you and your new product Your product has been manufactured and tested with your safety in mind. However, improper use can result in potential elec- trical shock or fire hazards. To avoid defeating the safeguards that have been built into your new product, please read and observe the following safety points when installing and using your new product, and save them for future reference. -
Page 4: Safety Instructions
Safety Instructions Safety Instructions continued Safety Instructions continued 14. Outdoor Antenna Grounding If an outside antenna or cable system is connected to the product, be sure the antenna or cable system is grounded so as to provide some protection against voltage surges and built-up static charges. -
Page 5: Table Of Contents
VCR Setup ......12 Cable TV Setup ......12 External A/V Source Setup . -
Page 6: Introduction
Introduction Introduction Introduction L17W36 Controls & Connection Options L17W36 Controls & Connection Options Headphone Jack S-Video Input Video Input Audio Input DC IN (15V) COMPONENT(480i/480p/720p/1080i) DC 15V Input (Component (480i/480p/720p/1080i), Audio) Menu Button TV/Video Button On/Off Button on/off tv/video Power/Standby Indicator Glows red in Standby mode, Glows green when the TV is turned on. -
Page 7: Controls And Connection Options
L23W36 Controls & Connection Options L23W36 Controls & Connection Options MONO Mono Indicator Stereo Indicator Power/Standby Indicator Glows red in Standby mode, Glows green when the TV is turned on. Remote Control Sensor * Kensington Security System Connector (Refer to P.9) COMPONENT(480i/480p/720p/1080i) AC INPUT... -
Page 8: Remote Control Key Functions
Introduction Remote Control Key Functions Remote Control Key Functions - When using the remote control, aim it at the remote control sensor on the TV. MUTE Switches the sound on or off. TV/VIDEO Selects: , or mode. (Refer to p.16) -
Page 9: Installation
- Note: The Kensington Security System is an optional accessory. NOTES a. If the TV feels cold to the touch, there may be a small “flicker” when when it is turned on. This is normal, there is nothing wrong with TV. -
Page 10: Installation Instruction
- Thread, then pull the wires through the hole on the TV stand. Swivel Stand Swivel Stand - The TV can be conveniently swiveled on its stand 25° (L23W36) / 30°(L17W36) to the left or right to provide the optimum viewing angle. -
Page 11: External Equipment Connections
If you have a 300 the twisted wire to the antenna converter and then connect the converter to the antenna jack on the TV. - If using 75 round cable, do not bend the bronze wire. -
Page 12: Vcr Setup
TV Setup Cable TV Setup - After subscribing to a local cable TV service and installing a converter, you can watch cable TV programming. - For further cable TV information, contact a local cable service provider. Connection 1 1. Select 3 or 4 with channel switch on cable box. -
Page 13: Dvd Setup
) jacks and connect the DVD audio outputs to the AUDIO jacks. Viewing Setup 1. Turn on the DVD player, insert a DVD. 2. Use the tv/video or multimedia button on the remote control to select Component. 3. Refer to the DVD player's manual for operating instructions. -
Page 14: Pc Setup
Installation PC Setup PC Setup - After setup, be sure to select RGB-PC source on TV. Connections 1. Set the monitor output resolution on the PC before connecting to the TV. 2. Connect the TV to the PC with the PC cable. -
Page 15: Operation
NOTE • If you want to turn the TV off, press the on/off button located on the TV. If you intend to be away on vacation, disconnect the power plug from the wall power outlet. Menu Language Selection Menu Language Selection - The menus can be shown on the screen in the selected language. -
Page 16: Channel Menu Options
Favorite Channels Setup Favorite Channels Setup - Favorite Channel lets you quickly tune in up to 5 channels of your choice without having to wait for the TV to scan through all the in-between channels. 1. Press the menu button and then use menu. -
Page 17: Picture Menu Options
• Contrast, Brightness, Color, and Sharpness are adjustable from 0 to 100. • Tint is adjustable from Red 50 to Green 50. 5. Press the exit button to save and return to TV viewing. Auto Color Control Adjustment... -
Page 18: Manual Color Temperature Control
F / G 4. Use the button to make appropriate adjustments. • The adjustment range of 5. Press the exit button to save and return to TV viewing. (Digital Reality picture) (Digital Reality picture) - Improves picture outline in dark areas. -
Page 19: Sound Menu Options
Audio Audio - This function lets you enjoy the best sound without any special adjustment because the TV selects the appro- priate sound option based on the program content. 1. Use the audio button to select the appropriate sound setup as shown below. -
Page 20: Sound Selection In Pc Mode
Broadcasts Setup Broadcasts Setup - The TV can receive MTS stereo programs and any SAP (Secondary Audio Program) that accompanies the stereo program, if the broadcaster transmits an additional sound signal as well as the original one. - Mono: The primary language is heard from left and right speakers. Signal mode is mono. -
Page 21: Time Menu Options
6. Press the button and then use on whether or not your viewing area observes Daylight Savings Time. 7. Press the exit button to save and return to TV viewing. Manual Clock Setup Manual Clock Setup - If the time on the clock is incorrect, reset the clock manually. -
Page 22: On/Off Timer Setup
- The TV must be in standby mode for the On-Timer to work. - If you don’t press any button within 2 hours after turning on the TV with the On-Timer function, the TV will automatically revert to standby mode. -
Page 23: Special Menu Options
• SNOW: If your receiver is located at the weak, fringe area of a TV signal, your picture may be marred by small dots. It may be necessary to install a special antenna to improve the picture. 2. An old, bad, or illegally recorded tape is being played. -
Page 24: Captions
4. Press the exit button to save and return to TV viewing. Auto Of Auto Of - If Auto Off is active and there is no input signal, the TV switches to Standby mode automatically after 10 minutes. 1. Press the menu button and then use menu. -
Page 25: Lock Menu Options
V-Chip rating and categories Rating guidelines are provided by broadcast stations. Most television programs and television movies can be blocked by TV Rating and/or Individual Categories. Movies that have been shown at the theaters or direct-to-video movies use the Movie Rating System (MPAA) only. -
Page 26: Lock Menu Setup
1. Press the menu button and then use Then, press the button. • If is already set, enter the password requested. • The TV is set with the initial password “0-0-0-0”. 2. Setting Lock on/off: Press the button to select D / E... -
Page 27: Rgb-Pc Menu Options
Adjustment Adjustment - Automatically adjusts picture position and minimizes image shaking. - If the image is still not correct, your TV is functioning properly but needs further adjustment. 1. Press the menu button and then use 2. Press the button and then use D / E 3. -
Page 28: Pip (Picture-In-Picture) Feature
(Picture-in-Picture) Feature (Picture-in-Picture) Feature - PIP lets you view 2 different inputs pictures (sources) on your TV screen at the same time. One source will be large, and the other source will show a smaller inset image. - Double Window splits the screen into 2, allowing 2 picture sources to be shown on the TV screen at the same time. Each source is given half the screen. -
Page 29: Swapping The Pip
Use the pip input button to select the input source for the sub picture. Each press of pip input button changes the PIP source. Main Picture Source TV, Video 1, Video 2, and S-Video Component, and RGB-PC (Picture-of-Picture: Channel Scan) -
Page 30: Troubleshooting Checklist
Troubleshooting Checklist roubleshooting Checklist roubleshooting Checklist SYMPTOMS No power No picture or sound Poor picture but good sound Poor reception Lines in picture Ghosts (multiple images) Remote control does not work. Cannot tune desired channel. CHECK THESE THINGS Is power cord plugged in ? Is television turned on ? Check batteries in remote control. -
Page 31: Maintenance
Absence Extended Absence If you leave your TV dormant for a long time (such as a vacation), it’s a good idea to unplug the power cord to protect against possible damage from lightning or power surges. Product Specifications Product Specifications... - Page 32 LCD-TV L17W36, L23W36 LIMITED WARRANTY – USA Zenith will repair or replace your product, at Zenith’s option, if it proves to be defective in material or work- manship under normal use, during the warranty period (“Warranty Period”) listed below, effective from the date (“Date of Purchase”) of original purchase of the product.