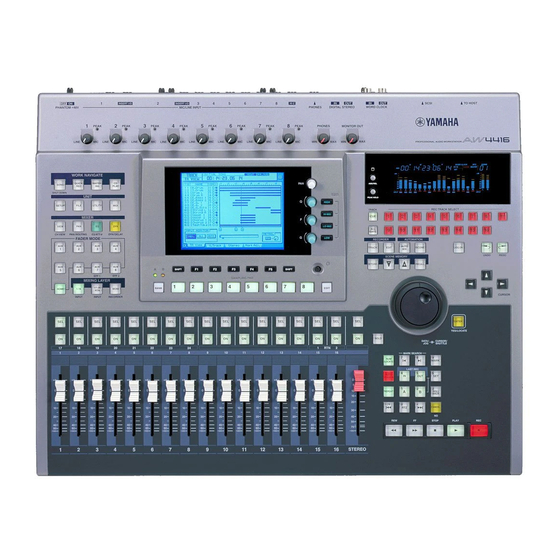
Yamaha AW4416 Tutorial
Professional audio workstation
Hide thumbs
Also See for AW4416:
- Operation manual (507 pages) ,
- Reference manual (191 pages) ,
- Service manual (154 pages)
Table of Contents
Advertisement
Quick Links
Advertisement
Table of Contents

Related Manuals for Yamaha AW4416


Summary of Contents for Yamaha AW4416
-
Page 1: Aw4416 Professional Audio Workstation
PROFESSIONAL AUDIO WORKSTATION Tutorial... -
Page 2: A Note About The Tutorial
It had to happen. The AW4416 can do what once required a couple of rooms full of very, very expensive equipment that required consider- able expertise to operate. And it does it very well, indeed. In short, the AW4416 can take your sound recording projects from conception to completion with pro- fessional-level control and quality. -
Page 3: Table Of Contents
To Process or Not To Process? ... 7 Load the Demo Song ... 8 Load the Demo Song From the CD-ROM Onto the AW4416 Hard Disk ... 8 Load the Demo Song from the Hard Disk ... 9 Mixdown ... 10 Phase 1: Listen To the Tracks and Make a Plan ... - Page 4 Step 1: Set Up the “Master” EQ and Dynamics... 28 Step 2: Record the Song to the Stereo Track... 29 Step 3: Write the Song to a CD-R Disk ... 30 Practice, Practice … ... 30 Glossary ... 31 Tutorial—AW4416 Professional Audio Workstation — Tutorial...
-
Page 5: Laying Down The Basic Tracks
Tutorial—Laying Down the Basic Tracks Laying Down the Basic Tracks Although the basic tracks you’ll use to assemble the “So Fine” mix have already been recorded for you (of course you can add your own tracks, if you like), let’s take a moment to discuss the initial recording process. -
Page 6: Scratch" Or "Guide" Vocals
And since the AW4416 provides switchable phantom power on inputs 1 and 2, you can choose studio-quality phantom-powered microphones with confidence. -
Page 7: Overdubs
Tutorial—Laying Down the Basic Tracks Overdubs The actual procedure for recording overdubs is really no different from recording the basic tracks, except that you’ll be monitoring previously recorded material while doing it. Remember to use a good pair of closed headphones to monitor the backing tracks while recording acoustic overdubs or vocals (not open types or the in-ear types often used with portable stereos) to prevent leakage of the head- phone mix back into the microphone. -
Page 8: Load The Demo Song
[ENTER] key). The default SCSI drive number is SCSI#3. If you install a CD-RW drive manufactured by Yamaha, the SCSI ID will be set to “3” at the factory, and we recommend that you leave it at this setting. -
Page 9: Load The Demo Song From The Hard Disk
Load the Demo Song from the Hard Disk 1. Press the [SONG] key (and the [F1] function key if necessary to select the “Song List” page). 2. Use the DATA dial to select “So Fine”. 3. Move the cursor to “LOAD” on the display and press [ENTER]. When the “Will Save Current song …... -
Page 10: Mixdown
Tutorial—Mixdown Mixdown Although the term “mixdown” seems to imply a single action, it is really a pro- cess that can involve many interrelated steps. As you become more experienced, the individual steps will sort of blend into one larger operation. This is important because at all times you’ll need to consider how each small action will affect the overall sound. -
Page 11: Contents
1. Make sure that the RECORDER [MONI] MIXING LAYER is selected. 2. Recall the scene number 01 “FADERS NOMINAL” provided to set faders 1 through 14 to nominal (Press the [SCENE] key, use the data dial to select the scene number 01 “FADERS NOMINAL”, move the cursor to “RECALL”, press [ENTER], select “OK”... -
Page 12: Phase 2: Set Up A Rough Mix
Tutorial—Mixdown Phase 2: Set Up a Rough Mix The rough mix is only the starting point for the final mix, and it doesn’t have to be perfect. The purpose of setting up a rough mix using only levels and panning is to give you a reference point on which to base decisions about more detailed pro- cessing, effects, automation, etc. -
Page 13: Add The Claves/Electronic Drums Track
cases where the drums or other instrument seems to occupy the entire stereo field, try panning the left and right channels between about a third and half way to the maximum values. In the case of the “So Fine” demo, however, the drums were recorded “live”... -
Page 14: Add The Lead Vocal
Tutorial—Mixdown Add the Lead Vocal Ah-ha! Fooled you! You thought we were going to add the chorus parts on tracks 11, 12, and 13, and THEN add the lead vocal track, didn’t you! Well we won’t, and the reason is simply that the chorus parts really must be heard in relation to the lead vocal in order to set appropriate levels. -
Page 15: Phase 3: Assemble The Mix Part By Part
Phase 3: Assemble the Mix Part by Part Now we’re ready to do some serious work on the sound of the individual tracks in an attempt to make them “mesh” to create a well-balanced overall mix. INSTANT GRATIFICATION! Once again, we’ve provided a scene you can simply recall to automatically make all the settings included in “Phase 3”, below. -
Page 16: Track 3: Claves/Electronic Drums
Tutorial—Mixdown Track 3: Claves/Electronic Drums This track needs a bit of compression to make the electronic drums jump out of the mix when they appear at the outro. Later, when we work on the automation, we’ll boost this track a bit at the outro for extra impact. 1. -
Page 17: Track 5: Rhythm Guitar
filter to remove some of the offending frequen- cies. The LOW band of the AW4416 parametric equalizer functions as a high- pass filter — all you have to do is make the appropriate settings. No compression is required. -
Page 18: Track 8: Piano
Tutorial—Mixdown Track 8: Piano We’ll use some EQ to “thin out” the piano sound a bit, and give it a touch more presence so that it will come through in the mix a bit more. Piano EQ Tracks 9 & 10: Strings If we’d recorded real strings we might have needed a bit of processing here, but since this is pretty-much a “pre-processed”... -
Page 19: Track 13: Male Chorus
Female Chorus 2 Compression THRESH. RATIO OUT GAIN –16 2.5:1 Track 13: Male Chorus The quality of this singer’s voice makes EQ unnecessary in this situation, but some compression will be helpful to help the blend with the female chorus. Male Chorus Compression THRESH. -
Page 20: Phase 4: Add Ambience
For the sake of consistency we’ll use only one reverb effect for the entire piece. The AW4416 has two separate effect processors built in, so it would be no prob- lem to set up two different reverbs or other effects and use them on different tracks, but the straightforward, “earthy”... -
Page 21: Add Ambience To The Tracks As Required
Add Ambience to the Tracks as Required All you have to do now is use the faders in the AUX 7 mode to add the required degree of the Reverb Room effect to the tracks. Tip! As with other stages in the mix process you’ll probably be turning channels on and off so you can hear how the processed tracks sound alone or in combination with certain other tracks. -
Page 22: Track 7: Organ
Tutorial—Mixdown Track 7: Organ Instruments like organ always present a challenge when trying to decide on the right amount of reverb to add. The sustained nature of the sound means you can add a LOT of reverb before you really notice it … but it’s there, and probably playing havoc with the overall mix. -
Page 23: Save The Song
Accidents do happen, and if after several hours of hard work your AW4416 is accidentally unplugged, or there’s a power failure, or your pet cat decides to do a mix of his own, you’ll have to go back and start again. Ouch! Press the WORK NAVIGATE [SONG] key to go to the SONG display, if necessary also press the [F1] function key to select the “Song List”... -
Page 24: Phase 5: Finalize The Mix & Set Up Automation
Thank goodness for the AW4416. It will let you record fader, channel ON/Off, pan, and EQ automation changes one at a time so you can put together the perfect automix with relative ease. -
Page 25: The Automix
“gating” (a type of dynamics processing in which signals below a specified level are cut off — the AW4416 dynamics processors can do this). But since the noise is effectively masked by the other tracks during denser parts of the song, we’ll simply use channel ON/OFF automation for the “So Fine”... - Page 26 Tutorial—Mixdown 00:01:31 The lead guitar on track 6 and the lead vocal on track 14 have been brought back down to their “normal” levels. The organ level is also returned to normal. 00:01:39 The level of the male chorus track (13) is boosted a bit here because for the next couple of phrases the male chorus doubles with the lead vocalist while the female chorus provides “0oh”...
-
Page 27: Phase 6: Use The Virtual Tracks To Create An Alternate Mix
Phase 6: Use the Virtual Tracks to Create an Alternate Mix If you feel that you need a little more practice with the mixing process, try select- ing the alternative string and vocal tracks we’ve provided and see how they change the overall sound. -
Page 28: Mastering
Tutorial—Mastering Mastering When you think mastering, think “subtle”. But just because it’s subtle doesn’t mean that it can’t have a huge impact on the overall sound of a song. Mastering is the process of making final adjustments to the overall sound, usually involving the application of EQ and/or compression. -
Page 29: Step 2: Record The Song To The Stereo Track
1.7:1 Step 2: Record the Song to the Stereo Track The AW4416 requires that your song be recorded to the stereo track before it can be written to a CD. So once you’re satisfied with the master EQ and/or compres- sion settings, record the song to the AW4416 stereo track, as follows: 1. -
Page 30: Step 3: Write The Song To A Cd-R Disk
Really. Mixing and mastering are skills which, like playing an instrument, can only be acquired through practice. You have the tools (the AW4416 is about the coolest little mixing and mastering toolkit you can lay your hands on), now it’s up to you to learn how to use them like a pro. -
Page 31: Glossary
–17 century, and who most certainly never saw anything like an interplanetary probe. We’re pretty sure he never saw an AW4416, either. Close-miking As the term implies, “close-miking” involves placing a microphone very close to the source in order to maximize the amount of sound picked up from the desired source in relation to other ambient sound. - Page 32 Tutorial—Glossary Directional Microphone A microphone which primarily picks up sound from only one general direction is a “directional” microphone. This can be handy in maximizing separation in the studio (and in reducing feedback on stage), because you can simply aim the microphone away from sources of sound you don’t want to pick up.
- Page 33 So Fine Written and arranged by Karl Christmas Engineered and produced by Darren Allison Vocals: Rusharn Simpson Vocals, backing vocals, guitars and keyboards: Karl Christmas Backing vocals: Billie Godfrey Bass: Finn Day-Lewis Drums: Andrew Small Recorded at Protocol Studios and Darren’s Studios, London. Mixed at Transmedia Services Ltd, Bedford, UK.
- Page 34 YAMAHA CORPORATION Pro Audio & Digital Musical Instrument Division V678610 R1 1 IP 36 P.O. Box 3, Hamamatsu, 430-8651, Japan 00 08 7000 AP Printed in Japan...