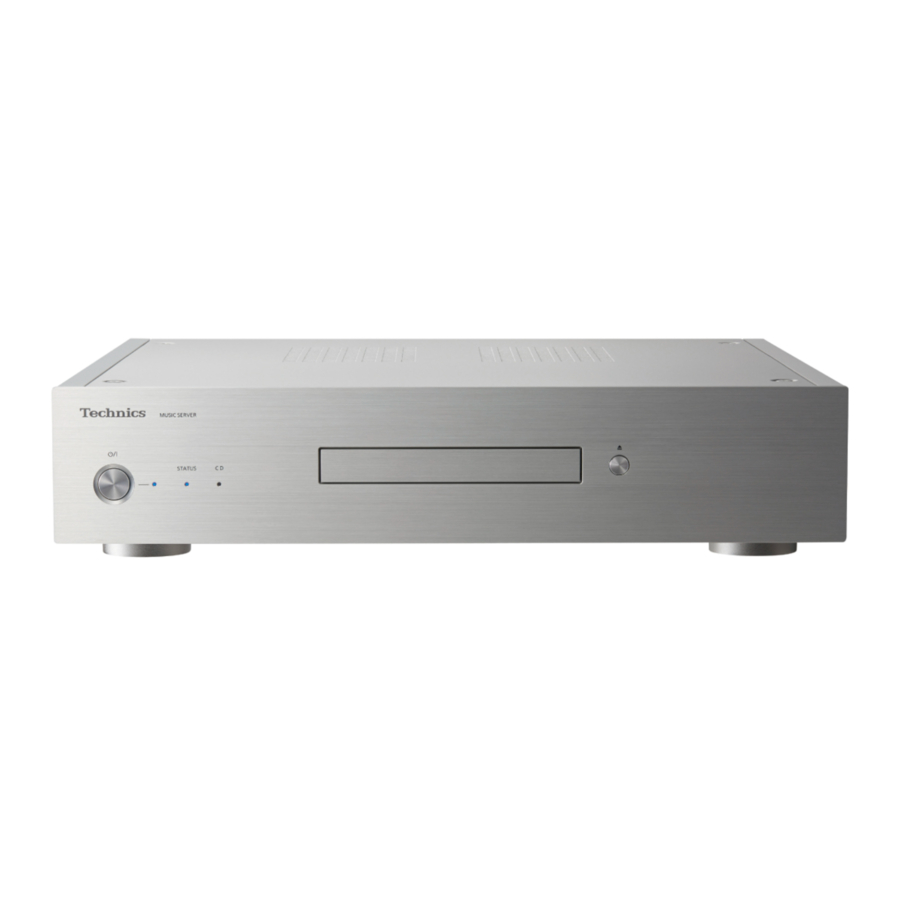
Technics ST-G30 - Music Server Manual
- Control manual (37 pages) ,
- Manual (20 pages) ,
- Introduction manual (2 pages)
Advertisement
Features
Hi-Fi-Grade Data Transmission
Equipped with a silent SSD, the Digital Noise Isolation Architecture reduces noise and jitter to the lowest possible levels. The Optimally Activated Circuit System sends high-quality music data to the player. For a USBDAC, the Low Noise USB Transfer reduces the processing load on the player side and ensures stable USB output power to achieve extremely accurate data transfers.
Bit-Perfect CD Ripping
Bit-Perfect Ripping not only readjusts read error characteristics and performs read retries, but also carries out comparative verification using correct hash values. The internal CD drive is manufactured entirely in-house. It is enclosed in a silent shelter and mounted at the centre of the casing. This Rigidly-Mounted Sheltered Drive minimises the generation of vibrations and noise and enables accurate reading of CD data.
Usability Optimised for Network Audio
The ST-G30 features a user interface that allows a variety of operations, such as managing a music library from a smartphone app, editing the tags and settings of various parameters, thus providing comfortable operation without using a PC. It lets you immerse yourself fully in the music. The internal SSD is removable to allow for future upgrades.
Accessories

(ONLY FOR CANADA)
The enclosed Canadian French label sheet corresponds to the English display on the unit.
- Product numbers provided in this Owner's Manual are correct as of February 2016.
- These may be subject to change.
- Do not use AC power supply cord with other equipment.
Installation
Installation
- Turn off all equipment before connection and read the appropriate operating instructions.
Unit care
- Pull out the AC power supply cord from the outlet before maintenance. Clean this unit with a soft cloth.
- When dirt is heavy, wring a wet cloth tightly to wipe the dirt, and then wipe it with a soft cloth.
- Do not use solvents including benzine, thinner, alcohol, kitchen detergent, a chemical wiper, etc. This might cause the exterior case to be deformed or the coating to come off.
To transfer this unit
This unit may contain private information. Before disposing of or transferring this unit, perform the following to delete the data, including personal or secret information.
(See "To return all settings to the factory defaults", "To delete music and settings stored on the SSD")
- The customer is responsible for the management of personal information imported on the SSD of this unit.
Storage of the SSD
Do not store the SSD in the following locations, as this may cause malfunctions:
- Extremely hot locations
- Locations with drastic temperature changes
- Locations exposed to direct sunlight
- Locations where static electricity or electromagnetic waves are generated
- Humid or dusty locations
Control reference guide


Main unit Front/Rear
- Standby/on switch (
![]() )
) - Press to switch the unit from on to standby mode or vice versa. In standby mode, the unit is still consuming a small amount of power.
- Power indicator
- Blue: The unit is on.
- STATUS indicator
This is a two-color LED indicator that shows the SSD status.- It flashes blue when this unit is on.
 )
) | OFF | Not possible to access SSD |
| Lights up (blue) | Possible to access SSD |
| Lights up (red) | Importing from USB / Downloading from Technics Tracks / Backing up / Restoring |
| Flashing (red) | The SSD is not formatted |
- CD indicator
This is a two-color LED indicator that shows the CD status.- It flashes blue when you insert a CD into this unit.
| OFF | No CD |
| Lights up (blue) | Possible to access the CD |
| Lights up (red) | Recording CD music |
| Flashing (red) | Incompatible CD |
- CD tray
- Opens/closes the CD tray
- The tray opens or closes after the CD indicator flashes.
- Network connection indicator
| OFF | Disconnected |
| Lights up (yellow) | Connected |
| Flashing (yellow) | Making a connection |
- LAN terminal
(See "Devices/AC power supply cord") - Network communication speed indicator
| OFF | Disconnected/10 Mbps connection |
| Lights up (Orange) | 100 Mbps connection |
| Lights up (green) | 1 Gbps connection |
- USB terminal (
![]() DC 5 V 500 mA AUDIO OUT)
DC 5 V 500 mA AUDIO OUT)
(See "Playback")- Connects to a device with a built-in USB-DAC.
- USB terminal (
![]() DC 5 V 900 mA IMPORT/BACKUP)
DC 5 V 900 mA IMPORT/BACKUP)
(See "Importing music from CDs or USB devices")- Connects to a USB memory device or USB HDD (Hard Disk Drive).
- Storage tray (STORAGE)
- You can remove the tray to attach and remove the SSD. (See "SSD")
- Fixing screw
- Product identification marking
- AC IN terminal (
![]() )
)
(See "Devices/AC power supply cord")
Connections
Connection with this unit
This unit is a Hi-Fi music server. It stores and automatically organizes music data, and transmits the data to wide-ranging audio devices. After saving music data to the SSD of this unit, you can enjoy the music by connecting this unit to a player or amplifier with a built-in USB DAC (digitalto-analog converter). In addition, using the DLNA function, you can play back the music on the SSD of this unit with a device such as a network player or tablet.


- Smartphone/Tablet
Download the "Technics Music App" to operate this unit.- Before operating this unit
- Device with a built-in USB-DAC
Connect an amplifier/DA converter with a USB cable to output music data stored on this unit.- Enjoying music with USB audio connections
- Network player/smartphone/ wireless speaker
Connect with DLNA to output music data stored on this unit.- Enjoying music with DLNA
- CD
- Recording music from CDs
- USB devices
Music on USB devices can be saved to the SSD of this unit. You can also back up music stored on the SSD to USB devices.- Importing music from USB devices
- Broadband router
Connect to this unit with a LAN cable.- Connections
- Internet
You can download music tracks from an online high-res music store, or automatically retrieve title information from the Gracenote database.- Before operating this unit
Devices/AC power supply cord
- Use only the supplied AC power supply cord.
- Do not connect the AC power supply cord until all other connections are complete.
- Insert the plugs of the cables to be connected all the way in.
- Do not bend cables at sharp angles.


* Insert the AC power supply cord up to a point just before the round hole.
- Connect the device with a built-in USB-DAC.
This unit will output audio signals, allowing you to play back music files.- See the operating instructions for connected equipment for operational details.
- The USB connection is not required for the playback of music using the DLNA function.
- Wired LAN connection
Normally, just connecting a LAN cable will complete the setup.- Use category 7 or above straight LAN cables (STP) when connecting to peripheral devices.
- AC power supply cord connection
Connect only after all other connections are completed.
Note
- This unit consumes a small amount of AC power even when the unit is in standby mode. Remove the plug from the main electrical outlet if you will not be using the unit for an extended period of time. Place the unit so the plug can be easily removed.
- While the AC power supply cord is disconnected, the LAN cable must be connected or disconnected.
- Inserting any cable other than a LAN cable in the LAN port can damage the unit.
Preparation
Before operating this unit

Control this unit with its dedicated app

Purchase music from online high-res music store
Download purchased music
Getting the app ready for use
Before using this unit, you need to install "Technics Music App"(free of charge), an app specifically designed for Technics products, on your smartphone or tablet.

Technics Music App
- iOS: App Store

- Android: Google Play

For information on the operations and on-screen displays of "Technics Music App", refer to its user guide, which can be the website below.
www.technics.com/support/
Connecting your smartphone or tablet to a wireless LAN network
Use a smartphone or tablet on which "Technics Music App" is instaled to control and configure this unit via a network. Enable the Wi-Fi setting of the smartphone or tablet, and connect it to the same network as this unit.
When using online high-res music store
Technics Tracks* is a music download service specializing in high quality lossless audio. You can purchase music files with your computer, smartphone or tablet.
- User registration is required to use Technics Tracks. Refer to the website below for details.
https://tracks.technics.com/
*For the United Kingdom, Germany, Canada (as of January 2016) - You can automatically download the music files purchased at an online high-res music store to the SSD of this unit.
For details, refer to the user guide for "Technics Music App". - High-res music services are subject to change or termination.
Importing music from CDs or USB devices

You can insert a CD or USB device and Import music.
- This unit cannot play back CDs.
- For information on compatible CDs and USB devices
Preparation
- Connect the device on which the app "Technics Music App" is instaled to the same network as this unit.
To make a recording of a CD
- Press [
![]() ] on this unit to turn it on.
] on this unit to turn it on. - Press [
![]() ] to open the CD tray, and insert the CD.
] to open the CD tray, and insert the CD.
To close the CD tray, press [![]() ] again.
] again. - The CD can be accessed once the CD indicator lights up blue.
- Start "Technics Music App" to record music from the CD.
- Go to the "ST-G30 Menu" first to perform this step. For details, refer to the user guide for "Technics Music App".
- If this unit is connected to a network, the CD's title information will be automatically retrieved from the Gracenote database.
 ] on this unit to turn it on.
 ] to open the CD tray, and insert the CD.
 ] again.
 To import from a USB device
- Press [
![]() ] on this unit to turn it on.
] on this unit to turn it on. - Connect the USB device to the USB terminal [IMPORT/BACKUP] on the back of this unit.
- Start "Technics Music App" to import music from the USB device.
- Go to the "ST-G30 Menu" first to perform this step. For details, refer to the user guide for "Technics Music App".
Note
- If you turn off this unit or disconnect the USB device during importing, the music being imported will not be saved.
- Depending on the conditions of use, importing may not be performed correctly.
- Please note that even if content is not imported correctly due to any defects, Panasonic will not be responsible for compensation for such content, losses arising out of the imported content, or any direct or indirect damage caused by such importing. The same also applies to repairing this unit.
Playback
Enjoying music with USB-Audio

You can connect this unit to a player or amplifier to play back music stored on the SSD of this unit, without using a computer.
- You cannot play back music that are stored on devices other than the SSD of this unit.
- About supported format, refer to "File format"
Preparation
- Connect this unit to a player or amplifier.(See "Devices/AC power supply cord")
- Connect the device on which the app "Technics Music App" is instaled and the player or amplifier to the same network as this unit.
- Start the app "Technics Music App".
- If a screen prompting you to display the menu screen for ST-G30 appears, tap "Display On".
- Tap "
![]() " to return to the "Music Source" screen.
" to return to the "Music Source" screen.
- Tap "Music Server", and then tap "Technics ST-G30******".
- "******" stands for a digit that is unique to each set.
- Tap "
![]() " to return to the "Music Source" screen.
" to return to the "Music Source" screen.
- Tap "
![]() ", and then tap the speaker set that you want to use.
", and then tap the speaker set that you want to use. - A Technics model number or "USB-DAC" will appear under "USB-AUDIO".
- Select a song.
- For details, refer to the user guide for "Technics Music App".
 ", and then tap the speaker set that you want to use.
 Note
- Depending on the connected device, this function may not work correctly.
Enjoying music with DLNA

You can play back music stored on the SSD of this unit with the DLNA function.
- About supported format, refer to "File format"
Preparation
- Connect the device on which the app "Technics Music App" is instaled and the network player or tablet to the same network as this unit.
- Start the app "Technics Music App".
- If a screen prompting you to display the menu screen for ST-G30 appears, tap "Display On".
- Tap "
![]() " to return to the "Music Source" screen.
" to return to the "Music Source" screen.
- Tap "Music Server", and then tap "Technics ST-G30******".
- "******" stands for a digit that is unique to each set.
- Tap "
![]() " to return to the "Music Source" screen.
" to return to the "Music Source" screen.
- Tap "
![]() ", and then tap the speaker set that you want to use.
", and then tap the speaker set that you want to use. - A model number will appear under "DLNA".
- Select a song.
- For details, refer to the user guide for "Technics Music App".
 ", and then tap the speaker set that you want to use.
 Note
- Depending on the contents and the connected equipment, operations or playback may not be possible.
Advanced operations
Importing music from a PC
You can operate a computer to access the ST-G30 over a network to save and edit folders and tracks.
Preparation
- Connect a computer containing the music that you want to import to this unit to the same network as this unit.
Example with Windows 7
- Open any folder, and click "Network".
- Double-click the "ST-G30-******" icon displayed in the "Computer" list in the folder.
- It may take time until the icon for this unit's name appears in the "Computer" list. If the icon is not displayed, click "Refresh "Network"" on the address bar of the folder. (Depending on the type or version of your OS, this refresh button may not be available. In that case, wait for a few minutes until the icon appears.)
- You may be required to enter a user name and password. In that case, enter the following:
User name: User
Password:
The one you set for "Technics Music App"- "User name" cannot be changed.
- There is no default setting for "Password".
- "Password" can be changed.
- For details, refer to the user guide for "Technics Music App".
- Save the desired music on the computer to the "share" folder.
Note
- The screen differs depending on the OS.
- For more details, check the support site below as well as this Owner's Manual.
www.technics.com/support/
Back up / Restore
You can back up the SSD's data to a USB device or restore backup data to the SSD.
- Press [
![]() ] on this unit to turn it on.
] on this unit to turn it on. - Connect the USB device to the USB terminal [IMPORT/BACKUP] on the back of this unit.
- Start "Technics Music App" to back up/restore music.
- For details, refer to the user guide for "Technics Music App".
 ] on this unit to turn it on.
Note
- If you turn off this unit or disconnect the USB device during back up, the music being imported will not be saved.
- Depending on the data size, it may take time until the backup or restoration is complete.
SSD
You can replace the built-in SSD of this unit. Pull out the SSD tray from this unit to replace the SSD.
- For information on the handling of the SSD, refer to "SSD"
- Before installing or removing the SSD, be sure to turn off this unit and pull out the mains plug from the outlet. Not doing so may cause malfunctions.
- We recommend creating a backup of your important data to prevent its loss before replacing the SSD. (See "Advanced operations")
Follow the steps below to replace the SSD.
- After pulling out the main plug from the mains outlet, rotate the fixing screw on the back of this unit to loosen it.

- Hold both ends of the storage tray to pull it out straight.

- Remove all the screws (M3 x 4, Silver), and take out the SSD.
Hold the SSD with one hand to prevent it from falling.

- Use a cross-slot screwdriver to remove the screws. Choose a cross-slot screwdriver that matches the size of the screws.
- Do not tighten the screws with excessive force. Doing so will strip their threads, making it impossible to use the screws again.
- Turn the storage tray over with the bottom side facing up, and attach the new SSD.
![]()
- Be careful about the orientation of the SSD and storage tray.
- Turn the storage tray over with the top side facing up, and tighten the screws (M3 x 4, Silver).
- In the same way as in Step 3, hold the SSD with one hand to prevent it from falling.
- Insert the storage tray into this unit, and tighten the fixing screw.

- After inserting the storage tray, tighten the fixing screw firmly until the tray is secure.
- Format the SSD with "Technics Music App". (See "Troubleshooting")
For details, refer to the user guide for "Technics Music App".


Note
- Be careful not to touch the gold contacts on the SSD.
Troubleshooting
Before requesting service, make the following checks. If you are uncertain about some of the check points, or if the solutions indicated in the following guide does not resolve the issue, then consult your dealer for instructions.
Heat buildup of this unit
This unit becomes warm when used for a long time.
This is not a malfunction.
Do you have the latest firmware instaled?
Panasonic is constantly improving the unit's firmware to ensure that our customers are enjoying the latest technology.
Check the support site below
www.technics.com/support/
To return all settings to the factory defaults
When the following situations occur, reset the memory:
- There is no response when buttons are pressed.
- Disconnect the mains plug.
- Before proceeding to Step 2, wait for at least 3 minutes.
- Connect the mains plug while pressing and holding [
![]() ].
].
The main unit will turn off after all the indicators on its front side flash.- All settings will return to the factory defaults. It is necessary to set the memory items again.
 ].
].To delete music and settings stored on the SSD
Follow the steps below to delete music or settings stored on the SSD of this unit.
- You want to clear and reset the memory contents.
- Start the app "Technics Music App".
- Tap "ST-G30 Menu", and then tap "TechnicsST-G30******".
- "******" stands for a digit that is unique to each set.
- Tap "Settings", and then tap "Initialize".
- Tap "Delete account information" to delete your account information.
- To clear account information, select "OK".
- Select "Format SSD" in Step 4, and repeat the same operation.
The unit does not work.
Operations are not done properly.
- One of the unit's safety devices may have been activated.
- Press [
![]() ] on the unit to switch the unit to standby.
] on the unit to switch the unit to standby. - If the unit does not switch to standby, press [
![]() ] on the unit for at least 5 seconds. The unit is forcibly switched to standby. Alternatively, disconnect the AC power supply cord, wait for at least 3 minutes, then reconnect it.
] on the unit for at least 5 seconds. The unit is forcibly switched to standby. Alternatively, disconnect the AC power supply cord, wait for at least 3 minutes, then reconnect it.
- If the unit does not switch to standby, press [
- Press [
![]() ] on the unit to switch on. If the unit still cannot be operated, consult the dealer.
] on the unit to switch on. If the unit still cannot be operated, consult the dealer.
A "humming" sound can be heard during playback.
- An AC power supply cord or fluorescent light is near the cables. Keep other appliances and cords away from the cables of this unit.
- A strong magnetic field near a TV or other device may adversely affect the audio quality. Keep this unit away from such devices.
- The speakers may output noise when a device nearby is emitting powerful radio waves, such as when a mobile phone is on a call.
No sound.
- Adjust the volume of the connected device (amplifier, etc.).
- Check to see if the cable connections to the input and output terminals are incorrect. If this is the case, turn off this unit and reconnect the cables correctly.
- Insert the plugs of the cables to be connected all the way in.
Playback does not start.
- Depending on your environment or connected devices, it may take some time.
The settings are reset to the factory defaults.
- Updating the firmware may reset the settings.
This unit turns off suddenly.
- If the SSD is removed or malfunctions while this unit is in operation, this unit will turn off automatically. Check to see if the SSD is attached correctly to the main unit. (See "SSD")
- If this unit still turns off even after you have attached the SSD correctly, there may be a malfunction with the SSD.
The sound is interrupted.
- Depending on your environment, the audio may be interrupted during playback. Check the operating instructions of the connected device and the connection to the device.
Recording does not start.
- Make sure that the disc is compatible with this unit.
- There is moisture on the lens. Wait for about an hour and then try again.
- Recording to unfinalized CD-R and CD-RW discs is not possible.
- WMA/MP3 is not supported. Refer to "CDs" for information about the discs this unit can play back.
Cannot connect to the network.
- Confirm the network connection and settings. (See "Connections")
- Make sure that the multicast function on the wireless router is enabled.
- Make sure that the devices, smartphone and tablet are connected to the same network as this system.
- Turn off and on the network connection of the smartphone, tablet or connected device, and reconnect it to this unit.
Playback does not start.
The sound is interrupted.
- If the signal is interrupted, changing the location and angle of the broadband router may improve the signal reception of the connected device.
- If several wireless devices are simultaneously using the same wireless network as this unit, try turning off the other devices or reducing their wireless network usage.
- If playback has stopped, check the playback status on the smartphone, tablet or connected device.
This unit does not recognize the USB connection correctly.
- Check to see if another device can detect your USB device.
- If you connect USB HDD to this unit, use the USB cable that is supplied with the HDD.
The USB device responds slowly.
- Large-capacity USB devices may respond slowly.
The SSD is not detected.
- Check to see if the SSD is attached correctly. (See "SSD")
The STATUS indicator is flashing red.
- When you replaced the SSD, you might have forgotten to format the new one. Before using a new SSD, be sure to format it on this unit.
IMPORTANT SAFETY INSTRUCTIONS
Read these operating instructions carefully before using the unit. Follow the safety instructions on the unit and the applicable safety instructions listed below. Keep these operating instructions handy for future reference.
- Read these instructions.
- Keep these instructions.
- Heed all warnings.
- Follow all instructions.
- Do not use this apparatus near water.
- Clean only with dry cloth.
- Do not block any ventilation openings. Install in accordance with the manufacturer's instructions.
- Do not install near any heat sources such as radiators, heat registers, stoves, or other apparatus (including amplifiers) that produce heat.
- Do not defeat the safety purpose of the polarized or grounding-type plug. A polarized plug has two blades with one wider than the other. A grounding-type plug has two blades and a third grounding prong. The wide blade or the third prong are provided for your safety. If the provided plug does not fit into your outlet, consult an electrician for replacement of the obsolete outlet.
- Protect the power cord from being walked on or pinched particularly at plugs, convenience receptacles, and the point where they exit from the apparatus.
- Only use attachments/accessories specified by the manufacturer.
- Use only with the cart, stand, tripod, bracket, or table specified by the manufacturer, or sold with the apparatus. When a cart is used, use caution when moving the cart/apparatus combination to avoid injury from tip-over.
![]()
- Unplug this apparatus during lightning storms or when unused for long periods of time.
- Refer all servicing to qualified service personnel. Servicing is required when the apparatus has been damaged in any way, such as power-supply cord or plug is damaged, liquid has been spilled or objects have fallen into the apparatus, the apparatus has been exposed to rain or moisture, does not operate normally, or has been dropped.


Unit
![burn hazard]()
![shock hazard]()
To reduce the risk of fire, electric shock or product damage,- Do not expose this unit to rain, moisture, dripping or splashing.
- Do not place objects filled with liquids, such as vases, on this unit.
- Use only the recommended accessories.
- Do not remove covers.
- Do not repair this unit by yourself. Refer servicing to qualified service personnel.
- Do not let metal objects fall inside this unit.
- Do not place heavy items on this unit.

AC power supply cord
- The power plug is the disconnecting device. Install this unit so that the power plug can be unplugged from the socket outlet immediately.
![shock hazard]() Ensure the earth pin on the power plug is securely connected to prevent electrical shock.
Ensure the earth pin on the power plug is securely connected to prevent electrical shock. - An apparatus with CLASS I construction shall be connected to a power socket outlet with a protective earthing connection.

Unit
- This unit utilizes a laser. Use of controls or adjustments or performance of procedures other than those specified herein may result in hazardous radiation exposure.
- Do not place sources of naked flames, such as lighted candles, on this unit.
- This unit may receive radio interference caused by mobile telephones during use. If such interference occurs, please increase separation between this unit and the mobile telephone.
Placement
- Place this unit on an even surface.
![burn hazard]()
![shock hazard]()
To reduce the risk of fire, electric shock or product damage,- Do not install or place this unit in a bookcase, built-in cabinet or in another confined space. Ensure this unit is well ventilated.
- Do not obstruct this unit's ventilation openings with newspapers, tablecloths, curtains, and similar items.
- Do not expose this unit to direct sunlight, high temperatures, high humidity, and excessive vibration.
- Keep your speakers at least 10 mm (13/32")away from the system for proper ventilation.
- Do not lift or carry this unit by holding any of its levers. Doing so may cause this unit to fall, resulting in personal injury or malfunction of this unit.
- Do not lift or carry this unit by holding the recessed portions on its SSD mount.
![]()


RISK OF ELECTRIC SHOCK
DO NOT OPEN
TO REDUCE THE RISK OF ELECTRIC SHOCK, DO NOT REMOVE SCREWS.
NO USER-SERVICEABLE PARTS INSIDE.
REFER SERVICING TO QUALIFIED SERVICE PERSONNEL.
 | The lightning flash with arrowhead symbol, within an equilateral triangle, is intended to alert the user to the presence of uninsulated "dangerous voltage" within the product's enclosure that may be of sufficient magnitude to constitute a risk of electric shock to persons. |
 | The exclamation point within an equilateral triangle is intended to alert the user to the presence of important operating and maintenance (servicing) instructions in the literature accompanying the appliance. |
- The illustrations shown may differ from your unit.
If you have any questions, visit:
U.S.A.: http://shop.panasonic.com/support
Canada: www.panasonic.ca/english/support
Register online at http://shop.panasonic.com/support (U.S. customers only)
Documents / Resources
References
![www.apple.com]() App Store - Apple
App Store - Apple![play.google.com]() Google Play
Google PlaySupport | Technics
![shop.panasonic.com]() Panasonic - Official Consumer Product Support
Panasonic - Official Consumer Product Support![www.panasonic.ca]() Panasonic - Official Consumer Product Support
Panasonic - Official Consumer Product Support
Download manual
Here you can download full pdf version of manual, it may contain additional safety instructions, warranty information, FCC rules, etc.
Advertisement
Thank you! Your question has been received!


Need Assistance?
Do you have a question about the ST-G30 that isn't answered in the manual? Leave your question here.