Table of Contents
Advertisement
Quick Links
Model No. 831.299284
Serial No.
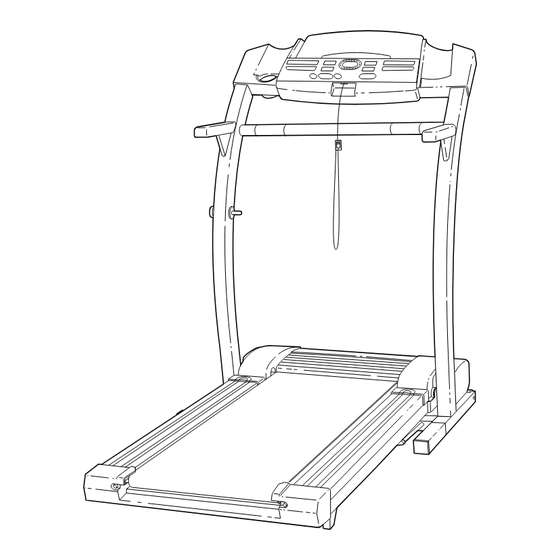
Find the serial number in the location
shown below. Write the serial number
in the space above for reference.
Serial
Number
Decal
SEARS, ROEBUCK AND CO.
HOFFMAN ESTATES, IL 60179
CAUTION
Read all precautions and instruc-
tions in this manual before using
this equipment. Save this manual
for future reference.
®
USER'S MANUAL
Visit our website at
www.proform.com
new products, prizes,
fitness tips, and much more!
Patent Pending
Advertisement
Table of Contents

Related Manuals for Sears PRO-FORM 830QT


Summary of Contents for Sears PRO-FORM 830QT
- Page 1 Find the serial number in the location shown below. Write the serial number in the space above for reference. Serial Number Decal SEARS, ROEBUCK AND CO. HOFFMAN ESTATES, IL 60179 Patent Pending CAUTION Visit our website at Read all precautions and instruc- tions in this manual before using www.proform.com...
-
Page 2: Table Of Contents
® TABLE OF CONTENTS IMPORTANT PRECAUTIONS ..............3 BEFORE YOU BEGIN . -
Page 3: Important Precautions
IMPORTANT PRECAUTIONS WARNING: To reduce the risk of burns, fire, electric shock, or injury to persons, read the following important precautions and information before operating the treadmill. 1. It is the responsibility of the owner to ensure pation of 450 joules. The surge suppressor that all users of this treadmill are adequately must be electrically rated for 120 volts AC and informed of all warnings and precautions. - Page 4 35 or persons with pre-existing health problems. Read all instructions before using. SEARS assumes no responsibility for personal injury or property damage sustained by or through the use of this product.
-
Page 5: Before You Begin
BEFORE YOU BEGIN Thank you for selecting the revolutionary PROFORM ® Monday through Saturday, 7 a.m. until 7 p.m. Central 830QT treadmill. The 830QT treadmill combines ad- Time (excluding holidays). To help us assist you, vanced technology with innovative design to help you please note the product model number and serial num- get the most from your exercise program in the conve- ber before calling. -
Page 6: Assembly
ASSEMBLY Assembly requires two people. Set the treadmill in a cleared area and remove all packing materials. Do not dispose of the packing materials until assembly is completed. Assembly requires the included allen wrench and your own phillips screwdriver Note: The underside of the treadmill walking belt is coated with high-performance lubricant. During shipping, a small amount of lubricant may be transferred to the top of the walking belt or the shipping carton. - Page 7 4. Locate the plastic tie in the post on the left Upright (82). Hold a Handrail Extension (85) in the position shown. Insert the plastic tie into the Handrail Extension as you insert the Handrail Extension into the post. Attach the Post Handrail Extension with three Screws (76).
-
Page 8: Operation And Adjustment
OPERATION AND ADJUSTMENT THE PERFORMANT LUBE WALKING BELT This product is for use on a nominal 120-volt circuit, and has a grounding plug that looks like the plug illus- Your treadmill features a walking belt coated with trated in drawing 1 below. A temporary adapter that PERFORMANT LUBE , a high-performance lubricant. - Page 9 CONSOLE DIAGRAM Manual/Program Indicators Displays LED Track Displays i-Fit.com Indicator Note: If there is a thin sheet of clear plastic Clip on the face of the console, remove it. home stereo, portable stereo, or computer and play CAUTION: special iFit.com CD programs (CD’s are available sep- Before operating the arately).
- Page 10 STEP-BY-STEP CONSOLE OPERATION exercise, change the speed of the walking belt as desired by pressing the SPEED buttons. Make sure that the on/off switch near the power To stop the walking belt, press the STOP button. cord is in the on The TIME/INCLINE/SEG TIME display will begin Position position.
- Page 11 CALS/FAT CALS/ Measure your pulse, if desired. PULSE display—This display shows the ap- Stand on the Sensors proximate numbers of foot rails and calories and fat calories place your you have burned (see hands on the FAT BURNING on page 22). Every seven sec- metal contacts onds, the display will change from one number to on the pulse bar.
- Page 12 One speed setting and one incline setting are pro- HOW TO USE PERSONAL TRAINER PROGRAMS grammed for each segment. When only three sec- onds remain in the first segment, a series of tones will sound and the treadmill will automatically ad- Insert the key into the console.
- Page 13 HOW TO CONNECT YOUR PORTABLE STEREO HOW TO CONNECT THE TREADMILL TO YOUR CD PLAYER, VCR, OR COMPUTER Note: If your stereo has an RCA-type AUDIO OUT jack, see instruction A below. If your stereo has a 3.5mm LINE OUT jack, see instruction B. If your To use iFit.com CD’s, the treadmill must be con- stereo has only a PHONES jack, see instruction C.
- Page 14 HOW TO CONNECT YOUR HOME STEREO HOW TO CONNECT YOUR COMPUTER Note: If your stereo has an unused LINE OUT jack, Note: If your computer has a 3.5mm LINE OUT jack, see instruction A below. If the LINE OUT jack is see instruction A.
- Page 15 HOW TO CONNECT YOUR VCR HOW TO USE IFIT.COM CD AND VIDEO PROGRAMS Note: If your VCR has an unused AUDIO OUT jack, see instruction A below. If the AUDIO OUT jack is being used, see instruction B. If you have a TV To use iFit.com CD’s or videocassettes, the treadmill with a built-in VCR, see instruction B.
- Page 16 • adjust the volume of your CD player or VCR. If Press the PLAY button on your CD player or the volume is too high or too low, the console VCR. may not detect the program signals A moment after the button is pressed, your per- •...
- Page 17 Follow the desired links on our internet site to HOW TO USE PROGRAMS DIRECTLY FROM select a program. OUR INTERNET SITE Read and follow the on-line instructions for using a program. Our new internet site at www.iFit.com allows you to access a large selection of programs that interactively Follow the on-line instructions to start the control your treadmill to help you achieve your specific...
- Page 18 IMPORTANT: The CALO- Follow your progress with the LED track and RIES/FAT CALORIES/ the four displays. PULSE display should be blank. If a “d” appears in the See step 5 on page 10. display, the console is in the “demo” mode. This mode is Measure your pulse, if desired.
-
Page 19: How To Fold And Move The Treadmill
HOW TO FOLD AND MOVE THE TREADMILL HOW TO FOLD THE TREADMILL FOR STORAGE Before folding the treadmill, adjust the incline to the lowest position. If this is not done, the treadmill may be permanently damaged. Next, unplug the power cord. CAUTION: You must be able to safely lift 45 pounds (20 kg) in order to raise, lower, or move the treadmill. -
Page 20: Trouble-Shooting
TROUBLE-SHOOTING Most treadmill problems can be solved by following the simple steps below. Find the symptom that applies, and follow the steps listed. If further assistance is needed, call our toll-free HELPLINE at 1-800-736-6879, Monday through Saturday, 7 a.m. until 7 p.m. Central Time (excluding holidays). PROBLEM: The power does not turn on SOLUTION: a. - Page 21 PROBLEM: The walking belt slows when walked on SOLUTION: a. Use only a UL-listed surge protector, rated at 15 amps, with a 14-gauge cord of five feet or less in length. b. If the walking belt is overtightened, treadmill perfor- 3”–4”...
-
Page 22: Conditioning Guidelines
CONDITIONING GUIDELINES uses easily accessible carbohydrate calories for en- WARNING: ergy. Only after the first few minutes does your body Before beginning this begin to use stored fat calories for energy. If your goal or any exercise program, consult your physi- is to burn fat, adjust the speed and incline of the tread- cian. -
Page 23: Part List
PART LIST—Model No. 831.299284 R0600A To locate the parts listed below, refer to the EXPLODED DRAWING attached in the center of this manual. No. Qty. Description No. Qty. Description No. Qty. Description Motor Belt Isolator Screw Front Wheel Pulley/Flywheel/Fan Plastic Fastener Incline Motor Shield Motor Nut Shield... -
Page 26: Full 90-Day Warranty
SEARS TREADMILL EXERCISER, contact the nearest SEARS Service Center throughout the United States and SEARS will repair or replace the TREADMILL EXERCISER, free of charge. This warranty does not apply when the TREADMILL EXERCISER is used commercially or for rental pur- poses.