Woods 59744 - Battery Operated In-Wall Timer Manual
- Programming manual (4 pages)
Advertisement
Installation

- Open battery door on the timer.
- Remove back plate from the timer by unscrewing the bottom 2 screws (located below battery cavity).
- Begin with the wall switch in the down and OFF position. The first programmed setting will flip the wall switch ON.
- Unscrew the 2 screws from the switch plate on the wall.
- Using the 2 long fiat-head screws (provided with this timer), mount the timer back plate to the wall switch plate (note timer back plate may extend above the switch plate)
Instructions
- While holding the timer in your hand, insert (2) AA batteries.
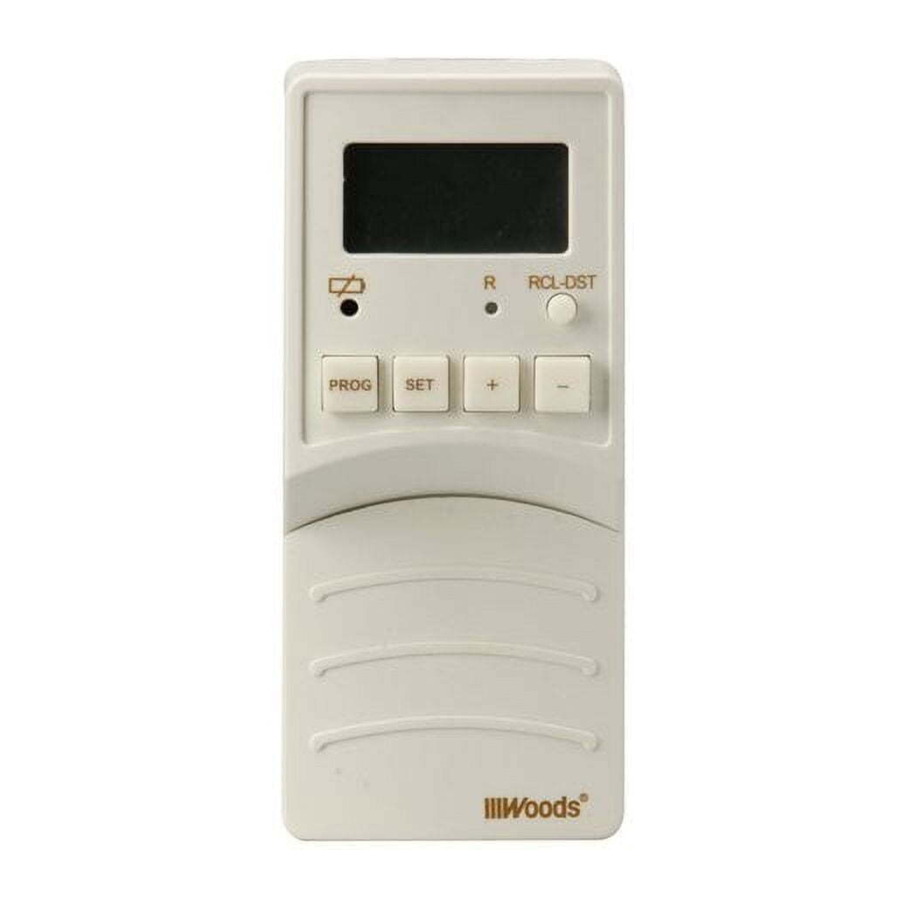
- Press the R button with a toothpick to erase any previous settings.
- To set the current time:
Press and hold the SET button for 2 seconds. The hour will begin to flash, press the + or - button to adjust the hour up or down. To change from AM to PM press the + or - button 12 times. Press the SET button again to advance to the minute setting. The minutes will begin to flash, press the + or - button to adjust the minutes up or down. Press the PROG button to exit setting time of day. - To Program the Timer:
Press the PROG button once to display the first setting "1 ON --:--". Press the SET button once to enter the hour setting mode. The hour will begin to flash, press the + or - button to adjust the hour up or down. Press the SET button again to enter the minutes setting mode. The minutes will begin to flash, press the + or - button to adjust the minutes up or down. Press the SET button again to enter the program setting mode. Press the + button once to display the second setting "1 OFF --:--". Repeat the procedure to create the "off" setting. Press the PROG button to exit program setting mode. - Make sure the timer is in the OFF setting (see the section "To Override the Timer") and the toggle switch on the wall is in the OFF position.
- Attach the timer to the timer back plate using the upper tabs as guides. Secure the timer to back plate using 2 small screws (previously removed in step 2). Tighten screws below battery cavity until unit is stable.
- To turn the timer ON, press the + button until AUTO appears in the lower left corner, or set according to the section "To Override the Timer".
To Override the Timer
Press the + button as necessary to display:
"ON" - the connected device is switched on permanently.
"OFF" - the connected device is switched off permanently.
"AUTO" - the connected device follows your programmed timer settings.
Review On/Off Settings
It is important to review all settings, even if you only use one, to make sure there are no extra, unintended settings. Press the PROG button once to display the first setting "1 ON". Press the + button to advance and cycle through the settings. Stop on any setting you want to change or remove.
- To Change a Setting: press the SET button once to enter the timer program setting mode.
- To Remove or Restore a Setting: press the PROG button to display the first setting "1 ON" and press the + button until the display shows the setting you want to remove. Press the RCL-DST button once to remove a setting. The display will replace the setting with dashes "--:--". Press the RCL-DST button again to restore a setting (and press SET if you then want change the setting).
Daylight Savings Time Feature
Press RCL-DST button to advance the time of day one hour for daylight savings time. "+1 h" will appear in the lower left corner of the display and the clock will automatically adjust forward one hour. Press the button again to set the time back one hour and "+1 h" will disappear.
To Use
The timer will operate according to the programmed settings. When the timer moves the toggle switch, you will be able to hear the motor turning. To keep the toggle switch always on or always off see the section "To Override the Timer".
Batteries
This timer requires (2) AA batteries which are not included. The better the battery the longer the programming remains.
Low Battery Alert
When the batteries are low, the red light (under the battery icon) will come on. This means you should change the batteries within 7 days. When the batteries are almost drained, the light will begin to flash. Once the low battery alert light begins to flash, the batteries need to be changed within 5 minutes or the programming will be lost.
| FOR INDOOR USE ONLY |
www.colemancable.com

Documents / ResourcesDownload manual
Here you can download full pdf version of manual, it may contain additional safety instructions, warranty information, FCC rules, etc.
Download Woods 59744 - Battery Operated In-Wall Timer Manual
Advertisement
Thank you! Your question has been received!


Need Assistance?
Do you have a question about the 59744 that isn't answered in the manual? Leave your question here.