Advertisement
Quick Links
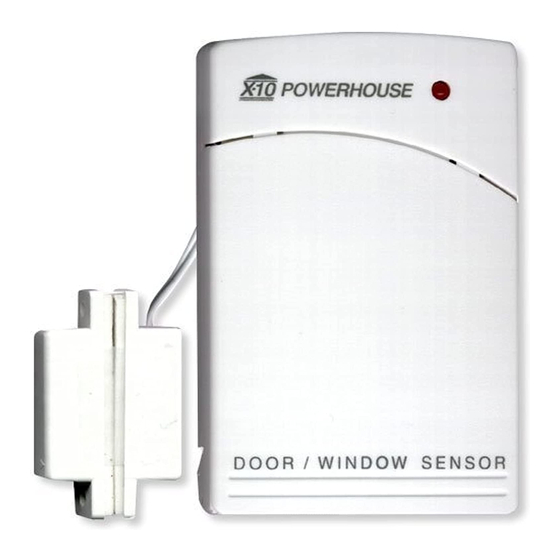
Door/Window Sensor, Model DS10A Set Up and Operating Instructions
Installing the Door/Window Sensor
• Attach the Door/Window Sensor to the wall using the
mounting screws provided.
• Fit the Door/Window Sensor as high as possible at the top
of the door/window.
• Make sure the arrows on the magnetic switches are facing
each other and that they separate cleanly when the door or
window is opened.
• Set the DELAY slide switch to MIN to always trigger the
alarm instantly (for windows), or to MAX to trigger the alarm
after a preset entry delay when the system is armed in
DELAY mode (for doors).
DOOR/WINDOW SENSOR
DELAY
MAX
MIN
Ideal location
TEST
DOOR/WINDOW SENSOR
Sliding window
Registering the Door/Window Sensor with the
Security Console
• Fit two AA Alkaline batteries in the battery compartment.
Observe polarity.
• Press and hold the TEST button for about a second. The red
indicator flashes twice when you release it. This confirms it
has generated a new security code.
• Set the slide switch on the Security Console to INSTALL.
• Press the TEST button on the Door/Window Sensor. The
Console beeps once to confirm and the next available zone
indicator lights.
• Return the Console's slide switch to the RUN1 or RUN2
position.
Testing the Door/Window Sensor
• Set the slide switch on the Security Console to RUN2.
• Open the door or window with the sensor attached. The
Console chimes to acknowledge and the appropriate zone
indicator lights.
*Note: you can install a total of 16 zones in the Console. This can
be a combination of Door/Window Sensors and Motion Sensors.
E.G. 8 Door/Window Sensors AND 8 Motion Sensors. See your
Security System Owner's Manual for more information.
X10.com, a Div. of X10 Wireless Technology, Inc.
For additional help, visit: http://www.x10.com/support
DOOR/WINDOW SENSOR
Two windows
(requires accessory
magnetic switch
pair)
Operation
When the security system is NOT armed and the Console is set
to RUN2, the Console chimes when you open a door or window
protected by the DS10A. The red indicator light for that zone on
the Console also lights up. In RUN1 mode there are no chimes.
When the security system IS armed, opening a door or window
trips the alarm. If the DS10A is set to MIN the alarm trips instantly.
If the DS10A is set to MAX (and the Console is armed in the
DELAY mode) there is a 30 second delay before the alarm trips
after you open the door or window.
Replacing batteries
Open the battery compartment and replace the batteries with two
AA alkaline batteries. After replacing the batteries, the following
steps are necessary to determine that the Console still recognizes
the DS10A.
• Place the Console's slide switch to RUN2.
• Press TEST on the DS10A. If the Console chimes, it recognizes
the DS10A and no further action is necessary.
If the Console did not chime:
Place the Console's slide switch to INSTALL. Press TEST on the
DS10A. The Console beeps and logs in the DS10A to the next
available zone. To make sure the Console logs the DS10A back
into the same zone it was allocated to before you changed the
batteries, wait four hours after removing the old batteries before
reinstalling (until the appropriate zone indicator on the Console
starts flashing).
F.C.C. CAUTION - THIS DEVICE COMPLIES WITH PART 15
OF THE FCC RULES. OPERATION IS SUBJECT TO THE
FOLLOWING TWO CONDITIONS: (1) THIS DEVICE MAY
NOT CAUSE HARMFUL INTERFERENCE, AND (2) THIS
DEVICE MUST ACCEPT ANY INTERFERENCE RECEIVED,
INCLUDING INTERFERENCE THAT MAY CAUSE
UNDESIRED OPERATION.
NOTE: NO CHANGES OR MODIFICATIONS MAY BE MADE
TO THE UNITS. ANY CHANGES MADE TO THE UNITS
WILL VOID THE USER'S AUTHORITY TO OPERATE THE
EQUIPMENT.
X10 Wireless Technology, Inc. Limited One Year Warranty
X10.com, a division of X10 Wireless Technology, Inc. (X10)
warrants X10 products to be free from defective material and
workmanship for a period of one (1) year from the original date of
purchase at retail. X10 agrees to repair or replace, at its sole
discretion, a defective X10 product if returned to X10 within the
warranty period and with proof of purchase. If service is required
under this warranty: Call 1-800-442-5065, visit www.x10.com, or
e-mail support@x10.com.
DS10A-10/02
Advertisement

