
Related Manuals for NCR VOYIX 7772-K169

Summary of Contents for NCR VOYIX 7772-K169
- Page 1 External Speaker Kit Instructions 7772-K169 Issue B Confidential and proprietary information of NCR Corporation. Unauthorized use, reproduction and/or distribution is strictly prohibited...
- Page 2 NCR, therefore, reserves the right to change specifications without prior notice. All features, functions, and operations described herein may not be marketed by NCR in all parts of the world. In some instances, photographs are of equipment prototypes. Therefore, before using this document, consult with your NCR representative or NCR office for information that is applicable and current.
- Page 3 Table of Contents Copyright External Speaker Kit Contents Installation Procedure Confidential and proprietary information of NCR Corporation. Unauthorized use, reproduction and/or distribution is strictly prohibited.
- Page 4 Revision Record Issue Date Remarks Jun 2021 First Issue Dec 2021 Added Warning statement Confidential and proprietary information of NCR Corporation. Unauthorized use, reproduction and/or distribution is strictly prohibited.
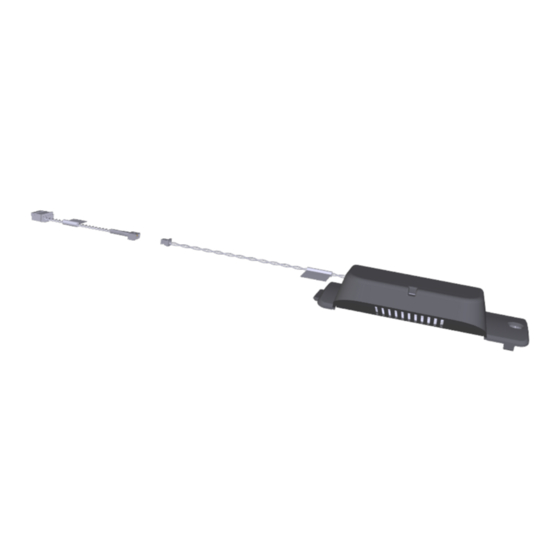
- Page 5 External Speaker This kit provides an External Speaker for NCR CX7 All-in-One POS (7772). Kit Contents Confidential and proprietary information of NCR Corporation. Unauthorized use, reproduction and/or distribution is strictly prohibited.
- Page 6 Remove the two (2) screws that secure the Cable Cover to the Back Cover. b. Rotate and unhook the Cable Cover from the Back Cover. Confidential and proprietary information of NCR Corporation. Unauthorized use, reproduction and/or distribution is strictly prohibited.
- Page 7 Remove the Ethernet Cable from the Cable Management Hook then disconnect the Cable. 4. Loosen the two (2) captive screws that secure the Back Cover to the Display. Confidential and proprietary information of NCR Corporation. Unauthorized use, reproduction and/or distribution is strictly prohibited.
- Page 8 5. Rotate the Back Cover away from the Display and unhook the Back Cover Tabs. Confidential and proprietary information of NCR Corporation. Unauthorized use, reproduction and/or distribution is strictly prohibited.
- Page 9 6. Insert a flat screw driver in the slot of Port C to unsnap the Plate from the display housing. 7. Disconnect the Internal Speaker Cable from the Motherboard and remove the Internal Speaker (2 screws). Confidential and proprietary information of NCR Corporation. Unauthorized use, reproduction and/or distribution is strictly prohibited.
- Page 10 8. Route the External Speaker Cable through the port opening as shown and connect the External Speaker Cable to the Extension Cable. 9. Connect the Extension Cable to the Motherboard. Confidential and proprietary information of NCR Corporation. Unauthorized use, reproduction and/or distribution is strictly prohibited.
- Page 11 11. Secure the External Speaker with a screw. 12. Reinstall the Display Back Cover. 13. Reconnect the 180-degree USB-C Cable and Ethernet Cable. 14. Reinstall the Cable Cover. Confidential and proprietary information of NCR Corporation. Unauthorized use, reproduction and/or distribution is strictly prohibited.