Table of Contents
Advertisement
NOTICE
FCC Statement
This device complies with Part 15 of the FCC Rules. Operation is subject to the following two conditions:
This device may not cause harmful interference, and
This device must accept any interference received, including interference that may cause undesired
operation.
Note: This equipment has been tested and found to comply with the limits for Class B digital devices,
pursuant to Part 15 of the FCC rules. These limits are designed to provide reasonable protection against
harmful interference in a residential installation. This equipment generates, uses and can radiate radio
frequency energy and, if not installed and used in accordance with the instructions, may cause harmful
interference to radio communications. However, there is no guarantee that interference will not occur in a
particular installation. If this equipment does cause harmful interference to radio or television reception,
which can be determined by turning the equipment off and on, the user is encouraged to try to correct
the interference by one or more of the following measures:
Reorient or relocate the receiving antenna.
Increase the separation between the equipment and receiver.
Connect the equipment into an outlet on a circuit different from that to which the receiver is connected.
Consult the dealer or an experienced radio/TV technician for help.
Use of shielded cable is required to comply with Class B limits in Subpart B of Part 15 of the FCC rules.
Do not make any changes or modifications to the equipment unless otherwise specified in the manual. If
such changes or modifications should be made, you could be required to stop operation of the equipment.
1 1 1 1
Advertisement
Table of Contents

Related Manuals for Vivitar Vivicam 3785


Summary of Contents for Vivitar Vivicam 3785
-
Page 1: Fcc Statement
NOTICE FCC Statement This device complies with Part 15 of the FCC Rules. Operation is subject to the following two conditions: This device may not cause harmful interference, and This device must accept any interference received, including interference that may cause undesired operation. -
Page 2: Read This First
Contact your dealer for precise product definition and included accessories. The manufacturer assumes no liability for any errors or discrepancies in this user’s manual. For user manual and driver updates, refer to the Vivitar website. are U.S. registered trademarks of Microsoft Corporation. -
Page 3: Safety Instructions
SAFETY INSTRUCTIONS Read and understand all Warnings and Cautions before using this product. Warnings If foreign objects or water have entered the camera, turn the power OFF and remove the batteries. Continued use in this state might cause fire or electric shock. Consult the store of purchase. If the camera has fallen or its case has been damaged, turn the power OFF and remove the batteries. - Page 4 Cautions Insert the batteries paying careful attention to the polarity (+ or –) of the terminals. Inserting the batteries with its polarities inverted might cause fire and injury, or damage to the surrounding areas due to the battery rupturing or leaking. Do not fire the flash close to anyone’s eyes.
-
Page 5: Notes On Battery Usage
When placing the batteries into the VIVICAM 3785, check the polarity markings on the batteries ( - and + ) to ensure that the batteries are inserted correctly. -
Page 6: Table Of Contents
CONTENTS INTRODUCTION ... 8 Overview ... 8 Package Contents ... 9 Optional Accessories ... 9 PRODUCT FEATURES ... 10 Front View ... 10 Rear View ... 11 Multi-Selector ... 12 LED Indicators ... 13 LCD Monitor Information ... 14 PREPARING YOUR CAMERA ... 18 Installing the Batteries (Optional Accessory)...18 Attaching the Camera Strap...18 Using an SD Memory Card... - Page 7 INSTALLING PHOTOSUITE...40 INSTALLING PHOTOVISTA...41 INSTALLING ACROBAT READER...42 USER MANUAL...43 LIST OF MENU OPTIONS...44 Capture Menu...44 Playback Menu...49 Video Clip Menu...50 Setup Menu...51 CONNECTING YOUR CAMERA TO OTHER DEVICES...53 CAMERA SPECIFICATIONS...54 7 7 7 7...
-
Page 8: Introduction
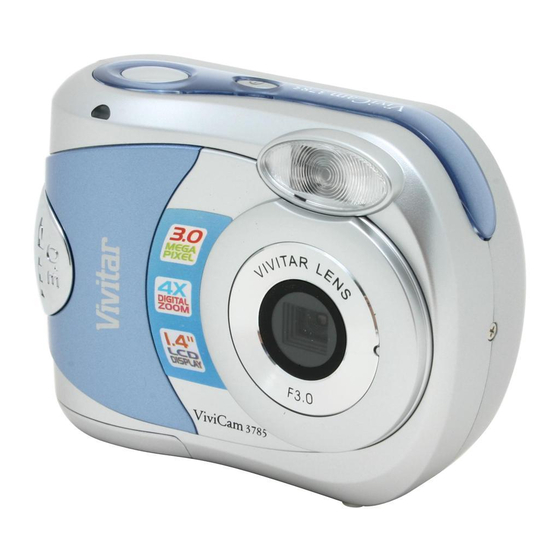
INTRODUCTION Overview Your new ViviCam 3785 delivers high quality, 2048 x 1536 resolution images using a 3.0 Megapixel sensor. An auto-flash sensor automatically detects the shooting (lighting) conditions and determines whether the flash should be used. This feature helps ensure that your images turn out right. -
Page 9: Package Contents
Package Contents Carefully unpack your ViviCam 3785 and ensure that you have the following items. In the event that any item is missing or if you find any mismatch or damage, promptly contact to your dealer. ViviCam 3785 Digital Camera User’s Manual... -
Page 10: Product Features
PRODUCT FEATURES Front View 1. Shutter button 2. Power button 3. Flash 4. Lens 5. Strap eyelet 6. Self-timer LED... -
Page 11: Rear View
Rear View 1. LED indicator 2. MODE button 3. Multi-selector MENU button 5. USB port 6. Battery/SD card cover 7. Tripod socket 8. LCD monitor... -
Page 12: Multi-Selector
Multi-Selector Arrow button (Up) Thumbnail button Arrow button (Right) Display button OK button Digital zoom button Arrow button (Down) Flash button Delete button Arrow button (Left) Self-timer... -
Page 13: Led Indicators
The ViviCam 3785 is powered and ready ViviCam 3785 error Charging the flash Image is being recorded to memory USB communication/transfer in progress The ViviCam 3785 is ready to record images (or movies) The self-timer function is activated Error message Valid button event... -
Page 14: Lcd Monitor Information
LCD Monitor Information These indicators are displayed when capturing still images: 1. Capture mode 2. Image resolution ] 2048X1536 (Native 3 MP resolution) ] 1600X1200 ] 1280X960 ] 640X480 3. Image quality ] Fine ] Normal ] Economy 4. Sharpness ] High ] Medium ] Low... - Page 15 These indicators are displayed when playing images back: 22/26 1. Reverse 2. [ ] Card indicator (if present) 3. Forward 4. [ ] Protect indicator (if protected) 5. Current image/total number of images 6. Battery level ] Full ] Partly consumed ] Nearly exhausted ] Virtually no battery power...
- Page 16 These indicators are displayed when recording video clips: 1. Movie mode 2. Recording indicator 3. Video counter 4. [ ] Card indicator (if present) 5. Battery level ] Full ] Partly consumed ] Nearly exhausted ] Virtually no battery power...
- Page 17 These indicators are displayed when playing video clips back: 00:00 1.Recorded time ] Card indicator (if present) 3. Battery level ] Full ] Partly consumed ] Nearly exhausted ] Virtually no battery power...
-
Page 18: Epreparing Your Camera
You may use 2 AA size batteries (either Alkaline or Ni-MH) to power your Vivicam 3785. Most often the Vivicam 3785 will be shipped with two AA alkaline batteries. These batteries are adequate to power-up the camera and demonstrate its functionality for a limited period of time. -
Page 19: Using An Sd Memory Card (Optional Accessory)
Be sure to format the memory card with this Vivicam 3785 before its initial usage. The Vivicam 3785, like most digital cameras will automatically use a memory card if it is inserted into the memory card slot. This is called °ßcard preference°®. Data stored in internal memory will not be accessible if a memory card is present. -
Page 20: Setting The Date And Time
Follow the steps below to set the OSD (On-Screen Display) language. 1. Select a language that you prefer by using the 2. Press the button to confirm. Note: The language setting will be retained even if the ViviCam 3785 is turned off. button. button. buttons. -
Page 21: Basic Functions
Turning the Power On 1. Press and hold the button for two seconds to turn on the ViviCam 3785. The LED indicator lights red while the ViviCam 3785 is initialized. Turning the Power Off Press the button again to turn off the ViviCam 3785. -
Page 22: Digital Zoom
Vivicam 3785 repeatedly until the desired flash mode icon appears on the LCD monitor. 3. Compose your image and press the shutter button. The ViviCam 3785 has four flash modes: Off, On (Fill flash), Automatic with button again. ] Movie mode. - Page 23 The table below will help to select the appropriate flash mode: Flash Mode Flash off Fill flash (on) Automatic with Red-eye reduction Automatic flash Description The flash will not fire. Select this mode when capturing images in a place where flash photography is prohibited, or when the distance to the subject is beyond the effective range of the flash.(10 feet or more) The flash will always fire regardless of the lighting conditions.
-
Page 24: Self-Timer
2 seconds or the first 7 seconds and then blinking rapidly for the last 3 seconds. 1. Secure the ViviCam 3785 to a tripod or place it on a stable surface. 2. Press the button to turn on your ViviCam 3785. -
Page 25: Setting The Image Resolution And Quality
These settings affect the number of images that can be stored in memory, or on an SD memory card. As you get to know the ViviCam 3785, it is recommended that you try each quality and resolution setting to get an appreciation for the effects that these settings will have on your images. - Page 26 The frame counter indicates the approximate number of images that can be stored in the internal memory or the SD memory card at the ViviCam 3785’s image quality and size settings. The number of recordable images may vary depending on the recorded subject and the capacity of the memory card, or if there are files other than images, or when the recording is made while switching the image quality/resolution.
-
Page 27: Recording Video Clips
] Movie mode allowing you to record silent video clips at a resolution of 320X240 pixels. 1. Press the button to turn on your ViviCam 3785. 2. Press the MODE button to enter the [ 3. Start recording a video clip by pressing the shutter button. -
Page 28: Image Playback
Single Image Replay To Play back still images one image at a time. 1. Press the button to turn on your ViviCam 3785. 2. Press the MODE button twice to enter [ The last recorded image appears on the LCD. -
Page 29: Playback Zoom
While reviewing your images, you may enlarge a selected portion of an image. This magnification capability allows you to view fine details. 1. Press the button to turn on your ViviCam 3785. 2. Press the MODE button twice to enter [ The last image frame appears on the LCD monitor. -
Page 30: Viewing Nine Images At A Time
This function allows you to view nine thumbnail images on the LCD monitor simultaneously so that you can quickly locate a particular image. 1.Press the button to turn on your ViviCam 3785. 2.Press the MODE button twice to enter [ 3.Press the thumbnail button and nine thumbnail images appear on the LCD monitor. -
Page 31: Viewing Video Clips
To view recorded video clips, follow the steps below: 1. Press the button to turn on your ViviCam 3785. 2. Press the MODE button twice to enter [ 3. Select the video clip that you want to view by using the Slide Show The Slide show function enables you to play your images back automatically in sequential order as a slide show. -
Page 32: Protecting Images
Protecting Images This feature allows you to prevent images from being accidentally erased. 1. Press the button to turn on your ViviCam 3785. 2. Press the MODE button twice to enter [ button to enter the Playback menu. 3. Select [Protect] by using the 4. -
Page 33: Deleting Images
You can delete a captured image or a recorded video clip at a time by pressing the 1. Press the button to turn on your ViviCam 3785. 2. Press the MODE button continuously to enter [ The last image frame appears on the LCD monitor. -
Page 34: Deleting All Images And Video Clips
Please be aware that deleted images cannot be recovered. Exercise adequate caution before deleting a file. Protected images cannot be deleted with the delete function. If a memory card is present; the ViviCam 3785 will automatically use the card in preference to internal memory. ] Playback mode. Then press button, and press the button. -
Page 35: Formatting An Sd Memory Card Or Internal Memory
For complete compatibility, be sure NOT to select FAT 32 as the file system when you format the SD card in your computer. Memory cards formatted in FAT 32 file system will not be recognized by this ViviCam 3785. ] Playback mode. Then press buttons, and press the button. -
Page 36: Transferring Recorded Images/Video Clips To Your Computer
You can share recorded images/video clips with your family or friends via e-mail or post them on the Web. Before doing these things, you need to connect the ViviCam 3785 to your computer using the USB cable and then transfer the images/video clips. -
Page 37: Step 1: Install The Usb Driver On A Windows
After the USB driver installation is complete, restart your computer. Using the Vivicam 3875 on a Macintosh Computer If your Mac is running OS 9.6, or OSX there is no driver or extension. Simply connect the Vivicam 3785 to your Mac and it will automatically recognize the camera. -
Page 38: Computer
Step 2: Connect the Vivicam 3785 to Your Computer 1. Connect one end of the USB cable to an available USB port on your computer. 2. Connect the other end of the USB cable to the USB connector on the Vivicam 3785. -
Page 39: Step 3: Download Recorded Images And Video Clips
Step 3: Download Recorded Images and Video Clips When the Vivicam 3785 is turned on and connected to your computer, it is considered to be a disk drive, just like a floppy disk or CD. You can download (transfer) images by copying them from the “removable disk” (“untitled”... -
Page 40: Installing Photosuite
For Windows 2000/XP users, make sure to install and use the PhotoSuite while logged in as a user with an “Administrator” account. PhotoSuite is not supported on the Mac. iPhoto or iPhoto2 (not included with the Vivicam 3785) is recommended. -
Page 41: Installing Photovista
PhotoVista’s powerful engine quickly and automatically stitches images together, and its intuitive interface will let even a novice get great results in minutes. To Install PhotoVista 1. Insert the CD-ROM packaged with the Vivicam 3785 into the CD-ROM drive. The welcome screen appears. 2. Click “Install PhotoVista”. Follow the on-screen instructions to complete the installation. -
Page 42: Installing Acrobat Reader
INSTALLING ACROBAT READER The CD-ROM includes a PDF (portable document format) copy of the user’s manual. To view a PDF you must have Acrobat Reader installed in your computer. Acrobat Reader is included on the camera CD ROM. Using Acrobat Reader, you can read the user’s manual and print sections of interest. -
Page 43: User Manual
If you misplace the printed guide, you may print another copy from the CD-ROM. The only requirement for viewing the User Manual on the CD-ROM is that you have Acrobat Reader (Adobe Reader) installed on your computer. Updates to this manual, and versions in other languages may be found on the Vivitar website (www. vivitar.com). -
Page 44: List Of Menu Options
In the Capture menu, you can specify camera settings you would like to use such as resolution, image quality, EV compensation, white balance, ISO, color mode, and sharpness. 1. Press the button to turn on your ViviCam 3785. 2. Press the button and then scroll through the options by using the buttons. - Page 45 Size Refer to “Setting the Image Resolution and Quality” in BASIC FUNCTIONS. Quality Refer to “ Setting the Image Resolution and Quality” in BASIC FUNCTIONS.
- Page 46 Your ViviCam 3785 adjusts the exposure of each scene automatically. However, when the subject is too dark or too bright, you can adjust the exposure manually. This is called EV compensation. The EV compensation of your Vivicam 3785 can be adjusted from [-1.5 EV] to [+1.5 EV] (in 0.3 EV steps). To adjust EV, press the button to enter the sub-menu and choose the setting.
- Page 47 The ViviCam 3785 determines the white balance by averaging the various kinds of light that enters the lens. You may specify the white balance when capturing images under specific lighting conditions (Auto, Daylight, Cloudy, Tungsten and Fluorescent).
- Page 48 ]: Sensitivity equivalent to ISO200 Color When capturing an image, the ViviCam 3785 offers three types of color (Full color/ Black & White/ Sepia) for you to match as your wish. Your images will demonstrate distinctively different impressions by choosing different color modes.
-
Page 49: Playback Menu
Using the Playback menu you can create an on-camera slide show. You may also delete images, and format your SD memory card or the internal memory. 1. Press button to turn the Vivicam 3785 on. 2. Press MODE button twice to enter [ Then press the button to enter Playback menu. -
Page 50: Video Clip Menu
Video Clip Menu Use the Video Clip menu you can adjust EV compensation, white balance to record video clips with your preferences. Video Clip menu items: EV, White Balance and Setup. Refer to “Capture Menu” in LIST OF MENU OPTIONS. White Balance Refer to “Capture Menu”... -
Page 51: Setup Menu
Setup Menu You can select preferences for the camera settings under Setup. Navigate the options you wish to configure by using the Setup menu items: Date & Time, Beeper, Language, Power off time, Light Frequency, Set to default and System Infor.. Date &... - Page 52 Power off time If no operation is performed for a specific period of time, the power to the camera is automatically turned off. This feature is designed to reduce bat- tery consumption. [3 min], [5 min], [10 min], [OFF] Light Frequency Set the frequency of the sensor to match the frequency of your local lighting standard.
-
Page 53: Other Devices
CONNECTING YOUR VIVICAM 3785 TO OTHER DEVICES USB Cable Computer SD Card Reader SD Card Reader PCMCIA Adapter Printer Notebook... -
Page 54: Camera Specifications
VIVICAM 3785 SPECIFICATIONS Item Effective pixels Image resolution Image quality Recording media Lens LCD monitor Self-timer Zoom Exposure compensation Description 3.0 Mega pixels Still image: 2048 x 1536 (Native resolution) 1600 x 1200 1280 x 960 640 x 480 Video clip:... - Page 55 Item White balance File format Standards Interface Power Tripod socket Dimensions Weight * Design and specifications are subject to change without notice. Description Auto; Manual: Daylight, Cloudy, Tungsten, Fluorescent JPEG, AVI JPEG, EXIF 2.1, AVI USB connector 2 x AA Alkaline batteries (optional), 2 x AA Ni-MH batteries (optional), One CR-V3 Lithium battery pack (optional).