Table of Contents
Advertisement
Quick Links
Advertisement
Table of Contents
Troubleshooting

Related Manuals for Friedrich Chill Premier CCW15B10B


Summary of Contents for Friedrich Chill Premier CCW15B10B
- Page 1 Chill® Premier Series Room Air Conditioners Standard Chassis Models Using R-32 Refrigerant Chill ® Premier COOL ONLY 115 VOLT CCW15B10B 230 VOLT CCW18B30B, CCW24B33B Chill ® Premier COOL WITH ELECTRIC HEAT 230 VOLT CEW18B33B, CEW24B33B THE EXPERTS IN ROOM AIR CONDITIONING 93011013_01...
-
Page 2: Table Of Contents
CAUTION: Do Not Operate Equipment During Active Stages Of Construction To ensure proper operation, Friedrich requires that all equipment is not operated during active construction phases. This includes active stages of completing framing, drywalling, spackling, sanding, painting, flooring, and molding in the equipment’s designated conditioning space. -
Page 3: Important Safety And General Information
A. IMPORTANT SAFETY AND GENERAL INFORMATION A.1 Introduction This booklet contains the installation and operating instructions for your Air Conditioning unit. There are some precautions that should be taken to ensure proper operation. Improper installation can result in unsatisfactory operation or dangerous conditions. Read this booklet and any instructions packaged with separate equipment required to make up the system prior to installation. - Page 4 A. IMPORTANT SAFETY AND GENERAL INFORMATION Read All Instructions and Cautionary Markings Before Operation 18. After proper installation, condensate will not overflow during and Installation to prevent death or injury to the user, other people, normal use. If the fan hits the built-up water and the sound annoys or property damage, the following instructions must be followed.
-
Page 5: Warning For Using R32 Refrigerant
A. IMPORTANT SAFETY AND GENERAL INFORMATION A.3 Warning For Using R32 Refrigerant 6. Information on servicing: 1) Checks to the area: For R32 refrigerant models: Prior to beginning work on systems containing flammable 1. Appliance shall be installed, operated and stored in a room with a refrigerants, safety checks are necessary to ensure that the risk floor area larger than 43 sq ft. - Page 6 A. IMPORTANT SAFETY AND GENERAL INFORMATION corroded or are suitably protected against being so corroded. breaking the vacuum in the system with OFN and continuing to fill 9) Checks to electrical devices: until the working pressure is achieved, then venting to atmosphere, Repair and maintenance to electrical components shall include and finally pulling down to a vacuum.
-
Page 7: Importance Of A Quality Installation
Opening of any ventilated Any tubing or refrigerant circuit work Opening of any sealed components Enclosures beyond the hinged door for filter cleaning Scan this QR code to be linked to the Friedrich professional support page where you can locate the Service Manual. -
Page 8: Product Inspection / Packing List
A. IMPORTANT SAFETY AND GENERAL INFORMATION A.5 Product Inspection / Packing List Upon receiving the unit, inspect it for any damage from shipment. Claims for damage, either shipping or concealed, should be filed immediately with the shipping company. IMPORTANT: Check the unit model number, Cooling size, electrical characteristics, and accessories to determine if they are correct. -
Page 9: Specifications
Air Conditioner Service Manual B. SPECIFICATIONS 2. PRODUCT DIMENSIONS B.1 Dimensions Window type: A(mm) B (mm) C (mm) Model Vertical MINIMUM MAXIMUM Model Clearance WINDOW WINDOW 10B10 B WIDTH WIDTH CCW15B10B, CCW18B30B, 12B10 B 20” CEW18B33B 5B 10B CCW24B30B, CEW24B33B 21”... -
Page 10: Installation Of The Unit
C. INSTALLATION OF THE UNIT C.3. Choosing a Location C.1 Pre-Installation Checkpoints Installation Clearances Improper installation of the Air Conditioner can cause poor Before attempting any installation, carefully consider the performance and premature wear of the unit. following points: Ensure that the unit is installed with proper clearances as described •... -
Page 11: Window Installation
C. INSTALLATION OF THE UNIT C.4 Window Installation CAUTION CAUTION Moving Parts Hazard Excessive Weight Hazard Do not operate unit out of sleeve Use two or more people when or with front grille removed. installing your air conditioner. Do not place hands in blower Failure to do so can result in or fan blade areas. - Page 12 C. INSTALLATION OF THE UNIT Window Installation(Cont) REMOVE FRONT PANEL AND CHASSIS 1. Pull down the front panel and remove the filter. 5. Remove the control panel screw and WI-FI module screw from the front panel. 2. Lift the front panel upwards to remove and place to the side.
- Page 13 C. INSTALLATION OF THE UNIT Window Installation(Cont) Air Conditioner Service Manual...
- Page 14 C. INSTALLATION OF THE UNIT Air Conditioner Service Manual Window Installation(Cont)
- Page 15 Sash lock C. INSTALLATION OF THE UNIT Air Conditioner Service Manual Window Installation(Cont) Storm Window Requirements A storm window frame will not allow the air conditioner to tilt properly which in turn will keep it from draining properly. To adjust 6.Drive 1/2”...
-
Page 16: Thru-The-Wall Installation Instructions - Optional
C. INSTALLATION OF THE UNIT tioner Service Manual C.5 Thru-The-Wall Installation Instructions - Optional... - Page 17 Air Conditioner Service Manual C. INSTALLATION OF THE UNIT C.5 Thru-The-Wall Installation Instructions - Optional (Cont) Model 10K/12K 15K/18K Inside frame Height 15-1/5” 18 1/4” 19-1/2” Inside frame Width 20” 23 7/8” 26-9/10”...
- Page 18 Air Conditioner Service Manual C. INSTALLATION OF THE UNIT C.5 Thru-The-Wall Installation Instructions - Optional (Cont)
-
Page 19: Electrical
E. ELECTRICAL Electrical Safety Information Testing the Power Cord All Friedrich room air conditioners are shipped from the factory with a Leakage Current Detection Interrupter (LCDI) equipped power WARNING cord. The LCDI device on the end of the cord meets the UL and NEC requirements for cord connected air conditioners. -
Page 20: Startup And Operation
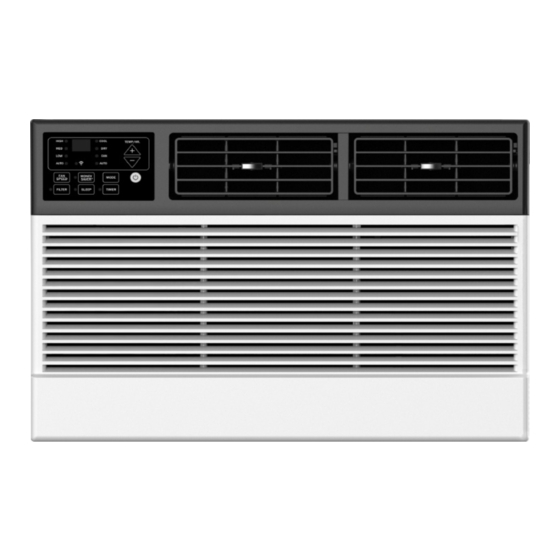
J. STARTUP AND OPERATION J.1 Control Panel Operation USING YOUR AIR CONDITIONER Cool Mode: The cooling function allows the air Electronic Control Panel & Remote Control conditioner to cool the room and at the same time reduces air humidity. Press the MODE button to NOTE: This display always shows the room temperature in Fan activate the cooling function. - Page 21 J. STARTUP AND OPERATION J.1 Control Panel Operation (Cont) or HEAT mode and...
- Page 22 J. STARTUP AND OPERATION J.2 Remote Control Operation 1. Power: Turn the air conditioner on and off. This button will clear the TIMER setting. 2. MODE: Press the button to select the mode of operation, AUTO, COOL, DRY, FAN ONLY, HEAT. Note: The HEAT mode is only for some heating models.
-
Page 23: Start-Up
Noises All air conditioners make some noise. Friedrich units are designed to operate as quietly as possible. An air conditioner mounted in a wall is quieter than one mounted in a window. It is important to ensure that the chassis seal gasket is properly installed (refer to the Installation Instructions). -
Page 24: Troubleshooting
M. TROUBLESHOOTING M.1. Troubleshooting Tips COMPLAINT CAUSE SOLUTION • • The unit is turned to the off position, or the Turn the unit to the on position and raise or lower temperature setting thermostat is satisfied. (as appropriate) to call for operation. •... -
Page 25: Troubleshooting
M. TROUBLESHOOTING COMPLAINT CAUSE SOLUTION • If there are heat producing appliances in use in the room, or if the • This may be due to an excessive heat load in the room is heavily occupied, the unit will need to run longer to remove the room. -
Page 26: Warranty
R. INFORMATION FOR THE OWNER R.3 Warranty...