Table of Contents
Advertisement
This operation manual contains information not found in the Quick Start Guide. For quick
installation instructions, see the Quick Start Guide accompanying your scanner.
Important: Unlock scanner before operating. Lock the scanner before moving it.
Trademarks
Presto! PageManager is a trademark of NewSoft Technology Corporation. IBM PC/AT is a
trademark of International Business Machines Corporation. MS-Windows, Windows, and MS-
DOS are trademarks of Microsoft Corporation. Macintosh and Mac Series are trademarks of
Apple Computer, Inc. Photoshop is a trademark of Adobe Systems, Inc. Other names and
trademarks appearing herein are trademarks of their respective holders.
Important Safeguards
Read all of the instructions.
Save these instructions for later use.
Follow all warnings and instructions marked on the product.
When replacement parts are required, be sure that service technicians have used
replacement parts that conform to at least the same safety standards with regard to fire,
electric shock, or other hazards.
Do not use this product near water or in rainy/moist environment.
Do not place the scanner on an uneven surface. This may cause serious damage to the
scanner.
The scanner should be operated only from the type of power source indicated on the
marketing label.
Do not attempt to service this product yourself as opening or removing the enclosure may
expose you to dangerous voltages or other hazards.
This unit has input circuitry suitable for a 100 ~ 240VAC supply.
The sound level at the operators position according to IEC 7041 : 1982 should be less
than or equal to 70dB(A).
Astra 2400S
Operation Manual
1
Advertisement
Table of Contents

Related Manuals for UMAX Technologies Astra 2400S


Summary of Contents for UMAX Technologies Astra 2400S
-
Page 1: Operation Manual
Do not use this product near water or in rainy/moist environment. Do not place the scanner on an uneven surface. This may cause serious damage to the scanner. The scanner should be operated only from the type of power source indicated on the marketing label. -
Page 2: Table Of Contents
Table of Contents A Glance At Your Scanner …………………………………………………………….. 3 Unlocking The Carriage ……………………………………………………………….. 4 Installing Application Software and VistaScan ……………………………………… 5 Testing The Scanner …………………………………………………………………… 7 Completing Your First Scan …………………………………………………………... 8 Start Your Scan By Using VistaScan …………………………………………………. 9 Troubleshooting ………………………………………………………………………. -
Page 3: A Glance At Your Scanner
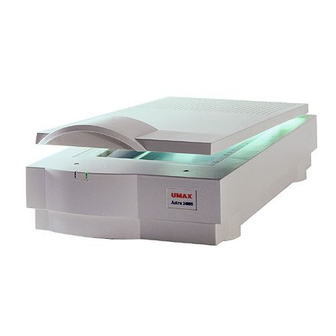
A Glance At Your Scanner The Front View The Rear View... -
Page 4: Unlocking The Carriage
Unlocking the Carriage Before operating the scanner, please unlock the restraint. To unlock the restraint, move the restraint toward the unlocked position. !! Warning: You must lock the scanner before transporting it. Failure to do so can cause extensive damage to your scanner. Be sure the scanner lamp is in the return position before locking the scanner. -
Page 5: Installing Application Software And Vistascan
Installing VistaScan (Install PhotoShop LE prior to installing VistaScan) Insert the Astra scanner (SCSI) CD into your CD-ROM drive. b. The installation program will launch automatically. Note: If the installation program does not launch, please follow these steps: 1. -
Page 6: For Macintosh Users
Double click on the PhotoShop installer icon. d. Follow the onscreen instructions to install the software. Installing UMAX Astra 2400S VistaScan CD (Install PhotoShop LE first prior to installing VistaScan) Insert the CD labeled Astra scanner (SCSI) into your CD-ROM drive. -
Page 7: Testing The Scanner
Quick Start Guide included with the scanner. The scanner automatically performs a simple self-test each time it is turned on to help spot major system errors in the scanner itself. Once the scanner has been unpacked and the shipping restraint has been removed, the scanner is ready to perform this test. -
Page 8: Completing Your First Scan
If the scanner test fails, please refer to the Troubleshooting section of this manual for a solution. Original Image Placement 1. Raise the scanner’s document cover. 2. Place the document (graphic, text, or photo) face down on the scanner. Center the document along the triangular mark. 3. Lower the document cover. -
Page 9: Start Your Scan By Using Vistascan
6. Select “Acquire” to activate the scanning dialog box as shown on page 10. 7. Place the image you will scan on top of the scanner’s object glass. 8. From the four modes on the “Click to Scan” panel, click a scan mode button that suits the required scan. - Page 11 B. Initiating VistaScan directly 1. Launch the VistaScan program group. 2. The VistaScan interface will appear as shown on page 12. 3. From the “Scan to” panel in the main menu, choose a destination for the scanned image. 4. Click one of the small icons in the “Scan To” panel representing the desired destination (a file, printer, e-mail application, etc.) for the scanned image.
- Page 12 C. Scanning the Image Click the “Preview” button. A quick, low resolution scan will be made and appear in the Preview Window. From this image, you can determine the area you want to scan. From the five “Scan to” choices, click the icon that represents the desired destination for the scanned image.
- Page 13 For more details about scanning the image, please refer to the online help of VistaScan. To access the VistaScan User’s Guide, please follow the instructions below: Double-click the hard drive icon on the desktop. Double-click the UMAX VistaScan 3.5 folder. Double-click the VistaScan Help. Your Internet browser will launch and display the VistaScan User’s Guide.
- Page 14 B. Initiating VistaScan directly Launch the “UMAX VistaScan DA 3.x” program group. The VistaScan interface will appear as shown on page 15. From the “Scan to” panel in the main menu, choose a destination for the scanned image. Click one of the small icons in the “Scan To” panel representing the desired destination (a file, printer, email application, etc.) for the scanned image.
- Page 15 C. Scanning the Image Click the PREVIEW button. A quick, low-resolution scan will be made and appear in the PREVIEW WINDOW. From this image, you can determine the area you want to scan. From the five “Scan to” choices, click on the icon that represents the desired destination for the scanned image.
-
Page 16: Troubleshooting
Troubleshooting UMAX scanners are designed to be reliable and easy to install. If, however, you have a problem with your scanner, these troubleshooting steps should indicate where the problem lies. Scanner Troubleshooting This section will cover problems you may encounter when installing or using your scanner and suggest possible solutions. -
Page 17: Changing The Scsi Id Number
Note: Do not use SCSI 8 and 9 on your scanner. They are for factory use only. If All Else Fails If the above solutions do not resolve the problem, contact your dealer or check the UMAX support Web site at www.umax.com/support. In addition, UMAX has Support Technicians that can be reached at 214- 739-1915 Monday through Friday from 9am-5pm CST. -
Page 18: Maintenance
Regularly cleaning the object glass will ensure that dirt or smudges will not reduce the quality of your scanned image. Before you clean the glass, make sure the scanner is turned off and the power cord is unplugged. Clean the object glass and document cover with a soft damp cloth and a mild detergent or alcohol. -
Page 19: Specifications
Specifications Scanner Type ………………………………………………………………………………………… Flatbed Scan Speed ………………………………………………………... 42.2 Seconds/A4 (600 dpi, Color Mode) Preview Speed ……………………... 5.3 Seconds/A4 (Color Mode); 3.5 Seconds/A4 (Gray/Line art Mode) Maximum Scannable Area ……………………………………………….. 216 x 356.6 mm (8.5 c 14 inches) Optical Resolution …………………………………………………………………………… 600 x 2400 dpi Maximum Resolution ………………………………………………………………………. -
Page 20: Glossary
Driver: The driver is a software program that tells the computer how to communicate with and operate scanner. The driver can be a stand alone application or can be accessed from within another application. DPI (Dots-per-inch): A measurement of resolution. The higher the dpi, the higher the resolution of the image. - Page 21 TWAIN: A standardized interfacing system that allows many different software applications to access many different imaging input devices. UTA: UMAX Transparency Adapter; a scanner option that consists of additional hardware allowing the scanning of transparent originals, such as slides or x-rays.
- Page 22 “Although the scanner is compatible with the German power supply systems, we do not include the German power cord along with the product except in Germany. If you bought your scanner outside of Germany, but intend to use it there, you should purchase a power cord compatible with the German system.”...