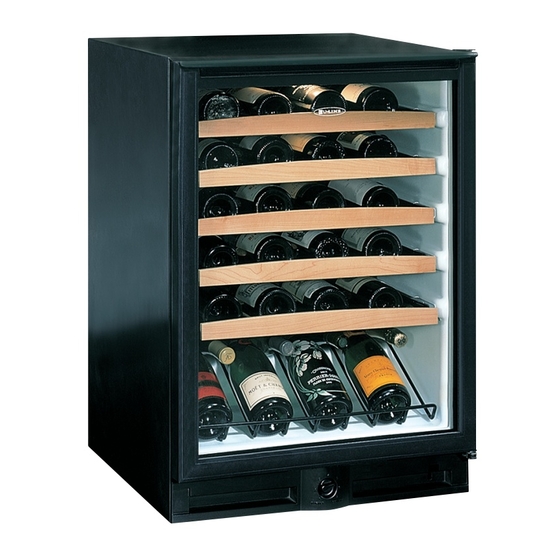
U-Line 2075WC Wine Captain Installation Manual
Echelon series
Hide thumbs
Also See for 2075WC Wine Captain:
- Features & benefits (2 pages) ,
- Service and parts manual (118 pages) ,
- User manual (32 pages)
Table of Contents
Advertisement
Quick Links
Advertisement
Table of Contents

Related Manuals for U-Line 2075WC Wine Captain


Summary of Contents for U-Line 2075WC Wine Captain
- Page 1 ™ Installation Guide ® 2075WC Wine Captain ® and 2075WCOL Wine Captain with Overlay www.U-LineService.com Phone (414) 354-0300 • FAX (414) 354-7905 Service & Parts Tech Lines Phone (800) 779-2547 • FAX (414) 354-5696 OnlineService@U-Line.com ©2005 U-Line Corporation 02/2005...
-
Page 2: Table Of Contents
2075WC/2075WCOL Wine Captain Contents Exterior Cleaning ......Cut-Out Dimensions ...... -
Page 3: Inspect And Plan
02/2005 2075WC/2075WCOL Wine Captain 2 Inspect and Plan You have received a carton containing your 2075WC or 2075WCOL Wine Captain containing a User Manual, a Product Registration Card and an Anti-Tip Bracket Installation Kit. 2075WCOL units are shipped with a cardboard-wrapped door and an additional package of hardware. -
Page 4: Exterior Cleaning
® 3 Prepare Site Your U-Line product has been designed for either free- standing or built-in installation. When built-in, your unit does not require additional air space for top, sides or rear. However, the front grille must NOT be obstructed and clearance is required for electrical connection in the rear. -
Page 5: Product Dimensions
(see Figure 29 on Page 13). 02/2005 2075WC/2075WCOL Wine Captain Door Swing/Clearances Information Black, White and Wood Overlay units have a zero clearance for the door to open 90° (see Figure 3). -
Page 6: Other Site Requirements
2075WC/2075WCOL Wine Captain 2. Remove plastic screw plugs (3 each, top and bottom) from new hinge location. Do not discard (see Figure 6). Figure 5 Figure 6 3. Remove top hinge (3 screws), reinstall hinge screw pin, and remount on opposite side BOTTOM (see Figure 7). -
Page 7: Side-By-Side Installation Instructions
7. Allow the final coat to dry for 24 hours. 8. Reinstall wood trim to wine racks using screws removed in Step 2. 9. Reinstall wine racks in unit. 10. For 2075WC units, go on to 5 Adjust Door. ® ® is equipped with wood- CAUTION ®... -
Page 8: Staining Wood Trim A Different Color
10. Allow the final coat to dry for 24 hours. 11. Reinstall wood trim to wine racks using screws removed in Step 2. 12. Reinstall wine racks in unit. 13. For 2075WC units, go on to 5 Adjust Door. www.U-LineService.com ® Overlay Frame... - Page 9 5/16" Dia. x 1/2" Deep Back View Figure 15 02/2005 2075WC/2075WCOL Wine Captain Route notch in top corner of overlay frame as shown (see Top and Side Views). Top of notch is entire depth of frame, front to back. Width: 13/16"...
- Page 10 2075WC/2075WCOL Wine Captain Installation Instructions Preparing Door Note: Door is not attached. It is in a separate box inside the unit box and taped to the unit. 1. Lay door on a clean, flat surface with the gasket facing up.
- Page 11 3/8". Door frame and overlay frame must be aligned properly or the door will not operate correctly. 02/2005 2075WC/2075WCOL Wine Captain Note: The door frame is designed with a slight amount of “play” to square it to the overlay frame.
-
Page 12: Checking Door Alignment
2075WC/2075WCOL Wine Captain 5 Adjust Door Checking Door Alignment The unit’s door is aligned at the factory before shipment. However, its alignment could have been disturbed during shipment or during overlay frame installation. IMPORTANT Properly aligned, the door should be 1/8" below the top of the unit’s cabinet, NOT flush with the top (see Figure 23). -
Page 13: Electrical Specifications
• Never use an extension cord to connect power to the unit. Go on to 7 Level the Unit. 02/2005 2075WC/2075WCOL Wine Captain 7 Level the Unit Leveling Information Note: It is recommended that the unit is level. 1. Use a level to check the levelness of the Wine ®... -
Page 14: Anti-Tip Bracket Installation
2075WC/2075WCOL Wine Captain 8 Install the Unit Anti-Tip Bracket Installation 1. Locate two Anti-Tip Brackets included inside the unit. 2. Place the unit into the area where it will be installed. Check the door, sides and top for a proper fit. Also test to make sure the door opens and closes freely. -
Page 15: Installation Troubleshooting
Also, re-check leveling from front to back of the unit and readjust if necessary. Make sure that pivot plate is installed correctly. 02/2005 2075WC/2075WCOL Wine Captain 9 Start-Up for the First Time Initial Start-Up The unit is shipped with the control preset. No adjustments should be necessary at this time. -
Page 16: Service Information
For more than four decades, U-Line has distinguished itself as the leader in built-in undercounter ice making, refrigeration and wine storage appliances. U-Line Corporation, located in Milwaukee, WI, is a family operated manufacturer of built-in undercounter icemakers, Combo ®...