
Related Manuals for Nektar Impact LX Mini


Summary of Contents for Nektar Impact LX Mini
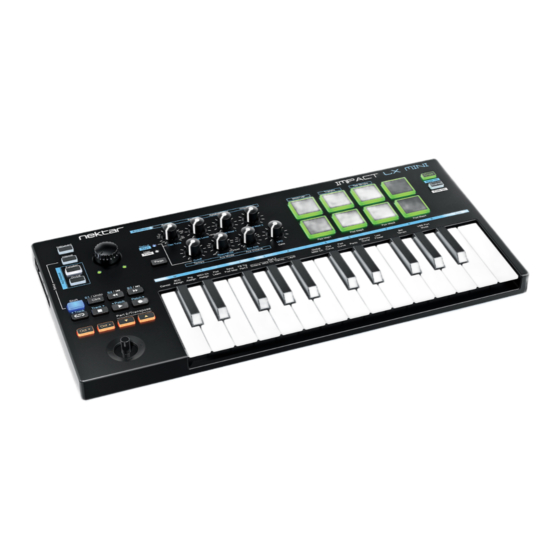
- Page 1 Impact LX Mini Owner’s Manual www.nektartech.com www.nektartech.com Nektar Impact GX49 & GX61 User Guide 1...
- Page 2 Minimum system requirements Impact LX Mini overview DAW & MIDI control Updating firmware & downloading Nektar DAW Integration software Using Impact LX Mini as a generic USB MIDI controller Power on and get started Keyboard Octave buttons Keyboard & real-time controls...
-
Page 3: Box Content
Impact LX Mini is of course user configurable for complete MIDI control. If you prefer to create your own setups, you can do that, too. We hope you enjoy Impact LX Mini as much as we have enjoyed creating it. - Page 4 5. Transport buttons The 7 buttons are primarily used by DAW using the 8 pots. When Nektar DAW Integration is not ac- Nektar DAW Integration, delivering comprehensive control over tive, the mode can be selected to use the pots for MIDI learn.
- Page 5 When [Internal] is selected, the pots send their assigned MIDI the screen printing. The buttons are otherwise used for Nektar messages. [Instrument] is mainly used to control plugin DAW Integration, if supported by the DAW.
- Page 6 Using Impact LX Mini as a generic USB MIDI controller Impact LX Mini works as a generic USB MIDI controller straight out of the box. For MIDI control, the LX Mini’s large pot (12) sends MIDI cc#7 to control volume and in Internal mode, the eight pots (13) send MIDI messages that can be used to control instruments.
-
Page 7: Part 2 / Transpose Buttons
And finally, to keep your hands free for performing, it’s also possible to assign the foot switch to activate Part 2. See page 17 to learn how. With the default settings, Impact LX Mini plays an additional note, one octave higher than the note played when Part Two is activated. In parameter terms, this means that Octave is set to +1 and Layer is set to on. - Page 8 Arpeggiator and Note Repeat Impact LX Mini’s arpeggiator and note repeat feature can help create interesting musical parts by adjusting a few controls. There are two Arp/Repeat engines, one for the keyboard and another for the pads. Settings are programmed independently for keyboard and pad with only the tempo source shared.
-
Page 9: Midi Clock
MIDI clock Impact LX Mini automatically detects if MIDI clock is received on USB MIDI port 1. Clock will then switch from internal clock to MIDI clock. When the Arp/Repeat engine is sync‘ed to MIDI clock, tempo can only be set on the master clock device (such as a DAW or MIDI equipment sending MIDI clock). -
Page 10: Arp Mode
Parameters controlled by the pots can be adjusted for both keys and pads at the same time. • Press and hold [Shift]+[Page] while moving the pot that controls the parameter you want to change. • Release the buttons when done. 10 Nektar Impact LX Mini owner’s manual www.nektartech.com... -
Page 11: Internal Mode
Instrument mode If you have installed Nektar DAW Integration, your DAW’s instruments most likely are ready to be controlled when [Instrument] is selected. Check the dedicated PDF user guide included with the DAW integration file package for more details regarding controlling plugins from Impact LX Mini. - Page 12 18. Clips & Scenes buttons The two Clips & Scenes buttons are sometimes used by Nektar DAW Integration to enhance the use of the pads with certain DAWs. 12 Nektar Impact LX Mini owner’s manual...
-
Page 13: Pad Colors
This enables you to always see at a glance which MIDI Program is active, even if you have a mix of pads sending notes and program messages. Nektar Impact LX Mini owner’s manual 13 www.nektartech.com... - Page 14 Global Global Global Global Global Global Global Global Map 4 - GM drum kit Note Note No. Data 1 Data 2 Data 3 Chan Global Global Global Global Global Global Global Global 14 Nektar Impact LX Mini owner’s manual www.nektartech.com...
-
Page 15: Setup Mode
8 pots in 2 pages (16 total), the foot switch socket and the 8 pads. All settings are retained when you switch Impact LX Mini off. So the next time you switch the unit on, all settings are recalled as you left them. -
Page 16: Program Assign
Press [Enter] (C3) to accept the change and exit Setup. MIDI Channel Assign Each control can be assigned a specific MIDI channel from 1-16 or it can follow the Impact LX Mini’s global MIDI channel by selecting the value 0. - Page 17 Press [Shift]+[Internal] to activate Setup mode. The [Internal] button blinks while Setup is active. • Press A#1 on the keyboard to select Part 2 ‘Layer’. The status of Part 2 Layer is immediately changed and the unit exits Setup mode. Nektar Impact LX Mini owner’s manual 17 www.nektartech.com...
-
Page 18: Global Midi Channel
Keyboard Velocity Curve Impact LX Mini has 7 different keyboard velocity options to choose from, including 4 curves and 3 fixed. Start with the default curve and play for a while, then change to an option that might suite your playing style better. -
Page 19: Memory Dump
Restoring a backup: A memory dump/backup MIDI sysex file can be sent to the Impact LX Mini at any time, while the unit is powered on, in order to restore a backup. Make sure the Impact LX Mini is the output destination of the MIDI track containing the backup data. -
Page 20: Pro Tools Setup
• Click OK to exit. Impact LX Mini is now set up to work with Pro Tools. When [Instrument] is selected, the 8 pots control volume for each of the mixer channels in the current bank. The chart below shows what the transport buttons do. -
Page 21: Factory Restore
Impact LX Mini has been tested to meet or exceed Emissions and Immunity requirements European Standards EN55032: 2012, EN 61000-3-3: 2013, EN 61000-3-2: 2006 + A1: 2009 & A2: 2009 and EN55035: 2017. Impact LX Mini is in conformity with the provisions of EMC Directive 2014/30/EU. - Page 22 22 Nektar Impact LX Mini owner’s manual www.nektartech.com...
- Page 23 Nektar Impact LX Mini owner’s manual 23 www.nektartech.com...
- Page 24 Designed by Nektar Technology, Inc 24 Nektar Impact LX Mini owner’s manual www.nektartech.com (Rev 7)