Advertisement
MODEL NO.
917.295651
Caution:
Read and follow
all Safety Rules
and Bnstructions
Before Operating
This Equipment
©
®
5,0
P
17 INCH TmNEWnDTH
Tn
LLER
WITH
COUNTER
ROTATING TINES
o Assembly
o Operation
o Customer Responsibilities
o Service and Adjustments
o Repair Parts
Sears, Roebuck and Co., Hoffman Estates, IL 60179 U.S.A.
i = ==,,
=
.......................................................................................
=
= = = =
=
= =H=
Advertisement
Table of Contents

Related Manuals for Craftsman SEARS 917.295651


Summary of Contents for Craftsman SEARS 917.295651
- Page 1 MODEL NO. 917.295651 Caution: Read and follow all Safety Rules and Bnstructions Before Operating This Equipment Sears, Roebuck and Co., Hoffman Estates, IL 60179 U.S.A. i = ==,, 17 INCH TmNEWnDTH LLER COUNTER ROTATING TINES o Assembly o Operation o Customer Responsibilities o Service and Adjustments o Repair Parts ©...
-
Page 2: Accessories
After striking a foreign object, stop the engine (motor'), remove the wire from the spark plug, thoroughly im spect the tiller for any damage, and repair the damage before restarting and operating the tiller_ Exercise caution to avoid slipping or falling. - Page 3 Repairs necessary because of operator abuse or negligence, maintain the equipment according to the instructions contained in the owner's manual. • If this Craftsman Tiller is used for commercial or rental purposes, this Warranty applies for only 30 days from the date of purchase. WARRANTY...
- Page 4 Fill Fuel Tank ... Starting Engine ... 12 Stopping Tines & Engine ... 10 Tilling ... 10 Tilling Hints ... 12 Tine Operation Transporting Tiller ... 11 Winter' Operation ...14 SCHEDULE ORDERING ... BACK COVER Repair Parts: Tiller ... 21-27 Engine ...
- Page 5 These accesso ries were available when the tiller was purchased. They are also available at most Sears Retail outlets and Service Centers. Most Sears Stores can order repair parts for you when you provide the model number of your tiller.
- Page 6 Your new tiller has been assembled at the factory with exception of those parts left unassembted for = shipping purposes. To ensure safe and proper operation of your' tiller all parts and hardware you assemble must be tightened securely° correct tools as necessary to insure proper tightness,...
-
Page 7: Depth Stake
OR KINK Rotate handle assembly down, bolt first, with bolt head on LH.. side of tiller (See Fig. 5). Insert front carriage installation is limited. Lower the handle assembly, Tighten locknuts on bolts so handle moves with some resistance. - Page 8 (See Fig° 6) Tilt tiller forward by lifting handle, Separate cardboard cover from leveling shield,. Rotate tiller' handle to the right and pull tiller out of carton. INSERT CABLE Insert plastic cable ciip into hole on the back of handle column,.
-
Page 9: Throttle
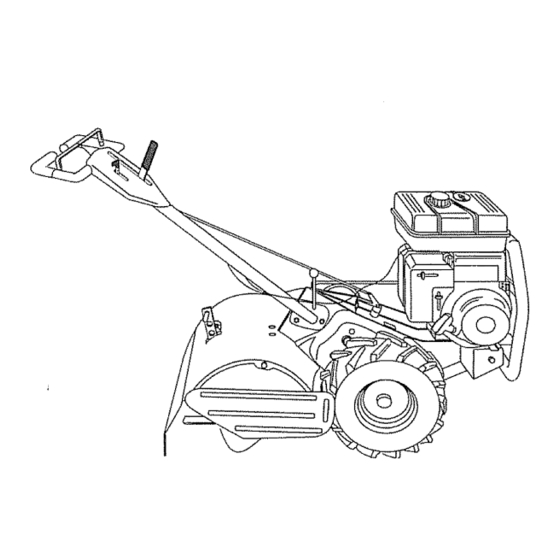
,i, ,,i,,,lll KNOW YOUR TILLER READ THIS OWNER'S MANUAL AND SAFETY RULES BEFORE OPERATING YOUR TILLER. Compare the illustrations with your tiller to familiarize yourself with the location of various controls and adjustments. Save this manual for future reference, DRIVE... - Page 10 Always wear safety glasses or eye shields before starting your tiller and while tilling. We recommend a wide vision safety mask over the spectacles The operation of any tiller can result in foreign or standard safety glasses.
- Page 11 Loosen nut "A" in slot and nut "B'L Move shield to desired position (both sides)+ Retighten nuts. TO TRANSPORT CAUTION: Before lifting or transport- ing, allow tiller engine and muffler to cool. Disconnect spark plug wire. Drain gasoline from fuel tank. AROUND THE YARD °...
- Page 12 Tilling is digging into, turning over, and breaking up packed soil before plantirlg. Loose, unpacked helps root growth. Best tilling depth is 4" to 6". A tiller will also clear the soil of unwanted vegetation.. The decomposition of this vegetable matter enriches the soil..
-
Page 13: Air Cleaner
1 - Change mere often when operating under a heavy load or in high ambient temperatures 2 - Service more o_ten when operating in dirty or dusty conditions GENERAL RECOMMENDATIONS The warranty on this tiller does not cover items that have been subjected to operator abuse or negligence,... - Page 14 Change the oil after the first two hours of operation and every 25 hours thereafter or at least once a year if the tiller is not used for 25 hours in one year.,...
- Page 15 Maintain 20 pounds of tire pressure,, if tire pressures are not equal, tiller will pull to one side. Keep tires free of gasoline or oil which can damage rubber i nn,un,,,u,u,,llll...
-
Page 16: Belt Guard
Remove LH, inner and outer side shields REMOVE WHEEL" in this section of this manual), Remove hair pin clip and clevis pin from left wheel wheel out from tiller' about I inch.. • Remove two (2) cap nuts and washers from side of belt guard •... - Page 17 Tines are sharp- dling tines. == .H H.,.=...=..HI A badly worn tine causes your tiller to work harder and dig more shallow° Most important, worn tines cannot chop and shred organic matter as effectively nor bury it as deeply as good tines.
-
Page 18: Throttle
SERVmCE AND ADJUSTMENTS ENGINE ADJUST THRO'N'LE CONTROL (See Fig, 27) Loosen cable clamp screw to allow cable to move_ Move throttle control lever on upper' handle to "FAST" position,, Pull throttle cable out to end of travel Hold cable in this position and tighten clamp screw securely., CLAMP SCREW FIG. - Page 19 Immediately prepare your tiller for storage at the end of the season or if the unit will not be used for 30 days or more. = Hn=,= n,i,u ... H CAUTION: Never store the tiller with where fumes may reach an open flame gasoline in the tank inside a building or spark.
-
Page 20: Muffler
Hm== Ground too wet, Soil balls up or clumps =nmmm nHm, Drive control bar is not engaged Engine runs but tiller won't move V-belt not correctly adjusted V-belt is off puIfey(s), Tiiling too deep Engine runs but labors...