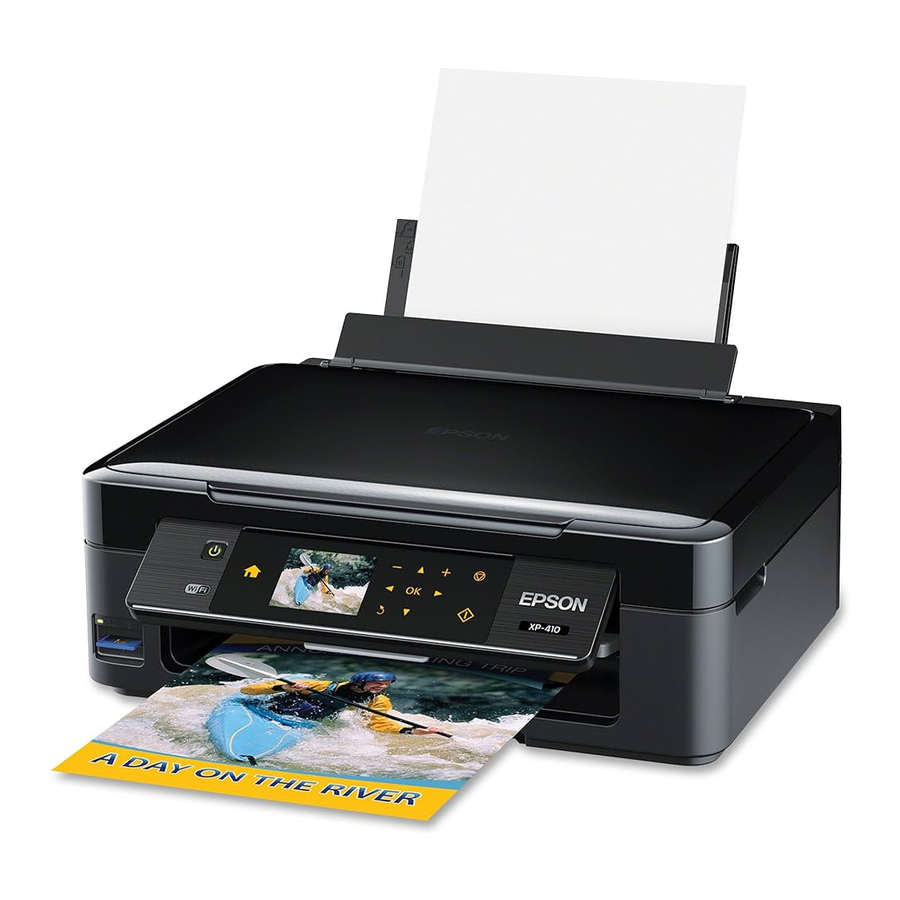
Epson XP-410 - All-In-Ones Printer Quick Installation Guide
- Manual (244 pages) ,
- User manual (153 pages) ,
- Programming manual (89 pages)
Advertisement
Unpack

Turn on and adjust
Step 1


Do not connect to your computer yet.
Step 2

Do not lower the control panel without first squeezing the release bar underneath or you may damage the product.
Step 3

To select English as your language, press OK. If you want to change the language, press  or
or  to select it, then press OK.
 Note: You can change the language later using the product's control panel.
Load paper
Step 1

Step 2

Step 3

Step 4

Install ink cartridges
Step 1

Step 2
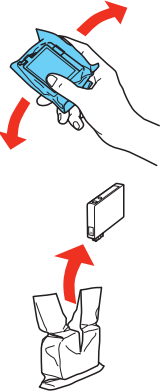
Step 3

Step 4
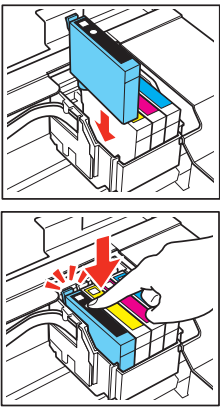
Step 5

Press ![]() to prime the ink delivery system. Priming takes about 4 minutes.
to prime the ink delivery system. Priming takes about 4 minutes.
Note: The cartridges included with the printer are designed for printer set up and not for resale. After some ink is used for priming, the rest is available for printing.
Don't turn off the printer while it is priming or you'll waste ink.
Install software
Mac OS X: Wait for ink priming to complete before installing the software.
Note: If your computer does not have a CD/DVD drive, download the software:
Windows: www.epson.com/support/xp410win
Mac OS X: www.epson.com/support/xp410mac
- Make sure the printer is NOT CONNECTED to your computer.
![]()
Windows®: If you see a Found New Hardware screen, click Cancel and disconnect the USB cable. You can't install your software that way. - Insert the product CD.
- Windows 8: Click the CD/DVD drive message that appears on your computer screen. Then select Run Setup.exe. If you don't see this option, navigate to your CD/DVD drive and double-click Setup.
Windows (other versions): If you see the AutoPlay window, click Run Setup.exe.
Mac OS X: Double-click the![]() Epson icon, if necessary.
Epson icon, if necessary. - Click Install (Windows) or Continue (Mac OS X) and follow the instructions on your computer screen.
- When you see the Select Your Connection screen, select one of the following connections:

 Epson icon, if necessary.
Wireless connection
For the first installation, we recommend using a USB cable (not included) to simplify wireless setup. After the printer is connected to the network, you will be prompted to remove the cable. You must install the software on every computer from which you want to print.
If you're using Mac OS X 10.6, 10.7, or 10.8, or you don't have a USB cable, you will need to use the buttons on the printer to select wireless settings.
Make sure you know your network name (SSID) and network password.
Direct USB connection
Make sure you have a USB cable (not included).
Any problems?
If you experience problems during setup, see below:
Network setup was unsuccessful.
- Make sure you select the right network name (SSID).
- If you see a firewall alert message, click Unblock or Allow to let setup continue.
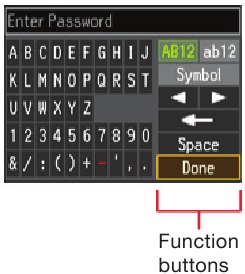
- If your network has security enabled, make sure you enter your network password (WEP key or WPA passphrase) correctly. Passwords must be entered in the correct case. Use the function buttons to select uppercase (AB12), lowercase (ab12), symbols (1#%@ [Symbol]), or spaces (Space), and to delete characters (
![]() ).
).
![]()
Press![]() ,
, ![]() ,
, ![]() or
or ![]() on the printer to highlight a letter or function button. Press OK to select it.
on the printer to highlight a letter or function button. Press OK to select it.
Highlight Done and then press OK.
 ).
).
 ,
,  ,
,  or
or  on the printer to highlight a letter or function button. Press OK to select it.
The printer's screen is dark.
Press any button to wake your product from sleep mode.
Setup is unable to find my printer after connecting it with a USB cable.
Make sure the printer is turned on and that it is securely connected as shown:

Any questions?
On-screen
Select Help or ? when you're using your software.
Online
Visit epson.com/support (U.S.) or epson.ca/support (Canada).
Phone
Speak with a support specialist by calling (562) 276-4382 (US) or (905) 709-3839 (Canada), 6 AM to 8 PM, Pacific Time, Monday through Friday, and 7 AM to 4 PM, Pacific Time, Saturday.
Days and hours of support are subject to change without notice. Toll or long distance charges may apply.
Need paper and ink?

Try Epson specialty papers with DURABrite® Ultra Ink for professional results. For the right supplies at the right time, you can purchase them at Epson® Supplies Central® at www.epson.com/ink3 (U.S. sales) or www.epson.ca (Canadian sales). You can also purchase supplies from an Epson authorized reseller. To find the nearest one, call 800-GO-EPSON (800-463-7766).

XP-410 ink cartridges

| Color | Standard-capacity | High-capacity |
 Black Black | 200 | 200XL |
 Cyan Cyan | 200 | 200XL |
 Magenta Magenta | 200 | 200XL |
 Yellow Yellow | 200 | 200XL |
Print Anywhere, Anytime*

Print wirelessly from your tablet, smartphone, or computer. Print documents and photos from across the room or around the world. Learn more at www.epson.com/connect.
* Most features require an Internet connection to the printer as well as an Internet- and/or email-enabled device.

Documents / Resources
References
Epson XP-410 | Support | Epson US
Epson XP-410 | Support | Epson US
Epson® Official Support
Epson® Official Support
Ink Finder | Epson US
Epson Canada | Homepage
Mobile Printing and Scanning Solutions | Epson US
Download manual
Here you can download full pdf version of manual, it may contain additional safety instructions, warranty information, FCC rules, etc.
Download Epson XP-410 - All-In-Ones Printer Quick Installation Guide
Advertisement
Thank you! Your question has been received!


Need Assistance?
Do you have a question about the XP-410 that isn't answered in the manual? Leave your question here.