Epson ET-7750 Quick Start Guide
- User manual (293 pages) ,
- Programming manual (94 pages) ,
- Quick manual (17 pages)
Advertisement
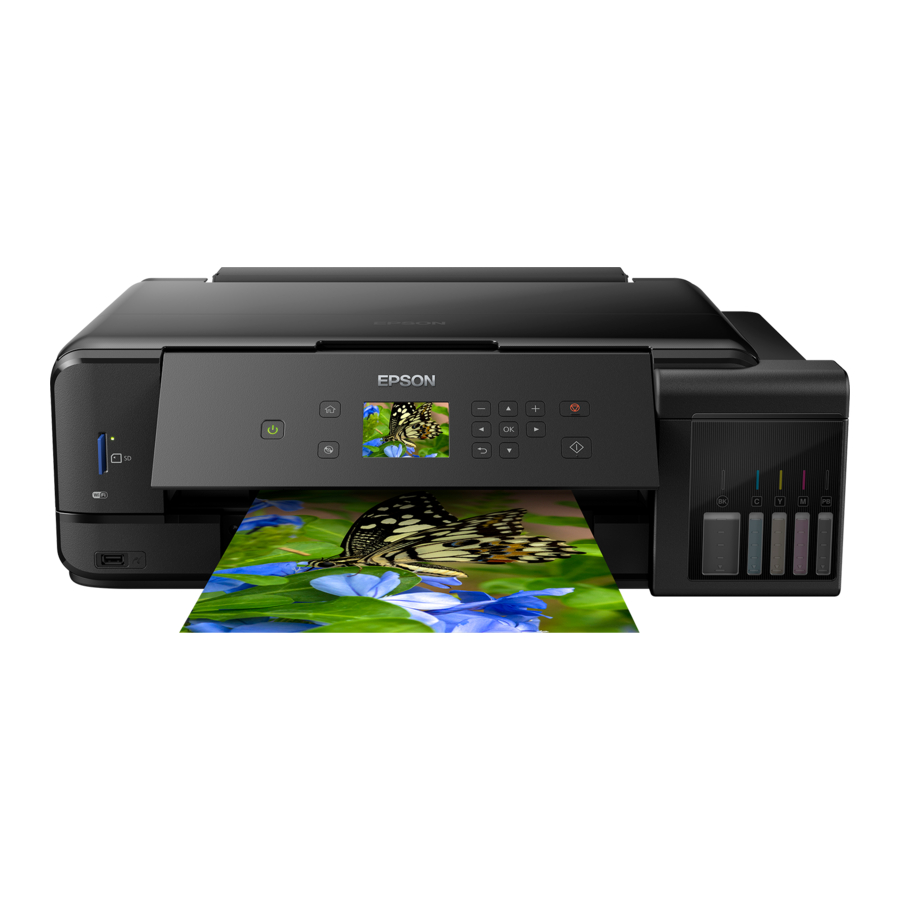
Introduction
Read This First
This product requires careful handling of ink. Ink may splatter when the ink tanks are filled or refilled with ink. If ink gets on your clothes or belongings, it may not come off.

Must be observed to avoid damage to your equipment.
What's included
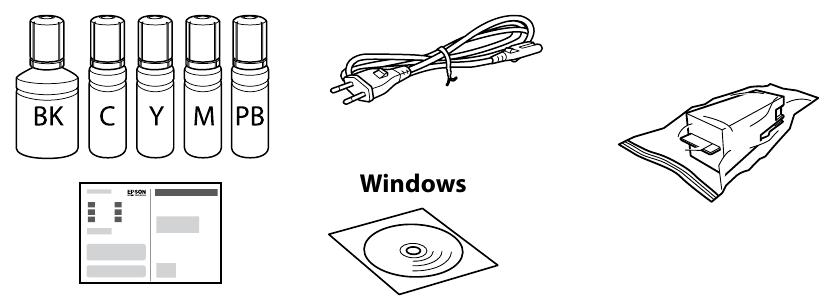
Contents may vary by location.
 Do not open the ink bottle package until you are ready to fill the ink tank. The ink bottle is vacuum packed to maintain its reliability.
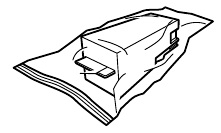
Maintenance box: When the mounted maintenance box full error appears, replace the maintenance box. See the User's Guide.
How to install
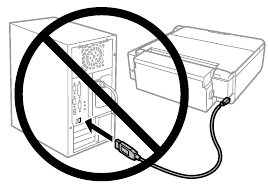
Do not connect a USB cable unless instructed to do so.
Windows (No CD/DVD drive)
Mac OS

http://epson.sn
Visit the website to start the setup process, install software, and configure network settings.
Windows with CD/DVD drive
You can also use attached CD to start the setup process, install software, and configure network.
 If the Firewall alert appears, allow access for Epson applications.
iOS / Android

http://epson.sn
Visit the website to install Epson iPrint application, start the setup process, and configure network settings.
No PC
Proceed to the next step.
How to install
- Remove all protective materials.

- Open


- Use the ink bottles that came with your product.
- Epson cannot guarantee the quality or reliability of non-genuine ink. The use of non-genuine ink may cause damage that is not covered by Epson's warranties.
- Make sure that the color of the ink tank matches the ink color that you want to fill.
- Remove the cap while keeping the ink bottle upright.

- Position the top of the ink bottle along the slot in front of the filling port, and then stand the bottle slowly to insert it into the filling port.

![warning]() Do not knock the ink bottle, otherwise the ink may leak.
Do not knock the ink bottle, otherwise the ink may leak.
- Fill to the upper line.


- Ink is injected even if the ink bottle is not being squeezed. If the ink does not start flowing into the tank, remove the ink bottle and try reinserting it.
- Ink flow stops automatically when the ink level reaches the upper line.
- Do not leave the ink bottle inserted; otherwise the bottle may be damaged or ink may leak.
- Cover the cap.

![]() Store the ink bottle upright for later use.
Store the ink bottle upright for later use.
- Close securely.

- Repeat steps 2 to 6 for each ink bottle.
- Close.

- Connect and plug in.

- Hold down
![]() until the lamp turns on.
until the lamp turns on.

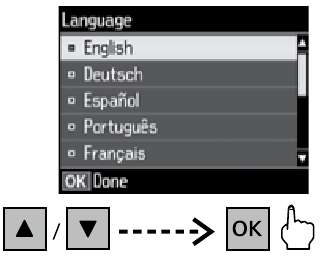
- Select a language.
![]()
- When the message of seeing Start Here is displayed, press OK for 3 seconds.

- Confirm that the tanks are filled with ink, and then press x to start charging ink. Charging ink takes about 7 minutes.


 until the lamp turns on.


Follow the on-screen instructions for adjusting the printer to guarantee print quality. See "Loading Paper" on this page for paper settings.
When you have finished making adjustments, refill the rest of the ink. See "Checking Ink Levels and Refilling Ink" on the back page.
Basic Operations
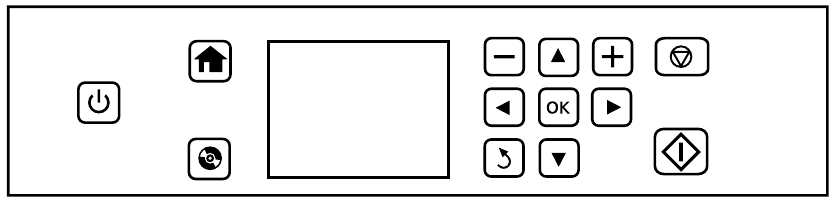
Guide to Control Panel
 |
Turns the printer on or off. |  |
Displays the home screen. |
 |
Displays the CD/DVD label menu. The product prepares CD/DVD label printing. | ||
 |
Sets the number of copies and prints. | ||
 |
Press  , ,  , ,  , ,  to select menus. Press OK to confirm the setting you have selected and go to next screen. to select menus. Press OK to confirm the setting you have selected and go to next screen. |
||
 |
Cancels/returns to the previous menu. | ||
 |
Stops the ongoing operation or initialize the current settings. | ||
 |
Starts the operation you selected. | ||
Loading Paper
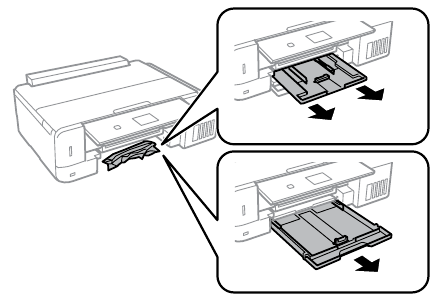
- Raise the panel.

- Open the front cover and pull out the paper cassette 2 (lower one).

- Slide the edge guides to the sides of the paper cassette.

- Slide the edge guide to adjust to the paper size you will use.

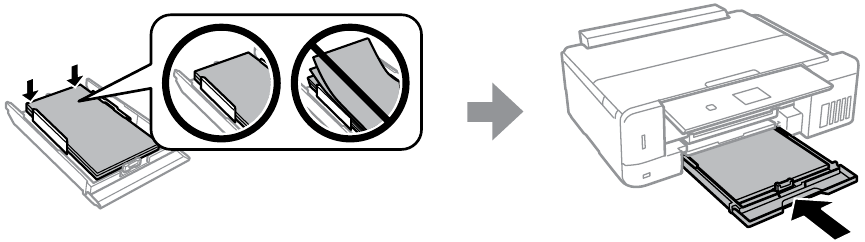
- Load paper toward the edge guide with printable side face-down, and check that the paper is not sticking out from the end of the cassette.

- Slide the edge guides to the edges of the paper. Keep the cassette flat and insert it back into the printer carefully and slowly.

- The paper setup screen is displayed on the LCD screen. Select the paper size and paper type you loaded in the printer.
![]() You need to pull out and close the output tray manually.
You need to pull out and close the output tray manually.


 You need to pull out and close the output tray manually.
Printing Photos
- Insert a memory card and enter the Print Photos mode from the home screen.

- Select a photo and press + or - to set the number of copies.
- Press
![]() , and then make the print settings. Scroll down if necessary.
, and then make the print settings. Scroll down if necessary. - Press
![]() to start printing.
to start printing.


 , and then make the print settings. Scroll down if necessary.
 to start printing.
Checking Ink Levels and Refilling Ink
- Check the ink levels. If an ink level is below the lower line, refill the ink.

![warning]() To confirm the actual ink remaining, visually check the ink levels in all of the product's tanks. Prolonged use of the product when the ink level is below the lower line on the tank could damage the product.
To confirm the actual ink remaining, visually check the ink levels in all of the product's tanks. Prolonged use of the product when the ink level is below the lower line on the tank could damage the product. - Open.

- Refer to steps 2 to 6 in section 3 of the front page to refill the ink to the upper line.

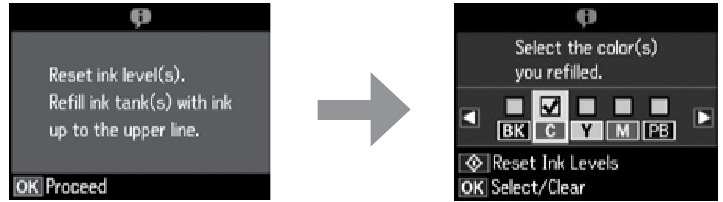
- Check the color that you refilled to the upper line, and follow the instructions on the LCD screen to reset the ink levels.
![]()
![warning]() If you reset the ink levels before refilling ink up to the upper lines, ink level estimates may become incorrect.
If you reset the ink levels before refilling ink up to the upper lines, ink level estimates may become incorrect.


Clearing the Paper Jam
When removing jammed paper, avoid tilting the printer, placing it vertically, or turning it upside down; otherwise ink may leak.
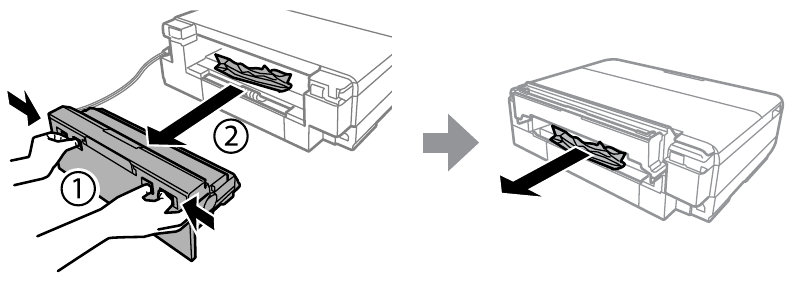
From the rear cover
- Pull out the rear cover and carefully remove the jammed paper.
![]()
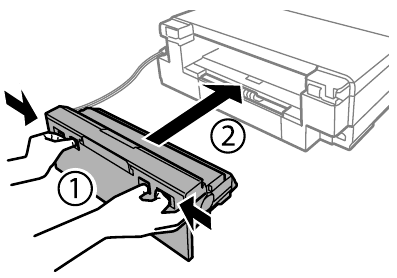
- Reattach the rear cover.
![]()
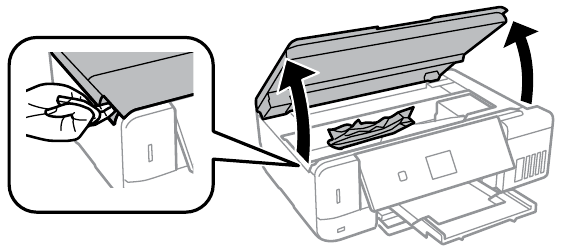
From inside the printer
- Open the scanner unit and remove all of the paper inside, including any torn pieces.
![]()
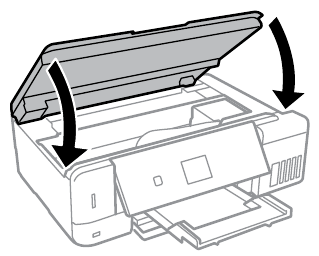
- Close the scanner unit.
![]()
From the paper cassette
- Pull out the paper cassette.
![]()
- Remove the jammed paper from the cassette.
- Align the edges of the paper. Keep the cassette flat and insert it back into the printer carefully and slowly.
![]()
Print Quality Help
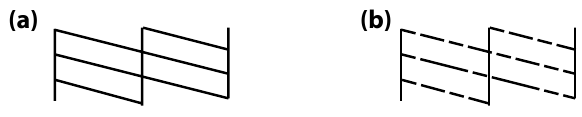
Print a nozzle check pattern. Select Maint. > Nozzle Check. If the pattern looks like "b", perform Print Head Cleaning.
Transporting
- Secure print head with a tape.

- Close securely.

- Close.

- Put it in original or similar box.


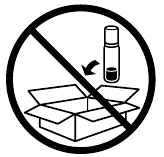
Do not put ink bottles.
Keep the product level as you transport it. Otherwise, ink may leak. As you transport the ink bottle, be sure to keep it upright when tightening the cap, and take measures to prevent ink from leaking.

After you move it, remove the tape securing the print head. If you notice a decline in print quality, run a cleaning cycle or align the print head.
Safety Instructions

Use only the power cord that comes with the printer. Use of another cord may cause fire or shock. Do not use the cord with any other equipment.
Be sure your AC power cord meets the relevant local safety standard.

Except as specifically explained in your documentation, do not attempt to service the printer yourself.
 Keep ink bottles, the ink tank unit, and maintenance box out of the reach of children and do not drink the ink.
Do not shake an ink bottle too vigorously or subject it to strong impacts as this can cause ink to leak.
Be sure to keep the ink bottles upright and do not subject them to impacts or temperature changes.

If ink gets on your skin, wash the area thoroughly with soap and water. If ink gets into your eyes, flush them immediately with water. If discomfort or vision problems continue after a thorough flushing, see a doctor immediately. If ink gets into your mouth, see a doctor right away.

Always keep this guide handy.
Ink Bottles
| BK | PB | C | M | Y |
| 105 | 106 | 106 | 106 | 106 |
Use of genuine Epson ink other than specified could cause damage that is not covered by Epson's warranties.
Ink Bottles in Australia
| BK | PB | C | M | Y |
| 512 | 512 | 512 | 512 | 512 |
Use of genuine Epson ink other than specified could cause damage that is not covered by Epson's warranties.
Epson Connect
 https://www.epsonconnect.com/
Using your mobile device, you can print from any location worldwide to your Epson Connect compatible printer. Visit the website for more information.
Windows® is a registered trademark of the Microsoft Corporation.
Mac is a trademark of Apple Inc., registered in the U.S. and other countries.
Android™ is a trademark of Google Inc.
Web: http://www.epson.com/
For users in Australia/New Zealand, please visit the following website.
http://support.epson.net/
http://www.epson.eu/Support
The contents of this manual and the specifications of this product are subject to change without notice.

© 2017 Seiko Epson Corporation

VideosEpson Expression ET-7750: How to Fill the Ink Tanks (video)
Documents / ResourcesDownload manual
Here you can download full pdf version of manual, it may contain additional safety instructions, warranty information, FCC rules, etc.
Advertisement
Thank you! Your question has been received!


Need Assistance?
Do you have a question about the ET-7750 that isn't answered in the manual? Leave your question here.