Table of Contents

Related Manuals for Orion HCCA3000.1DSPLX


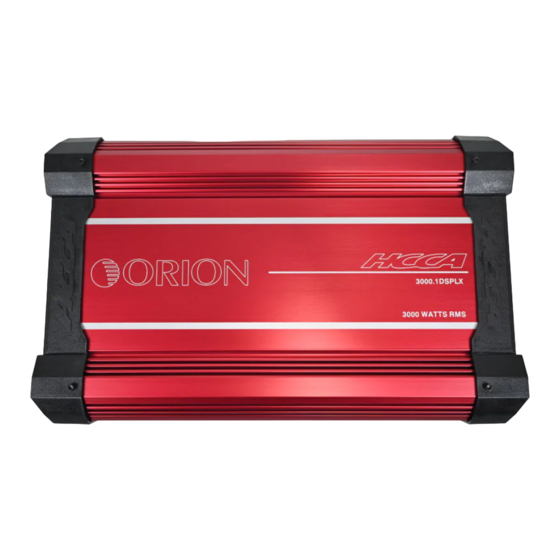
Summary of Contents for Orion HCCA3000.1DSPLX
- Page 1 HCCA1500.2 HCCA3000.1DSPLX HCCA3000.2H HCCA2000.2 HCCA5000.1DSPLX HCCA4000.2H HCCA1000.4 HCCA8000.1DSPLX HCCA3000.4H HCCA1500.4 HCCA12500.1DSPLX HCCA4000.4H HCCA2000.4 HCCA17000.1DSPLX High Peerformance Competition Amplifiers...
- Page 2 Thank you for purchasing this Orion product. Orion products are specif ically engineered and designed for the mobile audio environment. This manual contains important information about installation, set-up procedures and integrating your new Orion product into your vehicle. With proper care and installation, your new product will provide you with many years of high performance listening enjoyment.
-
Page 3: Table Of Contents
TABLE OF CONTENTS INTRODUCTION......................2 SPECIFICATIONS......................3 - 4 DIAGRAM ........................5-7 MOUNTING AMPLIFIER....................8 PRECAUTION....................9 PLANNING & INSTALLING..................10-11 OPERATION.......................12-14 WARNING & DISCLAIMER..................15 TROUBLESHOOTING...................16-17 WARRANTY........................18 WHAT’S IN THE BOX 1 x HCCA Amplif ier 1 x Remote Gain Control with Cable 1 x Allen Wrench Kit (2.5, 3.0, & 5mm) 4 x Mounting Screws 1 x Window Sticker 1 x Owners Manual... -
Page 4: Specifications
SPECIFICATIONS HCCA CLASS A/B AMPLIFIERS ORION HCCA 2CH&4CH HCCA1500.2 HCCA2000.2. HCCA1000.4 HCCA1500.4 HCCA2000.4 4-ohm 2 x 500W 2 x 600W 4 x 150W 4 x 250W 4 x 300W POWER 2-ohm 2 x 750W 2 x 1000W 4 x 250W... - Page 5 SPECIFICATIONS HCCA CLASS H AMPLIFIERS ORION HCCA 2CH&4CH HCCA3000.2H HCCA4000.2H HCCA3000.4H HCCA4000.4H 4-ohm 2 x 900W 2 x 1200W 4 x 450W 4 x 600W POWER 2-ohm 2 x 1500W 2 x 2000W 4 x 750W 4 x 1000W 4-ohm...
-
Page 6: Diagram
50 1.5K High 20 250 Line out Protection 0 +18 Full 500 15K (Hz) (Hz) (dB) (Hz) REMOTE R-CH OUT-R HCCA3000.1DSPLX HCCA5000.1DSPLX HCCA8000.1DSPLX HCCA12500.1DSPLX HCCA17000.1DSPLX Bass Level Phase MODE Sonic Boost Power Clipping 0 +18 40 300 Slave Master (Hz) - Page 7 DIAGRAM HCCA1000.4 HCCA1500.4 HCCA2000.4 +12V POWER BRIDGE BRIDGE SPEAKERS HCCA3000.4H HCCA4000.4H +12V +12V BRIDGE POWER SPEAKERS HCCA1500.2 HCCA2000.2 +12V L-CH R-CH POWER BRIDGE SPEAKERS HCCA3000.2H HCCA4000.2H +12V +12V L-CH R-CH BRIDGE POWER SPEAKERS...
- Page 8 DIAGRAM Bridging two mono-block Class-D amplif iers can be done only between two amplif iers of the same model number. Bridged Switch: Master Position Bridged Switch: Slave Position...
-
Page 9: Mounting Amplifier
MOUNTING AMPLIFIER Mounting the Amplif ier (See Page 11) You must f irst remove the end caps to mount the amplif ier (mounting holes are within). Remove the screws f irst f rom the end caps. 2. Pull the end caps away f rom the amplif ier. 3. -
Page 10: Precaution
PRECAUTIONS CHARGING SYSTEM: Audio systems with a single amplif ier can be supplied by most vehicles electrical systems. Systems with multiple amplif iers or a amplif ier that draws extensive amount of current require a higher capacity, battery, alternator or the use of a storage capacitor. We strongly recommend researching the capabilities of the charging system of the vehicle. -
Page 11: Planning & Installing
PLANNING & INSTALLING All cables create interference. The power cable and RCA cable are very prone to interference; the remote cables are less prone. There is often interference caused by the alternator or other car electronic parts. Most of these problems can be eliminated by correct and careful cabling. - Page 12 PLANNING & INSTALLING Before beginning the installation, consider the following: If you plan to expand your system by adding other components sometime in the future, ensure the adequate space is left, and cooling requirement are met. Are your components matched? The peak power rating of your speakers must be equal or greater than the amplif ier.
-
Page 13: Operation
OPERATIONS POWER & PROTECTION INDICATORS - Provide instant information on status of amplif ier, including short-circuit and thermal overload alerts. RCA INPUT - Accepts Low Level RCA lnputs(200mV-6V) form a head unit, pre amplif ier, or equalizer. RCA OUTPUT - Provides easy connection to additional amplif iers. Note that some OEM stereo head units may sense the attached load and may turn off their speaker outputs if expected load conditions aren’t achieved. - Page 14 OPERATIONS After the amplif ier has been installed and all connections have been made carefully and securely, turn the radio on to check if the amplif ier powers up. Now turn up the volume slowly f rom the source unit. If there is no sound or sound is distorted, turn-off the system immediately and check if all connections have been made correctly and is secured.
- Page 15 OPERATIONS PHASE SHIFT CONTROL • 0 Degree - Leaves output unaffected. The output signal is in phase with the input signal. • 180 Degree - Inverts the output. The channel is 180 degrees output of phase. This conf iguration is useful for inverting the phase of subwoofers to improve staging in a vehicle.
-
Page 16: Warning & Disclaimer
IMPORTANT: Never cut any metal that is an integral part of the vehicle’s safety or structural support system. If you are unsure, it is best to have the product professionally installed by an Authorized ORION Dealer. Never sacrif ice your safety for sound. -
Page 17: Troubleshooting
TROUBLESHOOTING Power LED: This LED lights up green when the amplif ier is turned on. Protection LED: This LED lights up red if the amplif ier goes into protection. Below is a description of reasons the amplif ier could trigger the protection circuit. - Page 18 TROUBLESHOOTING SYMPTOMS CHECK REMEDY NO SOUND Is the power LED Check all fuses to amplifier. illuminated? (NO) Be sure Turn-on lead is connected. Check signal leads. Check gain control. Check source unit. Clean contacts or fuse holder. Is the Diagnostic LED Check for speaker short or illuminated (YES) amplifier overheating...
-
Page 19: Warranty
4. This warranty does not cover car static, electrical interference, adjustments or labor costs for the removal or reinstallation of the unit for repair. 5. The sole responsibility of Orion under this warranty shall be limited to the repair or replacement thereof, at the sole discretion of Orion. - Page 20 TEL: 786.464.0247 • EMAIL: SUPPORT@ORIONCARAUDIO.COM • ORIONCARAUDIO.COM PROUD SPONSOR OF Copyright ORION All righs reserved. Any unauthorized reproduction or use of any Orion logos, images or design elements is strictly prohibited by law. Specifications subject to change without notice. REV. 23.5...