Advertisement
- 1 Package Content
- 2 Setup the Main Console
- 3 Insert Batteries in the Sensors
- 4 Testing the Door/Window Sensor
- 5 Testing Motion Sensor
- 6 Main Console Overview
- 7 Keychain Remote Overview
- 8 Install the Door/Window Sensor
- 9 Install the Motion Sensor
- 10 Operation of Alarm System
- 11 Enable Chime or Alert Mode
- 12 Alert Notification
- 13 Program Security Remote/Keypad Console
- 14 Program W/D Sensor to Main Console
- 15 Program Motion Sensor to Main Console
- 16 Zone Settings
- 17 Sensor Failure/Battery Indication
- 18 FAQ
- 19 Erasing the Sensors/Remote from the Main Console
- 20 Documents / Resources
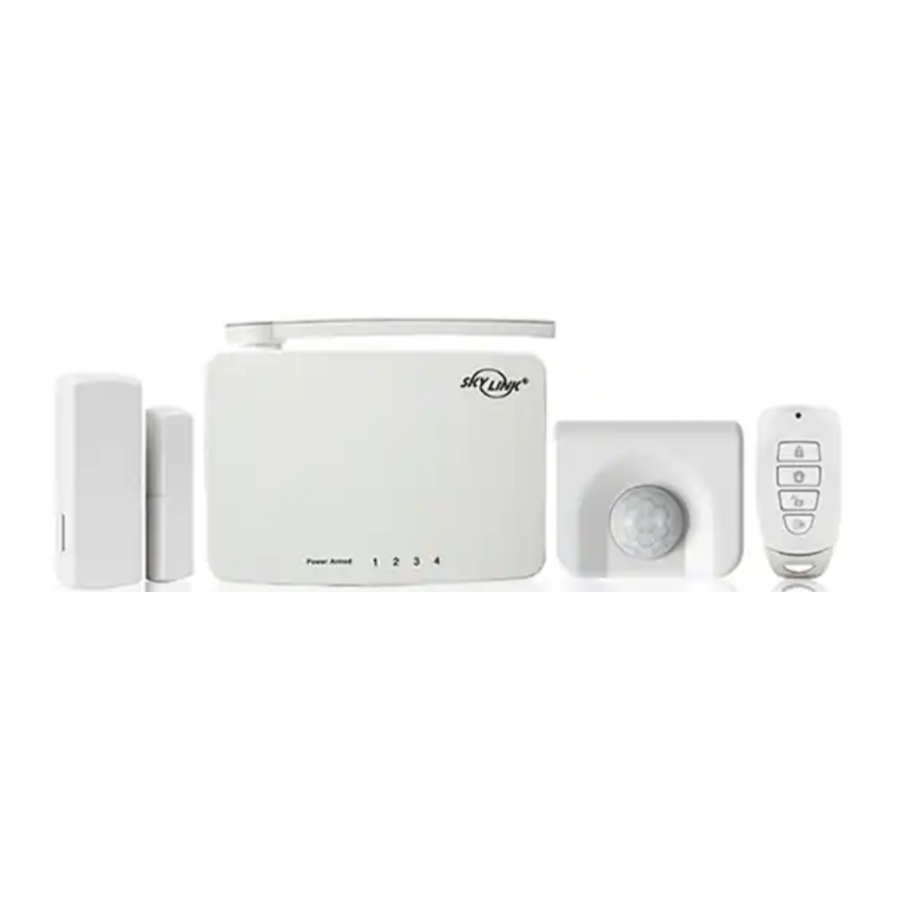
Package Content
NOTE: 5 x AAA and 1 x AA-Batteries are required to setup the Alert/Alarm System. (AA/AAA Batteries are not included.)

Setup the Main Console
- Plug in the power adapter to the Main Console and rotate the antenna to the upright position for the best signal reception.

- Insert 4 x AAA-Batteries in the Main Console for backup power in case of power outage. (Optional)


Insert Batteries in the Sensors
- Push the both sides in and open the cover of the Door/Window Sensor to insert an AAA Battery.

- Use a coin to open the Motion Sensor and insert an AA Battery.
![]()


Testing the Door/Window Sensor
NOTE: The Door/Window Sensors are factory preset in Zone 1.
- Slide the switch at the back of the Main Console to alert mode.


- Activate the Sensor by separating the magnetic contact of the sensor.


- The main console will beep continuously and flash the the Zone 1 LED if the door is open.


- Move the magnetic contact back to the sensor and the alert sound will stop.


Testing Motion Sensor
NOTE: The Motion Sensors are factory preset in Zone 2.
- Slide the switch at the back of the Main Console to alert mode.


- Move in front of the motion sensor to trigger the sensor. The red LED on the sensor will flash multiple times.


- The Main Console will continue beeping and the Zone 2 LED will flash if a motion is detected.


- The Main Console will stop beeping and flashing the LED after 15 seconds.


* As an energy saving feature, the motion sensor will not be triggered again unless there is no motion detected for 6 seconds. In this case, the red LED will only flash once indicating the motion is detected, but no signal is sent.
Main Console Overview

Power LED
Steady green is normal and flashing green indicates low backup battery status.
LED Armed Indication
Shows if the Alarm System is armed or disarmed.
LED Zone Indication
Shows the status of the sensors in that zone or the status when programming.
AC Adapter
Input Jack
Mute Button
To disable the beep sound temporary.
Learn Button
To program and erase sensors.
Alert Notification Switch
Select the type of audio alert signal. OFF | CHIME | ALERT
Keychain Remote Overview

Arm Away / Exit Away
Select "Arm Away" to protect your home when you're away. This mode gives you 45 seconds exit delay to leave the house. It will also give you 30 seconds entry delay to disarm the system when you are back.
Arm Home
Select "Arm Home" to protect while you're at home. This mode deactivates motion sensors but leaves other sensors activated with instant alarm.
Disarm
Tap the Button to disarm the alarm system.
Panic Button
Press and hold the Panic Button for 3 sec. to activate the alarm.
Install the Door/Window Sensor
Place the sensor in the appropriate location:

Mount the Door/Window Sensor on your door or window with double sided tape.
Install the Motion Sensor
Place the sensor in the appropriate location:

The motion sensor can be mounted with a double sided tape or screws in a corner, straight wall, ceiling or stand freely by itself.
Operation of Alarm System
- Arm your alarm system by pressing the "Arm Away" or "Arm Home" button on the Security Keychain Remote.

- When a sensor get triggered, the main console will sound a siren and the corresponding zone LED will flash for 3 minutes.

- Press the "Disarm Button" on your Keychain Remote to deactivate the alarm system.


Enable Chime or Alert Mode
- Slide the switch at the back of the Main Console to enable Chime or Alert Mode.

Chime Mode
When chime mode is enabled and your Skylink Alarm System is disarmed, the Main Console will beep every time a sensor gets triggered.
Alert Mode
When alert mode is enabled and your Skylink Alarm System is disarmed, the Main Console will beep continously when a window/ door is opened or motion is detected until the sensor is deactivated.

Alert Notification
When the Alert Mode is activated, you can identify the zone number by the number of beeps.
ZONE 1 SENSORS - 1 Beep, Pause, 1 Beep, Pause... etc.
ZONE 2 SENSORS - 2 Beep, Pause, 2 Beep, Pause... etc.
ZONE 3 SENSORS - 3 Beep, Pause, 3 Beep, Pause... etc.
ZONE 4 SENSORS - 4 Beep, Pause, 4 Beep, Pause... etc.
The beeping will continue until the sensor is deactivated. When the Main Console receives a signal from the motion sensor, the Main Console will beep and the LED will flash on the corresponding zone for 15 seconds.
Press the MUTE button if you want to temporarily disable the beeping sound.
Program Security Remote/Keypad Console
NOTE: The Keychain Remote must be programmed in Zone 1. You can program up to 4 Remotes or Keypads with the Main Console.
- Press and hold the "Learn" button for 3 seconds, until the Zone 1 LED is flash.

- Press any button to program the Security Keychain Remote or enter the PIN number followed by the "Disarm Button" to program the Security Keypad Console.

- Once the Security Keychain Remote or Keypad Console is programmed, the Main Console will beep once and the corresponding zone LED will be off.


Program W/D Sensor to Main Console
NOTE: You can program up to 4 sensors in each Zone.
- Press and hold the "Learn" button for 3 seconds, until the Zone 1 red LED flash.


- Zone 1 is selected. Press the learn button to select the Zone you want to program the sensor.


- Activate the Sensor by separating the magnetic contact of the sensor.


- Once the sensor is programmed, the Main Console will beep once and the corresponding zone red LED will be off.


Program Motion Sensor to Main Console
NOTE: You can program up to 4 sensors in each Zone.
- Press and hold the "Learn" button for 3 seconds, until the Zone 1 red LED flash.


- Zone 1 is selected. Press the learn button to select the Zone you want to program the sensor.


- Open the Motion Sensor cover with a coin and press the learn button.


- Once the sensor is programmed, the Main Console will beep once and the corresponding zone red LED will be off.


Zone Settings
Refer to the chart below for the 2 zone operation modes. The unit is currently set at Default Zone Setting Mode.
Zone Setting
| Zone | Default Zone Setting | Special Zone Setting | Suggestion Application |
| Zone 1 & 2 | Alert when disarmed, Alarm when armed. | Alert when disarmed, Alarm when armed. | Most sensor, except for sensors in outdoor or high traffic area. |
| Zone 3 | No alert when disarmed, but will alarm when armed. | Alert when disarmed, Alarm when armed. | Indoor motion sensor in a high traffice area. |
| Zone 4 | Alert Only, No Alarm. | Alert when disarmed, Alarm when armed. | For outdoor sensor. |
Change between Default Zone and All Alert Zone Mode:
- Power up the Main Console.
- Press and hold the "Learn" and "Mute" button simultaneously for 5 seconds, until you hear the beep.
- If you hear one beep, you are in "All Alert Zone Setting" and if you hear 2 beeps, you are in "Default Zone Setting".
- Release both button.
Repeat the above steps to change between 2 operation modes.
Sensor Failure/Battery Indication
If the signal is lost between the sensor and the Main Console, or if the battery in the sensor is low, the zone LED light will start blinking fast.
Take the following steps to troubleshoot the problem:
- Check if the sensor is located where it should be, and whether there is any physical damage to the sensor.
- If the failed sensor is not physically damaged, try to activate the sensor and see if the Main Console reacts to the activation.
- If not, try to remove the sensor from its location, and bring it closer to Main Console and then activate the sensor. It is possible that the sensor is installed too far from the Main Console and it cannot establish a steady communication with the Main Console. If this is the case, please install the sensor closer to the Main Console.
- Replace the battery of the sensor in that zone if the Main Console does not respond even when the sensor is near the Main Console.
NOTE: If you have multiple sensors in a zone, you may test the function of each sensor to identify which sensor is having a problem.
FAQ
The Main Console does not respond to the sensor, keychain remote or Keypad Control?
- You must program the sensor or keypad to zone 1 of the main unit before they can work together.
- Ensure to input the correct password on the Keypad.
- Ensure to input the correct password if enable the password feature in keychain remote.
Can I erase just one sensor or remote from a zone?
- You must erase all the sensors/remotes in that zone and then program the remote you want to keep.
I have multiple remotes in a zone and the zone LED keep flashing that is a remote failure, how do I know which sensor/remote is having the problem?
- You need to test each remote/keypad/sensor individually.
Can I only use battery to power up the Control Panel?
- It is recommended to power up the control panel with AC adapter. Install batteries to the Control Panel so it can continue to operate during power failure.
Erasing the Sensors/Remote from the Main Console
NOTE: To erase any sensors or remote from the Main Console, you need reset the Main Console and learn the sensors/remotes you wish to keep.

- Remove the power adapter from the Main Console.
- Press and hold the Learn Button and plug in the power adapter back in the Main Console.
- Release the learn button when the red LED are flashing on the Main Console.
- You have successfully erased all sensors and remotes from the Main Console.

Changes or modifications to this unit not expressly approved by the party responsible for compliance could void the user's authority to operate the equipment.
If you have any questions, problems or missing parts, please call:
Skylink Customer Support
1-800-304-1187
9:00am – 5:00pm EST, Monday-Friday.
Or e-mail us at support@skylinkhome.com
www.skylinkhome.com

Documents / Resources
References
Download manual
Here you can download full pdf version of manual, it may contain additional safety instructions, warranty information, FCC rules, etc.
Download Sky link M4 - 2In1 Long Range Household Alert & Alarm System Quick Guide
Advertisement
Thank you! Your question has been received!


Need Assistance?
Do you have a question about the M4 that isn't answered in the manual? Leave your question here.