Table of Contents
Advertisement
Quick Links
Advertisement
Table of Contents

Related Manuals for BenQ InstaShow VS10


Summary of Contents for BenQ InstaShow VS10
- Page 1 InstaShow™ User Manual VS10 V 1.00...
-
Page 2: Copyright
Statement regarding hyperlinks and third-party websites BenQ is not responsible for the content of the websites or of similar resources, which are maintained and controlled by third parties, that may be linked from this product. Providing links to those websites or to similar resources does not mean that BenQ makes any warranty or representation to their content by expression or by implication. -
Page 3: Benq Ecofacts
BenQ ecoFACTS BenQ has been dedicated to the design and development of greener product as part of its aspiration to realize the ideal of the “Bringing Enjoyment 'N Quality to Life” corporate vision with the ultimate goal to achieve a low-carbon society. Besides meeting international... -
Page 4: Table Of Contents
Table of Contents Copyright ....................... 2 Disclaimer ......................2 Statement regarding hyperlinks and third-party websites ......... 2 BenQ ecoFACTS ....................3 Introduction ......................6 Product features ........................7 Package content ........................8 Product specifications ......................9 Overview ..........................11 Button ..........................11 Host .......................... - Page 5 Using multiple InstaShow Buttons as microphones ............46 Web management ....................48 Accessing the web management interface ...............48 Logging into the web management interface via direct connection ......48 Logging into the web management interface via LAN ..........51 Logging into the web management interface via a wireless network ......51 Getting started ........................
-
Page 6: Introduction
Introduction Instashow VS10 is a wireless conferencing solution that supports BYOM in your organization. You can use your own device to host a video conference. All you have to do is few clicks on your VS Assist App. Your presenters can use the VS10 buttons to share presentation with simple plug and play. -
Page 7: Product Features
Product features The product is equipped with the following features: Features Description Brings a stable Wi-Fi connection and security features that benefit Router based WIFI the system. Auto Channel The product automatically selects the best wireless channel upon Selection bootup, ensuring smooth presentations in any environment. Wireless Conferencing InstaShow Button Lightly equipped meeting rooms with a VS10 Host with VS20... -
Page 8: Package Content
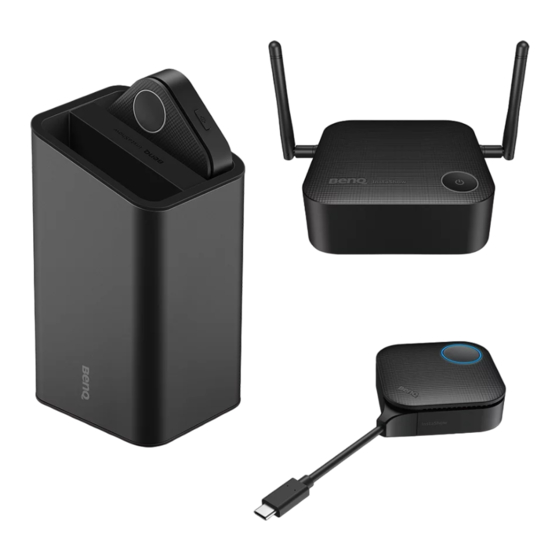
Package content InstaShow™ Buttons InstaShow™ Host 2 Antennas Cradle Adapter & Plugs Screws and Screw Anchors Rubber Feet Velcro Strap Quick Start Guide & Cable: HDMI A(M) to A(M) 2 Button HDMI Cables Safety Statement • The plug provided with the adapter will vary by region. •... -
Page 9: Product Specifications
Product specifications General Features Model name VS10 Color Black Interface HDMI Out + RJ45 (Ethernet) + 2 x USB 2.0 (Type-A) HDMI 1.4 (Complies with HDCP 1.4): 1920x1200P60, 1920x1080P60, Host HDMI-output resolution 1920x1080P50, 1920x1080P30, 1920x1080P24, 1280x720P60, 1280x720P50, 720x480P60, 640x480P60 Mode Split screen mode(on/off) Simultaneous connections 32 pcs... - Page 10 InstaShow™ Button Cable USB Type C Power supply DC 5V±10%, 0.9A Red/Green/Blue/ Reset button White* x1 (Share with Present key Split screen key Pairing Key) Weight Power consumption Up to 4.5W / 3.5W (Operating) / 2.5W (Standby) Wireiess transmission IEEE 802.11 ac, 5GHz, 2T2R protocol Data rate wireless Up to 867Mbps (at 5GHz for 802.11ac)
-
Page 11: Overview
Overview Button Present key with LED indicator Press to start or stop presenting. Split screen key Press to enable split screen presentations. USB-C connector Connect to a computer or laptop. Reset Poke the reset hole to reset the device if the Bottom of a Button device stops responding. -
Page 12: Led Indicators Of The Button And The Host
WAN port Allows the following connections: • Connect the Host to a network for Internet access. • Connect the Host to a laptop to access the Host's web management interface. DC 2A port Connect to the supplied adapter extender power cable and adapter to power the Host. Power switch 10 Lid of the Host Slide to power on or off the Host. - Page 13 LED indicator on the Host Status Description Static blue The connected device is presenting. Flashing blue The device is pairing. • The device is starting up. Flashing green • The device is upgrading the firmware. • The device is powering up. Static white •...
-
Page 14: Installation
Installation This section will guide you on how to prepare the unit before its initial use. Environment check Before installing your InstaShow™ kit, check the environmental conditions. 1. Do not install the device near heat sources like radiators or direct sunlight, or in a site with excessive dust or humidity. -
Page 15: Assembling The Host
Assembling the Host Assemble the Host with two antennas by turning the antennas clockwise to fasten them tightly. Setting up the Host You are provided with four different ways to position the Host. The total weight of the Host Unit varies by model. See the specifications for the weight of your product. Attaching the Host to the ceiling 1. -
Page 16: Attaching The Host To A Ceiling Mount
Attaching the Host to a ceiling mount If the display is mounted on the ceiling: 1. Attach the Host to the ceiling mount using the provided velcro strap. 2. Fix the Host to the mounting holder. 3. Use the supplied velcro to fix the mounting holder and the Host to the ceiling mount as shown in the illustration. - Page 17 2. Turn the lid counter-clockwise until it clicks into place. 3. When the lid is correctly installed on the Host the OPEN and LOCK print on the lid should be pointed to the rear side of the Host. 4. Attach the rubber feet to the recesses on the base of the lid and put the Host right next to the display.
- Page 18 You can also place the Host on a mobile display trolley. See the illustration.
-
Page 19: Positioning The Host Antennas
Positioning the Host antennas Once you have properly installed the Host, follow the guidelines below to position the antennas to maximize signal reception: For ceiling installation Position the antennas so that they are both pointed downwards at an angle roughly perpendicular to the ceiling: For ceiling mount installation •... -
Page 20: For Table Placement
• Avoid positioning the antennas in a horizontal manner, this may result in a weak signal reception: • If the Host is attached to a metallic ceiling mount ensure that the antennas are at least 3 cm away from the metal portion of the ceiling mount: 3 cm 3 cm For table placement... -
Page 21: Connecting The Hdmi Cable And Power
Connecting the HDMI cable and power Once the Host has been positioned properly near the display, connect the HDMI cable and power to ensure signal transmission. Assembling the adapter Every adapter provided in the box includes a plug socket and plugs based on the region in which you purchased the product. -
Page 22: Connecting The Hdmi Cable
Power HDMI For BenQ IFP (Interactive Flat Panel) products, please have power supplied via a power adapter. Do not keep the device powered on all the time. For better performance, power off the device for 30 minutes every 24 hours then restart it. -
Page 23: Lan Connection
LAN connection The Host can be connected to a local network or a laptop via its WAN port. The LAN connection can be used to: • Access the Internet for videoconferences, see Using InstaShow in hybrid meetings on page 39 for more information. -
Page 24: Switching To The Button Hdmi Cable
Switching to the Button HDMI cable A product set includes an additional Button HDMI cable which can be installed onto a Button to allow it to work with laptops without a USB-C port. To switch the cable on the Button to the HDMI cable, follow the steps below: 1. -
Page 25: Setting Up And Powering A Button
Setting up and powering a Button 1. Connect the button to a laptop using one of the following methods: • Connect the Button’s USB-C connector to the corresponding input of a laptop. USB-C • For Buttons where the connectors have been switched to the HDMI cable, connect the Button’s HDMI and USB connectors to the corresponding inputs of a laptop. - Page 26 3. When the Button is ready to present, the LED indicator will turn solid green. Press the Present key when the LED indicator turns green. • If the Button encounters problems while pairing with the Host during startup, the LED indicator will flash red.
- Page 27 4. When the Button is ready to present, the LED indicator will turn solid green. Press the Present key when the LED indicator turns green. • Handle the Button cable with care. Rough handling might cause defects. • Pull/Push the connectors instead of the cable when inserting or removing Buttons.
-
Page 28: Pairing A Button And Host
Pairing a Button and Host A product set includes a Host and two Buttons, which are paired before shipment. In such a case, you don’t need to pair them again. However, if you buy two or more product sets, and you want to pair a Button with a different Host, you need to follow the instruction below. - Page 29 00:00:00 00:00:05 If the Host is attached to the ceiling so that it is not easy to press the PAIRING key, please use the pairing process in the web management interface. Refer to Pairing on page 66 for information. 4. Press the split screen key on the side of the Button for five seconds. The LED indicator of the Button will blink blue for about 10 seconds.
-
Page 30: Storing Buttons And Usb Cable In The Cradle
5. The LED indicator of the Button turns static green and a “Pairing complete” message will be shown when the Host and Button are successfully paired. The maximum number of Buttons you can pair with one Host is 32. Storing Buttons and USB cable in the cradle You are provided with two different ways to store the Buttons in the cradle. -
Page 31: Resetting A Host
Resetting a Host Resetting a Host allows you to return the Host to its original factory settings. You may want to reset the Host because of either one of the following reasons: • You want to clear the web management interface of all changes made to its configurations, such as pairing information, passwords, SSID, etc. -
Page 32: Resetting A Button
Resetting a Button Resetting a Button allows you to return the Button to its original factory settings. You may want to reset a Button because of either one of the following conditions: • You purchased an additional Button (via a Button Kit) which has not been paired to a Host. -
Page 33: Enabling Network Standby Mode
Enabling network standby mode You can set the Host to enter network standby mode after a period of inactivity. To set the time of inactivity, go to Web Management > Advance Setting > Network Standby. See Advance Setting on page 70 for more information. -
Page 34: Starting And Stopping Presentations
Starting and stopping presentations This section will guide you on how to start and stop a presentation using the product. Getting ready Make sure that all the connected devices have been powered on and ready for the presentation. As the product could work with different projectors, IFPs, TVs, or monitors with standard HDMI ports, the steps required to start a presentation may vary according to the actual environment and your display specifications. -
Page 35: Idle Presentation
5. The device starts presenting, and the LED indicator of the Button turns static blue. • Make sure the transmission distance between the Button and Host is within 20 meters and with no obstacles. • The product supports MacBooks and Windows laptops to mirror an extended desktop. Idle presentation 1. -
Page 36: Split Screen Presentations
Split screen presentations The product allows up to 2 users to present simultaneously in a split screen orientation. Starting a split screen presentation 1. Connect a Button to each computer that will be presenting in the split screen presentation. See Setting up and powering a Button on page 25 for more information. -
Page 37: Switching From A Split Screen To A Full Screen Presentation
Switching from a split screen to a full screen presentation Once in a split screen presentation you can switch to a full screen presentation of any of the participant’s screen by pressing the split screen button on the Button of the computer that wants to present in a full screen. -
Page 38: Touch Back
Touch back When a Host is connected to a touchscreen display and a PC is presenting via a Button, you can use a USB Type-A cable to connect the top USB 2.0 port (Port 1 as indicated below) located at the rear of the Host to the touch input USB port of the display to control the interface of the PC remotely via touch gestures on the display. -
Page 39: Using Instashow In Hybrid Meetings
Using InstaShow in hybrid meetings InstaShow is a wireless presentation system that can be fully integrated into any hybrid meeting that uses videoconferencing applications to link remote participants, so that those participants are also able to view and interact with any content being broadcast in the conference room by InstaShow. - Page 40 2. Connect the laptop that will be running the videoconferencing application to the same network as the Host using one of the following methods: • Connect the laptop's Wi-Fi to the SSID of the Host listed on the bottom-right corner of the InstaShow Guide screen.
- Page 41 5. Select Room List on the app's home screen. Room List 6. Select the search (magnifying glass) button in the app and it will search the network for all available Hosts. 7. Double-click the name of your respective Host under the Room Name column. VS10_XXXXXX Connect If you are unsure of your Host's name you can also cross check the IP address shown in the IP Address...
- Page 42 9. Start a videoconference and then share the InstaShow Display Sharing pop-up window in the videoconferencing application. √ A Window Internet You can also select the InstaShow Display option in the Video > Camera settings menu of the videoconferencing application to share the presentation display, but please note that this option will broadcast a lower resolution image with higher latency compared to using the InstaShow Display Sharing method indicated in the instructions.
-
Page 43: Using An External Webcam
Using an external webcam Within a hybrid meeting, you can also switch from the webcam on the laptop to an external webcam so that remote users are able to get a clear view of the full conference room during the meeting. To switch to an external webcam in your hybrid meeting: 1. - Page 44 If the preview video shown is not from your webcam, repeat the process and ensure that the correct Host/Room Name is selected in the app. 5. Open the webcam input source menu in the videoconferencing application and select InstaShow Camera. √...
-
Page 45: Using A Single Instashow Button As A Microphone
Using a single InstaShow Button as a microphone This feature is not available when using a VS10 Button. To be able to use this feature with the VS10 Host, purchase a set of VS20 Buttons separately. For hybrid meetings where you do not have a webcam with a built-in microphone or the microphone on the laptop running the videoconferencing application does not adequately capture all the sound in the room, you can use the InstaShow Button as a microphone. -
Page 46: Using Multiple Instashow Buttons As Microphones
Internet Using multiple InstaShow Buttons as microphones This feature is not available when using a VS10 Button. To be able to use this feature with the VS10 Host, purchase a set of VS20 Buttons separately. For hybrid meetings in larger conference rooms, you can use multiple InstaShow Buttons connected to laptops throughout the room as an array of microphones that is able to capture sound from every corner of the room and transmit that sound to any person participanting in the videoconference. - Page 47 3. Open the microphone input source menu in the videoconferencing application and select InstaShow Audio. √ InstaShow Audio Internet For hybrid meetings that feature an external webcam with a built-in microphone connected to the Host, the resulting microphone array will also include the microphone on the webcam.
-
Page 48: Web Management
Web management The product is equipped with a web management interface that enables you to configure its features through a browser such as Google Chrome (version 49.0.26), Internet Explorer (version 8.0), or Firefox (version 46.0.1). The features may vary according to different firmware versions. Accessing the web management interface Logging into the web management interface via direct connection... - Page 49 3. The default IP address of your Host is 192.168.20.1 Change your laptop’s IP address to 192.168.20.x (e.g. 192.168.20.100).
- Page 50 4. On your browser, enter the IP address: 192.168.20.1 At the first access to the web management interface or after a firmware upgrade, you may be prompted to change the password to proceed. Enter the default password (0000) as the old password, and set a new one.
-
Page 51: Logging Into The Web Management Interface Via Lan
Logging into the web management interface via LAN If your Host is connected to your LAN (the same network as your laptop), you can enter the IP Address shown on the screen via a web browser. Logging into the web management interface via a wireless network The product supports 802.11 ac/n. - Page 52 The following is an example of how you can log into the web management interface via a mobile device with a wireless connection. 1. Go to Wi-Fi menu of the mobile device, and you can find the SSID of your Host: VS10_0d0912.
-
Page 53: Getting Started
Getting started You can now use the web management interface to configure various settings of your Host. Main column Top command buttons Function bar Top command buttons Language The default language for the web management interface is English. Logging out Click Logout on the upper right corner. -
Page 54: Information
Information Click Information and you will see detailed information for System Information, WAN, Wireless Network, My Screen, and Screen Message. System Information The System Information sub-menu lists the following basic system information for the Host: • Serial Number • Firmware Version - To update the firmware, see Firmware Upgrade on page •... - Page 55 The WAN sub-menu lists the following information for the Host's WAN connections: • Connection Status • WAN Connection Type - Lists the way in which the Host obtains its IP address, subnet mask and default gateway information. For more information on configuring the WAN Connection Type, see General on page •...
- Page 56 My Screen The My Screen sub-menu allows you to customize the Idle Screen and Guide Screen that is shown when the Host is connected to a projector or display. Guide Screen Background Image Tutorial Boxes Idle Screen Background Image Tutorial Boxes To customize the Idle Screen and/or Guide Screen: 1.
-
Page 57: Wan
Click WAN and you can configure the settings for the Host's wired connection in the General sub-menu. General The General sub-menu includes the following configurable settings for the Host's connection to a network access point via the WAN port: • WAN Connection Type - Select one of the following options to configure how the Host obtains the connection settings for its WAN connection, including IP address, subnet mask, and default gateway: - DHCP - This option allows the host to automatically acquire its configuration settings... -
Page 58: Wireless Network
Wireless Network Click Wireless Network and you will see the Setting, Wi-Fi Radio Setup, and Wireless Nodes Status sub-menus for the Host's wireless connection. Setting The Setting sub-menu includes the following basic settings for the Host's Wi-Fi signal: • SSID1 Setting - This field allows you to customize the SSID (and Room Name) for the Host. - Page 59 slower data speeds and is more commonly used by older mobile devices. • 5G Enable - This option cannot be disabled as all the connections between the Host and Buttons rely on 5G Wi-Fi. • Certain mobile devices are unable to access 5G Wi-Fi signals due to hardware limitations. If your mobile device is unable to connect to the Host via Wi-Fi, select Enable in the 2.4G Enable field.
- Page 60 2. In the Enable SSID2 Multiple field, select On. 3. In the SSID2 Setting field, enter the name you want to use for the second SSID. 4. In the Wi-Fi Security Option field, select WPA2 Enterprise. The Wi-Fi Security Option field for the original SSID is fixed at WPA2 Personal Mixed and is not adjustable.
- Page 61 5. In the Radius Server IP Address and Radius Port fields enter the corresponding information for your organization’s network. 6. Click Apply to save the settings.
- Page 62 Wi-Fi Radio Setup The Wi-Fi Radio Setup sub-menu includes the following additional settings for the Host's Wi-Fi signal: • Transmission Power - This field allows you to set the strength of the Wi-Fi signal with the following options: - Heavy - This option sets the Wi-Fi signal to a strong signal strength (10 dbm for 2.4G; 16 dbm for 5G).
-
Page 63: Peripheral Setting
Peripheral Setting The TX Wi-Fi Microphone function is only available when used in tandem with VS20 Buttons. Click Peripheral Setting and you will see the Connected Device, Advance Setting, Selected VC Devices and VC Devices in Use sub-menus for the Host. Connected Device The Connected Device sub-menu lists the Host's USB ports (see image below for the respective listing for each port) and the corresponding peripheral devices (webcams,... - Page 64 • For devices that have multiple functions, a separate listing will appear for each individual function. So, for example, a 3-in-1 webcam will feature three separate listings: one for the camera function, one for the microphone function, one for the speaker function. •...
- Page 65 videoconferencing-related functions combined in one) and use it as the default device for each respective function (camera, microphone, speaker). • If there are no multi-function devices connected to the Host and Auto Meeting Audio is selected, the Host will select the first supporting device detected for the respective function. •...
-
Page 66: Pairing
Pairing Click Pairing and you will see Pairing and Pairing Status sub-menus. Pairing The Pairing submenu can be used when the Host is attached to the ceiling as it is not easy to press the PAIRING key of the Host when the device is too high. To pair a Button and Host via the web management interface: 1. - Page 67 2. When the Button is successfully connected to the laptop, the LED indicator of the Button will blink green. 3. Make sure the Host is properly connected to a power source. 4. Press Start pairing to pair the Host to the Button via the web management interface, you will have two minutes to pair with the Button.
- Page 68 6. The LED indicator of the Button will turn static green when the Host and Button are successfully paired. • Images are for reference only. Each product features a different serial number. • The maximum number of Buttons you can pair with one Host is 32. 7.
-
Page 69: Display
Display Click Display and you will see the Display Output Setting sub-menu. Display Output Setting The Display Output Setting sub-menu includes the following settings for the video output by the Host to the display connected to its HDMI OUT port: •... -
Page 70: Advance Setting
Advance Setting Click Advance Setting and you will see the Advance Setting, Firewall, Network Service, Restart, and Power Saving sub-menus. Advance Setting The Advance Setting sub-menu includes the following advanced setting for the Host: • BYOD Wireless Display - This setting allows you to permit or prohibit iOS mobile devices from presenting via the Host. - Page 71 • Video Conference Standby - This setting when enabled allows you to automatically hide the InstaShow window from videoconferencing interface anytime InstaShow is not presenting thus allowing the videoconferencing application to save screen space when InstaShow is not directly in use. The InstaShow window will still appear within the videoconferencing interface on command anytime the Button is pushed and a presentation via the Host begins.
-
Page 72: Scheduling
Power Saving The Power Saving sub-menu allows you to put the Host in Standby mode when it is active, or Wakeup the Host from Standby mode. Scheduling Click Scheduling and you will see the System Time and Scheduler sub-menus. System Time The System Time sub-menu includes the following time settings for the Host: •... -
Page 73: Tools
3. Select the Wakeup Time for the corresponding day. 4. Select the Standby Time for the corresponding day. 5. Click Apply to save the schedule. Tools Click Tools to see the Password Setup, Firmware Upgrade, Configuration Management, Wi-Fi Traffic Test, and Log Setting tools/sub-menus. Password Setup The Password Setup allows you to change the Password for the web management menu. - Page 74 3. Enter the new password again to confirm your new password. 4. Press Reset to save the password. Firmware Upgrade The Firmware Upgrade sub-menu allows you to check for and execute firmware upgrades for both the Host (via the Host(RX) Firmware Upgrade sub-menu) and Button (via the Button(TX) Firmware Upgrade sub-menu).
- Page 75 To check if firmware upgrades are available for the Host and/or Button click the New Firmware Check button in the respective sub-menu for the device. • To have the Host or Button periodically check for firmware upgrades check the Periodical Check box in the respective sub-menu for the device.
- Page 76 To perform a direct upgrade from an upgrade file located on your local computer follow the steps below: Before executing a direct firmware upgrade, please contact your BenQ regional office for access to the upgrade files. 1. Select From a Local File and then click the Select File button in the Firmware File field.
- Page 77 Button(TX) Firmware Upgrade To upgrade the Button’s firmware using an upgrade file located on your local computer follow the steps below: 1. Connect the Button you want to upgrade to the laptop running the web management interface and then wait for the Button's LED indicator to light up green. 2.
- Page 78 1. Connect the Button you want to upgrade to a laptop and then wait for the Button to link up with the Host and the LED indicator to light up green. 2. Select From Host(RX) in the Firmware File field. 3.
- Page 79 1. Connect the Button you want to upgrade to the laptop running the web management interface and then wait for the Button to link up with the Host and the LED indicator to light up green. 2. Select From OTA Server in the Firmware File field. 3.
- Page 80 Configuration Management Configuration backup files feature the configuration settings for your Host except for the host name, SSID and wireless password settings, and pairing status. In Configuration Management, you can choose Import Configuration File, Export Complete Configuration File, and Factory Default. You can import configurations files by: 1.
- Page 81 You can export a full configuration backup in the Export Complete Configuration File sub- menu by: 1. Clicking Export. 2. Navigating to the folder you want to save the backup file to in your local computer and then choosing Save. The exported configuration file can only be imported by the same Host that exported the file.
- Page 82 Wi-Fi Traffic Test The Wi-Fi Traffic Test sub-menu allow you to test the speed of the connection between your Host and the Button. To test the speed of the connection follow the steps below: 1. Select the Button you want to test the connection speed for in the Option Button field.
- Page 83 2. Click the Settings button in the Option Button field. 3. Select the channel you want to test the speed of in the Option Channel field.
- Page 84 4. Click the Settings button to set the channel test.
- Page 85 5. Click the Test button. The results of the test will be shown in the main window.
-
Page 86: Legal Announcement
Log Setting Logs are records of all system activity for your Host, which may be used by support technicians to track errors or locate bugs. In the Log Setting menu you can: • Download the system log to your local computer by clicking Download To PC •... -
Page 87: Troubleshooting
Troubleshooting Category Problem Cause Solution The Button is The Button should be paired Your screen is connecting to another again with the Host. not appearing Host. on the display when pressing the Press the Present key until the Pressing time is not LED indicator turns from green Button. - Page 88 Category Problem Cause Solution Insert the HDMI cable between The video cable is not the Host and the display device connected properly. again. The display fails to show the Host’s output Replace the display with a resolution at 1080p in new one that supports output "Guide Screen"...
-
Page 89: Error Code
Category Problem Cause Solution When presenting a video file via Gom Use other media players to play Windows Media Player, the Media player video files, such as Windows Software full-screen image is Media Player. cut into upper and lower halves. 1. - Page 90 BenQ.com © 2023 BenQ Corporation. All rights reserved. Rights of modification reserved.