Table of Contents
Advertisement
Advertisement
Table of Contents

Related Manuals for Nikon Speedlight SB-16


Summary of Contents for Nikon Speedlight SB-16
- Page 1 Nikon Speedlight INSTRUCTION MANUAL...
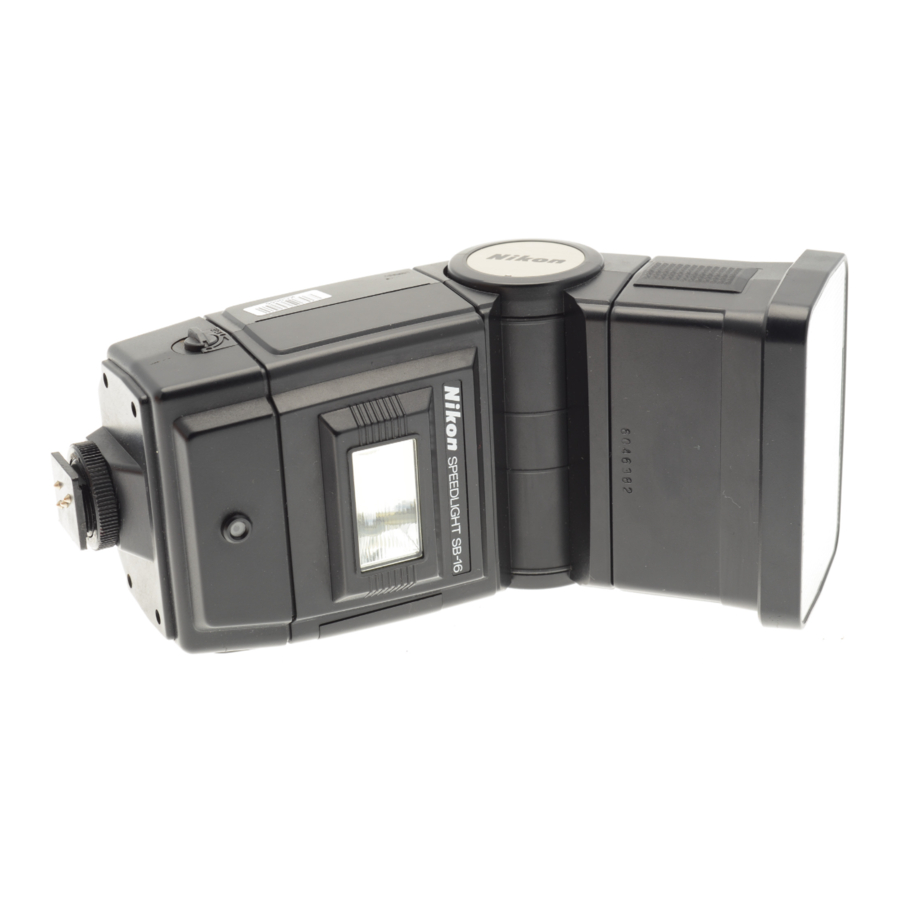
- Page 2 -NOMENCLATURE------------ Wide-Flash Adapter SW-7 Main flash head ® Main flash unit Light sensor ® n n/~ln,oo'" knob...
- Page 3 Zoom scale @Shooling mode indicator LEOs @TTL multiple flash terminal...
- Page 4 C O N T E N T S - - - - - - - - - - - - - NOMENCLATURE ATTENTION!. FOREWORD BASIC OPERATION CONTROLS IN DETAIL Flash Unit Couplers AS-8 and AS-9 .. Synchronization Speed Zoom Head Shooting Mode Selector ...
- Page 5 '''The SB-16B cannot used with the Nikon Magnification Finder OW-4 attached. ····The SB-16B cannot be mounted on the Nikon F2-series cameras with the Action Finder OA-l Hot.: For more detailed information about shooting modes, refer to page As shown in the...
-
Page 6: Foreword
The Nikon Speedlight SB-16 is a direct-mounting elec tronic flash unit, providing automatic through-the-Iens (TTL) control of the flash exposure when used with Nikon cameras having TTL flash capability. an inte rchangeable mounting foot tached to the special accessory shoe of all Nikon F3... - Page 7 BASIC O P E R A T I O N - - - - - - - - - - - - Set the openl closed knob • ® on the flash unit coupler to the OPEN position. Attach the flash unit .
- Page 8 -BASIC OPERATION-confinued---------- lock the flash unit . coupler. Turn the open/closed knob to the "c losed " position (indicated by a dot) to lock the flash unit coupler make sure the flash unit and flash unit coupler fit tightly together. Note To remove the flash unit coupler.
- Page 9 Load the batteries into . the holder. Load four 1.5V AA-type penlight alkaline-manganese cells or 1.2V rechargeable NiCd batteries into the holder, making sure that the positive and negative and -) terminal match the diagrams on the holder. Notes 1) Use of manganese batteries not recom mended because their power insufficient...
- Page 10 Attach the flash unit to . the camera's accessory shoe. Notes: you are using an F3-series camera, make sure that the ASAIISO film speed is already on the camera before attaching the flash unit, the camera's ASAIISO dial cannot changed after the flash is attached to the accessory shoe.
- Page 12 -BASIC OPERATION-confinued---------- Tilt the flash head ® . the normal shooting position. Tilt the flash head 90°, faces straight ahead Set ASAIISO film speed. Turn the ASA/ISO film speed setting ring around the exposure calculator dial until the ASAIISO that index opposite the film loaded in your...
- Page 13 TTL operation with Nikon F3·series camera, the camera's backup mechanical release lever cannot be used with the shutter speed dial set at T (time). With the Nikon FA FE2, Nikonos -V, mechanical shutter speed !i.e., M250, B) cannot be used for operation.
- Page 14 -BASIC OPERATION-continued----------- A-14 Set the S8·16's mode . selector to TTL (45) Slide the mode selector to the right as far as it will go, that the on the selector opposite the square mark for automatic through-the-Iens (TTL) flash exposure control. With the F-501/N2020 F-301/N2000...
- Page 15 A-16 Set the lens aperture . ring to the appro· priate fI stop. If you decide to shoot at f/4, then you must set the aperture ring on the lens to f/4 8-14. Choose an f/stop from the exposure calculator dial. non-TTL automatic operation the exposure calculator dial provides a choice of two f/stops.
- Page 16 -BASIC OPERATION-continued---------- B -15 Set the mode selector to the blue or • orange dot for automatic operation. you select 1/4, must selector the orange dot, ponding to f/4 on exposure calcu- lator dial. B-16 Set the lens aperture . ring to the appro· priate f/stop.
- Page 17 C-15. S~t ,lens to the minimum aperture (largest f·number), C-16. Set the 58·16'5 mode selector to TTL. • fffIl For TTL operation • • For automatic operation (A2) Turn on the flash unit. Slide the S8-16's ON/OFF switch to the right. Immediately, an LED will...
- Page 18 As soon as the flash ready-light built into the back of the flash unit comes the 88 -16 ready to fire. With the except ion of the Nikon F2 -series, if your camera an LED ready- light inside the viewfinder,...
- Page 19 Nikon ca meras having built -in ready-light (except F2-series cameras). Turn off the flash unit. conserve battery power between shooting sessions power switch the left.
- Page 20 AS SB-16B camera either Nikon Flash Unit automatic shooting mode, only when th SB-16A used with a Nikon es came ra or wh en FA, FE2, F-501/N2020, F-301/N2000, Sync Cord). For more detailed informatin about combinations,...
-
Page 21: Synchronization Speed
$8-16 • When the shutter speed dial setting higher than flash sync sync speed setting is available with Nikon FE, F-501/N2020, cameras. table, automatic Actual shutt.r sp •• d ( •• c .) 1/80 2598 1/80 Band T S8C. -
Page 22: Zoom Head
-CONTROLS IN ZoomHead 88·16's zoom head various angles of coverage as shown in the The number with an orange background lens with the same at that setting. However, please remember that the lower numbered setting, smaller the narrower the automatic shooting number and automatic shooting... -
Page 23: A (Non-Ttl Automatic Operation)
Shooting Mode Selector shooting mode lector on the back of the SB-16 has five click-stop settings. Directly above the selector ing from left right), there are the blue and orange dots for non-TTL automatic operation, two white dots middle indicating MD (Motor Drive) -
Page 24: Exposure Calculator Dial
MD (synchronization with motor drive) the motor drive (MD) setting recycle fast enough to synchronize camera firing continuously up to four frames It is possible to take up to eight flash succession in this way. At the MD setting flash head fires the light sixteenth that... -
Page 25: Set T He Zoom Setting Knob
2) Set the zoom setting knob Turn the zoom setting knob at the center on zoom setting index is opposite the same letter selected setting the zoom head. the zoom head T for a 85mm ting knob must also set at Note: setting on the dial is... - Page 26 -CONTROLS IN DETAIL-continued--------- For through·the·lens (TTL) operation dial there are eight lis tops ranging from f/2 to f/22 . Each IIstop determines which you can obtain the correct automatic exposure These ranges indicated lines above distance scale. For programmed TIL operation the lens aperture.
- Page 27 11+113 zoom head away, 16+1/3 1/8, f/11 or f/16. use 1/2.8. If greater • For Nikon F-5011N2020 and F-3011N2000 • ' used when the wide-ffash adapter zoom head set at c=:J Programmed TTL ranges for TTL photography are shown table.
- Page 28 For non-TTL automatic (A) operation For non -TTL automatic operation two flstops indicated by the blue indicator lines at the bottom of the calculator dial. After determining the aperture corresponding to the aperture you Example can select one of orange aperture at N for the blue A1...
- Page 29 Example 2 If you using ASAIISO 400 film, the now f/16 1 and auto shooting range varies according to head setting as shown in the table head setting, the range is the same speed and the corresponding Iistop As you can see in the table the closest...
- Page 30 For manual (M) operation After setting the ASA/ISO film speed and zoom setting knob exposure calculator ject; then look the lens and read off tance determine exactly how far away the subject actually Now, find the end of the directly above the flash-to-subject distance and the f-number next to this line.
- Page 31 The guide number various film settings shown in the following Guide numbers the manual mode ASAIISO film Zoom head setting 119(390) 84 (276) 59 (194) 42 (351) 76 (250) 54 (177) 38 (125) 27 (89) 90 (295) 64 (210) (148) 32 (105) 76 (250) 54 (177) 38 (125) 27 (89) 54 (177l 38 (125) 27(89) is used when the wide-flash adapter is attached...
- Page 32 Now, you are ready to read the usable f/stop from the dial. Each color-coded line indicating the auto shooting range for each f/stop has a notch on it. Find the notch directly above the flash-to-subject distance and read the f-number at the end of the line. Example With ASAIISO 100, zoom...
-
Page 33: Exposure Compensation
TTL exposure compensation When shooti camera's exposure compensation dial (or compensation button also available when using the Nikon FG) sation according to the intentionally Turn the dial turn it in sure (refer information). according ng TTL... - Page 34 2 (overexposure), compensation Reset the exposure and then Film speed In use match the com pen calculator • For Nikon F-5011N2020 and F-301IN2000 only value 800' 200 400 800 1000' 250 500 1000 possible; make the necessary compensation in automatic mode...
- Page 35 Non-TTL automatic exposure compensation the non-TTL automatic exposure mode, exposure compensation can be performed by stopping down opening up the lens. With dark subject use a smaller aperture. When a subject is light tone use a larger aperture.
- Page 36 8B -16 is recyc led and ready fire. At the same time, inside viewfinder of all Nikon in addition to the FA, FE2, FM2, FE, F-501/N2020, F-301/N2000, FG, FG-20, and Nikonos-V also lights Thus, without removing your eye from the tell when the flash unit is ready for the next shot.
-
Page 37: Warning Functions
Warning functions In the TTL or non -TTL automatic lights on the fla sh unit and in the blink for 3 seconds after the flash unit output indica ting that the light insufficient for correct exposure. subj distance and if it out of the automatic range, use a wider aperture... - Page 38 1) When the AS-8 mounting foot is not When using the TTL mode with the Nikon F3-series camera camera 's film beyond the usable range of ASAIISO...
- Page 39 Shutt.r C.mer. Seili 3· •• rle. sel1ings seUings and M FA 'II. A S·' M25O. B <In A and All settings except E2 'II. A S·' M250, B AUTO. 11125 or slower FE 'II. AS· ' r.ater 1/250 1/250 or slower FM2 (with 1/250 •...
- Page 40 1) When the shooting mode selector is set at TIL with any flash ready to fire camera other than the Nikon FA, viewfinder blinks in F-301/N2000 2) When using the FA, automatic flash photography with the camera's shutter...
- Page 41 Shutt.r .ptled Camer Setting F 3-•• rle. setti AS·4 A1I settings M250, selllngs except M250, AUTO, rsster 1/250 t/250 or slower FM2 (wUh 11250 • • y . p.ed) taater 1/500 t 1200 ( )( 200) FM2 (wllh 1/200 •• e .
-
Page 42: Open- Flash Button
In this case, make sure that the flash unit is not connected to the be used as an open- The open-flash button is also useful for test -firing the SB-16 to determine whether the illumination from the flash was effects or paint automatic one of the color-coded dots (A 1 or A2), push the"... - Page 43 In the TTL mode, test -firing must be performed by trip- ping shutter. Note that without camera ready-light will blink exposure is obtainable a substitute film a strip of cut film old) or piece gray paper. film loaded in the even if the correct...
-
Page 44: Tilting/Rotating Flash Head
-CONTROLS IN DETAIL-continued--------- Tilting/Rotating Flash Head For truly creative bounce flash two flash heads. main head tilts back 90° wi th click 45° , 60°, 75° and 90° positions. an arc or 270°, 90° lockwise with click 60° and 90° positions, and 180°... -
Page 45: Secondary Flash Head
Secondary Flash Head ® The smaller secondary head built into the front fla sh unit faces straight ahead. Its purpose shadows the eye socket light for the eyes when doing bounce flash ary head a guide number of to fill provide second-... -
Page 46: Wide-Flash Adapter Sw-7
28mm len s) increases the angle of coverage 70° horizontal 53° vertical tively, allowing the SB-16 to be used with a 24mm wide- angle lens, With the SW-7 attached zoom head knob on the exposure calculator dial at Because the... -
Page 47: Ttl Multiple Flash Terminal
TTL Multiple Flash Terminal The TTL multiple flash terminal is provided for TTL multi- ple flash photography. (For more pages 58-61.) Sync/Multiple Flash Terminal Located at the information, refer terminal which serves two purposes: attach a or you manual multiple lighting mation about manual multiple flash and 62 Notes:... -
Page 48: Synchro-Sunlight Fill-In Flash Photography
Synchro-Sunlight Fill-In Flash Photography A backlit subject such as a person back to the sun indoors in front of come out almost as a silhouette correctly exposed other pensation made to give backlit subject background fill in the shadows and balance the illumination levels of the subject background... - Page 49 With fill-in fla sh: both the subject and the background come out properly exposed.
-
Page 50: In The Manual Mode
Synchro-sunlight fill-in flash photography is possible with the S8-16's shooting mode selector set to the TTL-auto- matic, non-TTL automatic, or manual mode. Operation in the manual mode assures you of good re- sults in virtually all cases, so we will describe this proce- dure first. -
Page 51: In The Ttl-Automatic Mode
In the TTL-automatic mode Same Steps the manual With the S8-16 3) Take the picture. turned on, just take the picture Notes: as a With strongly backlit subject (such the desired exposure balance may not be the 8B-16 on manual. 2) To give different exposures to the subject and background, you can re set the camera s shutter speed dial and exposure compensation dial... - Page 52 -PHOTOGRAPHIC TECHNIQUES-continued------ Synchronization with slow shutter speeds If you are using 88·16 at a high shutter speed under dim light, the background may come out too dark. To avoid this, use a slower shutter synchron ization with slow shutter that described before; however, camera on a tripod to avoid camera shake at speeds of 1/30sec...
- Page 53 Fast synchronization speed: the background dark. Slow synchronization speed: now detaifs in the background can be seen.
-
Page 54: Diffusing The Light
Diffusing the Light Light is what gives form to solid pointed direc tly at th e subjec t and subjec will look fl at because of is moved Howeve off-axis appear on the side opposite impression of roundness comes directly from the flash. - Page 55 Combination bounce and direct fla sh: soft, natural-looking lighting with a pleasing catchlight in the eyes.
- Page 56 The procedure for bounce flash is as follows 1) Choose the bounce surface. Select the ceiling or wall you want to bounce the flash off then tilt and/or rotate the main flash head pOints in that direction. The position of the flash unit, the bounce angle, and the setting of the zoom head should be determined after considering...
-
Page 57: Using A Diffuser
Using a diffuser also possible to diffuse the light by placing a trans lucent material such as one or mo paper, between the flash and subject. more pronounced diffusion by placing a certain between the diffuser flash diffuser around the flash head. -
Page 58: Multiple Flash Photography
-PHOTOGRAPHIC TECHNIQUES-continued------ Multiple Flash Photography have another flash unit, light source for multiple flash use only one flash unit in front may be produced or light ground. But by using more than solve these problems. With the 8B-16 and F3-series, FA, FE2, F-301/N2000, FG or Nikonos-V camera TIL and manual multiple flash photography are possible. -
Page 59: Ttl Multiple Flash Photography
TTL multiple flash photography 8y using the S8-16 connected to an F-501/N2020, F-301/N2000, FG or Nikonos-V Sync Cord) camera as a master flash unit and either the Nikon 8peedlight 88-11 , 88-14, 88-15, and/or 88-140 slave flash unit(s), TIL multiple flash... - Page 60 SYSTEM CHART FOR TTL MULTIPLE FLASH OPERATION ffiOfJ Nikon l1Jl9JJ Nlkon ~L.- Nlkon N2000 ,Ikonos-v V-Type Sync Cord IJ~!5 @~5B" ~-----+-!=~~ Nlkon FE2 F-5011 -Q:r ~ -"--f-:-@)III~II F-3011 Nikon -_ _ _ __ _ indicates the "master" flash unit. "TTL multiple flash photography is possible onty with an...
- Page 61 F~s." ~---- ~~S~= 2 =3=-- SB-16B ~-Ej AS-11 ~-El SB-11 SB-14/ SB-140 ~____. SC-18 SC-19 SC-18 IlIL SC-19 ,jllJIlll- a i l ~SB-18 AS-11 SB-141 SB-140...
-
Page 62: Manual Multiple Flash Photography
Nikon Speedlight Caution: prevent electrical shock and damage to the hot·shoe S8-17, either recommend mixing Nikon Speedlights with flash units of other makers for or SC-15 (approx. 1 m) sync multiple flash photography, sync/multiple ing. Otherwise. -
Page 63: Ttl Remote Cord Sc-14
Coupler (A8-1 for the F2 and A8-4/7 for the F3) is required TTL Remote Cord SC-14 The 8C setups. The 8C-11 meter off a Nikon F3 -series camera for TTL automatic To use the 8C-1O with flash operation TTL Remote Cord SC-17 The coiled cord 8C-17 enables the... -
Page 64: Ttl Multi-Flash Sync Cords Sc-18 And Sc-19
S8- The AS-1 is for the F2-series camera and the AS-4 unit. AS-6, on the other hand, is used when you want to -16A directly on the Nikon mount the S8-16A on an F2-series camera, preven ts lets and 7... -
Page 65: Red Eye"
Soft Flash Unit Case 55·16 The SS-16 accommodates the main flash unit of the S8-16 both Flash Unit Couplers AS-8 and tached to the main flash unit, and one inside the pocket with the Wide attached to the flash head. you do not store a flash unit coupler in the pocket... - Page 66 Nikon authorized service facility. To prevent damage flash unit 's electronic circuitry, keep camera away from places where...
- Page 67 your 88-16 has not been used for a long time its recycling time longer, To maintain the built-in condenser in peak condition there- by enabling you to use the 88-16 many years fire flash unit a times every month After firing, wait until the ready-light lights,...
- Page 68 Polarity. When installing polarities ative (-) termina should therefore be occur, take the SB-16 to your NiCd batteries. NiCd batteries provide faster recycling time and better efficiency at low temperatures recycling time and the number of flashes per battery use.
- Page 69 TIL, non·TIL automatic, mode brand of battery and amount of Through-the-Iens automatic ex- posure control when the S8-16A is combined with the Nikon F3-series camera or S8-168 is combined with the Nikon FE2, F-301/N2000, FG or film speeds from ASAJISO...
- Page 70 -SPECIFICATIONS-confinued----------- Manual exposure control Synchronization with motor driven camera Dimensions (W SB·16A SB·16B Weight SB·16A SB ·16B Accessories provided Specifications designs shown notice. Full output at M setting Possible at MD setting with 1/16th of full output guide number is at ASA/ISO 100 aM meters 13 at ASA/ ISO...
- Page 72 Nippon Kogaku (1IIIro,,) NIPPON KOGAKU K.K. whole or part reviews). may be Fuji Bldg., 2-3, K.K. Phone: Marunouchi 3-chome, Chiyoda-ku, Tokyo 100, Japan 81-3-214-5311 Telex: J22601 (NIKON) Fax: Prin ted in Japan 8& 137-E 06 81-3-201-5856...