Table of Contents
Advertisement
Quick Links
Advertisement
Table of Contents

Related Manuals for Doro 2821


Summary of Contents for Doro 2821
- Page 1 Doro 2821 English...
-
Page 2: Table Of Contents
English Contents Overview ......................1 Congratulations on your purchase ..............2 Getting started ....................3 Unbox your new phone ................. 3 Insert SIM card, memory card and battery ........... 3 Charge the phone................... 5 Save energy .................... 6 Turn the phone on and off..............6 Get to know your phone................ - Page 3 English Message settings.................. 22 Camera ......................26 Alarm ......................27 Torch......................28 Organiser ..................... 28 Calendar ....................28 My files ....................29 Media ......................30 Gallery ....................30 FM radio ....................31 Sound recorder ..................31 Settings......................32 General ....................32 Display ....................
- Page 4 English Specifications ....................53 Copyright and other notices ..............54 Hearing aid compatibility..............54 Specific Absorption Rate (SAR) ............55 Recycle....................55 Correct disposal of this product ............55 Correct disposal of batteries in this product ........56 EU Declaration of Conformity.............. 56 Ecodesign declaration, energy efficiency for external power supply .
-
Page 5: Overview
You can obtain addi- tional accessories from your local Doro deal- er. The supplied accessories provide the best performance with your phone. -
Page 6: Congratulations On Your Purchase
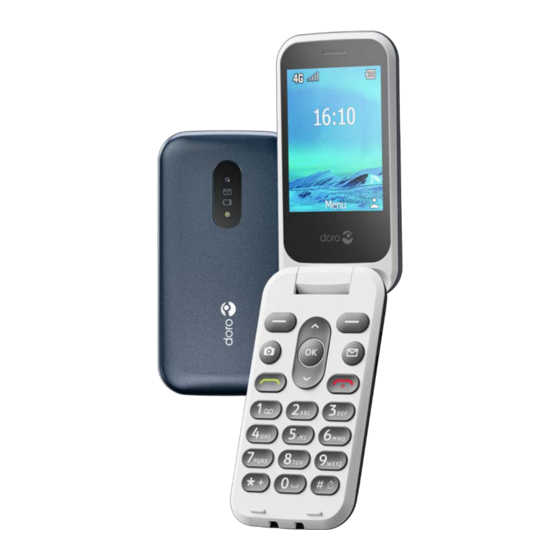
14. Camera flash and torch Congratulations on your purchase Doro 2821 is a stylish 4G clamshell phone that prevents accidental key presses when folded, and lets you answer and end calls with a simple flip. Easily call, message and share photos with family and friends thanks to widely separated, high contrast keys and a large, 2.8"... -
Page 7: Getting Started
Appearances and specifications are subject to change without prior • notice. • You can purchase additional accessories from your local Doro retailer. • Make sure accessories are compatible with the device before purchase. •... - Page 8 English Remove the battery cover IMPORTANT! Turn off the phone and disconnect the charger before removing the battery cover. Be careful not to damage your fingernails when you remove the battery cover. Do not bend or twist the battery cover excessively as it may get damaged.
-
Page 9: Charge The Phone
English Insert the battery Insert the battery by sliding it into the battery compartment. Replace the battery cover. Charge the phone While it is possible that your phone will already come with enough power to be turned on right out of the box, we recommend charging the device fully before using it. -
Page 10: Save Energy
English Note! To protect the environment we might not provide chargers and USB- cables with all our products. Your device supports charging with a USB-C cable and a USB charger that is compliant with applicable country regulations and international and regional safety standards, such as UKCA or CE. -
Page 11: Get To Know Your Phone
English Get to know your phone Assistive functions Use the symbols below to guide you through supporting sections in the manual. Seeing Handling Hearing Safety Start-up Wizard When starting the device for the first time, a Start-up Wizard will be initi- ated to set some basic settings. -
Page 12: Descriptions In This Document
English Descriptions in this document Descriptions in this document are based on your phone’s setup at the time of purchase. Instructions normally start from the start screen. Press to reach the start screen. Some descriptions are simplified. The arrow ( ) indicates next action in step-by-step instructions. - Page 13 English Navigation keys (A) Use the Navigation keys to navigate. • (B) Use the to open the Menu and to • confirm actions. Standby (idle mode) When the phone is ready to use, and you have not keyed in any characters, the phone is in standby.
-
Page 14: Enter Text
English CAUTION Using a headset at high volume may damage your hearing. Adjust the volume level carefully when using a headset. Enter text Enter text manually Select character Press a numerical key repeatedly until the desired character is shown. • Wait a few seconds before entering the next character. -
Page 15: Hearing Aid Compatible
English Press and continue with the next word. Alternatively, press 0 to insert a space and continue with the next word. If none of the suggested words are correct, use manual input mode. Note! See Writing language, p.33 for more information. New word means that you can manually enter a word if its not found in the dictionary. -
Page 16: Connect The Phone To A Computer
English • M: To use your hearing aid in this mode, make sure that your hearing aid is set to "M-mode" or acoustic coupling mode, and position the phones receiver near the hearing aid’s built-in microphone. For the best results, try using the phone in different positions relative to your hearing aid—for example, placing the receiver slightly above the ear may result in better performance for hearing aids with microphones positioned behind the ear. -
Page 17: Calls
English Calls Make a call Enter the phone number including the area code. Delete with Clear. Press to make a call. Press to end the call. Tip: For international calls, always use + before the country code for best operation. Press * twice for the international prefix +. Call from the phonebook Press to open the phonebook. -
Page 18: Sos Calls
English Loudspeaker During a call, press the right softkey Speaker to activate loudspeaker mode. Speak clearly into the phone microphone at a maximum distance of 1 m. Press the right softkey Speaker to deactivate loudspeaker mode. Options During a call the options button ( ) give access to additional functions. •... -
Page 19: Contacts
English Alternatively, press Call log. Calls are displayed as follows depending on call type: Incoming call Outgoing call Missed call Select wanted entry and press to dial. Alternatively, select an entry and press Details to show details for the selected call. •... - Page 20 English • Edit to edit the contact. When done, press Save. Search contact to search for a contact. • Add to Top 10 to set the entry as one of the first listed contacts • in the phonebook. • Delete to delete the selected contact. Press Yes to confirm. •...
-
Page 21: Ice (In Case Of Emergency)
English ICE (In Case of Emergency) First responders can access additional information such as medical infor- mation from your phone ICE in case of emergency. In the event of a trauma, it is critical to have this information as early as possible to increase the chances of survival. -
Page 22: Assistance Button
English When done with My details, press Save. Assistance button If you need help, the assistance button allows easy access to contact your predefined Helpers. Make sure that the assistance function is activated and configured before use, enter recipients (Helpers) in the numbers list and edit the text message. - Page 23 English Helpers Add numbers to the list that is called when the assistance button is pressed. IMPORTANT! Always inform recipients in the numbers list that they are listed as your assistance contacts. Press Menu Assistance Helpers. Press Add Manual to add names/numbers manually. Alternatively, press Contacts to add a contact from the phonebook.
-
Page 24: Messages
English Dialling duration Select for how long the phone will dial one Helper number before moving on to the next number in the list. Set the dial duration to be shorter than the activation time for an answering service. Press Menu Assistance Dialling duration. -
Page 25: Read And Handle Messages
English • Add subject to enter a subject. Add contact to add a contact as a vcf-file from your phonebook. • Add audio file to add a recorded audio from your library. • Preview to preview the message before sending. •... -
Page 26: Message Settings
English Message settings SMS (text message) Message center Text messages requires a message center number, this is normally auto- matically set on your phone. The number can be obtained from the mobile carrier. Press Menu Messages Settings Message center. Press and enter the service center number. - Page 27 English Press Menu Messages Settings Preferred storage. Select to save messages on Phone or SIM. SMS reminder The reminder alerts you once if you haven't checked your messages within 10 minutes from receipt. Press Menu Messages Settings SMS. Check SMS reminder with to enable.
- Page 28 English These settings are needed to use the picture messages function. The settings for picture messages is supplied by your service provider and can be sent to you automatically. • New connection: Follow the steps below if your service provider is not in the list.
- Page 29 English Cell broadcast You can receive messages on various topics from your service provider, such as weather or traffic conditions in a particular region. For available channels and relevant channel settings, contact your service provider. Cell broadcast messages cannot be received when the device is roaming. Press to read a cell broadcast message.
-
Page 30: Camera
English Press for the following options, but the options might differ de- pending on selected type of messages: • View to open and view the selected message. • Delete to delete that individual message. Delete all to delete all messages. •... -
Page 31: Alarm
English Note! Some options are only available in photo mode and some in video mode. Image viewer The Image viewer displays all your taken photos and recorded • videos in the gallery. See more at Gallery, p.30. Flash • Auto to automatically use the flash/lamp depending on the sur- rounding light. -
Page 32: Torch
English Select and set the different options: Set the alarm On or Off. • Set the time for the alarm. • Set the options for Repeat mode if the alarm should be • repeated. Once for a single occurrence of the alarm. •... -
Page 33: My Files
English Add calendar event Press Menu Organiser Calendar. Select a date and press for the following options: Subject to enter a event name and other relevant text. • • Set the date. • Set the time. • Set the reminder ringtone. •... -
Page 34: Media
English The files are normally stored in the folders corresponding to the type of file. The folder names are in English only. Video file types like: MP3, AMR-NB, AMR-WB, PCM, ADPCM, WMA, Audio MIDI Other file types that are not recognised as audio, photo, video or Others vCard. -
Page 35: Fm Radio
English FM radio FM radio has a frequency range from 87.5 to 108.0 MHz. To listen to the radio you need to connect a compatible headset that works as antenna. Turning the radio on/off Connect a headset to the headset socket Press Menu to turn the radio on ( Media... -
Page 36: Settings
English Press for options: New recording to start a new recording. • Delete to delete the current recording. • Send to send the recording via MMS or Bluetooth. • Recordings for the list of recordings and press to play the re- •... - Page 37 English Note! Setting the time manually will turn off the automatic time and date update. Set date Press Menu Settings General Time & date Set date. Enter the date and press Note! Setting the date manually will turn off the automatic time and date update.
-
Page 38: Display
English Predictive text Use predictive text input method to have a dictionary suggest words. Press corresponding key once, even if the displayed character is not the one you want. The dictionary will suggest words based on the keys you have pressed. - Page 39 English • Static wallpaper for predefined available wallpapers. More pictures for images available among your files. • Brightness You can adjust the brightness of the display. Press Menu Settings Display Brightness. Set the brightness to comfortable level and press when done. Note! The brighter the display is, the more batter power it will consume.
-
Page 40: Security
English Theme You can select different themes to adjust the phone's texts and background. Press Menu Settings Display Theme. Select the wanted theme and press Security Press Menu Settings Security PIN. • Check PIN to activate the PIN code. You need to enter the PIN code every time the phone is started. - Page 41 English Modify the cellphone password Press Menu Settings Security Modify the cellphone password. Enter current code and press Enter new code and press Confirm new code and press Note! The default phone code is 1234 and is used for e.g. resetting the phone.
-
Page 42: Calls
English • Edit to edit the number. Delete to delete the number. • Import contacts to import contacts from phonebook. • Delete all to delete all numbers. • Blacklist settings Press Menu Settings Security Blacklist Blacklist settings. Check Audio call interception to enable blacklist blocking for in- •... - Page 43 English Call waiting You can handle more than one call at a time, put the current call on hold and answer the incoming call. When activated, an alert tone is heard if there is an incoming call while talking. During a call, press to answer the second call.
-
Page 44: Connections
English Caller ID Display or hide your phone number on the recipient's phone when you call. Press Menu Settings Calls Caller ID: • Hide ID to never show your number. Send ID to always show your number. • Set by network to use default setting by the network. •... - Page 45 English communicates using other computer networks. The APN settings for most major service providers are already included from start. Follow the steps below if your service provider’s profile is not in the list or if you need to change any setting. Contact your service provider for correct settings.
- Page 46 English Data service Use data service to access mobile data services. IMPORTANT! Using mobile data services can be costly. We recommend that you check your data rates with your service provider. Enable data service for services like software update. Uncheck to avoid da- ta charges.
-
Page 47: Sound
English Press Menu Settings Connections Network selection. Select Auto select to select network automatically or Manual select to select network manually and a list of available network operators is displayed (after a short delay). Select desired operator and press IMPORTANT! If you select a network manually, your phone will lose network connection when the selected network is out of reach. - Page 48 English Press Menu Settings Sound Audio setup: Normal for normal hearing in normal conditions. • High for moderate hearing impairment or use in a very noisy • environment. HAC for use with hearing aid. • Press to confirm. Note! Try different settings to find the one that suits your hearing the best. Tone setup Select various ringtones and alerts on your device.
-
Page 49: Bluetooth
English Select type of sound and use or the volume keys to adjust the volume. • Ring volume. • Message volume. • Alarm volume. • In-call volume. Press Save to save. Alert type Select to use ringtone and/or vibration for different notifications. Press Menu Settings Sound... - Page 50 English Press Menu Settings Bluetooth Bluetooth visibility. Select On to make your device visible to other devices, or Off to be invisible. Paired device View already paired devices and pair new. Press Menu Settings Bluetooth Paired device. To search and pair an available Bluetooth device in your proximity, press Add new device Make sure that the device you want to connect with is within range, visible and in pairing mode.
-
Page 51: Start-Up Wizard
English DFC-0470 is displayed. Edit the name. Press Save to save the device name. This name should now appear for other Bluetooth devices. Bluetooth file storage You can both send and receive files via Bluetooth. Here you can set where the files received via Bluetooth should be stored. -
Page 52: Additional Functions
English • Version Info to see software version information. Release notes to see information about the software update • package. If there is a an update available, you will be asked if you want to download it. Press Yes to download the software update. When download has finished, press Yes to install the software update. -
Page 53: Safety Instructions
English Safety instructions CAUTION The unit and the accessories can contain small parts. Keep all of the equipment out of the reach of small children. The mains adapter is the disconnect device between the product and mains power. The mains socket outlet must be close to the equipment and easily accessible. Network services and costs Your device is approved for use on the 4G LTE FDD 1 (2100), 3 (1800), 7 (2600), 8 (900), 20 (800), 28 (700) MHz, WCDMA 1 (2100), 8 (900) MHz, GSM 900/1800 MHz networks. -
Page 54: Areas With Explosion Risk
English If you have any reason to suspect that interference is taking place, turn the device off im- mediately. If you have any questions about using your wireless device with an implanted medical device, consult your health care provider. Areas with explosion risk Always turn off the unit when you are in an area where there is a risk of explosion. -
Page 55: Emergency Calls
English Emergency calls IMPORTANT! Mobile phones use radio signals, the mobile phone network, the terrestrial network and user-programmed functions. This means that connection cannot be guaranteed in all circumstances. Therefore, never rely only on a mobile phone for very important calls such as medical emergencies. -
Page 56: Warranty
English Protect the unit from moisture. Rain, snow, humidity, and all types of liquids can con- • tain substances that corrode the electronic circuits. If the unit gets wet, you should immediately power off the device, remove the battery and allow the unit to dry com- pletely before you replace it. -
Page 57: Device Os Software Warranty
This guarantee does not apply if batteries other than DORO original batteries are used. Device OS software warranty By using the device, you accept to install any OS software updates provided by Doro, at earliest possibility. By updating your device, you help to maintain your device secure. -
Page 58: Copyright And Other Notices
Doro reserves the right to revise this document or withdraw it at any time without prior notice. -
Page 59: Specific Absorption Rate (Sar)
Recycle Doro takes responsibility for the entire life cycle of our products including how they are recycled at end of their life. Your previous product can still be useful for someone else and, if it has reached its end of life, materials that can be used for new products. We rec- ommend to first-hand reuse, repair or refurbish your device, and if this is not possible leave it for recycling according to local regulations. -
Page 60: Correct Disposal Of Batteries In This Product
EU Declaration of Conformity Hereby, Doro declares that the radio equipment type DFC-0470 (Doro 2821) is in compli- ance with Directives: 2014/53/EU and 2011/65/EU including delegated Directive (EU) 2015/863 amending Annex II. - Page 61 English...
- Page 62 DFC-0470 (Doro 2821) English Version 1.0 ©2023 Doro AB. All rights reserved. www.doro.com REV 21234 — STR 20211104...