
Related Manuals for Teac PD-D2610


Summary of Contents for Teac PD-D2610
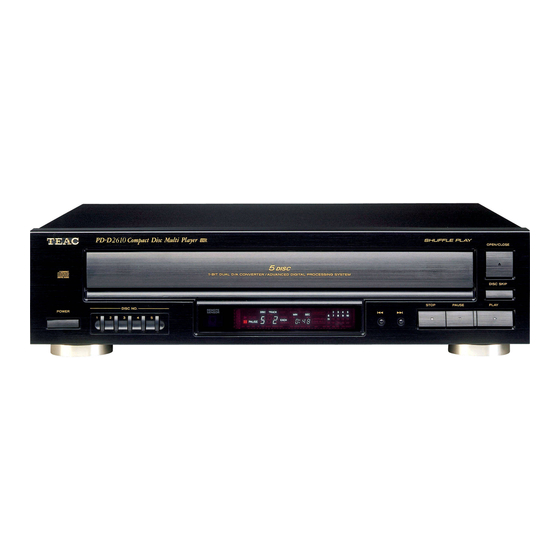
- Page 1 9A10506200 PD - D2610 Compact Disc Changer OWNER’S MANUAL MANUEL DU PROPRIÉTAIRE MANUAL DEL USUARIO...
-
Page 2: Important Safety Instructions
CAUTION: TO REDUCE THE RISK OF ELECTRIC SHOCK, DO NOT REMOVE COVER (OR BACK). NO USER- SERVICEABLE PARTS INSIDE. REFER SERVICING TO QUALIFIED SERVICE PERSONNEL. IMPORTANT SAFETY INSTRUCTIONS CAUTION • Read all of these Instructions. • Save these Instructions for later use. •... - Page 3 EXPOSE THE ELECTRONICS. NO USER SERVICEABLE PARTS ARE WITHIN! < IF YOU ARE EXPERIENCING PROBLEMS WITH THIS PRODUCT, CONTACT TEAC FOR A SERVICE REFERRAL. DO NOT USE THE PRODUCT UNTIL IT HAS BEEN REPAIRED. < USE OF CONTROLS OR ADJUSTMENTS OR PERFORMANCE OF PROCEDURES OTHER THAN THOSE SPECIFIED HEREIN MAY RESULT IN HAZARDOUS RADIATION EXPOSURE.
-
Page 4: Table Of Contents
Contents Thank you for choosing TEAC. Read this manual carefully to get the best performance from this unit. Important Safety Instructions ......2 Before Use . -
Page 5: Discs
< Copy-protected discs and other discs that do not conform to the CD standard may not play back correctly in this player. If you use such discs in this unit, TEAC Corporation and its subsidiaries cannot be responsible for any consequences or guarantee the quality of reproduction. -
Page 6: Name And Function
Name and Function POWER Press this button to turn the unit on or off. The equipment draws nominal non-operating power from the AC outlet with its POWER switch in the OFF position. Disc tray OPEN/CLOSE Use this button to open and close the disc tray. DISC SKIP Use this button to skip discs. -
Page 7: Remote Control Unit
DISC NO. Use these buttons to slect a disc. TRACK NO. Use these buttons to select a track number. For instance, to select track number 35, press “3” and “5”. PROGRAM Use this button to enter the program mode. In program mode, use this button to enter selections. -
Page 8: Connection
Be sure to connect the power cord to an AC outlet which supplies the correct voltage. Grasp the plug, not the cord when plugging or unplugging the power cord. PD-D2610 white plug q white jack (L: left channel) red plug q red jack (R: right channel) -
Page 9: Playback 1
DISC NO. Press the POWER button to turn the unit on. Press the OPEN/CLOSE button (L). Place a disc on a tray with the printed label face up. carousel disc number < Never place more than a disc on a tray. <... - Page 10 DISC NO. To stop playback Press the STOP button (H) to stop playback. To suspend playback temporarily (pause mode) Press the PAUSE button (J) during playback. Playback stops at the current position, and J is displayed. To resume playback, press the PLAY button (G) or the PAUSE button (J).
-
Page 11: Repeat Playback
Repeat Playback Each time the REPEAT button is pressed, the mode is changed as follows: REPEAT ALL REPEAT ONE (OFF) REPEAT ALL All tracks or files of all discs will be played repeatedly. REPEAT ONE The track/file being played will be played repeatedly. If you select another track/file in REPEAT ONE mode, the track/file selected will be played repeatedly. -
Page 12: Programed Playback
< Up to 32 tracks can be programed in the desired order. < If the shuffle mode is on, the PROGRAM button does not work. Press the PROGRAM button in the stop mode. “PROGRAM” lights on the display. If you want to select a track/file in another disc, press the corresponding DISC NO. -
Page 13: Intro Check
To add a track/file to the program If you want to add a track/file to the end of the program, press the PROGRAM CHECK button repeatedly until “A” appears after the end of the program. Then select a track/file number using the numeric buttons and press the PROGRAM button. -
Page 14: Time Display
During playback, each time the TIME button is pressed the display changes as follows: When the disc is CD: current disc current track number number In stop mode: total number of tracks in the disc Time Display When the disc is MP3: elapsed time of the current track remaining time of... -
Page 15: Troubleshooting
Troubleshooting If you experience any problems with the unit, please take a moment to look through this chart and see if you can solve the problem yourself before you call your dealer or a TEAC service center. General No power e Check the connection to the AC power supply. -
Page 16: Avant D'employer L'appareil
Sommaire Nous vous remercions pour l’achat d’un appareil TEAC. Lire ce manuel avec attention pour obtenir les meilleures performances possibles de cet appareil. Avant d’employer l’appareil ......16 Disques. -
Page 17: Disques
CD peuvent ne pas être lus correctement par cet appareil. Si vous utilisez de tels disques dans cet appareil, TEAC Corporation et ses filiales ne peuvent être tenus pour responsables d’aucune conséquence et ne garantissent pas la qualité de reproduction. Si vous rencontrez des problèmes avec de tels disques non standards, vous devez... -
Page 18: Noms De Pièces Et Leurs Fonctions
Noms de pièces et leurs fonctions POWER Appuyez sur cette touche pour mettre l'appareil en ou hors circuit. L’appareil tire de la prise secteur une puissance faible mais non nulle lorsque l’interrupteur POWER est sur la position OFF. Tiroir disque OPEN/CLOSE Utilisez cette touche pour ouvrir et fermer le tiroir. -
Page 19: Boîtier De Télécommande
Télécommande Lors de l’utilisation de la télécommander, dirigez-la vers le capteur de télécommande. DISC NO. Utilisez ces touches pour sélectionner des disques. TRACK NO. Utilisez ces touches pour sélectionner un numéro de plage. Par exemple, pour sélectionner le numéro de plage 35, appuyez sur les touches “3”... -
Page 20: Raccordements
Assurez-vous de raccorder le câble à une prise qui délivre une tension correcte. Tenez la prise lorsque vous branchez ou débranchez le câble secteur. PD-D2610 la fiche blanche q la prise blanche (L: voie gauche) la fiche rouge q la prise rouge (R: voie droite) -
Page 21: Lecture 1
DISC NO. Appuyez sur la touche POWER pour mettre l’appareil en marche. Appuyez sur la touche OPEN/CLOSE (L). Placez un disque sur le tiroir, face imprimée vers le haut. carrousel numéro du disque < Ne mettez jamais plus d’un disque sur le tiroir. <... - Page 22 DISC NO. Pour arrêter la lecture Appuyez sur la touche STOP (H) pour arrêter la lecture. Pour suspendre la lecture momentanément (mode pause) Appuyez sur la touche PAUSE (J) en lecture. La lecture s’arrête à la position actuelle, et l’afficheur PAUSE (J) s’illumine sur l’écran.
-
Page 23: Lecture Répétée
Lecture répétée Chaque fois que vous appuyez sur la touche REPEAT le mode change comme suit: REPEAT ALL REPEAT ONE (Répétition hors service) REPEAT ALL Toutes les plages ou les fichiers sont reproduits répétitivement. REPEAT ONE La plage ou le fichier en cours de lecture est reproduit de façon répétée. -
Page 24: Lecture Programmée
< Jusqu’à 32 plages peuvent être programmés dans l’ordre désiré. < La touche PROGRAM ne marche pas si le mode aléatoire est activé. Appuyez sur la touche PROGRAM en mode stop. “PROGRAM” s’illumine sur l’écran. Si vous voulez sélectionner une plage ou un fichier d'un autre disque, appuyez sur la touche DISC NO. -
Page 25: Lecture Intro Des Plages
Pour ajouter une plage ou un fichier au programme Pour ajouter une plage ou un fichier à la fin du programme, appuyez sur la touche PROGRAM CHECK répétitivement jusqu'à ce que “A” soit affiché sur l'écran après que la derniere plage programmé aie été affiché. Et puis sélectionnez une palge ou un fichier au moyen des touches numériques et appuyez sur la touche PROGRAM. -
Page 26: Affichage Du Temps
Lors de la lecture, l’affichage change comme suit chaque fois que vous appuyez sur la touche TIME: Quand un CD audio est chargé: Numéro de Numéro de plage disque en cours en cour Temps restant de la plage en cours Temps écoulé... -
Page 27: Dépannage
En cas de problème avec l’appareil, prenez le temps de lire ce tableau et de voir si vous pouvez résoudre le problème tout seul avant de faire appel à votre revendeur ou au centre d'assistance TEAC. Généralités L'appareil ne s'allume pas e Vérifier que l'appareil est bien branché... -
Page 28: Antes De Utilizar La Unidad
Indice Enhorabuena por la adquisición de un TEAC. Lea detenidamente este manual a fin de obtener el mejor rendimiento de esta unidad. Antes de utilizar la unidad......28 Discos . -
Page 29: Discos
CD es posible que no se reproduzcan correctamente en esta unidad. Si utiliza discos de éstos con la unidad, TEAC Corporation y sus filiales no asumen responsabilidades por las posibles consecuencias ni garantizan la calidad de la reproducción. Si tiene problemas con tales discos, póngase en contacto con sus fabricantes. -
Page 30: Nombres De Los Controles
Nombres de los controles POWER Utilice este botón para encender o apagar el equipo. El equipo suministra una energía no operativa nominal desde la toma de CA con su interruptor POWER en la posición OFF. Bandeja de disco OPEN/CLOSE Utilice este botón para abrir y cerrar la bandeja de disco. DISC SKIP Utilice estos botones para saltar discos. -
Page 31: Control Remoto
DISC NO. Ulitice estos botones para selectionar los discos. TRACK NO. Utilice estos botones para seleccionar un número de pista/archivo. Por ejemplo, para seleccionar el número de pista/archivo 35, pulse “3” y “5”. PROGRAM Utilice este botón para activar el modo de programación. Una vez activado este modo, utilice este botón para introducir sus selecciones. -
Page 32: Conexión
Asegúrese de conectar el cable de alimentación a una toma de red que suministre la tensión adecuada. Al conectar o retirar el cable de alimentación, sostenga siempre la clavija. PD-D2610 Enchufe blanco q Enchufe blanco (L: canal izquierdo) Enchufe rojo q Enchufe rojo (R: canal derecho) -
Page 33: Reproducción 1
DISC NO. Pulse el botón POWER para encender la unidad. Pulse el botón OPEN/CLOSE (L). Deposite un disco en la bandeja con la cara de la etiqueta hacia arriba. carrusel número de disco < No coloque nunca más de un disco en la bandeja. <... - Page 34 DISC NO. Para detener la reproducción Pulse el botón STOP (H) para detener la reproducción. Para interrumpir momentáneamente la reproducción (modo de pausa) Pulse el botón PAUSE (J) durante la reproducción. La reproducción se detiene en la posición actual, y el indicador PAUSE (J) se ilumina en la pantalla.
-
Page 35: Repetición
Repetición Cada vez que pulse el botón REPEAT, el modo cambiará en el siguiente orden: REPEAT ALL REPEAT ONE (Repetición desactivada) REPEAT ALL Todas las pistas o todos los archivos de todos discos se reproducirán repetidamente. REPEAT ONE La pista o el archivo que esté reproduciéndose se reproducirá repetidamente. -
Page 36: Reproducción Programada
< Se pueden programar hasta 32 pistas/archivos en el orden deseado. < El botón PROGRAM no funciona cuando está activado el modo de reproducción al azar. Pulse el botón PROGRAM desde la posición de parada. “PROGRAM” se ilumina en la pantalla. Si desea seleccionar una pista o uno archivo de otro disco, pulse el botón DISC NO. -
Page 37: Verificación De Introducciones
Para agregar una pista o un archivo al programa Si desea agregar una pista o un archivo al final del programa, pulse el botón PROGRAM CHECK repetidamente hasta que “A” se ilumina después del final del programa. Pues utilice los botones numéricos para seleccionar una pista o un archivo y pulse el botón PROGRAM. -
Page 38: Lectura De Tiempo
Cada vez que pulse el botón TIME durante la reproducción, la lectura cambiará en el siguiente orden:: Cuando se coloca un CD de audio: número de número de tiempo transcurrido disco actual pista actual de pista actual tiempo restante de pista actual tiempo transcurrido del disco... -
Page 39: Solución De Problemas
Si surge algún problema con la unidad, dedique unos instantes a revisar los siguientes puntos por si puede solucionar el problema sin necesidad de acudir al distribuidor o centro de servicio técnico TEAC. En general No hay corriente. e Compruebe la conexión a la red. Compruebe que la fuente de c.a. - Page 40 7733 Telegraph Road, Montebello, California 90640 Phone: (323) 726-0303 TEAC CANADA LTD. 5939 Wallace Street, Mississauga, Ontario L4Z 1Z8, Canada Phone: (905) 890-8008 TEAC MEXICO, S.A. De C.V Campesinos N°184, Colonia Granjas Esmeralda, Delegacion Iztapalapa, CP 09810, México DF Phone: (525) 581-5500 TEAC UK LIMITED Unit 19 &...