Daikin EHVZ08S23DA6V Installation Manual
Hide thumbs
Also See for EHVZ08S23DA6V:
- Installer's reference manual (104 pages) ,
- Installation manual (32 pages) ,
- User reference manual (20 pages)
Table of Contents
Advertisement
Quick Links
Advertisement
Table of Contents

Related Manuals for Daikin EHVZ08S23DA6V


Summary of Contents for Daikin EHVZ08S23DA6V
- Page 1 Installation manual Daikin Altherma 3 R F EHVZ04S18DA6V(G) EHVZ08S18DA6V(G) EHVZ08S23DA6V(G) EHVZ08S18DA9W(G) EHVZ08S23DA9W(G) EHVZ04S18DJ6V(G) EHVZ08S18DJ6V(G) EHVZ08S23DJ6V(G) Installation manual EHVZ08S18DJ9W(G) English Daikin Altherma 3 R F EHVZ08S23DJ9W(G)
- Page 2 3P507286-4...
- Page 3 3P507286-7A...
-
Page 4: Table Of Contents
Detailed screen with weather-dependent curve..20 Daikin website (publicly accessible). 5.2.8 Configuration wizard: Tank ......... 21 Settings menu ................21 ▪ The full set of latest technical data is available on the Daikin 5.3.1 Main zone ..............21 extranet (authentication required). 5.3.2 Additional zone ............ -
Page 5: About The Box
WARNING Make sure installation, servicing, maintenance and repair The appliance shall be stored in a room without comply with instructions from Daikin and with applicable continuously operating ignition sources (example: open legislation (for example national gas regulation) and are flames, an operating gas appliance or an operating electric executed only by authorised persons. - Page 6 3 Preparation NOTICE ▪ Pipework shall be protected from physical damage. ▪ Installation of pipework shall be kept to a minimum. Installation manual EHVZ04+08S18+23DA + EHVZ04+08S18+23DJ Daikin Altherma 3 R F 4P584429-1 – 2019.06...
- Page 7 ▪ Ventilation openings to the outside are NOT considered suitable ventilation openings (the user can block them when it is cold). EHVZ04+08S18+23DA + EHVZ04+08S18+23DJ Installation manual Daikin Altherma 3 R F 4P584429-1 – 2019.06...
-
Page 8: Preparing Water Piping
User interface used as room thermostat Room thermostat 3 or 4 100 mA Outdoor ambient temperature sensor Indoor ambient temperature sensor Heat pump convector 100 mA Field supplied components Installation manual EHVZ04+08S18+23DA + EHVZ04+08S18+23DJ Daikin Altherma 3 R F 4P584429-1 – 2019.06... -
Page 9: To Open The Switch Box Cover Of The Indoor Unit
1 Remove the top panel that keeps the switch box into place at the top of the unit. 2 Tilt the switch box to the front and lift it out of its hinges. 2× EHVZ04+08S18+23DA + EHVZ04+08S18+23DJ Installation manual Daikin Altherma 3 R F 4P584429-1 – 2019.06... -
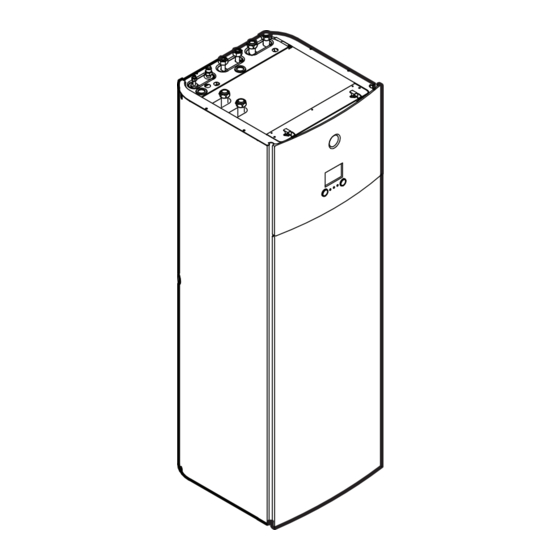
Page 10: Mounting The Indoor Unit
Prerequisite: The user interface panel and front panel have been removed. 1 Remove one of the side panels. 2 Cut out the rubber grommet. Refrigerant liquid connection Installation manual EHVZ04+08S18+23DA + EHVZ04+08S18+23DJ Daikin Altherma 3 R F 4P584429-1 – 2019.06... -
Page 11: Connecting The Water Piping
4 Reattach the top panel. 4.4.3 To fill the water circuit To fill the water circuit, use a field supply filling kit. Make sure you comply with the applicable legislation. EHVZ04+08S18+23DA + EHVZ04+08S18+23DJ Installation manual Daikin Altherma 3 R F 4P584429-1 – 2019.06... -
Page 12: To Fill The Domestic Hot Water Tank
Do NOT push or place redundant cable length in the unit. 4 Seal the low voltage wiring intake using the sealing tape (delivered as accessory). Installation manual EHVZ04+08S18+23DA + EHVZ04+08S18+23DJ Daikin Altherma 3 R F 4P584429-1 – 2019.06... -
Page 13: To Connect The Main Power Supply
Z less than or equal to (6V) (6T1) Connect the backup heater power supply as follows: EHVZ04+08S18+23DA + EHVZ04+08S18+23DJ Installation manual Daikin Altherma 3 R F 4P584429-1 – 2019.06... -
Page 14: To Connect The Shut-Off Valve
In case of an electrical meter with transistor output, check the polarity. The positive polarity MUST be connected to X5M/6 and X5M/4; the negative polarity to X5M/5 and X5M/3. Installation manual EHVZ04+08S18+23DA + EHVZ04+08S18+23DJ Daikin Altherma 3 R F 4P584429-1 – 2019.06... -
Page 15: To Connect The Domestic Hot Water Pump
2 Fix the cable with cable ties to the cable tie mountings. 4.5.9 To connect the space heating ON/OFF output 1 Connect the space heating ON/OFF output cable to the appropriate terminals as shown in the illustration below. EHVZ04+08S18+23DA + EHVZ04+08S18+23DJ Installation manual Daikin Altherma 3 R F 4P584429-1 – 2019.06... -
Page 16: To Connect The Safety Thermostat (Normally Closed Contact)
▪ What you can see on and do with the user interface 9 10 You can configure the system via the user interface. 4 Fix the cable with cable ties to the cable tie mountings. Installation manual EHVZ04+08S18+23DA + EHVZ04+08S18+23DJ Daikin Altherma 3 R F 4P584429-1 – 2019.06... -
Page 17: To Access The Most Used Commands
Installer 5678 6 Press the left dial to confirm the new setting. 7 Press the center button to go back to the home screen. EHVZ04+08S18+23DA + EHVZ04+08S18+23DJ Installation manual Daikin Altherma 3 R F 4P584429-1 – 2019.06... -
Page 18: Configuration Wizard
▪ When Emergency is set to Automatic and a heat pump failure occurs, the backup heater automatically takes over the domestic ▪ c: Mixing station hot water production and space heating. Installation manual EHVZ04+08S18+23DA + EHVZ04+08S18+23DJ Daikin Altherma 3 R F 4P584429-1 – 2019.06... -
Page 19: Configuration Wizard: Backup Heater
[2.7] and for the additional zone [3.7] correctly in the storage temperature set point is higher than 50°C, accordance with the connected emitter. Daikin recommends NOT to disable the backup heater second step because it will have a big impact on the NOTICE... -
Page 20: Configuration Wizard: Additional Zone
The most important settings for the additional leaving water zone can be set here. Emitter type For more info about this functionality, see "5.2.5 Configuration wizard: Main zone" on page 19. Installation manual EHVZ04+08S18+23DA + EHVZ04+08S18+23DJ Daikin Altherma 3 R F 4P584429-1 – 2019.06... -
Page 21: Configuration Wizard: Tank
NOT been reached. Only program a storage stop when tank heating is absolutely undesirable. Code Description Comfort setpoint [5.2] [6-0A] ▪ 30°C~[6‑0E]°C EHVZ04+08S18+23DA + EHVZ04+08S18+23DJ Installation manual Daikin Altherma 3 R F 4P584429-1 – 2019.06... -
Page 22: Additional Zone
▪ 2: 2 contacts 5.3.3 Information Dealer information The installer can fill in his contact number here. Code Description [8.3] Number that users can call in case of problems. Installation manual EHVZ04+08S18+23DA + EHVZ04+08S18+23DJ Daikin Altherma 3 R F 4P584429-1 – 2019.06... -
Page 23: Menu Structure: Overview Installer Settings
Solar kit settings are shown but are NOT applicable for this unit. Settings shall NOT be used or changed. INFORMATION Depending on the selected installer settings and unit type, settings will be visible/invisible. EHVZ04+08S18+23DA + EHVZ04+08S18+23DJ Installation manual Daikin Altherma 3 R F 4P584429-1 – 2019.06... -
Page 24: Commissioning
7 Modify the bypass valve setting to reach the — There is NO water leak inside the indoor unit. minimum required flow rate + 2 l/min. Installation manual EHVZ04+08S18+23DA + EHVZ04+08S18+23DJ Daikin Altherma 3 R F 4P584429-1 – 2019.06... -
Page 25: To Perform An Air Purge
3 Set a dryout program: go to Program and use the when done (±30 min). UFH screed dryout programming screen. To stop the test run manually: — 1 Go to Stop test run. 2 Select OK to confirm. EHVZ04+08S18+23DA + EHVZ04+08S18+23DJ Installation manual Daikin Altherma 3 R F 4P584429-1 – 2019.06... -
Page 26: Hand-Over To The User
▪ Show the user what to do for the maintenance of the unit. ▪ Explain the user about energy saving tips as described in the operation manual. Installation manual EHVZ04+08S18+23DA + EHVZ04+08S18+23DJ Daikin Altherma 3 R F 4P584429-1 – 2019.06... -
Page 27: Technical Data
8 Technical data Technical data A subset of the latest technical data is available on the regional Daikin website (publicly accessible). The full set of latest technical data is available on the Daikin Business Portal (authentication required). Piping diagram: Indoor unit... -
Page 28: Wiring Diagram: Indoor Unit
* Ambient sensor On/OFF thermostat * On/OFF thermostat (PC=power circuit) R1T (A14P) * Ambient sensor user interface * Heat pump convector R2T (A1P) Outlet backup heater thermistor * Digital I/O PCB Installation manual EHVZ04+08S18+23DA + EHVZ04+08S18+23DJ Daikin Altherma 3 R F 4P584429-1 – 2019.06... - Page 29 (5) Ext. thermistor (5) External thermistor thermostat thermostat Switch box Only for wireless On/OFF Only for wireless On/OFF (6) Field supplied options (6) Field supplied options thermostat thermostat EHVZ04+08S18+23DA + EHVZ04+08S18+23DJ Installation manual Daikin Altherma 3 R F 4P584429-1 – 2019.06...
- Page 30 4 signal 2 core Only for remote user interface 2x0.75 X5M: 11-12 A14P: P1-P2 user interface communication 2 core 2x0.75 A13P: P1-P2 LAN adapter communication 4D109880B Installation manual EHVZ04+08S18+23DA + EHVZ04+08S18+23DJ Daikin Altherma 3 R F 4P584429-1 – 2019.06...
-
Page 31: Indoor Unit
"A =12 m ". room Table 2 – Minimum floor area: indoor unit (kg) Minimum floor area (m²) H=600 mm 1.84 28.81 1.86 29.44 1.88 30.08 1.90 30.72 EHVZ04+08S18+23DA + EHVZ04+08S18+23DJ Installation manual Daikin Altherma 3 R F 4P584429-1 – 2019.06... - Page 32 4P584429-1 0000000U 4P584429-1 2019.06...