Table of Contents
Advertisement
Quick Links
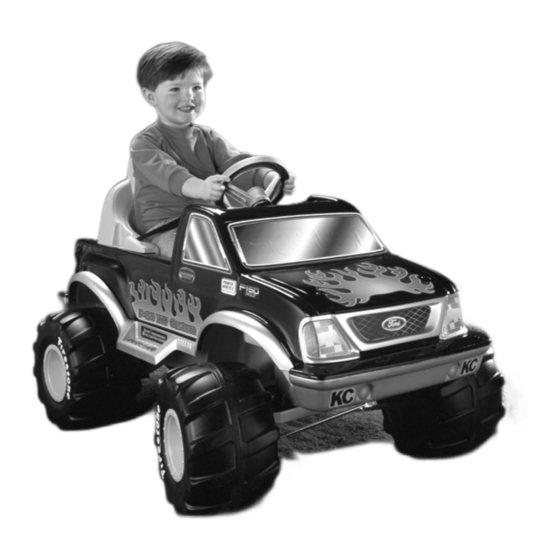
Product features may vary from the picture above.
Ford, F-150 and associated trademarks used under license from Ford Motor Company.
FIRESTONE is a registered trademark of Bridgestone/Firestone Research, Inc.
Fisher Price, Power Wheels and Power Stick are U.S. trademarks of Mattel, Inc.
Owner's Manual
with Assembly Instructions
Please read this manual and save it with your original sales receipt.
For Model 75547
Tools needed for assembly: Phillips Screwdriver, Slotted Screwdriver, Hammer, and Safety Scissors (tools not included).
Use only with a Power Wheels
®
6 Volt Battery with A-Style Connector and Built-in Thermal Fuse
and a Power Wheels
Super 6
Volt Charger (both included).
®
™
Advertisement
Table of Contents

Related Manuals for Fisher-Price POWER WHEELS Ford FlashBack 4x4


Summary of Contents for Fisher-Price POWER WHEELS Ford FlashBack 4x4
- Page 1 Product features may vary from the picture above. Ford, F-150 and associated trademarks used under license from Ford Motor Company. FIRESTONE is a registered trademark of Bridgestone/Firestone Research, Inc. Fisher Price, Power Wheels and Power Stick are U.S. trademarks of Mattel, Inc. Owner’s Manual with Assembly Instructions Please read this manual and save it with your original sales receipt.
-
Page 2: Table Of Contents
Table of Contents Important Information ..............2 Warnings and Cautions . -
Page 3: Warnings And Cautions
Warnings and Cautions ELECTRICAL HAZARD WARNING • Battery can fall out and injure a child if vehicle tips over. Always use battery clamp. • PREVENT FIRE - Never modify the electrical system. Alterations could cause a fire resulting in serious injury and could also ruin the electrical system. -
Page 4: Parts
Parts • If you experience a problem with this product or are missing a part, please call us at 1-800-348-0751 rather than return this product to the store. • Please identify all parts before assembly and save all packaging material until assembly is complete to ensure that no parts are discarded. - Page 5 Parts Hood Vehicle Body Tailgate Seat Knob Steering Wheel Steering Column #8 x 1" Screw – 12 #6 x " Screw – 2 .354 Cap Nut – 3* #6 x " Screw – 2 All Shown Actual Size * For your convenience, an extra .354 cap nut has been included. Not Shown: Label Sheet...
-
Page 6: Parts Diagram
Parts Diagram Parts Hood Knob Battery Clamp Microphone Seat Seat Belt Straps - 2 ™ Steering Column Tailgate Super 6 Volt Charger Steering Wheel Left Taillight Steering Wheel Cap Right Taillight Part Not Shown: Label Sheet Cap Nut – 2 Vehicle Body Dash Cover Grille... -
Page 7: Battery Charging
Battery Charging Important Notes ELECTRICAL HAZARD • Your new battery must be charged for at least 18 hours before you use it in your vehicle for the WARNING first time. • We recommend that you start charging your battery • Battery can fall out and injure a before beginning assembly of your vehicle. - Page 8 Battery Charging A-Style Charger Connector A-Style Battery Connector NO GAP Incorrect Correct • Plug the charger into a standard 120 volt wall outlet. • Plug the charger and battery connectors together. Note: If power flow to the wall outlet is controlled by a Push firmly to make sure the two connectors are com- switch, make sure the switch is “ON”.
-
Page 9: Assembly
Assembly Do Not Omit Any Steps WARNING Children can be harmed by small parts, “T” End sharp edges and sharp points in the vehi- cle’s unassembled state, or by electrical Slot items. Care should be taken in unpacking and assembly of the vehicle. Children should not handle parts, including the bat- tery, or help in assembly of the vehicle. - Page 10 Assembly Hole Steering Wheel Steering Column Cap Nut Front Axle “UP” Bottom View • Fit the curved end of the steering column into the hole in • Hold the steering column in place and gently lower the the front axle. vehicle body.
- Page 11 Assembly Seat Belt Straps Second T-tab First Position Second Bottom Position T-tab Second Push T-tab Here Slot Seat • Make sure the two seat belt straps are fastened together. If they are not fastened together, connect the fasteners to form one seat belt. •...
- Page 12 Assembly Right Taillight Outer Lens Left Holes Taillight Lens Slots Left Right Rear Bumper • Using safety scissors, remove the taillight lenses from Inner the plastic connector. Dispose of the plastic connector. Holes • Face the rear of the vehicle. Front Bumper •...
- Page 13 Assembly Slots Grille Opening Pegs Hood Grille Opening Side Tab Tabs Grille Openings • Face the front of the vehicle. • Insert the two tabs at the top of the grille into the slots in Note: If you have already charged your Power Wheels ®...
-
Page 14: Label Decoration
Label Decoration Proper label application will help to keep the labels look- ing their best! When applying labels, keep the following guidelines in mind: • Wash your hands before applying the labels. • Before applying the labels, wipe the surface of the vehicle with a clean, dry cloth to remove any dust or oils. -
Page 15: Battery Installation
Battery Installation IMPORTANT! Use only a Power Wheels ® 6 volt battery with A-style connector and built-in thermal fuse. Use of any other battery can damage your vehicle. Make sure that you charge the battery for at least 18 hours using the enclosed Power Wheels ®... -
Page 16: Battery Care And Disposal
Battery Care and Disposal Care Disposal If a battery leak develops, avoid contact with the leaking • Your Power Wheels ® battery is a sealed lead-acid acid and place the damaged battery in a plastic bag. See battery. It must be recycled or disposed of in an environ- information below for proper disposal. -
Page 17: Rules For Safe Driving
Rules for Safe Driving RIDING HAZARD WARNING Prevent Injuries and Deaths • Direct Adult Supervision Required • Keep Children Within Safe Riding Areas These areas must be: - away from swimming pools and other Use vehicle on generally level ground ONLY! bodies of water to prevent drownings - generally level to prevent tipovers... -
Page 18: How To Operate Your Vehicle
How to Operate Your Vehicle To Back Up To Drive Note: To avoid damaging the motors and gears, stop • Make sure the Power Stick™ shifter is in the forward the vehicle before shifting from forward to position reverse • Press down on the foot pedal . -
Page 19: Caring For Your Vehicle
Bumper-to-Bumper* Caring Limited Warranty For Your Vehicle • Check all screws, retainers and their protective coverings *One year limited warranty from date regularly and tighten as required. Check plastic parts on of purchase on Power Wheels ® vehicle. a regular basis for cracks or broken pieces. Six month limited warranty on 6 volt battery. -
Page 20: Problems And Solutions Guide
Problems and Solutions Guide IMPORTANT! If you experience a problem with your vehicle, first check the Problems and Solutions Guide below. If you still experience a problem, please contact Power Wheels ® Consumer Relations, toll-free at 1-800-348-0751 between 8 AM and 6 PM (EST) Monday through Friday. Or, contact your local Power Wheels authorized service center. - Page 21 Problems and Solutions Guide Problem Possible Cause Solution Vehicle was running but Loose wire or loose connectors Check all wires and connectors. Make sure the battery suddenly stopped connector is tightly plugged into the motor harness connector, and that there are no loose wires around the motor.
- Page 22 Problems and Solutions Guide Problem Possible Cause Solution Vehicle runs sluggishly (cont.) Battery is old and will not accept Even with proper care, rechargeable batteries do not last full charge forever. Average battery life is 1 to 3 years depending on the vehicle use and use conditions.
-
Page 23: Authorized Service Centers
Authorized Service Centers We are continually expanding our Authorized Service Center Network. Please check this listing for the Authorized Service Center nearest you. If there is not one in your area, please call Power Wheels ® Consumer Relations at 1-800-348-0751. ALABAMA SKY FOREST - Sky Forest Electrical, 26870 Highway 18, POMPANO BEACH - Authorized Appliance, 2171 North... - Page 24 Authorized Service Centers ROCKFORD - Sun Appliance Sales & Service, 3112 N. METAIRIE - Le Jouet Inc., 1700 Airline Hwy, 70001, MINNESOTA Rockton Avenue, 61103, (815) 964-3866 (504) 837-0533 BLAINE - Barness #1, 8701 Central Ave. NE, 55434, SPRINGFIELD - Rexx Battery Co. Inc., 2505 South Grand MORGAN CITY - Sam's Sales &...
- Page 25 Authorized Service Centers TOMS RIVER - South Jersey TV Service, 1171 Fischer NORTH DAKOTA PITTSBURGH - Ferry Electric Service Co., 140 Clairton Road, 08753, (732) 506-9400 Blvd., 15236, (412) 653-6004 FARGO - General Parts & Supply Co., 10 S. 18th Street, TRENTON - Tattersall Inc.
- Page 26 Authorized Service Centers FT. WORTH - Ft. Worth Shaver and Appliance, UTAH WEST VIRGINIA 1012 West 7th Street, 76102, (817) 335-9970 OREM - The Mending Shed, 1735 South State Street, BECKLEY - Jerry’s Detectors, Vacuum & Appl., HOUSTON - Brand Appliance Service Center, 84058, (801) 225-8012, (800) 339-9297 411 Second Street, 25801, (304) 253-3521 1970 FM 1960 W, 77090, (281) 537-7795...
- Page 27 Authorized Service Center list in this manual. Fisher-Price and Power Wheels by Fisher-Price are U.S. trademarks of Mattel, Inc. Fisher-Price, Inc., a subsidiary of Mattel, Inc., East Aurora, New York 14052 U.S.A. ©2000 Mattel, Inc. All Rights Reserved. Printed in the U.S.A.