Advertisement
Quick Links
INSTALLATION PROCEDURE
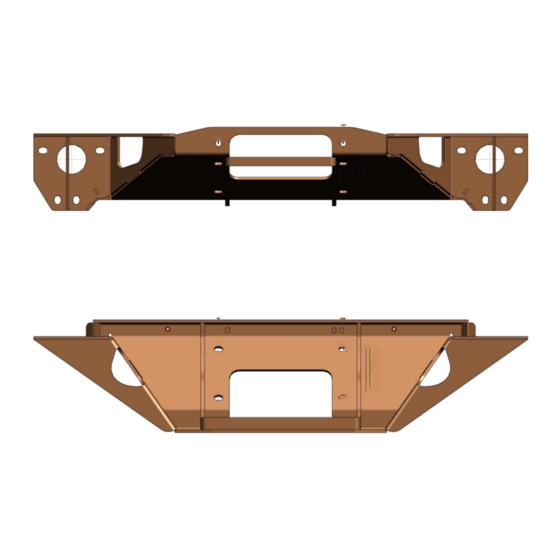
PRODUKT: WINCH BRACKET
MAKE:
NISSAN NAVARA (2015-)(SPANISH)
PART NO: 2L.4101.2
WARNING!
In order to reduce the risk of severe injury or property damage: Before installation and use of this product read the whole
procedure, paying special attention to the safety notice and installation notice! Upon installation or maintenance of this product
it is necessary to use protective glasses. Check integrity of the design and torque settings of fasteners in each 1000km of the
vehicle usage. Do not use this product if there is any damage to the design or fasteners!
www.rival4x4.com
Advertisement

Related Manuals for Rival 2L.4101.2


Summary of Contents for Rival 2L.4101.2
- Page 1 PRODUKT: WINCH BRACKET MAKE: NISSAN NAVARA (2015-)(SPANISH) PART NO: 2L.4101.2 WARNING! In order to reduce the risk of severe injury or property damage: Before installation and use of this product read the whole procedure, paying special attention to the safety notice and installation notice! Upon installation or maintenance of this product it is necessary to use protective glasses.
- Page 2 * It is not allowed to operate damaged winch bracket or components hereof. It is necessary to inform the nearest RIVAL dealer of the event of damage of the winch bracket or components hereof. * It is not allowed to operate the winch bracket with loosen fasteners.
- Page 3 ТЕХНИЧЕСКАЯ ИНФОРМАЦИЯ TECHNICAL INFORMATION TECHNICAL INFORMATION Winch with a force up to 8500lb (3850 kg) is mounted onto the winch bracket. Installation clearance of the winch: Installation manual 2L.4101.2 www.rival4x4.com Date: August 6, 2021 < Page 3 of 16 >...
- Page 4 1 pcs. 9. Bolt M12x30........8 pcs. 10. Bolt M12x1,25x40......2 pcs. 11. Nut M12.......... 8 pcs. 12. Washer 12........18 pcs. 13. Screw M6x50........4 pcs. Installation manual 2L.4101.2 www.rival4x4.com Date: August 6, 2021 < Page 4 of 16 >...
- Page 5 2.Disconnect the negative battery terminal cable. 3. Remove caps of grille mount in upper side. 4. Remove caps of grille mount from left and right side. Installation manual 2L.4101.2 www.rival4x4.com Date: August 6, 2021 < Page 5 of 16 >...
- Page 6 Инструкция по установке INSTALLATION PROCEDURE 5. Disconnect the front chamber. 6. Carefully dismantle the radiator grille by unlatching the latches at the bottom. 7. Remove the bumper clips. Installation manual 2L.4101.2 www.rival4x4.com Date: August 6, 2021 < Page 6 of 16 >...
- Page 7 14. Disconnect the hose from the headlamp washer*. *Make sure that the washing liquid tank is empty. Installation manual 2L.4101.2 www.rival4x4.com Date: August 6, 2021 < Page 7 of 16 >...
- Page 8 9. Unscrew 4 tension bolts of the bumper skirt center. Remove the bumper skirt center. 10. Unscrew 2 tension bolts of the bumper skirt side on the vehicle's left and right. Installation manual 2L.4101.2 www.rival4x4.com Date: August 6, 2021 < Page 8 of 16 >...
- Page 9 Инструкция по установке INSTALLATION PROCEDURE 15. Dismantle the dampers. 16. Remove the clips of plastic dust caps. 17. Dismantle plastic dust caps on the left and right. Installation manual 2L.4101.2 www.rival4x4.com Date: August 6, 2021 < Page 9 of 16 >...
- Page 10 Dismantle the air intake. 19. Unscrew 4 tension bolts of the frame booster. Dismantle the booster. 20. Unscrew 2 tension bolts of standard towing eye. Dismantle the towing eye. Installation manual 2L.4101.2 www.rival4x4.com Date: August 6, 2021 < Page 10 of 16 >...
- Page 11 Инструкция по установке INSTALLATION PROCEDURE 21. Insert embedded part M12 (pos. 8) into the frame on the left. 22. Install left frame booster (pos. 2) onto the vehicle frame and secure it to embedded part M12 (pos. 8), bolts M12x1,25x40 (pos. 10) and washers (pos.
- Page 12 M12x30 (pos. 9), nuts M12 (pos. 11) and washers (pos. 12). Adjust the winch bracket. Tighten all screw joints, including adapters and frame boosters. Installation manual 2L.4101.2 www.rival4x4.com Date: August 6, 2021 < Page 12 of 16 >...
- Page 13 27. Remove the bumper. 28. Carefully cut out pad eye hole in standard bumper. Installation manual 2L.4101.2 www.rival4x4.com Date: August 6, 2021 < Page 13 of 16 >...
- Page 14 30. Install the winch bracket onto the vehicle. See paragraph 25. 31. Install standard bumper. Installation manual 2L.4101.2 www.rival4x4.com Date: August 6, 2021 < Page 14 of 16 >...
- Page 15 32. Install the number embedded parts (pos. 6 and 7) onto the bumper grille using screws M6x50 (pos. 13). 33. Install number frame and radiator grille onto the vehicle. Installation manual 2L.4101.2 www.rival4x4.com Date: August 6, 2021 < Page 15 of 16 >...
- Page 16 Инструкция по установке INSTALLATION PROCEDURE Before starting operation with the winch installed on Rival winch bracket: - make sure that all screw joints are tightened; - check integrity of the winch control wiring. Installation manual 2L.4101.2 www.rival4x4.com Date: August 6, 2021...