Table of Contents
Advertisement
Quick Links
Basic Guide
Please read this guide before operating this equipment.
After you finish reading this guide, store it in a safe place for future reference.
Series
What Can I Do with This Machine?
Before Using the Machine
Document Handling
Print Media
Sending Faxes (MF3240 Only)
Receiving Faxes (MF3240 Only)
Copying
Printing
Scanning
PC Faxing (MF3240 Only)
Maintenance
Troubleshooting
Machine Settings
Appendix
ENG
Advertisement
Table of Contents

Related Manuals for Canon LaserBase MF3200 Series


Summary of Contents for Canon LaserBase MF3200 Series
- Page 1 Series What Can I Do with This Machine? Basic Guide Before Using the Machine Document Handling Print Media Sending Faxes (MF3240 Only) Receiving Faxes (MF3240 Only) Copying Printing Scanning PC Faxing (MF3240 Only) Maintenance Troubleshooting Machine Settings Appendix Please read this guide before operating this equipment. After you finish reading this guide, store it in a safe place for future reference.
-
Page 2: Manuals For The Machine
● Considerable effort has been made to make sure that the manuals for the machine are free of inaccuracies and omissions. However, as we are constantly improving our products, if you need an exact specification, please contact Canon. ● The machine illustration on the cover may differ slightly from your machine. -
Page 3: What Can I Do With This Machine
What Can I Do with This Machine? Fax Features (MF3240 Only) Specify a recipient with a single key One-Touch Speed Dialing → p. 4-7 Specify a recipient with a two-digit code Coded Dialing → p. 4-14 Specify multiple recipients with a single key Group Dialing →... - Page 4 Fax Features (continued) Send a fax to multiple recipients Broadcasting → Advanced Guide Receive faxes in memory without printing out Memory Reception → Advanced Guide Reject faxes without their numbers Reception Restriction → Advanced Guide Fas (continued)
-
Page 5: Copy Features
Copy Features Select a scan mode depending on the type of image Image Quality → p. 6-3 Adjust the density level of scanned images Density → p. 6-4 Enlarge or reduce copied images Zoom Ratio → p. 6-6 Sorts copies by page order AAAA AAAA AAAA... -
Page 6: Printer Feature
Printer Feature Print a document from a PC AB C AB C Printing AB C AB C → Software Guide Scanner Feature Specify detailed scanning options to suit various images AB C AB C Scanning AB C AB C → Software Guide PC Fax Feature (MF3240 Only) Send a fax from a PC... -
Page 7: Table Of Contents
Contents Manuals for the Machine..............i What Can I Do with This Machine? ..........ii Fax Features (MF3240 Only)........... ii Copy Features ..............iv Printer Feature..............v Scanner Feature .............. v PC Fax Feature (MF3240 Only) ........v Contents ..................vi How to Use This Guide.............. - Page 8 Timer Settings................1-10 Setting Sleep Mode ............1-10 Setting Daylight Saving Time (MF3240 Only).....1-13 2 Document Handling..............2-1 Document Requirements ............2-1 Scanning Area................2-2 Loading Documents ..............2-3 3 Print Media ................3-1 Paper Requirements..............3-1 Printable Area ................3-2 Paper Guidelines .................3-3 Loading Paper................3-4 Into the Multi-Purpose Feeder ........3-4 Setting Paper Size and Type............3-7 Selecting the Paper Output Area..........3-10 Paper Type and Paper Output Area ......3-11...
- Page 9 5 Receiving Faxes (MF3240 Only)..........5-1 6 Copying ..................6-1 Scan Settings ................6-3 Image Quality..............6-3 Density................6-4 Zoom Ratio ..............6-6 7 Printing ..................7-1 8 Scanning .................. 8-1 9 PC Faxing (MF3240 Only) ............9-1 10 Maintenance................. 10-1 Cleaning the Machine..............10-1 Exterior ...............10-1 Interior.................10-2 Scanning area.............10-4...
- Page 10 12 Machine Settings ..............12-1 Machine Settings ...............12-1 Printing User’s Data List (MF3240 Only) ....12-1 Accessing the Setting Menu ........12-3 Setting Menu ................12-5 COMMON SETTINGS ..........12-5 COPY SETTINGS ............12-6 TIMER SETTINGS .............12-7 FAX SETTINGS (MF3240 Only) ........12-7 BROADCAST (MF3240 Only) .........12-11 ADDRESS BOOK SET.
-
Page 11: How To Use This Guide
How to Use This Guide Symbols Used in This Manual The following symbols are used throughout the manuals for the machine and indicate the warnings, cautions and notes you should keep in mind when using the machine. Indicates a warning that may lead to death or serious injury if not WARNING observed. -
Page 12: Illustrations Used In This Manual
Illustrations Used in This Manual Unless otherwise mentioned, illustrations used in this manual are those taken from the LaserBase MF3240. When there is any difference between MF3240 and MF3220, it is clearly indicated in the text, e.g., “MF3240 Only.”... -
Page 13: Legal Notices
Copyright Copyright © 2006 by Canon Inc. All rights reserved. No part of this publication may be reproduced, transmitted, transcribed, stored in a retrieval system, or translated into any language or computer language in any form or by any means, electronic, mechanical, magnetic, optical, chemical, manual, or otherwise, without the prior written permission of Canon Inc. -
Page 14: Before Using The Machine
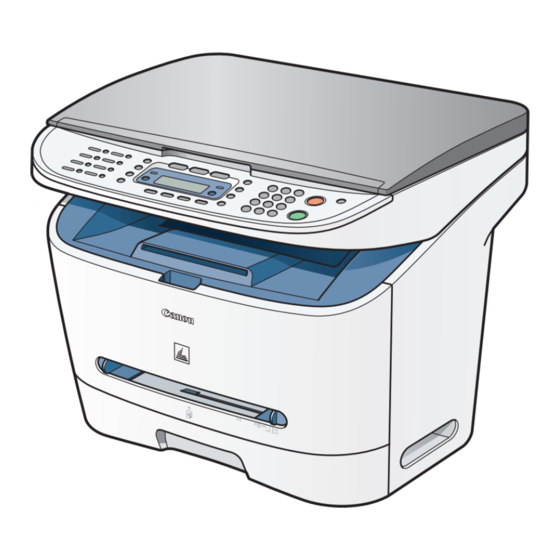
Before Using the Machine Machine Components Platen glass cover Open this cover when placing a document on the platen glass. Platen glass Place documents. Operation panel Controls the machine. Output tray Outputs printouts. Front cover Open this cover when installing the toner cartridge or clearing paper jams. - Page 15 Telephone line jack Connect the telephone cable. External device jack Connect an external device. USB port Connect the USB (Universal Serial Bus) cable. Face up cover Open this cover when outputting paper face up or clearing paper jams. Power socket Connect the power cord.
-
Page 16: Operation Panel
Operation Panel Main Operation Panel ● MF3240 Processing/Data indicator [Enlarge/Reduce] key Flashes during sending or receiving faxes. Press to enlarge or reduce copy ratio. Lights when the machine has waiting jobs. Numeric keys [COPY] key Enter letters and numbers. Press to switch to Copy mode. [Stop/Reset] key [FAX] key Press to stop a current job. - Page 17 [Tone] key ] key Press to switch from rotary pulse to tone Press to increase the value for various dialing. settings. Also press to see the next item in the menu. [Collate/2 on 1] key [OK] key Press to collate copies, or press to set 2 on 1 copying.
- Page 18 ● MF3220 Processing/Data indicator [Image Quality] key Lights when the machine has waiting jobs. Press to select image quality for copy. [COPY] key [Clear] key Press to switch to Copy mode. Press to clear entered alphanumeric characters. [SCAN] key [Additional Functions] key Press to switch to SCAN mode.
-
Page 19: Facsimile Operation Panel (Mf3240 Only)
Facsimile Operation Panel (MF3240 Only) One-Touch Speed Dial keys [Coded Dial] key Press to use one-touch speed dialing (Pre- Press to perform coded dialing. registered frequently used numbers) or [Redial/Pause] key Group Dialing. Press to redial the last dialed number when [R] key fax is standing by, or press to insert a pause Press to dial an outside line access number... -
Page 20: Lcd (Standby Mode)
LCD (Standby Mode) Fax Mode* (MF3240 Only) Copy Mode 3 1 / 1 2 2 0 0 5 S A T 1 0 : 5 0 1 0 0 % F a x O n l y S T A N D A R D T E X T Date &... -
Page 21: Toner Cartridge
Toner Cartridge The lifetime of the Canon Genuine toner cartridge used in this machine is approximately 2,500 pages. The page counts are on the basis of “ISO/IEC 19752”* when printing A4 size paper with the default print density setting. The level of toner consumption varies depending on the type of documents printed. -
Page 22: Maintaining The Toner Cartridge
Maintaining the Toner Cartridge ● Keep the toner cartridge away from computer screens, disk drives, and floppy disks. The magnet inside the toner cartridge may harm these items. ● Avoid locations subject to high temperature, high humidity, or rapid changes in temperature. -
Page 23: Timer Settings
Timer Settings Setting Sleep Mode When the machine remains idle for a certain period of time, it automatically enters Sleep mode. [OK] Press [Additional Functions]. Press [ ] or [ ] to select <TIMER SETTINGS>, then press [OK]. Press [ ] or [ ] to select <AUTO SLEEP>, then press [OK]. - Page 24 [OK] Press [ ] or [ ] to select <ON>, then press [OK]. Press [ ] or [ ] to select the desired interval, then press [OK]. You can set the interval from 3 to 30 minutes (in one-minute increments). You can also enter values with the numeric keys.
- Page 25 NOTE – To resume normal mode from Sleep mode, press [Energy Saver] on the operation panel. – To enter Sleep mode manually, press [Energy Saver] on the operation panel. – The machine will not enter Sleep mode when: • the machine is in operation •...
-
Page 26: Setting Daylight Saving Time (Mf3240 Only)
Setting Daylight Saving Time (MF3240 Only) In some countries or areas, time is advanced throughout the summer season. This is called “Daylight Saving Time.” [OK] Press [Additional Functions]. Press [ ] or [ ] to select <TIMER SETTINGS>, then press [OK]. Press [ ] or [ ] to select <DAYLIGHT SV.TIME>, then press [OK]. -
Page 27: Document Handling
Document Handling Document Requirements Type – Plain paper – Thick documents – Photographs – Small documents (e.g., index cards) – Special types of paper (e.g., tracing paper*, transparencies*, etc.) – Book (Height: max. 35 mm) Size (W × L) Max. 216 × 297 mm Weight Max. -
Page 28: Scanning Area
Scanning Area Make sure your document’s text and graphics fall within the shaded area in the following diagram. Note that the margin widths listed are approximate and there may be slight variations in actual use. 1 mm 1 mm 2 mm 2 mm... -
Page 29: Loading Documents
Loading Documents Lift up the platen glass cover. Place your document face down. - Page 30 Align the document with the appropriate paper size marks. If your document does not match any of the paper size marks, align the center of your document with the arrow mark. Gently close the platen glass cover. The document is ready for scanning. CAUTION –...
-
Page 31: Print Media
Print Media Paper Requirements Paper cassette Multi-purpose feeder Size (W × L) A4, B5, A5, Executive, A4, B5, A5, Executive, Envelope (COM10, Monarch, Envelope (COM10, Monarch, DL, ISO-C5), LTR DL, ISOC5), LTR, LGL (76 × 127 to 216 × 356 mm) (76 ×... -
Page 32: Printable Area
Printable Area The shaded area indicates the approximate printable area of A4-size paper and envelope. 5 mm 5 mm 5 mm 5 mm... -
Page 33: Paper Guidelines
● Store all paper wrapped and on a flat surface until ready for use. Keep opened packs in their original packaging in a cool, dry location. ● Store paper at 18°C-24°C, 40%-60% relative humidity. ● Use only the transparencies designed for laser printers. Canon recommends you to use Canon type transparencies with this machine. -
Page 34: Loading Paper
Loading Paper To load paper in the paper cassette, see “Set Up the Paper Cassette and Load Paper,” in the Starter Guide. Into the Multi-Purpose Feeder Use the multi-purpose feeder when you want to copy or print on the different paper which is in the paper cassette. - Page 35 When setting a paper, insert the paper into the multi-purpose feeder with the print side up. NOTE When you load paper with a logo on, position the paper with the print side up (logo side) and insert it so that the top of the paper feeds first in the multi-purpose feeder. When setting an envelope, insert the envelope into the multi-purpose feeder with the print side up and the right edge (i.e., closer to the stamp) first.
- Page 36 Specify the size and the type of the paper you load. For details on how to specify the paper size and type, see “Setting Paper Size and Type,” on p. 3-7.
-
Page 37: Setting Paper Size And Type
Setting Paper Size and Type The default setting is <A4> and <PLAIN PAPER>. When you place other sizes and/or types of paper, follow this procedure to change the settings. The procedure is same for the paper cassette and multi-purpose feeder except for selecting the paper cassette or multi-purpose feeder in step 4 and 7. - Page 38 [OK] Press [ ] or [ ] to select <PAPER SETTINGS>, then press [OK]. Press [ ] or [ ] to select <CASSETTE> or <MP TRAY>, then press [OK]. Press [ ] or [ ] to select <PAPER SIZE>, then press [OK]. Press [ ] or [ ] to select the paper size, then press [OK].
- Page 39 [OK] Press [ ] or [ ] to select <CASSETTE> or <MP TRAY>, then press [OK]. Press [ ] or [ ] to select <PAPER TYPE>, then press [OK]. Press [ ] or [ ] to select the paper type, then press [OK]. You can select from the following paper types: <PLAIN PAPER>...
-
Page 40: Selecting The Paper Output Area
Selecting the Paper Output Area Open the face up cover located on back side of the unit for face up paper output, or close the face up cover and attach the output tray on the front of the unit for face down paper output. -
Page 41: Paper Type And Paper Output Area
Paper Type and Paper Output Area Select the suitable paper output area depending on the paper type and your purpose. Paper Type Paper Output Area The Number of Output Sheets Plain Paper face up 1 sheet face down approx. 60 sheets (64 to 90 g/m Plain Paper L face up... -
Page 42: Face Down Paper Output Area
Face Down Paper Output Area The paper is delivered with the printed side down on the output tray. Paper is stacked in printed order. Close the face up cover, and attach the output tray. NOTE – Do not place the delivered paper back on the output tray. Doing so may result in paper jams. –... -
Page 43: Face Up Paper Output Area
Face Up Paper Output Area The paper is delivered with the printed side up from the face up paper output area at the rear of the machine. This way is convenient for printing on transparencies, or envelopes which tend to curl, because the paper is delivered straight through out of the machine. -
Page 44: Sending Faxes (Mf3240 Only)
Sending Faxes (MF3240 Only) Follow this procedure to send a fax. Set a Document Enter the Fax Mode Place the document on the platen Press [FAX]. glass. The FAX indicator lights and the machine enters fax standby mode. For documents you can fax, see “Document Requirements,”... - Page 45 Enter the Fax Number Send the Document Dial the recipient’s fax number with Press [Start]. After all scanning is the numeric keys. complete, press [OK] to start dialing. If the output paper in the recipient’s machine is not = 0 1 2 X X X X X X X _ equal to the scanned size, the original image may be reduced in size or divided into smaller parts when it is received.
-
Page 46: Scan Settings
Scan Settings You can adjust the image quality and density of the document you send. The higher image quality you set, the better the output will be, but the longer the transmission will take. Adjust the scan settings according to the type of document you are sending. - Page 47 [OK] Press [ ] or [ ] to select the resolution, then press [OK]. <STANDARD> for most text-only documents. (200 × 100 dpi) <FINE> for fine-print documents (the resolution is twice that of <STANDARD>). (200 × 200 dpi) <PHOTO> for documents that contain photographs (the resolution is twice that of <STANDARD>). (200 ×...
-
Page 48: Density
Density [OK] Press [FAX]. Press [Density]. D E N S I T Y - L T D K + Press [ ] or [ ] to adjust the density, then press [OK]. ]: to make light documents darker ]: to make dark documents lighter... -
Page 49: Speed Dialing
Speed Dialing Speed dialing allows you to dial fax/telephone numbers by simply pressing one or a few keys. The following speed dialing methods are available: ● One-Touch Speed Dialing (p. 4-7) – Register a fax/telephone number for one-touch speed dialing, then to dial the number, simply press the one-touch speed dialing key assigned to that number. - Page 50 ● Registering One-Touch Speed Dialing [OK] Press [Additional Functions]. Press [ ] or [ ] to select <ADDRESS BOOK SET.>, then press [OK]. Press [ ] or [ ] to select <1-TOUCH SPD DIAL>, then press [OK]. Press a one-touch speed dialing key (01 to 07) for a registering fax number, then press [OK].
- Page 51 [OK] Enter the destination name (max. 20 characters, including spaces) with the numeric keys, then press [OK]. N A M E [ A ] C A N Enter the fax number you register (max. 50 digits, including spaces and pauses) with the numeric keys, then press [OK]. T E L N U M B E R E N T R Y...
- Page 52 ● Editing One-Touch Speed Dialing [OK] Press [Additional Functions]. Press [ ] or [ ] to select <ADDRESS BOOK SET.>, then press [OK]. Press [ ] or [ ] to select <1-TOUCH SPD DIAL>, then press [OK]. Press the one-touch speed dialing key (01 to 07) you want to edit, then press [OK].
- Page 53 [OK] Press [ ] repeatedly to go to the wrong character, then press [Clear] to delete it. To delete the entire name, press and hold [Clear]. Enter a new character with the numeric keys, then press [OK]. 4-10...
- Page 54 [OK] Press [ ] repeatedly to go to the wrong number, then press [Clear] to delete it. To delete all numbers, press and hold [Clear]. Enter a new number with the numeric keys, then press [OK]. Press [Stop/Reset] to return to standby mode. 4-11...
- Page 55 ● Deleting One-Touch Speed Dialing [OK] Press [Additional Functions]. Press [ ] or [ ] to select <ADDRESS BOOK SET.>, then press [OK]. Press [ ] or [ ] to select <1-TOUCH SPD DIAL>, then press [OK]. Press the one-touch speed dialing key (01 to 07) you want to delete, then press [OK].
- Page 56 [OK] Press [OK]. Press and hold [Clear] to delete all numbers, then press [OK]. NOTE When deleting all numbers, the registered name is cleared automatically. Press [Stop/Reset] to return to standby mode. 4-13...
- Page 57 ● Registering Coded Dialing [OK] Press [Additional Functions]. Press [ ] or [ ] to select <ADDRESS BOOK SET.>, then press [OK]. Press [ ] or [ ] to select <CODED DIAL>, then press [OK]. Press [ ] or [ ] to select a coded dialing code (00 to 99), then press [OK].
- Page 58 [OK] Enter the destination name (max. 20 characters, including spaces) with the numeric keys, then press [OK]. N A M E [ A ] C A N Enter the fax number you register (max. 50 digits, including spaces and pauses) with the numeric keys, then press [OK]. T E L N U M B E R E N T R Y...
- Page 59 ● Editing Coded Dialing [OK] Press [Additional Functions]. Press [ ] or [ ] to select <ADDRESS BOOK SET.>, then press [OK]. Press [ ] or [ ] to select <CODED DIAL>, then press [OK]. Press [ ] or [ ] to select the coded dialing code (00 to 99) that you want to edit, then press [OK].
- Page 60 [OK] Press [ ] repeatedly to go to the wrong character, then press [Clear] to delete it. To delete the entire name, press and hold [Clear]. Enter a new character with the numeric keys, then press [OK]. 4-17...
- Page 61 [OK] Press [ ] repeatedly to go to the wrong number, then press [Clear] to delete it. To delete all numbers, press and hold [Clear]. Enter a new number with the numeric keys, then press [OK]. Press [Stop/Reset] to return to standby mode. 4-18...
- Page 62 ● Deleting Coded Dialing [OK] Press [Additional Functions]. Press [ ] or [ ] to select <ADDRESS BOOK SET.>, then press [OK]. Press [ ] or [ ] to select <CODED DIAL>, then press [OK]. Press [ ] or [ ] to select the coded dialing code (00 to 99) that you want to delete, then press [OK].
- Page 63 [OK] Press [OK]. Press and hold [Clear] to delete all numbers, then press [OK]. NOTE When deleting all numbers, the registered name is cleared automatically. Press [Stop/Reset] to return to standby mode. 4-20...
- Page 64 ● Registering Group Dialing [OK] Press [Additional Functions]. Press [ ] or [ ] to select <ADDRESS BOOK SET.>, then press [OK]. Press [ ] or [ ] to select <GROUP DIAL>, then press [OK]. Specify an empty one-touch speed dialing key that you want to set as the group dial, then press [OK].
- Page 65 [OK] Enter the group name (max. 20 characters, including spaces) with the numeric keys, then press [OK]. N A M E [ A ] C A N O N G R O U P Select the speed dialing numbers you want to register in the group (max. 50 destinations) until all destinations are registered, then press [OK].
- Page 66 ● Adding New Destination to Group [OK] Press [Additional Functions]. Press [ ] or [ ] to select <ADDRESS BOOK SET.>, then press [OK]. Press [ ] or [ ] to select <GROUP DIAL>, then press [OK]. Press [ ] or [ ] to select a group dial to edit, then press [OK].
- Page 67 ● Deleting Destination from Group [OK] Press [Additional Functions]. Press [ ] or [ ] to select <ADDRESS BOOK SET.>, then press [OK]. Press [ ] or [ ] to select <GROUP DIAL>, then press [OK]. Press [ ] or [ ] to select a group dial to delete, then press [OK].
- Page 68 Press [ ] or [ ] to display the speed dial number you want to delete from the group. Press [Clear]. Repeat steps 6 and 7 if you want to delete another speed dialing number, then press [OK]. Press [Stop/Reset] to return to standby mode. 4-25...
- Page 69 ● Changing Group Name [OK] Press [Additional Functions]. Press [ ] or [ ] to select <ADDRESS BOOK SET.>, then press [OK]. Press [ ] or [ ] to select <GROUP DIAL>, then press [OK]. Press [ ] or [ ] to select a group dial to edit, then press [OK].
- Page 70 [OK] Press [ ] repeatedly to go to the wrong character, then press [Clear] to delete it. To delete the entire character, press and hold [Clear]. Enter a new name with the numeric keys, then press [OK]. Press [Stop/Reset] to return to standby mode. 4-27...
- Page 71 ● Deleting Group Dialing [OK] Press [Additional Functions]. Press [ ] or [ ] to select <ADDRESS BOOK SET.>, then press [OK]. Press [ ] or [ ] to select <GROUP DIAL>, then press [OK]. Press [ ] or [ ] to select a group dial to delete, then press [OK].
- Page 72 [OK] Press [ ] or [ ] to display a speed dial number. Press [Clear]. Repeat steps 6 and 7 until all speed dial numbers are deleted, then press [OK]. NOTE When deleting all speed dial numbers, the group name is cleared automatically. Press [Stop/Reset] to return to standby mode.
-
Page 73: Using Speed Dialing
Using Speed Dialing Follow the procedure below to send faxes to registered recipients using speed dialing. For easy reference, print out the list of recipients registered for speed dialing. (See Chapter 4, “Reports and Lists (MF3240 Only),” in the Advanced Guide.) ●... - Page 74 ● Using Coded Dialing [OK] Place the document on the platen glass. Press [FAX]. Adjust any necessary settings for your document. For details, see “Scan Settings,” on p. 4-3. Press [Coded Dial]. Enter the desired two-digit code (00 to 99) with the numeric keys. = 0 1 2 X X X X X X X 0 1 ] C A N O N If you want to scan multiple pages, set the documents one by one, then press [Start].
-
Page 75: Receiving Faxes (Mf3240 Only)
Receiving Faxes (MF3240 Only) Follow this procedure to set the machine for receiving faxes. For advanced receiving features, see Chapter 1, “Advanced Fax Features (MF3240 Only),” in the Advanced Guide. Enter the Setting Menu Enter the Receive Mode Press [Additional Functions]. Select <FAX SETTINGS>... - Page 76 Select the Receive Mode Exit the Setting Menu ] or Select receive mode with Press [Stop/Reset] to return to , then press [OK]. standby display. <FaxOnly>: Answers all calls as faxes. <AnsMode>: Receives faxes automatically and records What if... voice messages. <FaxTel>: Switches between fax and voice calls ●...
-
Page 77: Copying
Copying Follow this procedure to make a copy. For advanced copying features, see Chapter 2, “Advanced Copy Features,” in the Advanced Guide. Set a Document Enter the Copy Mode Place the document on the platen Press [COPY]. glass. The COPY indicator lights and the machine enters copy standby mode. - Page 78 Enter the Copy Quantity Start Copying Enter the copy quantity (1 to 99) Press [Start]. with the numeric key. 1 0 0 % T E X T What if... What if... ● You press [Stop/Reset] to cancel a ● You enter a wrong number: job while scanning documents: Press [Clear] and enter a new number.
-
Page 79: Scan Settings
Scan Settings Before pressing [Start] to begin copying, you can adjust scan settings to better suit the document to be scanned. These settings return to the default values if Auto Clear function is activated or if you press [Stop/Reset]. Image Quality Press [COPY]. -
Page 80: Density
Density You can adjust the density to the most appropriate level for the document either automatically or manually. ● Adjusting Automatically [OK] Press [Density] until <AUTO> appears, then press [OK]. NOTE The image quality is automatically set to <TEXT>. - Page 81 ● Adjusting Manually [OK] Press [Density] until the manual mode appears. D E N S I T Y - L T D K + Press [ ] or [ ] to adjust the copy density, then press [OK]. ]: to make light documents darker ]: to make dark documents lighter...
-
Page 82: Zoom Ratio
Zoom Ratio ● Preset Zoom You can enlarge or reduce documents from one standard paper size to another. [OK] Press [Enlarge/Reduce]. Press [ ] or [ ] to select the copy ratio, then press [OK]. – 200 % MAX. – 141 % A5 → A4 –... - Page 83 ● Zoom Designation You can reduce or enlarge images by any copy ratio, in 1 % increments. The available copy ratios are from 50 % to 200 %. [OK] Press [Enlarge/Reduce] twice. Enter the copy ratio with the numeric keys, then press [OK]. Z O O M 5 0 - 2 0 0 % 1 0 0 %...
-
Page 84: Printing
For details on printing features, see Chapter 2, “Printing,” in the Software Guide. Start the Print Command Select the Printer From an open document on an Select the printer icon for the application, click [File] > [Print]. machine ([Canon MF3200 Series]). - Page 85 Adjust Preferences Print the Document Click [Preferences] or [Properties] Click [Print] or [OK]. to open the dialog box. After finished, click [OK]. What if... ● You want to cancel printing: See Chapter 3, “System Monitor,” in the Advanced Guide.
-
Page 86: Scanning
Scanning Follow this procedure to scan a document to your computer. Make sure that the scanner driver is installed. For details on scanning features, see Chapter 3, “Scanning a Document,” in the Software Guide. Set a Document Enter the Scan Mode Place the document on the platen Press [SCAN]. - Page 87 Start Scanning Press [Start]. The scanned data is transmitted to your computer and processed by the scan application. For more information on the scan application settings, see Chapter 3, “Scanning a Document,” in the Software Guide. What if... ● You want to cancel scanning: Press [Stop/Reset] on the operation panel, then click [OK] on the computer screen.
-
Page 88: Pc Faxing (Mf3240 Only)
For details on PC Faxing features, see Chapter 4, “PC Faxing,” in the Software Guide. Start the Print Command Select the Fax From an open document on an Select the fax icon ([Canon MF3200 application, click [File] > [Print]. Series(FAX)]), then click [Print]. What if... - Page 89 Set the Destination Send the Document Specify the name and fax number in Click [OK] in the Fax Sending [Sending Settings], then click [Add Settings. to Recipient List]. What if... What if... ● You want to cancel sending a fax: ●...
-
Page 90: Maintenance
Maintenance Cleaning the Machine Note the following before cleaning Exterior your machine: – Make sure no document is stored in Disconnect the power cord. memory, then disconnect the power cord. Wipe the machine’s exterior with – Use a soft cloth to avoid scratching a clean, soft, lint-free cloth the components. -
Page 91: Interior
Interior CAUTION Clean the machine’s print area – To avoid exposing the toner cartridge to light, place it in its protective bag or periodically to prevent toner powder and wrap it in a thick cloth. paper dust from accumulating inside. –... - Page 92 Insert the toner cartridge into the machine as far as it will go. Hold the toner cartridge and align the protrusions (A) on both sides of the toner cartridge to the guides (B) in the machine, then gently slide the toner cartridge into the machine as far as it will go.
-
Page 93: Scanning Area
Scanning area Close the platen glass cover. Keep the scanning area clean to avoid dirty copies or faxes to be sent. Open the platen glass cover. CAUTION Be careful not to get your fingers caught. Clean the platen glass and the underside of the platen glass cover with a cloth dampened with water. -
Page 94: Replacing The Toner Cartridge
Replacing the Toner Cartridge On MF3240, when the LCD displays Gently rock the toner cartridge <OUT OF TONER/CHANGE TONER>, five or six times to distribute redistribute toner in the toner toner evenly. cartridge. If the message persists, replace the toner cartridge. On MF3220, when the printout has vertical white streaks, redistribute the toner inside the cartridge. -
Page 95: Replacing The Toner Cartridge With A New One
Close the front cover. Replacing the Toner Cartridge with a New One Open the front cover. CAUTION Be careful not to get your fingers caught. Remove the toner cartridge. CAUTION Do not open the drum protective shutter on the toner cartridge. Print quality may deteriorate if the drum surface is exposed to light or is damaged. - Page 96 Remove the new toner cartridge Place the toner cartridge on a from the protective bag. flat and stable surface. Fold the tab (A) on the sealing tape (B) as shown below, and pull it out straight while supporting the toner cartridge. Make sure that the tab itself is detached from the toner cartridge.
- Page 97 Insert the toner cartridge into the machine as far as it will go. Hold the toner cartridge and align the protrusions (A) on both sides of the toner cartridge to the guides (B) in the machine, then gently slide the toner cartridge into the machine as far as it will go.
-
Page 98: Transporting The Machine
Transporting the Machine Follow this procedure to avoid Close the front cover. vibration damage to the machine when transporting it over a long distance. Disconnect the power cord and all the cables from the back of the machine. Open the front cover. CAUTION Be careful not to get your fingers caught. - Page 99 Remove the extension cover Detach the output tray. from the machine. Make sure all the covers are Detach the paper cassette closed. extension from the paper cassette. Grip the handles on both sides of the machine and lift it carefully, as shown in the illustration below.
-
Page 100: Troubleshooting
– Make sure you have removed any scraps of paper from inside the machine. NOTE Do not force jammed paper out of the machine. Contact your local authorized Canon dealer or the Canon help line for assistance if needed. 11-1... - Page 101 NOTE CAUTION Do not expose the toner cartridge to light – Remove watches and any bracelets or for more than five minutes. If necessary, rings when touching the inside of the put the toner cartridge in its original machine. These items might be protective bag or wrap it with a thick cloth damaged if they come into contact with to prevent exposure to light.
- Page 102 Hold both sides of the jammed If the leading edge of the paper is visible but has not entered the imaging area, pull paper and carefully move it the paper forwards and roll it inwards. inward, then gently pull it out. CAUTION –...
- Page 103 – Do not pull the jammed paper upward. If the jammed paper is badly folded, similar The toner on the paper will stain the to the folds of an accordion, ease the machine and cause a permanent jammed paper loose and then pull it out of reduction in print quality.
- Page 104 Hold both sides of the jammed NOTE paper and slowly pull it out in – Be sure to push the paper release levers the direction of the arrow. back to their original position. If the levers are left pushed down, the paper –...
- Page 105 Insert the toner cartridge into Close the front cover. the machine as far as it will go. Hold the toner cartridge and align the protrusions (A) on both sides of the toner cartridge to the guides (B) in the machine, then gently slide the toner cartridge into the machine as far as it will go.
-
Page 106: Lcd Messages
If the message persists, unplug the machine from the power supply and contact your local authorized Canon dealer or the Canon help line. CLOSE COVER The front cover is not closed Check the front cover, and FRONT COVER completely. - Page 107 Message Description Action LOAD CORRECT PAPER The size of the paper in the – Load the correct paper size or change the paper paper cassette or multi- size in <CASSETTE> or purpose feeder is different <MP TRAY> of the from that of the paper <PAPER SETTINGS>...
- Page 108 Message Description Action LOST IMAGE* The data in memory was lost The error is automatically when the machine was released after two seconds, turned on. and the machine automatically prints out the lost report that shows the records still existing in the activity report.
- Page 109 If particular type of error. the message persists, contact your local authorized Canon dealer or the Canon help line. TONER IS NOT SET A toner cartridge is not Install the toner cartridge...
-
Page 110: Facsimile (Mf3240 Only)
Facsimile (MF3240 Only) Message Description Action ALREADY REGISTERED The same recipient was Select a different recipient. entered twice. CANNOT REGIST MORE – Maximum number of – Resend the document to recipients (123) were other recipients if neces- entered for broadcasting. sary. - Page 111 Message Description Action MEMORY FULL – The memory becomes full – When sending the docu- during sending or receiv- ment, divide it into a few ing the fax. parts or select a lower fax – The number of fax jobs resolution.
- Page 112 Message Description Action NOT REGISTERED No recipient is registered in Select a registered key or the selected speed dialing code. For more information, key or code. “Registering One-Touch Speed Dialing,” on p. 4-7 or “Registering Coded Dialing,” on p. 4-14. RECEIVED IN MEMORY The received fax documents Load correct paper size in...
-
Page 113: Printer
Printer Message Description Action PRINTER DATA ERROR The data from the PC was Check if the software is CHECK PRINTER not printed. installed properly or if the printer cable is properly connected. PRINTING The printer is processing a No action required. Wait for print job. -
Page 114: Error Codes (Mf3240 Only)
Error Codes (MF3240 Only) An error code is a four-digit code displayed on the LCD or in the bottom row of a TX Result Report or an RX Result Report when an error occurs. JOB NO. TYPE DESTINATION TEL/ID DATE TIME PAGE DURATION... -
Page 115: If You Cannot Solve A Problem
– Steps you have taken to solve the problem and the results CAUTION If the machine makes strange noises, emits smoke or odd odor, unplug it immediately and contact your local authorized Canon dealer or the Canon help line. Do not attempt to disassemble or repair the machine yourself. NOTE Attempting to repair the machine yourself may void the limited warranty. -
Page 116: Machine Settings
Machine Settings Machine Settings You can adjust the machine settings from the Setting Menu to customize the way the machine works. To see the list of current settings, print out User’s Data List. Printing User’s Data List (MF3240 Only) [OK] Press [Additional Functions]. - Page 117 [OK] Press [ ] or [ ] to select <LIST PRINT>, then press [OK]. Press [ ] or [ ] to select <USER’S DATA LIST>, then press [OK]. 12-2...
-
Page 118: Accessing The Setting Menu
Accessing the Setting Menu [OK] Press [Additional Functions]. Press [ ] or [ ] to select the menu you want to access, then press [OK]. <COMMON SETTINGS> <COPY SETTINGS> <TIMER SETTINGS> <FAX SETTINGS>* <BROADCAST>* <ADDRESS BOOK SET.>* <REPORT SETTINGS>* * MF3240 Only 12-3... - Page 119 [OK] Press [ ] or [ ] to select a submenu, then press [OK]. To register the settings or go to a submenu item, press [OK]. When finished, press [Stop/Reset] to return to standby mode. NOTE Press [Stop/Reset] to exit from the menu. If you press [Stop/Reset] before pressing [OK], the setting will not be registered.
-
Page 120: Setting Menu
Setting Menu NOTE – Depending on the country of purchase, some settings may not be available. – The menus described in this section are based on the model LaserBase MF3240. Depending on the model of your machine, some settings may not be available and the number on the top of each menu may vary. -
Page 121: Copy Settings
COMMON SETTINGS 5 AUDIBLE TONES* Sets volumes for machine beeps in four levels. – MID – HIGH – OFF – LOW CALLING TONE Sets the calling volume. ENTRY TONE Sets the keypad volume. ERROR TONE Sets the alarm volume. MONITOR VOL. CTRL Sets the line monitor volume. -
Page 122: Timer Settings
TIMER SETTINGS Setting Item Description 1 AUTO SLEEP Sets auto sleep mode when the machine remains idle for a certain period of time. (3MIN.-30MIN.) (See “Setting Sleep Mode,” on p. 1-10.) – ON – OFF 2 DATE&TIME SETTING* Sets the current date and time. (See “Set Up the Machine,” in the Starter Guide.) 3 DATE TYPE SELECT* Sets the date format. - Page 123 FAX SETTINGS (MF3240 Only) IMAGE QUALITY Sets the default image quality for faxing. – STANDARD – FINE – PHOTO – SUPER FINE AUTO REDIAL Sets whether to redial automatically when the other line is busy or a transmission error occurs. (See Chapter 1, “Advanced Fax Features (MF3240 Only),”...
- Page 124 FAX SETTINGS (MF3240 Only) 3 RX SETTINGS Sets the reception functions. INCOMING RING Sets whether the telephone rings when it receives a voice call, enabling you to answer the call. This function is only available when the <RX MODE> is set to <FaxOnly>. The telephone does not ring when it receives a voice call.
- Page 125 FAX SETTINGS (MF3240 Only) RX TERMINAL ID Sets whether to insert the machine’s fax number and the sender information on received faxes. – OFF – ON RX RESTRICTION Sets whether to receive a fax by detecting the TSI (Transmitting Subscriber Identification) signal, used to identify the sending fax machine.
-
Page 126: Broadcast (Mf3240 Only)
BROADCAST (MF3240 Only) Setting Item Description BROADCAST Registers destinations for broadcasting. ADDRESS BOOK SET. (MF3240 Only) Setting Item Description 1 1-TOUCH SPD DIAL Registers the information on one-touch speed dialing. Up to 7 destinations can be registered. (See “Registering One- Touch Speed Dialing,”... -
Page 127: Report Settings (Mf3240 Only)
REPORT SETTINGS (MF3240 Only) Setting Item Description 1 SETTINGS Sets the report functions. (See Chapter 4, “Reports and Lists (MF3240 Only),” in the Advanced Guide.) TX RESULT REPORT Sets whether the fax transmission report prints out. – PRINT ERROR ONLY –... -
Page 128: Appendix
Appendix Specifications General ● Type Personal Desktop ● Power Source 220-240V, 50/60 Hz (Power requirements differ depending on the country in which you purchased the product.) ● Power Consumption MF3240: Max: Approx. 780 W Working: Less than 390 Wh Standby: Less than 9.5 Wh Energy Saver Mode: Less than 5.0 Wh MF3220: Max: Approx. - Page 129 General ● Dimensions 449 mm (W) × 487 mm (D) × 369 mm (H) (with the paper cassette attached) 449 mm (W) × 539 mm (D) × 369 mm (H) (with the paper cassette attached and front cover opened) ● Installation Space 649 mm (W) ×...
-
Page 130: Copier
Copier ● Scanning Resolution Text mode: 600 dpi × 400 dpi Photo mode, Text/Photo mode: 600 dpi × 600 dpi × ● Printing Resolution 600 dpi 600 dpi ● Magnification 1 ± 1.0%, 1:2.00, 1:1.41, 1:0.70, 1:0.50 Zoom 0.50 - 2.00, 1% increments ●... -
Page 131: Facsimile (Mf3240 Only)
Facsimile (MF3240 Only) ● Applicable Line Public Switched Telephone Network (PSTN)* ● Compatibility ● Data Compression MH, MR, MMR Schemes ● Modem Speed 33.6 Kbps Automatic fallback ● Transmission Speed Approx. 3 seconds/page* at 33.6 Kbps, ECM-MMR, transmitting from the memory ●... -
Page 132: Telephone (Mf3240 Only)
Telephone (MF3240 Only) ● Connection – External telephone/answering machine (CNG detecting signal)/data modem The Public Switched Telephone Network (PSTN) currently supports 28.8 Kbps modem speed or lower, depending on telephone line conditions. Based on ITU-T Standard Chart No. 1, MMR standard mode. NOTE Specifications are subject to change without notice. -
Page 133: Index
Index [Additional Functions] key 1-4 Daylight saving time 1-13 [Address Book] key 1-6 Density ADDRESS BOOK SET. 12-3, 12-11 Copying 6-4 Faxes 4-5 [Density] key 1-3 Document BROADCAST 12-3, 12-11 Loading 2-3 Requirements 2-1 Scannning area 2-2 CHANGE TONER message 10-5 Cleaning machine 10-1 Exterior 10-1 [Energy Saver] key 1-3... - Page 134 Group dialing 4-6 [OK] key 1-4 Adding destination 4-23 One-Touch Speed Dial keys 1-6 Changing name 4-26 One-touch speed dialing 4-6 Deleting destination 4-24 Deleting 4-12 Deleting group 4-28 Editing 4-9 Registering 4-21 Registering 4-7 Using 4-30 Using 4-30 Operation panel 1-1, 1-3 Output tray 1-1 [Hook] key 1-6 Paper...
- Page 135 [SCAN] key 1-3 USB port 1-2 Scan settings User’s Data List 12-1 Copying 6-3 Printing 12-1 Faxes 4-3 Using speed dialing 4-30 Scanning 8-1 Selecting the paper output area 3-10 Sending faxes 4-1 Zoom ratio 6-6 Setting paper size and type 3-7 Preset zoom 6-6 Zoom designation 6-7 Sleep Mode 1-10...
- Page 136 CANON INC. 30-2, Shimomaruko 3-chome, Ohta-ku, Tokyo 146-8501, Japan CANON U.S.A., INC. One Canon Plaza, Lake Success, NY 11042, U.S.A. CANON CANADA INC. 6390 Dixie Road Mississauga, Ontario L5T 1P7, Canada CANON EUROPA N.V. Bovenkerkerweg 59-61 1185 XB Amstelveen, The Netherlands CANON FRANCE S.A.S.