Danby DIM2500WDB - 25 lbs. Countertop Ice Maker Manual
- Owner's use and care manual (9 pages) ,
- Owner's use and care manual (25 pages)
Advertisement
IMPORTANT SAFETY INFORMATION
 READ AND FOLLOW ALL SAFETY INSTRUCTIONS
This appliance must be grounded. In the event of an electrical short circuit, grounding reduces the risk of electrical shock by providing an escape wire for the electrical current.
SAFETY PRECAUTIONS
- Power source must be suitable for the standards of the ice maker. If the voltage fluctuates by more than +/- 10% of the rated 120 volts, the ice maker may not work correctly.
- Hazardous materials such as explosive and flammable materials, corrosive acid and alkali materials cannot be used with or placed near the ice maker.
- If the power cord/plug is damaged stop using the icemaker. The cord and plug must be replaced by a professional.
- Unplug the plug directly from the socket; Never pull on the cable to unplug.
- Do not use the ice maker where coal is burning or a flammable gas could be leaking.
- Before cleaning or performing any kind of maintenance, remember to unplug the unit from the power source.
- The ice maker is specially designed for making ice cubes only; do not use it to refrigerate food or beverages.
- Unplug the cable from the power source before moving the ice maker to avoid any damage to the refrigerating system.
- To avoid personal injury do not take apart ice maker under any circumstances. Service must be performed by a professional.
- Only use the appliance for its intended purpose. This unit is not intended for use by children. Do not allow children to operate the unit unsupervised.
INSTALLATION INSTRUCTIONS
LOCATION
- Place the ice maker securely upon a sturdy and level surface.
- Position the unit away from any sources of heat and avoid direct sunlight, so as not to impact the ice-making performance.
- Ensure that there is a minimum unobstructed space of 20cm (7.87") from ice maker's air outlet and inlet.
- Ambient temperature for ice maker can not be less than 5°C (41°F).
- This ice maker cannot be used outdoors.
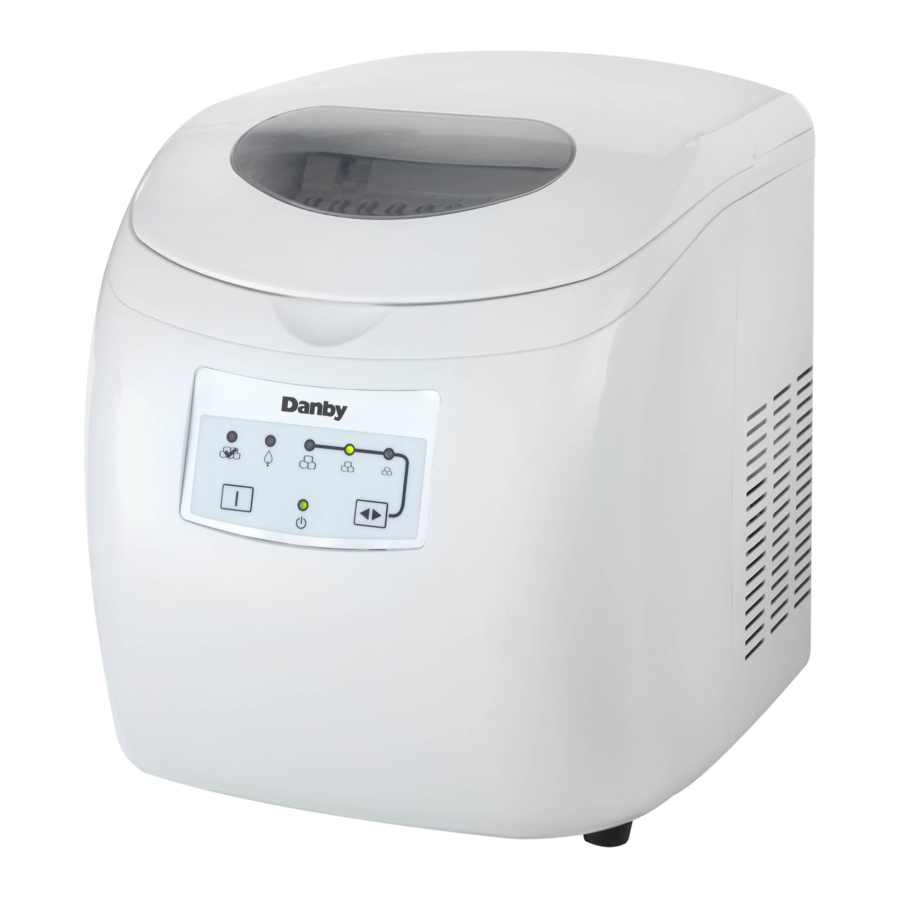
FEATURES
- Ice making status is watched through the transparent window.
- Push-button operation. LED indicator light indicates mode.
- Automatic beeping functions indicates water shortage, ice bucket fullness or cleaning cycle ensuring ice maker is always working properly.

- Transparent window
- Cover
- Operation panel
- Air outlet
- Air inlet
- Power cord
- Water outlet drain
- Ice bucket
- Evaporator
- Ice making box
OPERATING INSTRUCTIONS
PREPARATION BEFORE USE
- Remove and properly discard of all packaging.
- Make sure you have all the accessories and instructions.
- Place the ice maker in a suitable position (according to previous instructions)
- Clean the machine before use (according to directions)
- Turn on the self-clean mode before you use your ice maker for the first time. (see Self-Clean Mode operation)
USING THE ICE MAKER
- Do not switch on the power source to the ice maker within 30 minutes after moving the ice maker to allows the oil in the compressor to settle back into the compressor if the unit was tipped.
- Pour water into the water tank to the "Max Fill Line" (see Fig. A). You must use potable water (safe to drink water) to make ice.

- Press
![]() key to start making ice.
key to start making ice.

CONTROL PANEL

| Buttons and Icons | Functions |
 Button Button | Start operation, Standby, Clear faults/ Turn off unit. |
 SELECT Button SELECT Button | Select ice cube size. |
 ON indicator ON indicator | Power indicator |
 Bucket full indicator Bucket full indicator | Indicates ice cube fullness. |
 Add Water indicator Add Water indicator | Indicates water shortage, need to add water. |
 Large indicator Large indicator Medium indicator Medium indicator Small indicator Small indicator |
|
CARE AND MAINTENANCE
CLEANING INSIDE
NOTE: Be certain the power is off before cleaning any part of this appliance.
- Make sure to unplug the appliance before cleaning.
- Make sure to unplug the appliance before long term storage.
- Cleaning the water tank:
- Unscrew the nut and remove rubber plug from the water outlet, drain out all of the water.
- Use clean warm water and a cloth to clean inside the ice bucket. Flush unit with clean water until the water fl owing out is clear. Drain all water and reinstall rubber plugs and retighten the nut.
- Do not use solvents, boiling water, cleaning agents, strong acids or strong Alkali substances for cleaning.
- If ice maker will not be used for a long time, you should unplug it, drain out all water dry the appliance with a clean cloth and store the ice maker in a clean place.
- When you're finished making ice, drain the excess water out of the unit. Do not allow the same water to sit in the unit overnight or for extended periods of time.
HELPFUL HINTS
- Allow the ice maker cover to remain open for a few minutes after the ice making process is complete.
- Walls, Floor of bucket, Inside Window, and Plastic Parts - Some water deposits and dust can be removed with a paper towel, others may require a damp cloth.
- Ice Bucket - The ice bucket can be broken if dropped. Remember, do not operate the ice maker without the ice bucket in place. Do not use abrasive cleaners or sharp utensils on any part of your ice maker.
CLEANING THE OUTSIDE
OUTER CASE - Clean the outside of the appliance with a soapy cloth. Rinse and then dry. Wipe the window clean with a damp clean cloth.
CONTROL PANEL AND DOOR - Wipe with a damp cloth. Dry thoroughly. Do not use cleaning sprays, large amounts of soap and water and abrasive or sharp objects on the panel. They can damage it. Some paper towels can also scratch the control panel.
COVER SURFACE - It's important to keep the area clean where the door seals against the cabinet. Use only mild, non- abrasive detergents applied with a clean sponge or soft cloth. Rinse well.
SELF-CLEAN MODE OPERATION
The self-clean mode should be completed before you use your ice maker for the first time and/or if there has been a long period without use. The three LED lights for POWER, ICE FULL, ADD WATER will be on at the same time when the ice maker is in self-clean mode.
Stage 1
- Add equal parts of water and vinegar (1:1) to the ice maker's reservoir.
- In stand-by mode, hold the ON/OFF button for at least 5 seconds to activate the self-clean mode. Please note that self-clean mode will start automatically after a "Beep" sound.
- During self-clean mode, the upper water bucket is filled and evacuated. The pump will remain in continuous operation as it feeds water to the bucket and evaporator coils. This cycle will run continuously five times.
- Upon completion, the unit automatically changes back to stand-by mode.
Stage 2
- Drain the cleaning solution from the internal reservoir by removing the rear drain cap and plug.
- Add fresh water to the Max fill line. See Fig. A
- In stand-by mode, hold the ON/OFF button for at least 5 seconds to activate the self-clean mode again which will now act as a rinse.
- Upon completion of this final stage of the self-clean process, the unit automatically changes back to stand-by mode. Proceed to drain the water from the internal reservoir by removing the rear drain cap and plug. Leave the lid on the ice maker open to allow it to air dry. The vinegar smell will dissipate quickly.
Please note that if there is a water shortage during self-cleaning mode, the unit will automatically go into stand-by mode; If the water bucket fails to turn over, ICE FULL, and ADD WATER LED lights will be flashing at the same time. You need to press and hold the ON/OFF button for more than 5 seconds to deactivate the self-cleaning mode in order to change operation settings. Do not allow the evaporator to soak in the cleaning solution for an extended period.
TROUBLESHOOTING
Occasionally, a problem may arise that is minor in nature, and a service call may not be necessary. Use this troubleshoot- ing guide for a possible solution. If the unit continues to operate improperly, call an authorized service depot or Danby's Toll Free Number 1-800-263-2629 for assistance.
| PROBLEM | POSSIBLE CAUSE | SOLUTION |
POWER indicator does not illuminate | Power source is not on. |
|
ICE FULL indicator is on |
|
|
ADD WATER indicator is on | Water shortage. |
|
| ICE FULL indicator and ADD WATER indicator are both on. | Ice making box is in a incorrect position. |
|
Not making ice or not per- forming well |
|
|
Abnormal noise | Fan or pump is obstructed. |
|
 button.
Danby Products Limited, Ontario, Canada N1H 6Z9
Danby Products Inc., Findlay, Ohio, USA 45840

Documents / ResourcesDownload manual
Here you can download full pdf version of manual, it may contain additional safety instructions, warranty information, FCC rules, etc.
Download Danby DIM2500WDB - 25 lbs. Countertop Ice Maker Manual
Advertisement
Thank you! Your question has been received!


Need Assistance?
Do you have a question about the DIM2500WDB that isn't answered in the manual? Leave your question here.