
Related Manuals for Rowenta X-PLORER RR7675WH


Summary of Contents for Rowenta X-PLORER RR7675WH
- Page 1 MANUEL D’UTILISATION ROWENTA Aspirateur robot RR7675WH Besoin d’un conseil ? Une question sur ce produit ? RDV sur la communauté SAV Darty : https://sav.darty.com Déjà 1/2 million de solutions grâce à l’avis des utilisateurs.
- Page 2 X-PLORER SERIE 75 QUICK START GUIDE www.rowenta.com...
- Page 3 Engancha el accesorio de poner la base de carga. ga. Retira la cinta protectora de carga. Los botones se el robot esté totalmente « Rowenta X-plorer Series ciones de la aplicación para agua antes de ser utilizada. de agua. del accesorio para la mopa la mopa.
- Page 4 EN User’s guide BG Инструкции за употреба FR Guide de l’utilisateur CS Návod k použití ES Guía del usuario SK Používateľská príručka IT Manuale d’uso UK Інструкція з експлуатації EL Οδηγός χρήσης DE Bedienungsanleitung SR Priručnik za korisnika NL Gebruiksaanwijzing HR Korisnički priručnik PT Manual do utilizador HU Felhasználói útmutató...
- Page 5 / BG За повече информация / CS Více informací naleznete zde / SK Pre viac informácií / UK Для отримання детальнішої інформації / EL Για περισσότερες πληροφορίες / SR Za više informacija / HR Više informacija / HU További információk www.rowenta.com...
- Page 8 stool obstructions on staircases. cable ex. shoes books bowl liquid FR Votre robot peut rencontrer des difficultés sur les tapis : s’il a des franges trop épaisses ou de longs poils, s’il est trop léger (ex: tapis de salle de bain) / EN Your robot may encounter some difficulties on carpets: with fringes, too thick, with long piles, too light (ex: bathroom carpet) / DE Es kann vorkommen, dass Ihr Roboter auf Teppichboden Probleme hat: Fransen, zu dick, langflorig, zu leicht, schwarze Farbe / NL Uw robot kan tijdens een werking op vloerbekleding (met franjes, te dik, hoogpolig, te licht, zoals een badkamermat) problemen ondervinden / ES Su robot puede tener problemas con las alfombras: con flecos, demasiado gruesas, de pelo largo, excesivamente ligera (por ejemplo la alfombra de un baño) / PT O seu robot pode...
- Page 9 EN : Laser-Abstandssensor Главен бутон 1. Dust bin release button Schutzstreifen Презареждане на 2. LDS laser distance sensor Master-Taste почистването по региони 3. Protection strip Ladetaste / Punktuelle Включена или изключена 4. Control button Reinigung почистваща мощност на 5. Recharge / Spot cleaning Netzschalter / Start-Pause-Taste машината...
- Page 10 Λωρίδα προστασίας Glavna tipka Κύριο κουμπί Ponovno punjenje čišćenja Επαναφόρτιση / Καθαρισμός po regijama περιοχής Čišćenje Uključivanje ili Ενεργοποίηση/απενεργοποίηση isključivanje uređaja καθαρισμού συσκευής Portartály kioldógombja Dugme za otpuštanje LSD lézeres távolságérzékelő posude za prašinu Védőcsík LSD laserski senzor udaljenosti Főkapcsoló Zaštitna traka Feltöltés regionális takarítás Glavno dugme...
- Page 11 Spužvasti zaštitni filtar 10. Szűrőháló tartója 11. Portartály Mrežasti nosač filtra 10. Spremnik za prljavštinu HU : Pásztázási terület Szivárgási kimenet Vízbetöltő nyílás Víztartály akasztócsatja Visszaállítási nyílás Portartály fedele Portartály tartója Redőzött szűrő Szivacsos szűrő Connect the power cord to the main socket and plug the adaptor to the power jack on the side of the docking station.
- Page 12 1. 1. 0.5m 0.5m 1,5m To place the docking station, make sure there is an empty area of 0.5m on each side and 1.5m in front of the docking station. Do not install the docking station near stairs.The cable must be tight.
- Page 13 Place the robot on the docking station: the charging plate of the robot must touch those on the docking station. The buttons will then light up white, and the power indicator on the docking station changes from bright to dark. Placez le robot sur la station d’accueil : la plaque de charge du robot doit être en contact avec celle de la station d’accueil.
- Page 14 Помістіть робота на док-станцію: зарядна пластина робота повинна торкатися тих, хто знаходиться на док-станція. Потім кнопки загоряться білим, а індикатор живлення на док-станції станція змінюється з яскравої на темну. Τοποθετήστε το ρομπότ στη βάση σύνδεσης: η πλάκα φόρτισης του ρομπότ πρέπει να αγγίζει εκείνες...
- Page 15 The robot has drop sensors to detect stairs and gaps. The robot will change direction when detecting them. In order to correctly detect the floor level difference, make sure there are no objects (bags, shoes…) on the floor next to gaps, stairs or on the stairs’ steps. The robot near stairs without objects The robot near stairs with shoes, bags or other objects (the robot will not properly detect...
- Page 16 3 sec Press the button during 3 seconds to turn on power. The lights will blink and then light up permanently. If the battery is low the robot will not turn on. Appuyez sur le bouton pendant 3 secondes pour mettre l’appareil sous tension. Les voyants clignotent, puis restent allumés en continu.
- Page 17 Une fois que le robot est sous tension, appuyez sur le bouton pour démarrer le nettoyage (vous pouvez aussi utiliser l’application Rowenta X-plorer Series 75&95 : voir la section 2). En condition de fonctionnement normal, les boutons s’allument en blanc. Cuando el robot esté encendido, pulsa el botón para empezar a limpiar (o utiliza la aplicación Rowenta X-plorer Series 75&95, ver sección 2).
- Page 18 Press the button again to pause cleaning. Press it again to resume cleaning. Appuyez de nouveau sur le bouton pour interrompre le nettoyage. Appuyez à nouveau pour reprendre le nettoyage. Pulsa el botón de nuevo para detener la limpieza. Púlsalo otra vez para reanudar la actividad.
- Page 19 Čistenie prerušíte opätovným stlačením tlačidla . Opätovným stlačením čistenie obnovíte. Щоб зупинити чищення, знов натисніть кнопку . Щоб продовжити чищення, знов натисніть цю кнопку. Πιέστε ξανά το κουμπί για να σταματήσετε προσωρινά τον καθαρισμό. Πιέστε το ξανά για να συνεχίσετε τον καθαρισμό. Ponovo pritisnite dugme da biste pauzirali čišćenje.
- Page 20 Коли робот перебуває на паузі, натисніть кнопку для підзарядки. Робот автоматично повертається до док-станції з будь-якої з таких умов: Робот завершив очищення. Заряду акумулятора недостатньо; після заряджання до 80 % робот продовжить виконання роботи, що залишилася. Όταν το ρομπότ έχει σταματήσει προσωρινά τη λειτουργία του, πιέστε στιγμιαία το κουμπί για...
- Page 21 Lorsque le robot est en pause, appuyez sur le bouton pendant 3 secondes pour lancer le mode de nettoyage ponctuel. Cuando el robot esté en pausa, pulsa el botón durante 3 segundos para iniciar el modo de limpieza zona localizada. Quando il robot è in pausa, premere il pulsante per 3 secondi per avviare la modalità...
- Page 22 When the button is red, the battery level is low. Please place the robot on the docking station. The power of the robot should be >30% before it can work. Lorsque le bouton s’allume en rouge, le niveau de la batterie est faible. Placez le robot sur la station d’accueil.
- Page 23 Anleitungen in der App, um die Vorzüge Ihres Roboters auszunutzen! Om van alle mogelijkheden van uw robot gebruik te maken, kunt u de gratis app « •Rowenta X-plorer Series 75&95 » downloaden op uw smartphone (u kunt de bovenstaande QR-code gebruiken om de app in de app store of bij Google play te vinden).
- Page 24 When the buttons are blinking purple, the robot is ready to connect (please wait). When the buttons are white, the WIFi is connected ! Lorsque les boutons clignotent en violet, le robot est prêt à être connecté (veuillez patienter). Lorsque les boutons sont blancs, le WIFi est connecté ! Cuando los botones se pongan de color violeta y estén parpadeando, significa que el robot se puede conectar (ten paciencia).
- Page 27 month To clean the charging contact, switch off the robot and turn it upside down. Then use a dry cloth to wipe them. Do not scrub with oil. Clean the charging contact once a week. Please also clean the charging electrode plates of the docking station. Pour nettoyer le contact de charge, éteignez le robot et retournez-le.
- Page 28 month Wipe robot sensors with a dry, soft cloth including: • Wall sensor on the right side of the robot • Radar cover anti-collision sensor on the top of the robot • Three anti-drop sensors on the bottom of the robot •...
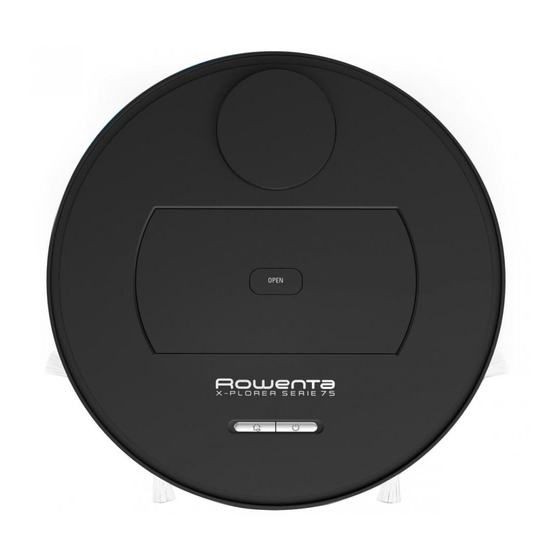
- Page 29 month Step 1: Press the “OPEN” button to remove the dust bin. Step 2: Open the dust bin in order to empty it. To avoid clogging of the filter, pull out the filter frame to remove the pleated filter and the foam. Tap the pleated filter gently over a garbage bin to shake off the dust. Rinse the foam, dust box and the filter frame with water.
- Page 30 month Turn the robot OFF and turn the robot upside down. Unlock the brushing guard using the 2 lockers. Mettez le robot hors tension et retournez-le. Déverrouillez la trappe de la brosse en déplaçant les deux clips. Apaga el robot y dale la vuelta. Desbloquea el protector del cepillo central utilizando los 2 cierres.
- Page 31 month Isključite robotski usisivač i okrenite ga naopako. Otključajte zaštitu za četku s pomoću dva blokatora. Kapcsolja KI a robotot, és fordítsa fejjel lefelé. Oldja ki a kefevédőt a 2 zár segítségével. Remove the brush guard and pull out the brush. Clean the brush with the blade side (to cut the hair) and the brush side (to remove them) doing movements from the top to bottom.
- Page 32 month Put the brush and the brush guard back. Make sure that the rubber part at the tip of the brush is in place. Lock the brush guard with the two lockers. Replacez la brosse et le protège-brosse. Assurez-vous que la partie en caoutchouc à l’extrémité de la brosse est bien installée.
- Page 33 month Vráťte kefu a kryt kefy na miesto. Uistite sa, že gumová časť na špičke kefy je na svojom mieste. Pomocou 2 uzáverov uzamknite kryt kefy. Встановіть щітку й захист щітки на місце. Переконайтеся, що гумова частина на кінчику щітки є на місці. Заблокуйте захист щітки за допомогою 2 фіксаторів. Τοποθετήστε...
- Page 34 year Kako biste očistili bočne četke, maknite ih tako da ih odvijete i upotrijebite čistu četku za čišćenje bočne četke i zapetljanja u otvoru za bočnu četku. Bočne četke čistite jedanput mjesečno. Az oldalsó keféket úgy tisztíthatja meg, ha kicsavarja és kiveszi őket, majd egy tisztítókefével megtisztítja az oldalkefét és az oldalkefe nyílásába gabalyodott dolgokat.
- Page 35 year Заменяйте страничните четки на всеки 6 месеца. Изхвърляйте старите четки и ги заменяйте с нови. Завинтете новите четки на робота. Boční kartáče vyměňujte každých 6 měsíců. Staré kartáče vyhoďte a vyměňte je za nové. Našroubujte nový kartáč na robotický vysavač. Postranné...
- Page 36 year It is recommended that every week, a dry cotton cloth should be used to carefully wipe its drop sensors to prevent dust accumulation, which will affect the performance of the product. Il est recommandé d’utiliser chaque semaine un chiffon en coton sec pour essuyer soigneusement ses capteurs de chute afin d’éviter toute accumulation de poussière susceptible d’affecter les performances du produit.
- Page 37 month Component Cleaning the component Replacing the component Dust collector After each use Not applicable Filter Once a week Twice per year Brush Once a week If required Charging base Once a week Not applicable Fall sensors Once a week Not applicable Wheels Once a month...
- Page 38 month year Every 6 months replace the pleated filter and the foam with new ones to maintain optimal performances. Tous les 6 mois, remplacez le filtre plissé et la mousse par des filtres neufs afin de garantir des performances optimales. Cada 6 meses, sustituya el filtro plisado y la espuma por otros nuevos para mantener un rendimiento óptimo.
- Page 39 Do not throw the robot in the bin. Always wear gloves and protection. Ne jetez pas le robot à la poubelle. Portez toujours des gants et une protection. No tire el robot en el cubo de basura. Utilice siempre guantes y protección. Non smaltire il robot insieme ai rifiuti generici.
- Page 40 Nemojte bacati robota u kantu za otpad. Uvek nosite rukavice i zaštitnu opremu. Robotski usisivač nemojte bacati u koš za smeće. Uvijek nosite rukavice i zaštitu. A robotot ne dobja a szemetesbe. Mindig viseljen kesztyűt és védőfelszerelést. Remove the top cover (clips). Unscrew the bumper lower part (12 screws). Unscrew the lower body (8 screws) and side brushes.
- Page 41 40°C - 104°F 0°C - 32°F...
-
Page 42: Code D'erreur
Codes d’erreur Selon le modèle : * En cas de panne du robot, le voyant rouge du robot clignote. Vérifiez sur l’application le code d’ e rreur indiqué. Code d’erreur Solution Erreur 1 : Le pare-chocs anticollision est coincé, Le pare-chocs anticollision est coincé. Appuyez plusieurs fois pour veuillez vérifier. - Page 43 Erreur 20 : Le capteur laser est peut-être bloqué. Le capteur de distance laser est bloqué, veuillez retirer l’ é lément Veuillez vérifier. bloquant. Un environnement trop spacieux et un environnement à réflexion multiple, tel que des miroirs métalliques, perturbent également le fonctionnement d’un capteur de distance laser. Veuillez déplacer l’appareil pour démarrer.
- Page 44 Défaillance Solution Impossible de . Assurez-vous que le robot est branché à une source d’alimentation. démarrer le robot . Assurez-vous que la batterie est entièrement chargée. Le robot s’arrête . Vérifiez si le robot est coincé ou bloqué par des obstacles. soudainement de .
- Page 45 The languages NL, PT, RO, BG, CS, SK, UK, EL, SR, HR and HU are included in the safety instructions. Les langues NL, PT, RO, BG, CS, SK, UK, EL, SR, HR and HU sont disponibles dans la notice de sécurité...
- Page 46 2220003805/02...