Table of Contents
Advertisement
Quick Links
Advertisement
Table of Contents

Related Manuals for Kohler LOMBARDINI 25 LD


Summary of Contents for Kohler LOMBARDINI 25 LD
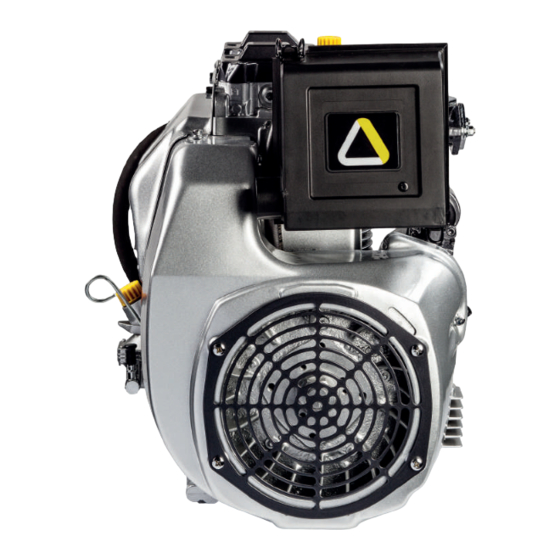
- Page 1 WORKSHOP MANUAL 25 LD 330-2 - 425-2...
- Page 2 REGISTRATION OF MODIFICATIONS TO THE DOCUMENT Any modifications to this document must be registered by the drafting body, by completing the following table. Drafting Document Model Review Edition Revision Issue date Endorsed body code N° date 51494 1° Tech-Pubs ED0053031690 24/02/2017 24/02/2017 Manual’s purpose...
- Page 3 - For any spare parts order please specify following details: ENGINE TYPE AND SERIAL NUMBER - Version (K) - on the engi- ne name plate - The complete and updated list of authorized Kohler service centers can be found on our web site: www.kohlerengines.com &...
-
Page 4: Table Of Contents
INDEX This manual contains pertinent information regarding the repair of LOMBARDINI air-cooled, indirect injection Diesel engines type 25LD330-2 and 25LD425-2. GENERAL REMARKS AND SAFETY INFORMATION ..................Pag. 8 - 12 Explanation of the safety pictograms that can be found on the engine or in the Workshop manual ......... 12 General safety during operating phase .......................... - Page 5 Index ELECTRICAL EQUIPMENT ............................36 - 37 Checking electrical equipment ............................37 Checking the alternator ..............................37 Plant specifi cations ................................36 ENGINE ASSEMBLY ..............................38 - 47 Camshaft................................... 41 Central main bearings ............................... 39 Checking injector protrusion ............................. 44 Connecting rods ................................
- Page 6 - 6 - 25 LD 330-2_425-2 Workshop Manual_cod. ED0053031690_1° ed_ rev. 00...
- Page 7 - 7 - 25 LD 330-2_425-2 Workshop Manual_cod. ED0053031690_1° ed_ rev. 00...
-
Page 8: Safety Regulation
General remarks and safety information This manual contains safety precautions which are explained Warning below. Caution is used to indicate the presence of a hazard that will or can cause minor personal injury or property damage if the caution is ignored. Danger Warning is used to indicate the presence of a hazard that can cause severe personal injury, death, or substantial property... -
Page 9: Regulations For Lifting The Engine
General remarks and safety information with your skin because of the health hazards involved. are mixed with others not containing these compounds as this may give rise to the formation of nitrosamines which are a health • Fuel vapours are highly toxic, so fill up only in the open air or hazard. -
Page 10: General Remarks And Safety Information
General remarks and safety information GENERAL SAFETY DURING OPERATING PHASES – The procedures contained in this manual have been tested and selected by the manufacturer’s technical experts, and hence are to be recognised as authorised operating methods. – A number of procedures must be carried out with the aid of equipment and tools that simplify and improve the timing of operations. -
Page 11: Information And Safety Signals
General remarks and safety information Information and safety signals Accidental Starts! Explosive Fuel! DANGER DANGER Accidental Starts can cause Fuel can cause fires and severe injury or death. severe burns. Disable engine by disconnecting Do not fill the fuel tank while the negative (-) battery cable. -
Page 12: Explanation Of The Safety Pictograms That Can Be Found On The Engine Or In The Workshop Manual
General remarks and safety information Explanation of the safety pictograms that can be found on the engine or in the Workshop manual - Read the Operation and Workshop manual before - Use protective gloves before carrying out the performing any operation on the engine operation - Use protective glasses before carrying out the operation... - Page 13 General remarks and safety information Plate for EPA regulations Plate for EPA regulations placed on the air-shroud Compilation example 1) Model year 2) Engine displacement 3) Power category, kW 4) Particulate emission limit (g/kWh) 5) Engine family ID 6) Injection timing (BTDC) 7) Injector opening pressure (bar) 8) Production date (example 2013_Jan) 9) Emission Control System = ECS...
-
Page 14: Technical Information
TECHNICAL INFORMATION MANUFACTURER AND MOTOR IDENTIFICATION DATA The identification plate shown in the figure can be found directly on the engine. Approval data The approval reference directives EC are on the engine plate. ENGINE IDENTIFICATION MODEL NUMBER R.P.M. Nr. Cylinders Customer's code Displacement (cc) Approval code... -
Page 15: Technical Specifications
Technical information TECHINICAL SPECIFICATIONS ENGINE TYPE 25LD330-2 25LD425-2 Number of cylinders Bore Stroke Swept volume cm³ Compression ratio 19:1 19:1 @ 3000 RPM 10(13,6) 12,5(17) N 80/1269/CEE-ISO 1585 @ 3600 RPM 12(16,3) 14(19) @ 3000 RPM 9,3(12,6) 11,4(15,5) Power kW (HP) NB ISO 3046 - 1 IFN @ 3600 RPM 11,2(15,2) -
Page 16: Overall Dimensions
Technical information OVERALL DIMENSIONS Note: Dimensions in mm - 16 - 25 LD 330-2_425-2 Workshop Manual_cod. ED0053031690_1° ed_ rev. 00... -
Page 17: Performance Diagrams
Technical information PERFORMANCE DIAGRAMS 25LD330-2 25LD425-2 N (80/1269/EEC - ISO 1585) AUTOMOTIVE RATING : Intermittent operation with variable speed and variable load. NB (ISO 3046 - 1 IFN) RATING WITH NO OWERLOAD CAPABILITY: continuos ligth duty operation with constant speed and variable load. -
Page 18: Possible Causes And Trouble Shooting
Technical information POSSIBLE CAUSES AND TROUBLE SHOOTING THE ENGINE MUST BE STOPPED IMMEDIATELY WHEN: 1) - The engine rpms suddenly increase and decrease 2) - A sudden and unusual noise is heard 3) - The colour of the exhaust fumes suddenly darkens 4) - The oil pressure indicator light turns on while running. -
Page 19: Routine Engine Maintenance
Technical information ROUTINE ENGINE MAINTENANCE Important • Failure to carry out the operations described in the table may lead to technical damage to the machine and/or system Frequency x hours OPERATION OPERATION DESCRIPTION 2500 5000 Oil-bath air cleaner Head and cylinder fins Cleaning Internal oil filter Fuel tank... -
Page 20: Prescribed Lubricant
Technical information PRESCRIBED LUBRICANT API CF-4/SG SAE 15W-40 specifications ACEA B2-B4 MIL-L-2104 C / MIL-L 46152 D For a temperature of -10°C an oil with a 5W40 viscosity is recommended. For a temperature of -15°C an oil with a 0W30 viscosity is recommended. -
Page 21: Acea Regulations - Sequences
Technical information LUBRICANT SAE Classification In the SAE classification, oils differ on the basis of their viscosity, and no other qualitative characteristic is taken into account. SAE 10W-30** The first number refers to the viscosity when the engine SAE 10W-40** is cold (symbol W = winter), while the second considers SAE 10W-60** viscosity with the engine at régime. -
Page 22: Disassembly Of The Engine
DISASSEMBLY OF THE ENGINE RECOMMENDATIONS FOR DISASSEMBLING Important • To locate specific topics, the reader should refer to the index. • The operator must make sure that the contact surfaces are intact, lubricate the coupling parts and protect those that are prone to oxidation. -
Page 23: Extracting Crankcase Bushes
Disassembly of the engine Extraction of crankshaft gear Use extractor tool number 00365R0890 (fig.4). Extraction of the camshaft gear Use the extractor number 00365R0010 (fig.5). Extracting crankcase bushes From crankcase (fig.6) From main bearing (fig.7) Use extractor number 00365R0900. Extracting the oil pressure indicator plug Loosen the plug securing screw, and remove circlip, spring and ball. - Page 24 CHECKS AND OVERHAUL RECOMMENDATIONS FOR OVERHAULS AND TUNING Important • To locate specific topics, the reader should refer to the index. • Before any intervention, the operator should lay out all equipment and tools in such a way as to enable him to carry out operations correctly and safely.
-
Page 25: Checks And Overhaul
Checks and overhaul Cylinders heads Parts shown in figure 9. 1.Head 10.Valve locking split cones 2.Tappets 11.Rocker arms 3.Valves 12.Rocker pins 4.Seats 13.Gaskets 5.Guides 14.Push rods 6.Seals 15.Cover tube 7.Lower washers 16.O-ring 8.Springs 17.Camshaft 9.Top washers The heads are made off aluminium with valve guides and seats are made of cast iron. - Page 26 Checks and overhaul After prolonged running of the engine the hammering of the valves on their seats at high temperature tends to harden the faces of the seats and makes manual grinding difficult. It is necessary to remove the hardened surface with a 45° cutter (fig. 12).
-
Page 27: Cylinders
Checks and overhaul Valves and springs In order to check the springs for possible failure measure the lengths under load as shown in figure 16. The permissible tolerance for loads and lengths is ± 10%. If the figures measured do not fall within these values, the springs must be renewed. -
Page 28: Connecting Rods
Checks and overhaul Piston rings - Pistons - Piston pins Check the wear of piston rings by fitting them into the cylinder through the lower end and measuring the end gap (fig.20). The values should be: Fitting mm Max. wear mm Piston ring 0,30 ÷... -
Page 29: Crankshaft
Checks and overhaul 2. Position the calibrated pin on two prisms arranged on a check surface. 3. Use a dial gauge to check that the discrepancy between readings at the ends of the calibrated pin is no more than 0.05 mm; should deformation exceed this value (max. 0.10mm) the connecting rod must be straightened. -
Page 30: Camshaft
Checks and overhaul Warning • During grinding take care not to remove the shim adjustment material from the main journal thrust face to avoid changing the crankshaft end float; also ensure that the grinding wheel radii are as specified in figure 28 so as not to create crack initiation sections on the crankshaft. -
Page 31: Fuel Pump Push-Rod
Checks and overhaul Tappets and push rods Make sure that the tappet surfaces (fig.32) are free from wear and present no signs of scoring or seizure, otherwise, renew. Assembly clearance between tappets and their housings should Fitting mm Max. wear mm 0,07 ÷... -
Page 32: Governor Lever And Spring
Checks and overhaul The clearance between the external rotor of the oil pump and the cover facing surface must be: Fitting mm Max. wear mm 0,27 ÷ 0,47 0,60 End float of rotors (fig.36): Fitting mm Max. wear mm 0,01 ÷... -
Page 33: Injection Equipment
INJECTION EQUIPMENT Fuel circuit Fuel feeding can be either gravity type or forced, with a mechanical double diaphragm pump operated a cam located on the camshaft. Fuel is filtered by a filter in the fuel tank or through an external filter cartridge. The fuel circuit is bled of air automatically. -
Page 34: Assembly Of Injection Pumps
Injection equipment Warning • The difference between the deliveries of the two pumps when locked must not exceed 0.5 cc. Also check: 1. That the distance between the injection cams in the rest position (bottom dead centre) and the pump supporting face is between 52.8 ÷... -
Page 35: Checking And Setting The Injectors
Injection equipment Injectors Details of fig.46: 1.Injector casing 2.Adjusting shim 3.Spring 4.Rod 5.Distance ring with locating pin 6.Nozzle 7.Ring nut Checking and setting the injectors 1. Clean the nozzle holes with 0.25 mm gauge steel wire (fig.47). 2. Place the injector on the test bench (p.n. 00365R0430, fig.48) bypass the pressure gauge and operate the lever rapidly. -
Page 36: Electrical Equipment
ELECTRICAL EQUIPMENT Plant specifications Internal built-in alternator Starter motor: Left rotation, 12V, power from 1.25 to 1.4 kW Built-in alternator: 280W Voltage regulator: Electronic with controlled diodes and connection for battery charge indicator light External alternator: 12V - 400W cables: Color x Section (mm²) Recommended battery: Refer to tables p.15 External alternator... -
Page 37: Checking Electrical Equipment
Electrical equipment Checking electrical equipment 1. Make sure that the connections between the voltage regulator and alternator are correctly made and in good condition. 2. Disconnect the starter motor wire from the battery terminal and connect a dc ammeter (fig.50 and 51). 3. -
Page 38: Engine Assembly
ENGINE ASSEMBLY RECOMMENDATIONS FOR ASSEMBLING The instructions are provided in a sequential way, following a practical and chronological order. The working methods have been selected, tested and approved by the Manufacturer's technicians. This chapter describes all the installation procedures for assemblies and /or single components after overhauling, testing and, if necessary, replacement using original spare parts. -
Page 39: Central Main Bearings
Engine assembly Important • Notice: These instructions are valid for engines up-dated prior to the publication of this manual. Any modifications must be checked on the technical circulars. • Before assembling the engine carefully clean all parts and dry them with compressed air. Lubricate moving parts to prevent seizing when starting up. -
Page 40: Crankshaft
Engine assembly Crankshaft Fit the crankshaft into the crankcase using tool p.n. 00365R0910 as shown in figure 60; make sure that the bearing oil passages are matched to the crankcase oil passages. Torque the bearing screws (fig. 61) to : kgm 2,2 (Nm 21,6) Main bearings - flywheel side Fit the bush to the bearing carriern using a special tool of... -
Page 41: Camshaft
Engine assembly Camshaft Prepare the camshaft assembly (fig.66) as described below: 1. Fit adjustment shim (nr. 3) and governor washer (nr. 4) onto the camshaft. 2. Fit snap ring (nr. 5) and key (nr. 7) into their respective seats. 3. Preheat (180 ÷ 200 °C) gear (nr. 6) complete with flyweights and mount it to the camshaft, making sure that it is snugly fitted against the retaining ring. -
Page 42: Oil Pump
Engine assembly Oil pump See pag. 25 if you wish to check the rotors. Fit the external oil pump rotor with the bevel toward the inside of the cover (fig.70). Torque the bolts to: kgm 0,5 ÷ 0,6 (Nm 4,9 ÷ 5,9) Important •... -
Page 43: Connecting Rods
Engine assembly Pistons Important • Lubricate the following parts with oil before mounting: the piston pin, the piston, the cylinder and the big-end bearing Fit the piston rings onto the pistons (fig.73) in the following order: 1. Chromed compression ring 2.Torsional compression ring (with internal bevel facing upward) 3. -
Page 44: Checking Injector Protrusion
Engine assembly Checking injector protrusion Before mounting the heads to the cylinders fit the injectors into their housings and, after having secured them temporarily, check the protrusion of the nozzles from the head faces (fig.77). Protrusion S should be: 1,75 ÷ 2,25 mm This value is adjusted by inserting copper washers between the injectors and the injector supporting faces on the heads (fig. -
Page 45: Injection Pumps
Engine assembly Injection pumps 1. Insert the injection pump tappet (D) and spacer (C) into the housings in the crankcase (fig.80). 2. Assemble the injection pumps (A fig. 80) on the crankcase and secure them on the adjustment sleeve by means of the appropriate pins (E or H fig. -
Page 46: Injection Check
Engine assembly Injection check 1. Connect the fuel tank to the injection pumps. 2. Set the speed control lever to Max. (fig.83) and the piston to the start of compression (cylinder nr. 1 on timing gear side). 3. To eliminate the injection delay caused by the milling on the pumping elements, bring the injection pump connection rod (A, fig.81) to a position mid-way between minimum and maximum. -
Page 47: Electric Shut Off
Injectors and injector pipes Mount injectors to heads placing copper gaskets in between (see pag. 36). Connect the injectors to the pumps by way of the injection lines. Important • Important: always use two wrenches to loosen or tighten the unions on the injector pipes (fig.86) thereby ensuring that the position of the delivery valve holder on the pumps is not changed (see pag.33). -
Page 48: Engine Testing
ENGINE TESTING Speed adjustment (fig.91) When the engine is hot set idle speed at 1000 rpm and maximum no-load speed at: 3150 rpm for engines at 3000 rpm 3750 rpm for engines at 3600 rpm Checking oil pressure 1. Remove the bolt from the hole in the crankcase and fit a pressure gauge with 0 to 10 kg/cm²... - Page 49 Engine testing Running-in table Time (min) Load 2000 3000/3600 " 30 % " 50 % " 70 % " 100 % Engine power curves are reported at page 17. Important • In order to check that the setting is correct, without tools, accelerate the engine a few times with no load and check the exhaust fumes.
-
Page 50: Storage
STORAGE Prepare engines as follows for storage over 3 months: Storage • Let engine run at idling speed in no-load conditions 15 minutes. • Fill crankcase with protection oil MIL-1-644-P9 and let engine run at 3/4 full speed for 5/10 minutes. •... -
Page 51: Special Tools
SPECIAL TOOLS For reference check the specific tools manual, cod. ED0053030770-S, to be found at: http://iservice.lombardini.it - 51 - 25 LD 330-2_425-2 Workshop Manual_cod. ED0053031690_1° ed_ rev. 00... -
Page 52: Quick Reference Charts
QUICK REFERENCE CHARTS Spiel (mm) Grezen (mm) Couplings Camshaft and central bearings (aluminum crankcase) 0,070 ÷ 0,105 Camshaft and central bearings (cast iron crankcase) 0,040 ÷ 0,075 Camshaft and flywheel side bearing 0,025 ÷ 0,075 End gap of compression rings 0,30 ÷... -
Page 53: Table Of Tightening Torques For Standard Screws (Coarse Thread)
Quick reference charts Table of tightening torques for standard screws (coarse thread) Resistance class (R) 10.9 12.9 Quality/ Dimensions R>400N/mm R>500N/mm R>600N/mm R>800N/mm R>1000N/mm R>1200N/mm Diameter 1000 1200 1050 1500 1800 1088 1450 2000 2400 Table of tightening torques for standard screws (fine thread) Resistance class (R) 10.9 10.9... - Page 54 - 54 - 25 LD 330-2_425-2 Workshop Manual_cod. ED0053031690_1° ed_ rev. 00...
- Page 55 - 55 - 25 LD 330-2_425-2 Workshop Manual_cod. ED0053031690_1° ed_ rev. 00...
- Page 56 Lombardini s.r.l. is a part of Kohler Group. E U R O P E U S A & CA N A DA F R A N C E Lombardini has manufacturing facilities Lombardini Srl Kohler Co. Lombardini France S.a.s. in Italy, Slovakia and India and sales Via Cav.