
Related Manuals for MB QUART MBQX-RAD-1


Summary of Contents for MB QUART MBQX-RAD-1
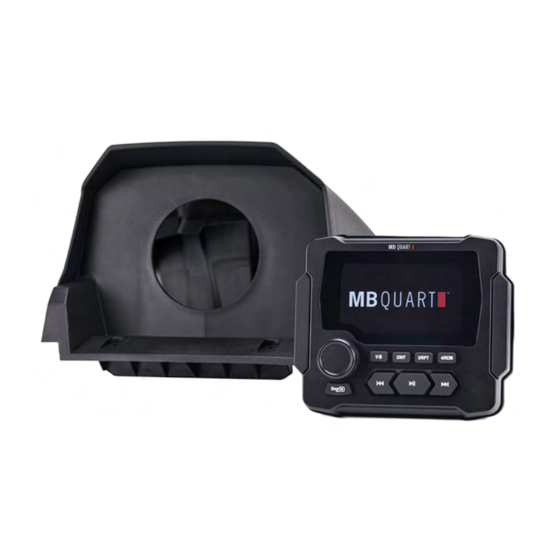
- Page 1 MBQX-RAD-1 ® AM/FM/USB/Bluetooth Multimedia Controller and Vehicle-Specific Housing for Can-Am X3 Vehicles Operator’s Guide and Installation Instructions...
-
Page 2: General Information
Congratulations for choosing the MBQX-RAD-1, an AM/FM/WB, USB and Bluetooth Multimedia Controller by MB Quart. The unit and housing are engineered to fit 2017 and newer Can-Am Maverick X3 vehicles. For more detailed information about the product and a video tutorial, please visit MBQuart.com... -
Page 3: Wiring And Connections
Wiring and Connections Water Tight Plug Face Shown (Wires to Connect Exit Rear) (M) Yellow (F) Gray (L) White/Black (E) Gray/Black (K) White (D) Green/Black (J) Red (C) Green (H) Purple/Black (B) Blue (G) Purple (A) Black Yellow (+12v Constant) Blue(Amp Turn-On) Red (+12v Accessory) Black (Chassis Ground) - Page 4 Wiring and Connections ● MB Quart recommends wire-to-wire connections such as power, ground and speaker wiring are soldered and protected with either heat shrink tubing or high quality electrical tape. ● The main (yellow) power wire should be connected to a source with at least 10 amps of additional current capability to support the unit.
- Page 5 Can-Am X3 Source Unit Mounting Instructions 1) Remove top center plas- tic cover above dash pock- et. Push up on the front pocket edge above lighter socket, then pull toward you. Remove lighter socket to facilitate wiring path or drill a 1" hole on the side of the pocket near the lighter socket for wire access.
- Page 6 Can-Am X3 Source Unit Mounting Instructions 5) Using battery-powered cordless drill with a 9/64” drill bit, drill two (2) mount- ing holes in the dimpled areas as indicated. As the material is plastic, there is very little pressure need- ed.. 6) Drill the remaining two (2) mounting holes at the back of the housing as indicated.
-
Page 7: Front Panel Controls
Front Panel Controls 2/INT 3/RPT 4/RDM Source POWER/Selector and Volume Knob ● Press the POWER/Selector Knob to power on the unit. ● Rotate the POWER/Selector Knob to view sources when source selection menu wheel is displayed. To select a source, press and release the POWER/Selector Knob. -
Page 8: Aux Input
Source Selection Weather FM Radio Bluetooth AM Radio Aux Input Camera Input Settings Step 1 Step 2 Source 2/INT 3/RPT 4/RDM 2/INT 3/RPT 4/RDM Source Source Press SOURCE Button to Rotate Selector Knob display source selection to choose a source menu. - Page 9 AM/FM Configuration Several configurable AM/FM radio parameters are available. ● Select between AM or FM on the Source Menu wheel. Each has its own menu. ● Once the chosen source is selected, press and hold the SOURCE button for 2 seconds. The AM or FM menu will appear (whichever source is selected).
- Page 10 AM/FM Configuration Settings Choices for AM ● PRESETS - This function shows stored AM presets 1-6 on AM1 or AM2. Only presets 1-4 have front panel quick access buttons without using this menu. ● SAVE PRESETS - This function stores AM presets in spaces 1-6. Only presets 1-4 have front panel quick access buttons.
-
Page 11: Weather Band Operation
AM/FM and Weather Band Operation Once setup is complete, select between AM or FM icons on the Source Menu wheel or simply press the SOURCE button to back up to the source screen showing the current AM or FM frequency. ●... -
Page 12: Bluetooth Pairing
● Ensure the Bluetooth functionality on the mobile device is enabled and supports A2DP audio streaming. ● Scan for "MB QUART" in the Bluetooth list on the mobile device. ● Select “MB QUART” and the connection will then be made automatically. - Page 13 15 seconds. ● To disconnect and allow another user to connect, use the mobile device to forget the "MB QUART" connection entirely. Once a Bluetooth device is paired and recognized: ● Be sure the multimedia controller has the Bluetooth source selected.
-
Page 14: Usb Input
USB Input The multimedia controller supports MP3, WMA, and WAV audio files with a USB thumb drive connected. Additionally, M4A or Apple Lossless file types are supported if the user connects an iPhone ® using iTunes as the music player. Most smartphones with a USB-based charging connector and USB thumb drives easily connect to the multimedia controller. - Page 15 USB RPT and RDM Functionality The multimedia controller has two modes of making a USB-connected music library more interesting with Repeat (RPT) and Random (RDM) functions. Random play is also called "Shuffle" on some mobile devices. USB Thumb Drive RPT and RDM With a thumb drive connected to the USB input, users see an icon on the right side of the screen (centered) that indicates the status of the RPT mode.
- Page 16 Auxiliary (AUX) Input and Camera The multimedia controller has right and left preamp level RCA connections for the Auxiliary Input. If a portable device with a headphone jack is used, a 3.5mm (male) to RCA (male) adapter cable is required and not included. Select the AUX icon on the Source Menu wheel.
-
Page 17: Settings Menu
SETTINGS Menu To access SETTINGS, press Selector/Volume knob in any source. The "SETTINGS" menu appears immediately. Alternatively, select "SOURCE" and navigate to the SETTINGS icon ("Gear" icon), then press the Selector/Volume knob to access the menu. 2/INT 3/RPT 4/RDM Use the Selector/Volume knob to navi- Source gate the main menu by turning to scroll and pressing to enter a specific feature... -
Page 18: Clock Adjust
SETTINGS Menu (Continued) Clock Adjust ● Access the clock adjust mode menu to change the time displayed on the unit's main screen. ● Navigate each time parameter (hour, then minute) by turning the knob and select by pushing the knob. ●... -
Page 19: Balance Control
BASS Level ● Adjust the bass from -7 to +7. Default setting is “0.” Center frequency is 100Hz. TREBLE Level ● Adjust the treble range from -7 to +7. Default setting is “0.” Center frequency is 10KHz. BALANCE Control ● Adjust the balance between the left and right speakers using the grid on the screen and the Selector/Volume knob to move the dot. - Page 20 Audio System Design Ideas Front Speakers Front and Rear Built-in Power Rear Speakers Multimedia Controller 4-Speaker System using Built-in Power Front Speakers Rear Speakers Subwoofers 4 Channel Amp Front and Rear RCAs Multimedia Controller Amplified System Subwoofer Amp with Subwoofers SUB (Green) RCAs...
- Page 21 Interior Speakers Front and Rear Rear Built-in Power Front Multimedia Controller Dual-Zone 4 Channel Amp Roll Bar UTV System Front and Rear RCAs using ZONE Control Speakers Interior Speakers Front and Rear Rear Built-in Power Front Multimedia Controller 4 Channel Amp Dual-Zone Roll Bar Front and Rear RCAs using ZONE Control...
-
Page 22: Diagnostics And Troubleshooting
Diagnostics & Troubleshooting Problem Cause Solution 1. Incorrect wiring 1. Re-check wiring No power 2. Fuse is blown 2. Replace fuse (Unit does not 3. Wiring harness is 3. Re-check wiring turn on) not connected harness connection 1. Increase volume 1. - Page 23 Notes...
- Page 24 The Bluetooth ® word mark and logos are registered trademarks owned by the Bluetooth SIG, Inc. and any use such marks by MB Quart is under license. All product names, logos, and brands are property of their respective owners. All company, prod- uct and service names used in this literature are for identification purposes only.