Table of Contents
Advertisement
Quick Links
Download this manual
See also:
Basic Manual
s/w version 1.003SP
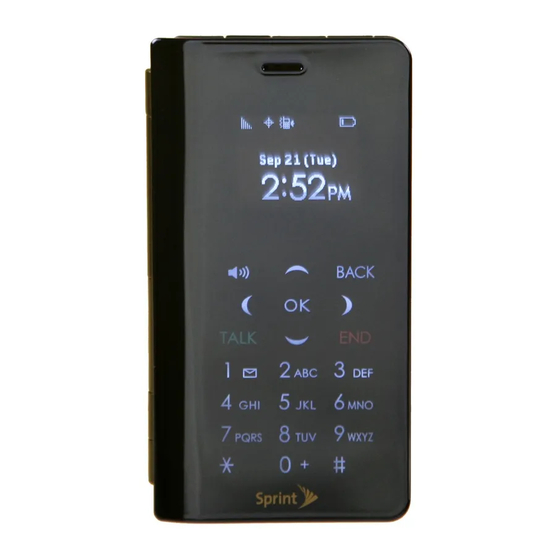
User Guide
SANYO INNUENDO™ by KYOCERA
www.sprint.com
©2010 Sprint. SPRINT and the logo are trademarks of Sprint.
Other marks are the property of their respective owners.
"SANYO" is a registered trademark of SANYO Electric Co., Ltd.
and is used under license. KYOCERA is a registered
trademark of Kyocera Corporation. Kyocera manufactures
and markets the SANYO line of wireless products.
8/20/10
Advertisement
Table of Contents

Related Manuals for Sanyo Innuendo


Summary of Contents for Sanyo Innuendo
-
Page 1: User Guide
©2010 Sprint. SPRINT and the logo are trademarks of Sprint. Other marks are the property of their respective owners. “SANYO” is a registered trademark of SANYO Electric Co., Ltd. and is used under license. KYOCERA is a registered trademark of Kyocera Corporation. Kyocera manufactures and markets the SANYO line of wireless products. - Page 2 Consejo: Para encontrar esta guía para usuarios en español, por favor visita a www.sprint.com Support > Devices To find this user guide in Spanish, please visit www.sprint.com and click Important Privacy Message – Sprint’s policies often do not apply to third-party applications. Third-party applications may access your personal information or require Sprint to disclose your customer information to the third-party application provider.
-
Page 3: Table Of Contents
Table of Contents Tip: Looking for something? If you don’t see it in the headings listed here, try the Index on page 154. Introduction ....... i Your Phone’s Menu . - Page 4 History Details ......58 History Options ......59 Making a Call From History .
- Page 5 Sending Pictures and Videos From Your Phone ....... 95 Printing Pictures From Your Phone ... 97 2J.
- Page 6 Radio Frequency (RF) Energy ... . . 143 Owner’s Record ......145 User Guide Proprietary Notice .
-
Page 7: Introduction
Introduction This introduces you to Sprint User Guide all the features of your new phone. It’s divided into four sections: Section 1: Getting Started Section 2: Your Phone Section 3: Sprint Service Section 4: Safety and Warranty Information Note: Because of updates in phone software, this printed guide may not be the most current version for your phone. - Page 8 My Stuff 1: Application Manager 2: Games 3: Ringers 4: Screen Savers 5: Applications 6: Call Tones Photos & Videos 1: Camera Press the right softkey for the following options: 1: Picture Mode 2: Zoom 3: Self-Timer 4: Fun Tools 5: Image Controls 6: Camera Settings 7: Review Media...
- Page 9 Settings 1: Display 1: Screensaver 2: Brightness 3: Backlight 4: Notification 5: Picture ID 6: Power Save Mode 7: Outer Clock 8: Greeting 2: Volume 1: Incoming Ringer 2: Playback Volume 3: Power Up/Down 4: Key Beeps 5: Touch Vibrate 3: Ringers 1: Incoming Calls 2: Voicemail...
- Page 10 4: Call Setup 1: Abbreviated Dialing 2: Call Answer 3: Auto-Answer 5: Data 1: Data On/Data Off 2: Net Guard 3: Update Data Profile 6: Headset Mode 1: Earpiece 2: Ringer Sound 7: Language 1: English 2: Español 8: Location 1: On/Off 2: NMEA Output 9: Roaming...
- Page 11 In Use Menu Press OPTIONS (right softkey) to display the following options: 1: Save/Contact Details 2: Main Menu 3: 3-Way Call 4: Contacts 5: Voice Memo 6: Phone Info...
-
Page 13: Section 1: Getting Started
Section 1 Getting Started... -
Page 14: Setting Up Service
1A. Setting Up Service Setting Up Your Phone (page 2) Activating Your Phone (page 3) Setting Up Your Voicemail (page 4) Sprint Account Passwords (page 4) Getting Help (page 5) Setting Up Your Phone Install the battery. Insert the battery into the opening in the back of the phone, making sure the connectors align. -
Page 15: Activating Your Phone
Note: Your phone’s battery should have enough charge for your phone to turn on and find a signal, set up your voicemail, and make a call. You should fully charge your battery as soon as possible. See “Charging the Battery” on page 17 for details. Activating Your Phone If you purchased your phone at a Sprint Store probably activated and ready to use. -
Page 16: Setting Up Your Voicemail
Setting Up Your Voicemail Your phone automatically transfers all unanswered calls to your voicemail, even if your phone is in use or turned off. You should set up your Sprint Voicemail and personal greeting as soon as your phone is activated. Always use a password to protect against unauthorized access. -
Page 17: Getting Help
Data Services Password With your Sprint phone, you may elect to set up an optional data services password to control data (Web) access and authorize Premium Service purchases. For more information, or to change your passwords, sign on to or call Sprint Customer www.sprint.com Service at 1-888-211-4727... -
Page 18: Sprint Operator Services
There is a per-call charge to use Sprint 411, and you will be billed for airtime. Press Sprint Operator Services Sprint Operator Services provides assistance when placing collect calls or when placing calls billed to a local telephone calling card or third party. Press For more information or to see the latest in products and services, visit us online at... -
Page 19: Section 2: Your Phone
Section 2 Your Phone... -
Page 20: Phone Basics
2A. Phone Basics Your Phone (page 8) Viewing the Display Screen (page 11) Turning Your Phone On and Off (page 16) Battery and Charger (page 16) Navigating Through the Menus (page 18) Displaying Your Phone Number (page 18) Making and Answering Calls (page 19) Entering Text (page 27) Simple Data Exchange (page 31) Tip:... -
Page 21: Key Functions
Key Functions Proximity Sensor allows you to lock the touch keypad automatically when held close to the face to prevent accidental key presses. The screen automatically turns off when close to the sensor, then turns back on when you pull it away. lets you hear the caller and automated Earpiece prompts. - Page 22 allows you to plug in an optional Headset Jack headset for convenient, hands-free conversations. CAUTION! Inserting an accessory into the incorrect jack may damage the phone. lets you hear the different ringers and Speaker sounds. The speaker also lets you hear the caller’s voice in speakerphone mode.
-
Page 23: Viewing The Display Screen
lets you enter numbers, letters, QWERTY Keyboard and characters, and perform functions using single or combined keypresses. provides one-touch access to the TEXT Key phone’s messaging feature. lets you place or receive calls in Speaker Key speakerphone mode or turn the speakerphone on and off during a call. - Page 24 Service Icons – Your phone’s current signal Signal Strength strength. (More bars = stronger signal.) – Your phone cannot find a usable No Service signal. Roaming – Your phone is “roaming” off the Nationwide Sprint Network. Data Service (EVDO) Active service (EVDO) is available.
- Page 25 Messaging and Alert Icons –You have one or more new New Messages messages waiting. New Voicemail – You have one or more new voicemail messages waiting. New Email – You have one or more new email messages waiting. Urgent Messages –...
- Page 26 Voice Call Icons – You have one or more missed Missed Call voice calls. Bluetooth Device – A call is in progress using a Bluetooth device. Headset – A call is in progress using an optional wired headset. Car Kit –...
- Page 27 Camera and Video Icons Camera Resolution (0.4M Wide) – Indicates the camera is set to 0.4-megapixel resolution with wide angle. Camera Resolution (0.3M) – Indicates the camera is set to 0.3-megapixel resolution. – Indicates the Camera Resolution (0.1M Wide) camera is set to 0.1-megapixel resolution with wide angle.
-
Page 28: Turning Your Phone On And Off
Turning Your Phone On and Off Turning Your Phone On Press and hold the Power/Lock button ( located at the top left of the phone. – or – Open the phone and press Once your phone is on and finds a signal, it automatically enters standby mode –... -
Page 29: Battery Capacity
Battery Capacity Your phone is equipped with a Lithium Ion (Li-Ion) battery. It allows you to recharge your battery before it is fully drained. The battery provides up to 4.5 hours of continuous digital talk time. For a quick check of your battery level, glance at the battery charge indicator located in the upper right corner of your phone’s display screen. -
Page 30: Navigating Through The Menus
Navigating Through the Menus Note: Your phone’s Sprint One Click main screen gives you instant access to your favorite features. See “2B. Navigating the Main Screen” on page 33 for complete information. The navigation key on your phone lets you scroll through onscreen items. -
Page 31: Making And Answering Calls
Making and Answering Calls Making Calls Using the External Keypad Enter a phone number from standby mode. (If you make a mistake while dialing, touch the numbers.) Touch When you are finished, touch Using the QWERTY Keyboard Enter a phone number from standby mode. (If you make a mistake while dialing, press the numbers.) Press... -
Page 32: Answering Calls
to insert a hard pause. (See “Dialing Hard Pause and Saving Phone Numbers With Pauses” on page 24.) to insert a two-second pause. (See 2-Sec. Pause “Dialing and Saving Phone Numbers With Pauses” on page 24.) Answering Calls Make sure your phone is on. (If your phone is off, incoming calls go to voicemail.) Touch to answer an incoming call. -
Page 33: Calling Emergency Numbers
Answering a Roam Call With Call Guard Enabled Call Guard is an option that helps you manage your roaming charges when making or receiving calls while outside the Nationwide Sprint Network. Please see “Roaming” on page 111 for more information about roaming. -
Page 34: In-Call Options
Enhanced 911 (E911) Information This phone features an embedded Global Positioning System (GPS) chip necessary for utilizing E911 emergency location services where available. When you place an emergency 911 call, the GPS feature of your phone seeks information to calculate your approximate location. -
Page 35: Saving A Phone Number
Press the volume button up or down to adjust the receiver volume. Press or touch to turn the speaker on. Press or touch again to turn it off. WARNING: Because of higher volume levels, do not place the phone near your ear during speakerphone use. -
Page 36: Finding A Phone Number
Finding a Phone Number You can search Contacts entries for phone numbers that contain a specific string of numbers. Enter four or more digits of the number in standby mode. (The more numbers you enter, the more specific the search becomes.) All Contacts entries matching the entered numbers will be displayed. -
Page 37: Plus Code Dialing
Plus (+) Code Dialing When placing international calls, use Plus Code Dialing to automatically enter the international access code for your location (for example, 011 for international calls made from the U.S.). Touch and hold to display “ screen. Enter the country code and phone number, and then touch . -
Page 38: Abbreviated Dialing
Abbreviated Dialing Abbreviated Dialing is similar to speed dialing. You can use either of the following abbreviated dialing features. – Retrieve any number saved in your Contacts Match Contacts by entering four or more digits of any part of the number. –... -
Page 39: Entering Text
Entering Text Selecting a Text Input Mode Your phone provides convenient ways to enter letters, numbers, and symbols whenever you are prompted to enter text. From a screen where you can enter text, press (right softkey) to change the text mode. OPTIONS (If you are in the message entry screen, press OPTIONS... -
Page 40: Abc Mode
Scroll to the correct word and press Adding a Word to the XT9 Database If a word you want to enter is not displayed in an XT9 word choice list when you are using XT9 Smart Input, add it to the database. While you are in XT9Word (A word choice list opens.) -
Page 41: Setting Text Entry Options
Setting Text Entry Options The text entry options menu allows you to specify a suitable feature during the text entry process. When entering text, press OPTIONS Text Options Highlight an option and press to suggest possible words based Word Complete on letters you have entered when the XT9 mode is enabled. -
Page 42: Entering Text With The Qwerty Keyboard
Entering Text With the QWERTY Keyboard Your phone features a QWERTY keyboard, specifically designed for easy and comfortable text entry. The QWERTY keyboard works in the same way as the standard keyboard on any computer. The easiest way to enter text on the QWERTY keyboard is to use your thumbs. -
Page 43: Simple Data Exchange
Simple Data Exchange This feature makes it easy to select certain information in a message or email message and automatically save it or use it in a related application. Simple Data Exchange works with these types of information: Email addresses Street addresses Phone numbers Web addresses (URLs) - Page 44 to send a message to the phone Send Message number. The messaging application will open and the phone number will appear in the to select Share Message application will open and the phone number will appear in the message body. to save the phone number in Save to Contacts Contacts.
-
Page 45: Navigating The Main Screen
2B. Navigating the Main Screen Getting to Know Sprint One Click (page 33) Personalizing the Carousel (page 35) Getting to Know Sprint One Click Sprint One Click brings all your favorite features to your fingertips. Instead of navigating through the levels of a traditional phone menu, this design puts the things you need the most –... - Page 46 – The tiles are the individual icons on the Tiles carousel. Each tile displays a specific menu, such as Messaging, Internet, and Call Log. The carousel can hold up to 15 tiles, which you can add, remove, and rearrange to suit your needs. The provides access to the phone’s full menu, and it is the only one that cannot be moved or removed.
-
Page 47: Personalizing The Carousel
Personalizing the Carousel Now that you know what the carousel is, it’s time to make it work for you by adding, removing, or rearranging tiles to match how you want to use your phone. Adding a Tile to the Carousel Highlight and press OPTIONS... -
Page 48: Rearranging Tiles On The Carousel
Sprint One Click Tiles – Access Sprint Navigation, Sprint Navigation including Drive To, Search, Maps & Traffic, and Share & More. Google – Get easy access to all your favorite Google services. – Access data services, including the Internet Sprint home page, Favorites, Recent Pages, the Enter Web Address menu, and Google search. - Page 49 To replace the previous tile, press softkey) or press to place the tile. Shortcut: From the main screen, highlight a tile, press OPTIONS (left softkey) > Replace Tile complete steps 3 and 4. Editing Tiles Certain tiles, such as Shortcuts, contain editable content.
-
Page 50: Settings
2C. Settings Display Settings (page 38) Volume Settings (page 41) Ringer Settings (page 42) Messaging Settings (page 44) Airplane Mode (page 46) TTY Use With Sprint Service (page 47) Using the Hearing Aid Device Compatibility Function (page 48) Phone Setup Options (page 49) Security Settings (page 50) External Keypad Settings (page 55) 2C. -
Page 51: Changing The Backlight Settings
Changing the Backlight Settings Select how long the display screen remains backlit after any keypress is made. You can also change the Java application backlight while running in the foreground. To change the main screen backlight setting: Highlight and press >... -
Page 52: Power Save Mode
Selecting a Picture ID You can select an image as a picture ID. Highlight and press Picture ID Select Contact Unsaved Numbers Private / Unknown Select a picture ID option and press Select an image and press Power Save Mode This feature helps conserve your battery power by automatically adjusting the backlight setting of your phone. -
Page 53: Volume Settings
Changing the Font Size Adjust the display font size for text in messages. Highlight and press > Settings > Others > Accessibility > Font Size > Messages Highlight a font size. You can see the highlighted font size in the New Size window. If you are satisfied with the font size, press (left softkey). -
Page 54: Ringer Settings
Silence All The Silence All option allows you to mute all sounds without turning your phone off. To activate Silence All: Press and hold the volume button down in standby mode. (The screen will display “Silence All.”) To deactivate Silence All: Press the volume button up repeatedly to select a volume level. - Page 55 Selecting Ringers for Messages Highlight and press > Settings > Ringers > Messaging Select Messages Email , skip to step 4. Otherwise, select Email , or Contacts Unsaved Numbers If you select Contacts , select All Contacts and then select an entry. One Contact Select a ringer option by pressing the navigation key up or down, and then select a ringer.
-
Page 56: Messaging Settings
Setting Up Voice Guide Voice Guide allows you to hear voice prompts and spoken numbers or key names as you press a key, and also to hear menus and options, Contacts names, email addresses, URLs, etc., as you highlight each item onscreen. -
Page 57: Managing Preset Messages
Select English Setting CMAS Alerts This phone features an embedded Commercial Mobile Alert System (CMAS), which is a federally supervised cell phone alert service to send out broadcast SMS messages for public warning. Highlight OPTIONS . The list Check the box next to the options you wish to select: Presidential Alerts alert. -
Page 58: Airplane Mode
Imminent Threat - Extreme alerts in an extreme emergency situation (an extraordinary threat to life or property). Imminent Threat - Severe alerts in a severe emergency situation (a significant threat to life or property). to deliver alerts related to missing or Amber Alerts endangered children. -
Page 59: Tty Use With Sprint Service
TTY Use With Sprint Service A TTY (also known as a TDD or Text Telephone) is a telecommunications device that allows people who are deaf, hard of hearing, or who have speech or language disabilities to communicate by telephone. Your phone is compatible with select TTY devices. Please check with the manufacturer of your TTY device to ensure that it is compatible with digital cell phones. -
Page 60: Using The Hearing Aid Device Compatibility
WARNING: 911 Emergency Calling Sprint recommends that TTY users make emergency calls by other means, including Telecommunications Relay Services (TRS), analog cellular, and landline communications. Wireless TTY calls to 911 may be corrupted when received by public safety answering points (PSAPs), rendering some communications unintelligible. -
Page 61: Phone Setup Options
Phone Setup Options Main Screen Your phone’s Sprint One Click main screen lets you customize your phone and provides quick access to the features and functions you use the most. See “Personalizing the Carousel” on page 35 for details. Call Answer Mode Select how to answer incoming calls on your phone whether by using or any number key. -
Page 62: Security Settings
Headset Mode Set up your phone for hands-free use, the type of headset (mono or stereo), and the ringer mode. To set the audio mode: Highlight and press Headset Mode > Earpiece > Stereo To set the ringer mode: Highlight and press Headset Mode >... - Page 63 Changing the Lock Code Highlight and press > Settings > , enter your lock code, and then press Lock Phone (left softkey). CONTINUE Select Change Lock Code Enter your new lock code and press (left softkey). Re-enter your new lock code and press softkey).
- Page 64 Changing the Parental Controls Code Highlight and press Parental Controls > Change Parental Control Code Enter your new code and press softkey). Re-enter your new code and press softkey). Restricting Voice Calls and Messages Highlight and press Parental Controls > Restriction Read the message and press softkey).
-
Page 65: Deleting Phone Content
Deleting Phone Content You can quickly and easily delete all the content that you have created or stored in your phone. Highlight and press > Settings > , enter your lock code, and then press Reset/Delete CONTINUE (left softkey). Select Delete Stuff Highlight an option and press to delete all messages. -
Page 66: Security Features For Data Services
Security Features for Data Services Enabling Data Services Although your phone’s data services are turned off by default, you may enable them at any time. To enable data services: Highlight and press . (A message is displayed.) Data > Data Off Press (left softkey) to enable data services. -
Page 67: External Keypad Settings
External Keypad Settings Using the Touch Keypad The touch-sensitive external keypad allows you to enter numbers and letters and select menu items with just a light touch of your fingers. Use the tip of your finger to touch the center of a key. When the key is pressed off-center, it may activate the nearby function instead. - Page 68 Setting the Keypad Touch Vibrate You can make the outer keypad vibrate every time you touch a key to confirm your action. Highlight and press Touch Vibrate Select Navigating the Outer Screen Menus The outer screen menus allow instant access to some functions without opening the phone.
-
Page 69: History
2D. History Viewing History (page 57) History Thread (page 58) History Details (page 58) History Options (page 59) Making a Call From History (page 59) Saving a Number From History (page 59) Making a New Group Entry From History (page 60) Deleting History (page 60) Viewing History History is a list of the last 60 phone numbers (or... -
Page 70: History Thread
History Icons You can determine if an entry was an incoming, outgoing, or missed call from the icons shown below. – Incoming Call – Outgoing Call – Missed Call History Thread The History thread screen shows all history for a selected entry. -
Page 71: History Options
History Options You may see several menu items on the onscreen menu. Press OPTIONS (right softkey) for additional options. to call the selected entry. Call Send Message to send a message to the selected entry. to create a new Group entry. New Group Contact Details to display information about the entry... -
Page 72: Making A New Group Entry From History
was selected, select an existing Existing Entry entry to which you want to save the number, and then highlight a number type and press Press DONE (left softkey) to save the entry. Making a New Group Entry From History You can make and save a new group entry from History. -
Page 73: Contacts
2E. Contacts About Contacts (page 61) Displaying Contacts Entries (page 61) Adding a New Contacts Entry (page 62) Editing a Contacts Entry (page 63) Adding a Number to a Contacts Entry (page 63) Creating a Group (page 63) Editing Groups (page 64) Finding Contacts Entries (page 65) Using Contacts Information in Other Applications (page 65) Assigning Speed Dial Numbers (page 66) -
Page 74: Adding A New Contacts Entry
Viewing History From Contacts You can view the history of a selected Contacts entry from the Contacts list. Highlight an entry and press softkey) > Contact History Displaying Contacts Details From the Contacts list, highlight an entry and press Highlight any data field and press options for that field will appear, if applicable. -
Page 75: Editing A Contacts Entry
Editing a Contacts Entry Display a Contacts entry (see “Displaying Contacts Entries” on page 61) and press softkey) > Edit Contact Highlight the information you wish to edit. Add or edit the information and press Press (left softkey) to save your changes. DONE Adding a Number to a Contacts Entry... -
Page 76: Editing Groups
Editing Groups From the Contacts list, highlight the group you want to edit. Press OPTIONS (right softkey) Change the group name or the group icon and press Press (left softkey). SAVE Adding Members to a Group From the Contacts list, highlight the group to which you want to add members. -
Page 77: Finding Contacts Entries
Finding Contacts Entries In standby mode, press CONTACTS Scroll through all the entries. – or – Enter the first few letters of any part of an entry’s name. Contacts with matching letters are listed. (The more letters you enter, the more your search narrows.) To display an entry, highlight it and press Press the navigation key left or right to display... -
Page 78: Assigning Speed Dial Numbers
To copy address information into a Sprint Navigation application: From the Contacts list, highlight an entry and press Highlight an address and press Highlight an option and press to get directions to the street address Navigate using Sprint Navigation. to display the address on a map. Note: For more information about your phone’s navigation features, see “3D. -
Page 79: Selecting A Ringer Type For An Entry
Highlight an available speed dial location and press Tip: To replace a current assignment, select a location and press REPLACE (left softkey). To check speed dial assignments: From the Contacts list, press OPTIONS softkey) > Settings > Speed Numbers Selecting a Ringer Type for an Entry Assign a ringer type to a Contacts entry so that you can identify the caller by the ringer type. -
Page 80: Secret Contacts Entries
Secret Contacts Entries When you make an entry secret and hide it, that entry is not displayed in your Contacts. In History, a telephone number is displayed but the Contacts entry’s name is not. To make an entry secret: From the Contacts list, highlight an entry and press (right softkey) OPTIONS >... -
Page 81: Calendar & Tools
2F. Calendar & Tools Calendar (page 69) Alarm (page 72) Calculator (page 73) World Clock (page 73) Countdown Timer (page 74) Stopwatch (page 74) Calendar Adding an Event to the Calendar Your Calendar helps organize your time and reminds you of up to 100 important events. Highlight and press >... -
Page 82: Adding A To Do List Item To The Calendar
Select a repeat status for the alarm by highlighting the repeat field and pressing If you chose Specific Period date for the repeat status and press softkey). If you chose , select the check box for each Weekly day of week you wish to set and press softkey). -
Page 83: Calendar Alerts
Calendar Alerts If you have an event on the Calendar, your phone alerts you by a ringing or vibrating alarm and displays a summary of the event. To respond to the alarm, select an available onscreen menu or press the appropriate softkey: Snooze to stop the alarm and start snooze mode. -
Page 84: Alarm
Deleting Events Highlight and press Personal Calendar Highlight the day from which you would like to delete an event and press – or – Press OPTIONS (right softkey) To Do List Highlight an event and press softkey) > Delete Highlight an option and press to delete the highlighted event. -
Page 85: Calculator
Select a snooze interval for the alarm by highlighting the snooze interval field and pressing Select the number of times the snooze should repeat by highlighting the snooze time field and pressing Press SAVE (left softkey). Tip: Press (left softkey) to toggle the alarm on and off. -
Page 86: Countdown Timer
Countdown Timer This feature allows you to use your phone as a countdown timer to alert you when a specified period of time has elapsed. You can set up to five timers. Highlight and press Highlight a countdown timer number and press Highlight a setting and press to enter the length of the countdown. -
Page 87: Voice Services
2G. Voice Services Automatic Speech Recognition (ASR) (page 75) Managing Voice Memos (page 79) Automatic Speech Recognition (ASR) You can use your phone’s built-in automatic speech recognition (ASR) software to dial a phone number or to launch phone functions. All you have to do is to talk into the phone, and ASR will recognize your voice and complete tasks by itself. -
Page 88: Making A Voice Call Using Asr
Making a Voice Call Using ASR Press and hold When you hear “Say a command,” say When you hear “Say the name or number,” say a name or a phone number. When you hear “Which location?,” say a number type (for example, “Mobile”). Tip: You can skip steps 3 and 4 by saying a name and location after “Call”... -
Page 89: Opening Menus Using Asr
Opening Menus Using ASR You can jump directly to many menu items or applications by saying “Go to” followed by a menu option. Press and hold When you hear “Say a command,” say When you hear “Which shortcut?,” say an application name (for example, “Messaging”). -
Page 90: Asr Settings
ASR Settings To change ASR confirmation: Press and hold Press (right softkey) SETTINGS to ask for confirmation only when the Automatic system is not sure what you said. Always Confirm to always ask for confirmation. Never Confirm to never ask for confirmation. To adapt the system to your voice: Press and hold Press... -
Page 91: Managing Voice Memos
Managing Voice Memos Use your phone’s Voice Memo to record brief memos to remind you of important events, phone numbers, or grocery list items and to record call memos of the other party’s voice during a phone call. Note: You can store up to 600 memos on your phone. Maximum recording time depends on the available memory space on your phone. - Page 92 To play multiple memos: Highlight and press Voice Services > Voice Memo > List Select In Phone Memory Card Press (right softkey) OPTIONS select memos you want to play. Press (left softkey). PLAY Voice Memos Options Your phone offers several options for managing voice memos you have recorded.
-
Page 93: Microsd Card
2H. microSD Card Your Phone’s microSD Card and Adapter (page 81) microSD Card Settings (page 82) microSD Card Folders (page 84) File Manager (page 84) Digital Print Order Format (DPOF) (page 86) Connecting Your Phone to Your Computer (page 87) Your Phone’s microSD Card and Adapter Your phone is equipped with a preinstalled 1GB microSD... -
Page 94: Microsd Card Settings
Inserting the microSD Card Remove the battery cover and battery. Insert a microSD card into the slot with the gold terminals facing down. Gently press the card until it snaps into place. Place the battery back into its compartment and replace the battery cover. -
Page 95: Formatting The Microsd Card
Formatting the microSD Card Formatting a microSD card permanently removes all files stored on the card. Highlight and press > Tools > Memory Storage Highlight Format Memory Card (A warning will be displayed.) If you are sure you wish to remove all the files from your microSD card, press Note: The formatting procedure erases all the data on the... -
Page 96: Microsd Card Folders
microSD Card Folders Displaying Your microSD Card Folders All the files stored in your microSD are accessible through your microSD card folders. Highlight and press Memory Storage > File Manager > Memory Card Highlight a folder and press To view or play a file, highlight it and press the appropriate softkey. -
Page 97: Opening Files In File Manager
Opening Files in File Manager Highlight and press > Tools > Memory Storage > File Manager > In Phone Memory Card Highlight a folder and press Highlight an item and press File Manager Options When viewing files or folders in File Manager, press (right softkey) to display available options. -
Page 98: Digital Print Order Format (Dpof)
to view the used and available memory Memory Info space. to switch from one storage Go to Card/Go to Phone area to another. to play a video, listen to audio, or Play/Listen/View view a picture. Digital Print Order Format (DPOF) Digital Print Order Format (DPOF) lets you set up digital print orders in advance, including options such as which pictures to print, number of prints, and index... -
Page 99: Connecting Your Phone To Your Computer
Connecting Your Phone to Your Computer Before using your phone’s mass storage capabilities, you need to prepare your phone’s data services to synchronize with your desktop or laptop computer. Once you have connected the phone to the computer, you can transfer your data to or from the microSD card. Highlight and press >... -
Page 100: Camera
2I. Camera Taking Pictures (page 88) Recording Videos (page 91) Storing Pictures and Videos (page 93) Sending Pictures and Videos From Your Phone (page 95) Printing Pictures From Your Phone (page 97) Taking Pictures Taking pictures with your phone’s built-in camera is as simple as choosing a subject, pointing the lens, and pressing a button. -
Page 101: Camera Mode Options
to go to the In Phone folder or Review Media memory card folder to review your saved pictures. to edit your picture or display details Details/Edit relating to your pictures. Assigning Pictures Assign a picture as a screen saver or as a picture ID. Take a picture. - Page 102 to go to the In Phone folder or memory Review Media card folder to review your saved pictures. to switch to video mode. (See Camcorder Mode “Recording Videos” on page 91.) to show keyboard shortcuts in camera Key Guidance mode. User Settings to provide convenient access to your favorite settings.
-
Page 103: Recording Videos
Zoom This feature allows you to zoom in on an object when you take a picture. You can adjust the zoom from 1x to 12x. From camera mode, press the navigation key right to zoom in or left to zoom out. Press , or (left softkey) to take a... -
Page 104: Camcorder Mode Options
Using the phone’s main screen as a viewfinder, aim the camera lens at your subject. Press (left softkey), RECORD recording. Press STOP (right softkey) to stop recording. (The video will automatically be saved in your designated storage area.) To return to camcorder mode to take another video, press CAMCORDER Press... -
Page 105: Storing Pictures And Videos
to indicate the key functions in Key Guidance camcorder mode. to provide convenient access to your User Settings favorite settings. Camcorder Settings From camcorder mode, press softkey) > Video Settings Select an option and press to select video resolution from Resolution QVGA (320x240) QCIF (176x144) -
Page 106: On Memory Card Folder
To review your stored pictures and videos in the In Phone folder: Highlight and press My Photos & Videos > In Phone On Memory Card Folder You can save pictures and videos directly to the memory card using your phone’s photo and video settings. -
Page 107: Sending Pictures And Videos From
to edit or display details relating to your Details/Edit pictures or videos. to edit the selected picture’s or Text Caption video’s caption. (for pictures) to select from Special Effects Frames Color Tone Fun Stamps (for pictures) to resize the selected picture. Resize Select 2.0M (1600x1200) - Page 108 Sending Pictures and Videos Using the Messaging Feature Highlight and press My Photos & Videos > In Phone Select your pictures or videos to send. Press OPTIONS (right softkey) select multiple pictures or videos. Press (left softkey) SEND > Contact Select the recipient from the list or from the following options: Go to Contacts...
-
Page 109: Printing Pictures From Your Phone
Printing Pictures From Your Phone Your phone is PictBridge compatible, allowing you to print directly from your phone without connecting to a computer. You can also print your pictures using Bluetooth. Note: Make sure your battery is fully charged before printing your pictures. - Page 110 Press (left softkey). Follow the instructions on the display to unplug the USB cable from the phone. To print pictures using the Bluetooth-enabled printer: Highlight and press My Photos & Videos > In Phone Highlight a picture to print and press (right softkey) >...
-
Page 111: Bluetooth
2J. Bluetooth About Bluetooth (page 99) Turning Bluetooth On and Off (page 99) Making Your Phone Discoverable (page 99) Bluetooth Menu (page 100) Pairing Bluetooth Devices (page 101) Viewing the Trusted Devices List (page 101) Sending Items via Bluetooth (page 102) About Bluetooth ®... -
Page 112: Bluetooth Menu
Bluetooth Status Indicators The following icons show your Bluetooth connection status at a glance: – Bluetooth feature is on – Your phone is visible to other Bluetooth devices. – Your phone is connected to a Bluetooth device. – Your phone is connected to or communicating with a Bluetooth device via Hands-free Profile (HFP). -
Page 113: Pairing Bluetooth Devices
Pairing Bluetooth Devices The Bluetooth pairing process allows you to establish trusted connections between your phone and another Bluetooth device. When devices are paired, a passkey (PIN) is shared between devices, allowing for fast, secure connections while bypassing the discovery and authentication process. -
Page 114: Sending Items Via Bluetooth
Options Menu From the Trusted Devices list, press softkey) to display the following options: to add a new Bluetooth device. Add New to delete the selected device from the list. Delete to delete all devices from the list. Delete All Auto-Accept to configure your phone’s accessibility to other Bluetooth devices. -
Page 115: Section 3: Sprint Service
Section 3 Sprint Service... -
Page 116: Sprint Service: The Basics
3A. Sprint Service: The Basics Voicemail (page 104) Messaging (page 106) Caller ID (page 109) Call Waiting (page 110) Making a 3-Way Call (page 110) Call Forwarding (page 111) Roaming (page 111) Voicemail Setting Up Your Voicemail Your phone automatically transfers all unanswered calls to your voicemail, even if your phone is in use or turned off. -
Page 117: New Voicemail Message Alerts
New Voicemail Message Alerts When you receive a new voicemail message, your phone alerts you and prompts you to call your voicemail. To call your voicemail from the notification screen: Touch Note: When you are roaming off the Nationwide Sprint Network, you may not receive notification of new voicemail messages. -
Page 118: Messaging
Tip: When you call into voicemail, you first hear the header information (date, time, and sender information) for the message. To skip directly to the message, press during the header. Voicemail Key Guide Here’s a quick guide to your keypad functions while listening to voicemail messages. -
Page 119: Composing Messages
Composing Messages Highlight and press > Messaging > Send Message Select a recipient from the list or from the following options: Go to Contacts to select a recipient from your Contacts. (Qualifying Contacts entries must contain a phone number or an email address.) MULTIPLE (left softkey) to select multiple recipients. -
Page 120: Threaded Messaging
Threaded Messaging Threaded messaging lets you follow a chain of messages to and from a particular contact. To display the thread list: Highlight and press Messages You will see a thread list. Each thread has an entry’s name (if saved in Contacts), a phone number, or an email address. -
Page 121: Caller Id
Press (left softkey) to send a SEND MESSAGE message to the entry. Press REPLY (left softkey) to reply to a message. Press (left softkey) to send a draft message. SEND Press (left softkey) to resend a failed RESEND message. Select a message, press OPTIONS and select an option: Forward... -
Page 122: Call Waiting
Call Waiting When you are on a call, Call Waiting alerts you to incoming calls by sounding a beep. Your phone’s screen informs you that another call is coming in and displays the caller’s phone number (if available). To respond to an incoming call while you’re on a call: Touch . -
Page 123: Call Forwarding
Call Forwarding Call Forwarding lets you forward all your incoming calls to another phone number – even when your phone is turned off. You can continue to make calls from your phone when you have activated Call Forwarding. To activate Call Forwarding: Enter Enter the area code and phone number to which you want your calls forwarded. -
Page 124: Setting Roam Mode
Checking for Voicemail Messages While Roaming When you are roaming off the Nationwide Sprint Network, you may not receive on-phone notification of new voicemail messages. Callers can still leave messages, but you will need to periodically check your voicemail for new messages if you are in a roaming service area for an extended period of time. -
Page 125: Call Guard
Call Guard Your phone has two ways of alerting you when you are roaming off the Nationwide Sprint Network: the onscreen roaming icon and Call Guard. Call Guard makes it easy to manage your roaming by requiring an extra step before you can place or answer a roaming call. - Page 126 To set your Data Roam Guard notification: Highlight and press Roaming > Data Roam Guard Select (default mode) turns your phone’s Data Roam Guard feature on. You will see a prompt that will require you to respond anytime you access data services while roaming.
-
Page 127: Web And Data Services
3B. Web and Data Services Getting Started With Data Services (page 115) Accessing Messages (page 118) Downloading Games, Ringers, and More (page 121) Applications (page 123) Browser Menu (page 124) Data Services FAQs (page 127) Getting Started With Data Services With your Sprint service, you are ready to start enjoying the advantages of data services. -
Page 128: Launching A Web Connection
Highlight and press Data > Update Data Profile before completing the update.) Launching a Web Connection Highlight and press connection starts and you see the SprintWeb home page.) Note: If Net Guard is enabled and displayed (see page 54), press (left softkey) to continue and launch the Web. -
Page 129: Navigating The Web
If you do not see an indicator, your phone does not have a current data connection. To launch a connection, see “Launching a Web Connection” on page 116. Navigating the Web Navigating through menus and websites during a data session is easy once you’ve learned a few basics. Here are some tips for getting around. -
Page 130: Accessing Messages
To select links: Highlight the link and press the appropriate softkey. Going Back To go back one page: Press the on your phone. Note: You can also use for deleting text (like a BACKSPACE key) when you are entering text. Going Home To return to the home page from any other page: Press and hold... -
Page 131: Accessing Email
– or – Select More... to choose from additional options. There are many available email options listed, or you may add your own IMAP or POP email accounts. Note: Work Email Setup: Consult your company’s IT department for required information and permissions for any Work email accounts. -
Page 132: Accessing Wireless Chatrooms
Use your keyboard and navigation keys to read, manage, and reply to your email messages. Press (right softkey) to select OPTIONS messaging options, such as , or Reply Check Mail Settings Press (right softkey) OPTIONS manually check for new messages. To view a different email account, press the left and right navigational keys to change the account tab. -
Page 133: Downloading Games, Ringers, And More
Downloading Games, Ringers, and More You have access to a dynamic variety of downloadable content, such as Games, Screen Savers, and other applications. (Additional charges may apply.) Follow the basic steps below to access and download these items. Accessing the Download Menus Highlight and press >... - Page 134 To download a selected item: From the information page, select will download automatically. When you see the screen, you have successfully New Download downloaded the item to your phone.) Note: If you have not previously purchased an item, you will be prompted to create your purchasing profile.
-
Page 135: Applications
To download purchased content from My Content Manager: From the My Content Manager item you wish to download, and press will see the information page for the selected item.) Highlight and press Download download automatically. When you see the New Download screen, you have successfully downloaded the item to your phone.) Select an option to continue:... -
Page 136: Browser Menu
To get started with applications: Highlight and press Applications > NASCAR Sprint Cup Mobile ScanLife Social Zone Sprint Football Live . (The selected application will launch.) WHERE Accept the terms and conditions if asked. Use the navigation key or press softkey) to explore your options. - Page 137 to launch a Web search. SPRINT SEARCH to display additional options: OPTIONS to set the current page as your Set as Homepage home page. to send a URL using the Send this page to... phone’s messaging feature. to delete the browser’s cache, Clear private data cookies, etc.
- Page 138 Creating a Favorite Favorites (bookmarks) allow you to store the addresses of your favorite websites for easy access at a later time. From the Web page you wish to add, press (right softkey) to open the browser TOOLBAR menu. Select MY PAGES Confirm that Add this page to favorites...
-
Page 139: Data Services Faqs
Data Services FAQs How will I know when my phone is ready for data service? Your User ID (for example, bsmith01@sprintpcs.com be displayed when you press Phone Info > Phone#/User ID How do I sign in for the first time? You are automatically signed in to access data services when you turn on your phone. -
Page 140: Entertainment: Tv And Music
Note: Sprint Music Plus may not be available when you purchase your SANYO INNUENDO. Please check www.sprint.com frequently for updated information. 3C. Entertainment: TV and Music Your Sprint TV Channel Options The Sprint TV application offers a wide variety of accessible channels. - Page 141 Watching TV Highlight and press > Entertainment > Sprint TV . Depending on your settings, your phone may prompt you to accept a data connection. Select , or Radio Favs More options. Use your navigation key and press channel from the Sprint TV listings or to select an available category.
- Page 142 Can I access a clip wherever I am, as long as I have my phone? As long as you are on the Nationwide Sprint Network, you will have access to the audio and video clips. Note: Sprint TV service does not work while roaming off of the Nationwide Sprint Network or where service is unavailable.
-
Page 143: Streaming Music
Streaming Music Sprint offers a variety of musical options through the Music category in the Sprint TV menu, including SIRIUS Music, Music Choice, VH1, and many others. Choose from rock, pop, hip-hop, and R&B, and access exclusive video clips, music industry news, performances, and interviews with your favorite artists. - Page 144 Receiving an Incoming Call While Playing Music An incoming call pauses any currently playing music file while the phone call is active. Once you end the call, you can choose to resume any paused applications. (Music will resume playing automatically.) Answer an incoming call by pressing When you are done with your call, press end the call.
-
Page 145: Gps Navigation
3D. GPS Navigation GPS Services (page 133) Sprint Navigation (page 134) Sprint Family Locator (page 135) GPS Services Your phone’s built-in GPS capability gives you access to a number of location-based services, including Sprint Navigation Sprint Family Locator Activating Location Mode Before using any of the location-based services, you must turn on your phone’s location mode. -
Page 146: Sprint Navigation
Sprint Navigation Sprint Navigation gives you turn-by-turn directions onscreen and over speakerphone. Note: Depending on your service plan, Sprint Navigation may require a monthly subscription. Contact Sprint for information and pricing. Registering Sprint Navigation Before you can use Sprint Navigation, your phone and service must be registered. -
Page 147: Sprint Family Locator
Sprint Family Locator Sprint Family Locator uses GPS technology to locate your child’s phone and display the location on an interactive map. Note: Sprint Family Locator service requires an additional monthly fee. Visit www.sprint.com/familylocator complete details. Signing Up for Sprint Family Locator Highlight and press >... -
Page 149: Section 4: Safety And Warranty Information
Section 4 Safety and Warranty Information... -
Page 150: Important Safety Information
4A. Important Safety Information General Precautions (page 138) Maintaining Safe Use of and Access to Your Phone (page 139) Using Your Phone With a Hearing Aid Device (page 140) Caring for the Battery (page 142) Radio Frequency (RF) Energy (page 143) Owner’s Record (page 145) User Guide Proprietary Notice (page 145) This phone guide contains important operational and... -
Page 151: Maintaining Safe Use Of And Access To
Maintaining Safe Use of and Access to Your Phone Do Not Rely on Your Phone for Emergency Calls Mobile phones operate using radio signals, which cannot guarantee connection in all conditions. Therefore you should never rely solely upon any mobile phone for essential communication (e.g., medical emergencies). -
Page 152: Using Your Phone With A Hearing Aid Device
If a hearing device is particularly vulnerable to interference noise; even a phone with a higher rating may still cause unacceptable noise levels in the hearing device. Trying Your INNUENDO... - Page 153 out the phone with your hearing device is the best way to evaluate it for your personal needs. : Phones rated M3 or M4 meet FCC requirements for M-Ratings hearing aid compatibility and are likely to generate less interference to hearing devices than unrated phones. (M4 is the better/higher of the two ratings.) : Phones rated T3 or T4 meet FCC requirements and T-Ratings...
-
Page 154: Caring For The Battery
Highlight the minimum time interval setting and press Position the phone so the internal antenna is farthest from your hearing aid. Move the phone around to find the point with least interference. Caring for the Battery Protecting Your Battery The guidelines listed below help you get the most out of your battery’s performance. -
Page 155: Radio Frequency (Rf) Energy
Disposal of Lithium Ion (Li-Ion) Batteries Promptly dispose of used batteries in accordance with local regulations. Never dispose of the battery by incineration. Do not handle a damaged or leaking Li-Ion battery as you can be burned. For safe disposal options of your Li-Ion batteries, contact your nearest Sprint authorized service center. -
Page 156: Fcc Radio Frequency Emission
SAR values at or below the federal standard of 1.6 W/kg are considered safe for use by the public. The highest reported SAR values of the INNUENDO Cellular CDMA mode (Part 22) Head: 0.61 W/kg; Body-worn: 0.52 W/kg PCS mode (Part 24) Head: 0.96 W/kg;... -
Page 157: Owner's Record
Record the serial number in the space provided below. This will be helpful if you need to contact us about your phone in the future. Model: SANYO INNUENDO by KYOCERA Serial No.: User Guide Proprietary Notice XT9 Mobile Interface is licensed under one or more of: U.S. -
Page 158: Manufacturer's Warranty
4B. Manufacturer’s Warranty Manufacturer’s Warranty (page 146) Your phone has been designed to provide you with reliable, worry-free service. If for any reason you have a problem with your equipment, please refer to the manufacturer’s warranty in this section. For information regarding the terms and conditions of service for your phone, please visit call Sprint Customer Service at Note:... - Page 159 KCI for charging the battery, (ii) any of the seals on the battery are broken or show evidence of tampering, or (iii) the battery has been used in equipment other than the SANYO brand mobile phone for which it is specified.
- Page 160 APPLICATIONS). THIS WARRANTY DOES NOT COVER PRODUCTS SOLD “AS IS” OR “WITH ALL FAULTS”. KCI MAKES NO OTHER EXPRESS WARRANTY WITH RESPECT TO THE PRODUCTS. THE DURATION OF IMPLIED WARRANTIES, INCLUDING IMPLIED WARRANTIES OF MERCHANTABILITY AND FITNESS FOR A PARTICULAR PURPOSE IS LIMITED TO THE DURATION OF THIS EXPRESS WARRANTY.
-
Page 161: End User License Agreement
4C. End User License Agreement End User License Agreement (page 149) End User License Agreement Kyocera Communications, Inc. (“Kyocera”) End User License Agreement CAREFULLY READ THE FOLLOWING TERMS AND CONDITIONS (“AGREEMENT”) BEFORE USING OR OTHERWISE ACCESSING THE SOFTWARE OR SERVICES PROVIDED WITH YOUR KYOCERA DEVICE. THE SOFTWARE AND SERVICES PROVIDED WITH YOUR KYOCERA DEVICE ARE SOLELY FOR PERSONAL USE BY YOU, THE ORIGINAL END USER, AS SET FORTH... - Page 162 acknowledge and agree that ownership of the Software and all other rights associated with the Software not expressly granted in this Agreement are retained by Kyocera or its suppliers or licensors. You are not permitted to, in any way, distribute the Software or make it available over a network for use on more than the single Kyocera device for which it was originally supplied.
- Page 163 CORRESPONDENCE WITH DESCRIPTION AND SATISFACTORY QUALITY. TO THE MAXIMUM EXTENT PERMISSIBLE BY LAW, THE ENTIRE RISK ARISING OUT OF THE USE OR PERFORMANCE OF THE SOFTWARE REMAINS WITH YOU. IN NO EVENT WILL KYOCERA, ITS EMPLOYEES, OFFICERS, SHAREHOLDERS, LICENSORS, SUPPLIERS, CARRIER OR DISTRIBUTOR CUSTOMERS OR AFFILIATES BE HELD LIABLE FOR ANY CONSEQUENTIAL, INCIDENTAL, INDIRECT, SPECIAL,...
- Page 164 restrictions from third party licensors or due to safety or security concerns or government restrictions or court orders. Kyocera reserves the right to modify the terms of this Agreement at its sole discretion. Any such modification will be effective upon Kyocera or a Kyocera affiliate or agent sending notice to you by email, text message, other electronic communication or postal mail.
- Page 165 ©2010 Sprint. SPRINT and the logo are trademarks of Sprint. Other marks are the property of their respective owners. “SANYO” is a registered trademark of SANYO Electric Co., Ltd. and is used under license. KYOCERA is a registered trademark of Kyocera Corporation. Kyocera manufactures and markets the SANYO line of wireless products.
-
Page 166: Index
Index Numerics 3-Way Call 110 Abbreviated Dialing 26 Activation 3 Airplane Mode 46 Alarm 72 Answering Calls 20 Applications 123 Downloading 121 Auto-Answer 49 Automatic Speech Recognition (ASR) 75 Backlight 39 Battery Capacity 17 Charging 17 Disposal 143 Installing 2 Index Bluetooth 99–102 Sending Items 102... - Page 167 Deleting Phone Content 53 Dialing From Contacts 24 With Pauses 24 Display Settings 38 Download Ringer 43 DPOF 86 Email 118 Emergency Call 21 End User License Agreement Entering Text 27 Favorite 126 FCC Notice 144 File Manager 84 Finding Contacts 65 Phone Number 24 Font Size 41...
- Page 168 Navigating the Main Screen 33–37 Net Guard 54 Owner’s Record 145 Parental Controls 51 Phone (illus.) 8 Phone Number Displaying 18 Finding 24 With Pauses 24 PictBridge 97 Pictures Assigning 89 Storing 93 Taking 88 Plus (+) Code Dialing 25 Power Save Mode 40 Preset Messages 45 Index...
- Page 169 Voice Memos 79 Voicemail Setting Up 4, 104 While Roaming 112 Volume 41 Warranty 146 Web 115–127 see also Data Services World Clock 73 Zoom 91 Index...