Table of Contents
Advertisement
Advertisement
Table of Contents

Related Manuals for Samsung FINO 120 SUPER


Summary of Contents for Samsung FINO 120 SUPER
- Page 1 ENGLISH...
- Page 2 NOTE • This camera will not function without a battery. • Use one 3V lithium battery (CR 2). • The lens cap automatically opens when the Power button is turned on. • Do not open the lens cap with your fingers. The shutter does not operate in the following circumstances: •...
-
Page 3: Table Of Contents
CONTENTS Thank you for purchasing the SAMSUNG camera. Please read this manual before using your camera. TABLE OF CONTENTS PREPARATION Part Names ... 4 LCD panel ... 7 Viewfinder and Indicators ... 8 Loading the battery ... 9 Checking the battery ... 10 Loading the film ... -
Page 4: Part Names
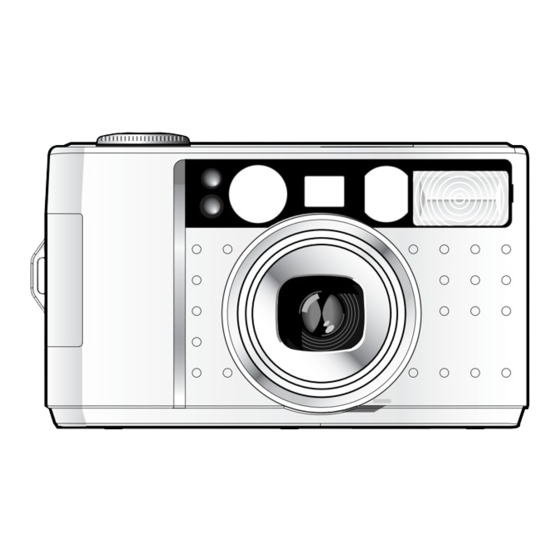
PART NAMES Front / Top Autofocus window Self-timer lamp Shutter button Mode dial Battery Chamber cover Exposure sensor Flash button (Flash mode selection button) LCD panel Buzzer ON/OFF button Mid-roll rewind button Flash Viewfinder Lens... - Page 5 Rear / Bottom Power button Autofocus/flash indicator(Green LED) Viewfinder Diopter adjustment dial Tripod socket Zoom Button(WIDE) Zoom Button(TELE) Film check window Back cover release button Strap eyelet Date record window (Q.D. model only) Date selection button (Q.D. model only)
- Page 6 Interior Back cover Film pressure plate Spool Film sensor Film pressure roller DX contacts...
-
Page 7: Lcd Panel
LCD PANEL Flash mode Buzzer indicator Exposure counter Film loading failure warning indicator(E) Exposure unit(EX) Seconds(s) when Bulb mode Battery condition indicator Film present indicator Film loading indicator... -
Page 8: Viewfinder And Indicators
VIEWFINDER AND INDICATORS Viewfinder Close range picture area mark - WIDE : Optimum picture area when shoot within 0.8m~1.5 m - TELE : Optimum picture area when shoot within 0.86m ~ 3m Picture area frame - WIDE : Optimum picture area when shoot over 1.5 m - TELE : Optimum picture area when shoot over 3m Autofocus frame (Focus on the subject with this frame) Indicators... -
Page 9: Loading The Battery
LOADING THE BATTERY 1. Open the chamber cover by sliding the battery chamber cover. 2. Insert a new battery and ensure it is placed in the correct position. 3. Close the chamber cover. NOTE Use one CR 2 battery. The camera will automatically turn the power off when not used after 3 minutes. Remove the battery from the camera when the camera is not used for an extended period. -
Page 10: Checking The Battery
CHECKING THE BATTERY You can check the battery life on the LCD panel 1. Normal operation - The battery condition indicator does not appear. 2. The indicator appears half way. - The battery life is low and you should ensure that a replacement battery is available. 3. -
Page 11: Loading The Film
LOADING THE FILM 1. Open the back cover by sliding the release knob as shown above. 2. Insert a roll of film in the chamber. Do not force the film into position. 3. The film should lie flat. 4. Close the back cover. It will close with a “click”. 5. -
Page 12: Adjusting The Diopter
ADJUSTING THE DIOPTER ATTACHING THE STRAP Refer to the illustrations above. Select the maximum zoom setting and turn the diopter adjustment dial until the viewfinder display becomes clear. -
Page 13: Using The Camera
USING THE CAMERA Press the Power button to turn the power on. The indicators will appear on the LCD panel. If the camera is not used for 3 minutes, the power will be turned off automatically. While looking through the viewfinder, aim the camera at the subject and operate the zoom buttons. Press the (Tele) button to move the lens out and press the... -
Page 14: Holding The Camera
HOLDING THE CAMERA ;; ;; ;; ;; ;; NOTE Avoid obstructing the lens when you take a picture. Pictures can be spoiled when a finger, hair or camera strap falls in front of the Lens, Exposure Sensor or Auto-focus Windows. When you take vertical pictures with flash, the flash should be above the lens. -
Page 15: Taking Pictures
TAKING PICTURES Aim the Autofocus frame at a subject.(Refer to page 8) Press the Shutter button half way down. The lens is focused when the green lamp turns on. Press the Shutter button all the way down to take a picture. The film will automatically advance after shooting and the frame counter will advance. -
Page 16: Buzzer Operation
BUZZER OPERATION According to the function, the buzzer sound is as follows. Buzzer sound Function Peek Selection long beeps(4Hz) Warning long beeps(8Hz) Warning long beeps(2Hz) Warning short beeps Warning The buzzer function can be selected by Buzzer ON/OFF button and it will operate only if the buzzer mark appears on the LCD panel. -
Page 17: Using The Focus Lock
USING THE FOCUS LOCK If you want to focus on a subject that is not in the centre of your picture, use the Focus Lock function described below. 1. Aim the camera with the autofocus frame superimposed over the subject. 2. -
Page 18: Rewinding The Film
REWINDING THE FILM 1. Automatic rewinding 2. Mid-roll rewinding Rewind button After taking all the pictures on a roll of film, the camera will automatically rewind the film. The motor stops when the rewinding is completed. When the rewinding is completed, the icon ( seconds the icon will no longer be displayed. -
Page 19: Date Imprinting (Q.d. Model Only)
DATE IMPRINTING (Q.D. MODEL ONLY) 1. Changing Date format Press the MODE button in the back cover to select the desired format. <No imprinting> 2. Date Zone <Month-Day-Year> <Day-Month-Year> <Year-Month-Day> <Day-Hour-Minute>... -
Page 20: Setting The Date
3. Setting the Date Select the date mode by pressing the MODE button. Press the SELECT button to access a day, month or year. Adjust the date or time by pressing the SET button. (The date will run through quickly if you press the SET button continuously.) NOTE To avoid damage the buttons, do not use a sharp implement. -
Page 21: Using The Flash Mode
USING THE FLASH MODE You can select the flash mode by pressing the FLASH button. The Flash Mode Order is subject to change without prior notice. <Red-eye reduction> NOTE In case of the "Auto Flash" function, the camera will retain the mode even though the camera is turned off. -
Page 22: Auto Red-Eye Reduction
AUTO AUTO RED-EYE REDUCTION NOTE When you press the shutter button down, the Red-eye reduction lamp will operate and the flash will fire. Do not allow the subject to move until the main flash has fired. Shooting beyond the scope of the flash range will induce the activation of the buzzer and the zoom lens. In low light conditions, the flash will automatically fire to obtain a suitable exposure. -
Page 23: Fill-In Flash
FILL-IN FLASH Select this mode by pressing the FLASH button 1 times. When the main subject is in shadow and the surrounding light conditions are too strong for the auto-flash to engage, the fill-in flash allows you to expose the subject correctly. NOTE When using this mode, the flash fires regardless of the brightness of the subject and background. -
Page 24: Auto Flash
AUTO FLASH AUTO Select the Auto Mode by pressing the FLASH button 3 times. Auto flash mode activates the flash by measuring the brightness of the object. Flash will not engage when the shooting object is too bright. NOTE Shooting under poor light might cause the eyes to appear red in the pictures. The red-eye reduction mode will be engaged automatically under poor lighted area. -
Page 25: Using The Shooting Mode
USING THE SHOOTING MODE Select the shooting mode as below by the Mode Dial. <PORTRAIT zoom> <Self-shooting> <Bulb-shooting> < LANDSCAPE shooting> <CONTINUOUS shooting> NOTE Self-shooting, Landscape-shooting, and Bulb-shooting will return to the default mode after one shutter. -
Page 26: Portrait Zoom
PORTRAIT ZOOM You can select the Portrait zoom by the Mode Dial. Use this mode to maintain a constant subject size within the frame, even though the distance to a subject may vary. Position your subject in the centre of the viewfinder and press the shutter button half-way. -
Page 27: Self Shooting
SELF-SHOOTING You can select the Self- shooting by the Mode Dial. You can take a picture of yourself by using this mode. When pressing the shutter button, the self-timer lamp illuminate for 7 seconds. Then the lamp blinks rapidly for 3 seconds and the picture is taken. -
Page 28: Bulb Shooting(B Shutter)
BULB BULB SHOOTING (B SHUTTER) You can select the Bulb shooting by the Mode Dial. Use this mode to shoot subjects that require an extended shutter speed such as fireworks and night scenes. The shutter remains open as long as the shutter button is depressed. The time selected is shown on the LCD panel and the maximum time is 60 seconds. -
Page 29: Landscape Shooting
LANDSCAPE SHOOTING You can select the Landscape shooting by the Mode Dial. Use this mode to photograph distant subjects through a window. NOTE With this mode, the flash does not fire. Use a tripod to avoid camera shake in low light conditions. <Without Landscape mode>... -
Page 30: Continuous Shooting
CONTINUOUS SHOOTING You can select the Continuous shooting by the Mode Dial. Use this mode to take a sequence of pictures. As long as you press the shutter button, the camera will continue to take pictures. NOTE If flash is required, the time between shots will be increased due to the flash recycling. -
Page 31: Care And Storage
CARE AND STORAGE If your camera needs cleaning, wipe it with a soft, lintless cloth. The lens should be cleaned only with special lens cleaning tissue and fluid.(Consult your camera retailer.) Do not allow your camera to come into contact with sand or water. Keep your camera in a dry, cool place that is free from high humidity and dust. -
Page 32: Trouble Shooting
TROUBLE SHOOTING If the sutter does not operate after pressing the shutter button. Check point Is the lens cover completely open? Is the battery loaded correctly? Has it been a long time since you used the camera? Change the battery. If a picture is partially dark or out of focus. -
Page 33: Specifications
Automatic advance to the first frame when the back cover is closed. Automatic advance, Single or Continuous shooting Automatic rewinding, Mid-roll rewinding Samsung SHD lens, F4.5 ~ 13.1 / 38 ~ 120mm 7 elements 6 groups Programmed AE electronic focusing Shutter speed : 1/3 ~ 1/400 sec. - Page 34 109 x 64 x 43mm / 4.29 x 2.52 x 1.69in DIMENSIONS(WxHxD) WEIGHT 205g / 7.23oz (without battery) Specifications are subject to change without prior notice. All data are based on SAMSUNG’S standard test methods. 0.8~4.6m/2.6~15.1ft 0.8~6.5m/2.6~21.3ft PORTRAIT zoom SELF shooting CONTINUOUS shooting...
-
Page 35: Checking The Camera
CHECKING THE CAMERA Checking the shutter condition - You can check the condition of the shutter by pressing it. The short click sound will result. Checking the irises - After removing the back cover of a camera, it is normal to see the closed lens opening up when you press the shutter. - Page 36 Internet address - http : //www.samsungcamera.com/ The CE Mark is a Directive conformity mark of the European Community (EC) SAMSUNG U.K. LTD. PHOTO PRODUCTS DIV. SAMSUNG HOUSE, 3 RIVERBANK WAY, GREAT WEST ROAD, BRENTFORD, MIDDLESEX,TW8 9RE, U.K. TEL : (44) 181-232-3278 FAX : (44) 181-569-8385...