Samsung SCX-4521F User Manual
Laser mfp
Hide thumbs
Also See for SCX-4521F:
- Service manual (173 pages) ,
- Specifications (2 pages) ,
- User manual (215 pages)
Table of Contents
Advertisement
Advertisement
Chapters
Table of Contents

Related Manuals for Samsung SCX-4521F


Summary of Contents for Samsung SCX-4521F
- Page 2 This manual is provided for information purposes only. All information included herein is subject to change without notice. Samsung Electronics is not responsible for any changes, direct or indirect, arising from or related to use of this manual. © 2005 Samsung Electronics .
- Page 3 SAMSUNG WORLDWIDE ONTACT If you have any comments or questions regarding Samsung products, contact the Samsung customer care center. Country Customer Care Center ARGENTINE 0800-333-3733 AUSTRALIA 1300 362 603 AUSTRIA 0800-SAMSUNG (726-7864) BELGIUM 0032 (0)2 201 24 18 BRAZIL 0800-124-421...
-
Page 4: Table Of Contents
Printer Driver Features ... 2.8 Changing the Display Language and Country ... 2.8 Setting Language ... 2.8 Setting Country ... 2.8 Setting the Machine ID (Only for SCX-4521F Entering Characters Using the Number Keypad ... 2.9 Setting the Date and Time (Only for SCX-4521F Changing the Clock Mode ... - Page 5 Canceling a Print Job ... 5.1 6. Scanning Scanning Basics ... 6.1 Scanning From the Control Panel to an Application ... 6.1 7. Faxing SCX-4521F (Only for Setting Up the Fax System Changing the Fax Setup options ... 7.1 Available Fax Setup Options ... 7.1 Sending a Fax Loading a Document ...
- Page 6 Clearing the Memory ... 8.1 Setting the Machine to be Checked by Phone (Only for ) ... 8.2 SCX-4521F Cleaning Your Machine ... 8.2 Cleaning the Outside ... 8.2 Cleaning the Inside ... 8.2 Cleaning the Scan Unit ... 8.3 Maintaining the Toner Cartridge ...
-
Page 7: Laser Safety Statement
During normal operation, this machine produces ozone. The ozone produced does not present a hazard to the operator. However, it is advisable that the machine be operated in a well ventilated area. If you need additional information about ozone, please request your nearest Samsung dealer. -
Page 8: Mercury Safety
LAMP(S) INSIDE THIS PRODUCT CONTAIN MERCURY AND MUST BE RECYCLED OR DISPOSED OF ACCORDING TO LOCAL, STATE OR FEDERAL LAWS. For details see lamprecycle.org, eiae.org, or call 1-800-Samsung Power Saver This machine contains advanced energy conservation technology that reduces power consumption when it is not in active use. -
Page 9: Ringer Equivalence Number
PSTNs and compatible PBXs of the European countries: In the event of problems, you should contact the Euro QA Lab of Samsung Electronics Co., Ltd. in the first instance. The product has been tested against TBR21. To assist in the use and... - Page 10 ARNING If you cut off the moulded plug, get rid of it straight away. You cannot rewire the plug and you may receive an electric shock if you plug it into a socket. : You must earth this machine. MPORTANT WARNING The wires in the mains lead have the following color code: •...
- Page 11 Differences Between British and American English British English American English (Re)dialling (Re)dialing Colour Color Emphasise Emphasize Recognise Recognize Organise Organize Authorise Authorize Cancelling Canceling Customise Customize Socket Jack Labelling Labeling Grey Gray...
-
Page 12: Introduction
Introduction Thank you for purchasing this Samsung multifunctional product. Your machine provides printing, copying, scanning, and faxing (only for SCX-4521F) functions! This chapter includes: • Special Features • Understanding Component Locations Special Features Your new machine is equipped with special features that improve the print quality. -
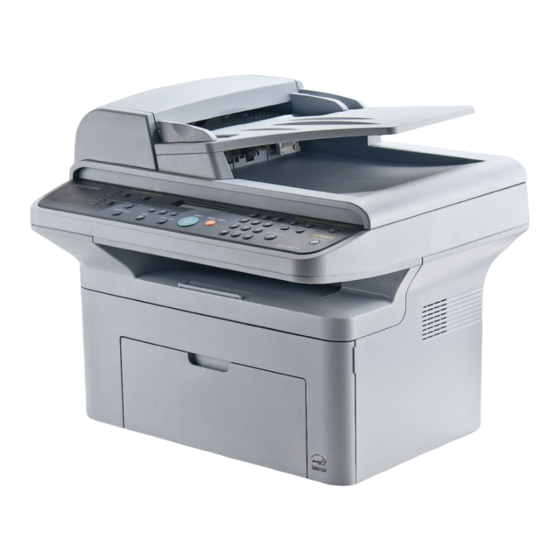
Page 13: Understanding Component Locations
Document Feeder Document Output Tray Paper Output Extension Paper Input Tray Front Door Output Tray (Face Down) The figure above shows an SCX-4521F. Document Cover Power Switch Document Glass Control Panel (SCX-4521F: see page 1.3. SCX-4321: see page 1.3.) Toner... -
Page 14: Control Panel Functions
Allows you to access a list of your PC software programs that an image can be scanned to. You Scan-to must create the scan list using the Samsung software (Printer Settings Utility) provided with this machine. For details, see Software User’s Guide. -
Page 15: Getting Started
• Installing Printer Software • Changing the Display Language and Country • Setting the Machine ID (Only for SCX-4521F) • Setting the Date and Time (Only for SCX-4521F) • Setting the Paper Size and Type • Setting Sounds (Only for SCX-4521F) •... -
Page 16: Selecting A Location
Remove the packing tape from the front, back, and sides of the machine. Tape Selecting a Location Select a level, stable place with adequate space for air circulation. Allow extra space for opening doors and trays. The area should be well-ventilated and away from direct sunlight or sources of heat, cold, and humidity. -
Page 17: Loading Paper
Gently roll the cartridge 5 or 6 times to distribute the toner. Thoroughly rolling the cartridge will assure maximum copies per cartridge. : If toner gets on your clothing, wipe it off with a dry cloth and wash clothing in cold water. Hot water sets toner into fabric. AUTIONS •... -
Page 18: Making Connections
Making Connections If you have SCX-4321: Skip this step and proceed to step 2. If you have SCX-4521F: Plug one end of the supplied telephone line cord into the LINE jack on the machine and the other end into the wall jack. - Page 19 Plug the cord of your extension phone or answering machine into the EXT. jack. To an extension phone or answering machine UK users should plug the cord of the extension phone into the supplied TAM lead and plug the cord of the TAM lead into the EXT.
-
Page 20: Turning The Machine On
Connect a USB cable to the USB connector on your machine. You need to buy a USB 1.1 compliant cable that is within 3 m in length. To the USB port on your computer If you want to use a parallel printer cable, purchase only an IEEE-1284 compliant parallel cable and connect it to the parallel connector on your machine. -
Page 21: Installing Printer Software
Installing Printer Software You must install software using the supplied CD- ROM after you have set up your machine and connected it to your computer. For details, see Software User’s Guide. The CD-ROM provides you with the following software: Programs for Windows To use your machine as a printer and scanner in Windows, you must install the MFP driver. -
Page 22: Printer Driver Features
Printer Driver Features Your printer drivers support the following standard features: • Paper source selection • Paper size, orientation and media type • number of copies The following table lists a general overview of features supported by your printer drivers. Printer Driver Feature Win 98/Me/... -
Page 23: Setting The Machine Id
Setting the Machine ID (Only for SCX-4521F) In some countries, you are required by law to indicate your fax number on any fax you send. The Machine ID, containing your telephone number and name (or company name), will be printed at the top of each page sent from your machine. -
Page 24: Setting The Date And Time (Only For Changing The Clock Mode
Setting the Date and Time (Only for SCX-4521F) When you turn your machine on for the first time, the display prompts you to enter the current date and time. After entering, it will not appear anymore. : When turning on the machine after turning it off for a long time, you need to reset date and time. -
Page 25: Setting Sounds
Setting Sounds (Only for SCX-4521F) You can control the following sounds: • Speaker: You can turn on or off the sounds from the telephone line through the speaker, such as the dial tone or a fax tone. With this option set to “Comm.” the speaker is on until the remote machine answers. -
Page 26: Setting The Dial Mode
Setting the Dial Mode (Only for SCX-4521F) You can select the type of the telephone dial system where your machine is connected. : The Dial Mode setting may be unavailable depending on your country. Press Menu until “Machine Setup” appears on the top line of the display. -
Page 27: Paper Handling
Paper Handling This chapter introduces you to the basics of selecting print materials and loading them into your machine. This chapter includes: • Selecting Print Materials • Loading Paper • Verifying an Output Location Selecting Print Materials You can print on a variety of print materials, such as plain paper, envelopes, labels, and transparencies. -
Page 28: Guidelines For Paper And Special Materials
Guidelines for Paper and Special Materials When selecting or loading paper, envelopes, or other special material, keep these guidelines in mind: • Always use paper and other materials that conform with the specifications listed under “Paper Specifications” on page 10.3. •... -
Page 29: Loading Paper
Loading Paper Proper paper loading helps prevent paper jams and ensure trouble-free printing. Do not remove the paper in the tray while a job is printing. Doing so may cause a paper jam. See “Paper Type, Input Sources, and Capacities” on page 3.1 for acceptable paper size and capacity for the tray. -
Page 30: Copying
Copying This chapter gives you step-by-step instructions for copying documents. This chapter includes: • Loading Paper for Copying • Preparing a Document • Making Copies on the Document Glass • Making Copies from the Automatic Document Feeder • Setting Copy Options •... -
Page 31: Making Copies On The Document Glass
Making Copies on the Document Glass Lift and open the document cover. Place the document face down on the document glass and align it at the top left corner of the glass. : Make sure that no documents are in the ADF (Automatic Document Feeder). -
Page 32: Setting Copy Options
Pressing and holding the button allows you to quickly scroll to the number you want. For the SCX-4521F, you can enter the value using the number keypad. Press Enter to save the selection. : When you make a reduced copy, black lines may appear at the bottom of your copy. -
Page 33: Using Special Copy Features
Using Special Copy Features You can use the following copy features: • Off: Prints in normal mode. • Clone: Prints multiple image copies from the original document on a single page. The number of images is automatically determined by the original image and paper size. -
Page 34: Id Card Copying
If necessary, customize the copy settings, including number of copies, darkness, and original type, by using the control panel buttons. See “Setting Copy Options” on page 4.3. : You cannot adjust the copy size using the Reduce/ Enlarge button while Auto Fit copying is enabled. Press Start to begin copying. -
Page 35: Changing The Default Settings
When the option you want to set appears, press Enter to access the option. Change the setting using the scroll button ( or For the SCX-4521F, you can enter the value using the number keypad. Press Enter to save the selection. -
Page 36: Basic Printing
Basic Printing This chapter includes: • Printing a Document • Canceling a Print Job Printing a Document This machine allows you to print in various Windows applications, a Macintosh computer, or a Linux system. The exact steps for printing a document may vary depending on the application you use. -
Page 37: Scanning
• From the Windows Images Acquisition (WIA) driver: Your machine also supports the WIA driver for scanning images. For details, see Software User’s Guide. • From the Samsung SmarThru software: Launch Samsung SmarThru and open Scan To to begin scanning. For details, see Software User’s Guide. -
Page 38: Faxing (Only For Scx-4521F )
Faxing (Only for SCX-4521F) The fax feature is only available on the SCX-4521F. This chapter gives you information about using your machine as a fax machine. This chapter includes: Setting Up the Fax System • Changing the Fax Setup options •... - Page 39 • In DRPD mode, you can receive a call using the Distinctive Ring Pattern Detection (DRPD) feature. This option is available only when you set up the DRPD Mode. For further details, see “Receiving Faxes Using the DRPD Mode” on page 7.7. Faxing (Only for SCX-4521F) Description “Receiving Faxes Using...
-
Page 40: Sending A Fax
: Make sure that no other documents are in the ADF (Automatic Document Feeder). If a document is detected in the ADF, the machine gives it priority over the document on the document glass. Close the document cover. Faxing (Only for SCX-4521F) -
Page 41: Adjusting The Document Resolution
“Another Page?”. The number is dialed and then the machine begins sending the fax when the receiving fax machine is ready. : When you want to cancel a fax job, press at any time while sending. Faxing (Only for SCX-4521F) Stop/Clear... -
Page 42: Sending A Fax Manually
When the display shows “Retry Redial ?”, press Enter to redial the number without waiting. To cancel the automatic redialing, press Stop/Clear. To change the time interval between redials and the number of redial attempts. See “Redial Term” on page 7.2. Faxing (Only for SCX-4521F) -
Page 43: Receiving A Fax
To change the number of rings, page 7.1. If you want to adjust the ringer volume, see “Setting Sounds (Only for SCX-4521F)” on page 2.11. Receiving Manually in Tel Mode You can receive a fax call by Start key pressure like below, Press the On Hook Dial l key or lift the external handset Press Start , then the "1.Sending 2.Receiving"... -
Page 44: Receiving Manually Using An Extension Telephone
If you receive a fax while you are copying or printing, your machine stores incoming faxes in memory. Then, as soon as you finish copying or printing, the machine automatically prints the fax. Faxing (Only for SCX-4521F) -
Page 45: Automatic Dialing
When the display confirms the number to be added to the group, press Enter. Repeat steps 6 and 7 to enter other speed dial numbers into the group. Faxing (Only for SCX-4521F) ) to display ) and press Enter. ) and then... -
Page 46: Editing Group Dial Numbers
“S” for speed dial or “G” for group dial numbers. These letters tell you how the number is stored. When the name and/or the number you want displays, press Start or Enter to dial. Faxing (Only for SCX-4521F) ) to scroll through the... -
Page 47: Searching With A Particular First Letter
For a document placed on the document glass, the display asks if you want to load another page. Select “1:Yes” to add. Otherwise, select “2:No”. The machine begins sending the document to the numbers you entered in the order in which you entered them. 7.10 Faxing (Only for SCX-4521F) -
Page 48: Sending A Delayed Fax
To assign a name to the transmission, enter the name you want. For details about entering characters, see “Entering Characters Using the Number Keypad” on page 2.9. If you do not want to assign a name, skip this step. 7.11 Faxing (Only for SCX-4521F) -
Page 49: Adding Documents To A Scheduled Fax
“Yes”. The selected job is canceled and the machine returns to Standby mode. To cancel your selection, press 2 to select “No”. 7.12 Faxing (Only for SCX-4521F) ) to display “Cancel Job” on ) until you see the fax job... -
Page 50: Additional Features
This feature recognize the last 6 digits of the fax number set as a remote fax machine’s ID. Multi-communication Report This report is printed automatically after sending documents from more than one location. 7.13 Faxing (Only for SCX-4521F) -
Page 51: Using Advanced Fax Settings
ECM-equipped fax machine. If the line quality is Correction poor, it takes more time to send a fax when you are Mode) using ECM. Select Off to turn this feature off. Select On to turn this feature on. 7.14 Faxing (Only for SCX-4521F) Description... -
Page 52: Maintenance
•Copy Setup: Restores all of the Copy Setup options to the factory default. •Fax Setup: (Only for SCX-4521F) Restores all of the Fax Setup options to the factory default. •Fax Feature: (Only for SCX-4521F) Cancels all of the scheduled fax jobs in the machine’s memory. -
Page 53: Setting The Machine To Be Checked By Phone
Setting the Machine to be Checked by Phone (Only for SCX-4521F) The Remote Test feature allows your machine to be checked out by a service company at a remote place by phone. Press Menu on the control panel until “Maintenance”... -
Page 54: Cleaning The Scan Unit
With a dry lint-free cloth, wipe away any dust and spilled toner from the toner cartridge area and the toner cartridge cavity. : Do not touch the black transfer roller inside the AUTION machine. Locate the long strip of glass (LSU) inside the top of the cartridge compartment, and gently swab the glass to see if dirt turns the white cotton black. -
Page 55: Redistributing Toner
: You can set the machine to ignore the “[Toner Empty]” message and to continue printing incoming faxes. See “Ignoring the Toner Empty Message (Only for SCX-4521F)” on page 8.5. Remove the old toner cartridge and install a new toner cartridge. -
Page 56: Cleaning The Drum
Transfer roller Fuser unit To purchase consumables and replacement parts, contact your Samsung dealer or the retailer where you bought your machine. We strongly recommend that these items be installed by a trained service professional, except for the toner cartridge (see “Replacing the Toner Cartridge”... -
Page 57: Replacing The Adf Rubber Pad
Replacing the ADF Rubber Pad You can purchase an ADF rubber pad from your Samsung dealer or the retailer where you bought your machine. Open the ADF cover. Remove the ADF rubber pad from the ADF, as shown. Insert a new ADF rubber pad into place. -
Page 58: Troubleshooting
Troubleshooting This chapter gives helpful information for what to do if you encounter an error. This chapter includes: • Clearing Document Jams • Clearing Paper Jams • Clearing LCD Error Messages • Solving Other Problems • Common Linux Problems • Common Macintosh Problems Clearing Document Jams When a document jams while passing through the ADF (Automatic Document Feeder), “[Document Jam]”... -
Page 59: Exit Misfeed
Exit Misfeed Remove any remaining page(s) from the ADF. Open the ADF cover. Remove the misfed documents from the document output tray. Close the ADF cover. Then load the removed page(s), if any, back into the ADF. Clearing Paper Jams When a paper jam occurs, “Paper Jam”... -
Page 60: In The Fuser Area Or Around The Toner Cartridge
In the Fuser Area or Around the Toner Cartridge : The fuser area is hot. Take care when removing paper from the machine. Open the front door. Pull the toner cartridge out, lightly pushing it down. If necessary, pull the manual tray out. Remove the jammed paper by gently pulling it straight out. -
Page 61: Tips For Avoiding Paper Jams
If there is any resistance and the paper does not move when you pull, or if you cannot see the paper in the output tray, open the rear cover by pulling the tab on it. Remove the jammed paper by gently pulling it straight out. - Page 62 Display Meaning Low Heat Error There is a problem in the fuser unit. Open Heat Error [Over Heat] Group Not You have tried to Available select a group location (only for SCX- number where only a 4521F) single location number can be used, such as when adding locations for a broadcast operation.
-
Page 63: Solving Other Problems
Display Meaning Remove Documents The Favorite Copy from ADF button is set to Clone, Autofit, ID Card Copy or Poster and you press the button. [Retry Redial?] The machine is (only for SCX- waiting for a specified 4521F) time interval to redial a previously busy station. -
Page 64: Printing Problems
Printing Problems Condition Possible cause The machine The machine is not Check the power cord does not receiving power. connections. Check the power print. switch and the power source. The machine is not Select your printer as your selected as the default default printer in your Windows. -
Page 65: Printing Quality Problems
Condition Possible cause Pages print, The toner cartridge is Redistribute the toner, if but are blank. defective or out of necessary. See “Redistributing toner. Toner” on page 8.4. If necessary, replace the toner cartridge. The file may have Check the file to ensure that it blank pages. - Page 66 Condition Suggested solutions Vertical lines If black vertical streaks appear on the page: • The drum inside the toner cartridge has probably been scratched. Remove the toner cartridge and install a AaBbCc AaBbCc new one. See “Replacing the Toner Cartridge” on AaBbCc page 8.4.
-
Page 67: Copying Problems
Condition Suggested solutions Back of Check for leaking toner. Clean the inside of the machine. printouts are See “Cleaning the Inside” on page 8.2. dirty Black pages • The toner cartridge may not be installed properly. Remove the cartridge and reinsert it. •... -
Page 68: Scanning Problems
It will help to increase the speed. For details about how to set BIOS, refer to your computer User’s Guide. Fax Problems (Only for SCX-4521F) Condition Suggested solutions The machine is not • Unplug the power cord and plug it in again. -
Page 69: Common Linux Problems
Common Linux Problems Problem Possible Cause and Solution The machine • Check if the printer driver is installed in your system. doesn’t print. Open MFP configurator and switch to the Printers tab in Printers configuration window to look at the list of available printers. -
Page 70: Common Macintosh Problems
• If you don’t want to uninstall MFP driver and install it again, you may make the necessary symbolic link yourself. Please, log in as root user and invoke the following command: ln -sf /usr/local/bin/samsung/slpr /usr/bin/lpr Can’t scan via • Check if Gimp Front-end has “Xsane:Device dialog..” on Gimp Front- the “Acquire”... -
Page 71: Specifications
Specifications This chapter includes: • General Specifications • Scanner and Copier Specifications • Printer Specifications • Facsimile Specifications (Only for SCX-4521F) • Paper Specifications General Specifications Item SCX-4321(WT21MFC) Model name SCX-4521F(WT21MFF) Automatic document Up to 30 sheets (20 lb, 75 g/m feeder Width: 5.6 to 8.5 inches (142 to 216 mm) -
Page 72: Scanner And Copier Specifications
* Min.: 3 x 5 in. (76 x 127 mm) Max.: 8.5 x 14 in. (216 x 356 mm) 600 x 600 dpi SPL (Samsung Printer Language) Windows 98/2000/NT 4.0/Me/XP, Various Linux OS (USB only), Macintosh 10.3 10 MB (Non-expendable) IEEE 1284 Parallel, USB 1.1 (Compatible with USB 2.0) -
Page 73: Facsimile Specifications (Only For Scx-4521F )
• Before purchasing large quantities of paper, insure the paper meets the requirements specified in this user’s guide. : Using paper that does not meet these AUTION specifications may cause problems, requiring repairs. These repairs are not covered by the Samsung warranty or service agreements. -
Page 74: Supported Sizes Of Paper
Supported Sizes of Paper Paper Dimensions 8.5 x 11 in. Letter (216 x 279 mm) 8.3 x 11.7 in. (210 x 297 mm) 7.3 x 10.5 in. Executive • 16 to 24 lb (184 x 267 mm) (60 to 90 g/m 8.5 x 14 in. -
Page 75: Paper Specifications
Paper Specifications Category Specifications Acid content 5.5 pH or lower Caliper 3.0 ~ 7.0 mils (0.094 ~ 0.18 mm) Curl in ream Flat within 0.02 in. (5 mm) Cut edge conditions Cut with sharp blades with no visible fray. Must not scorch, melt, offset or release hazardous Fusing compatibility emissions when heated to 200 °C (392 °F) for 0.1 second. -
Page 76: Envelope Margins
Envelopes with Double Side Seams Double side-seams construction has vertical seams at both ends of the envelope rather than diagonal seams. This style may be more likely to wrinkle. Be sure the seam extends all the way to the corner of the envelope as illustrated below. Correct Incorrect Envelopes with Adhesive Strips or Flaps... - Page 77 NDEX Numerics 2/4-up, special copy 4.5 adding documents 7.12 ADF (Automatic Document Feeder), load 4.2 ADF rubber pad, replace 8.6 auto fit, special copy 4.4 automatic dialing group 7.8 speed 7.8 automatic redialing 7.5 broadcasting faxes 7.10 canceling copy 4.2 fax 7.5 print 5.1 scheduled faxes 7.12...
- Page 78 paper guidelines 3.2 paper jam, clear 9.2 paper load manual tray 3.3 tray 2.3 paper load capacity 3.1 paper size, set paper tray 2.10 paper type, set paper tray 2.10 parallel,connect 2.6 poster copying 4.5 power save mode, use 2.11 print quality problems, solve 9.8 printing document 5.1...
- Page 79 Samsung Printer Software User’s Guide...
- Page 80 ONTENTS NSTALLING Chapter 1: Installing Printer Software ... 4 Reinstalling Printer Software ... 6 Removing Printer Software ... 6 ASIC RINTING Chapter 2: Printing a Document ... 7 Printer Settings ... 8 Layout Tab ... 8 Paper Tab ... 9 Graphics Tab ...
- Page 81 The Phonebook Tab (fax available model only) ... 21 The Firmware Update Tab ... 21 CANNING Chapter 6: Scanning Using Samsung SmarThru ... 22 Installing Samsung SmarThru ... 22 Uninstalling Samsung SmarThru ... 23 Using Samsung SmarThru ... 23 Using Onscreen Help File ... 24 Scanning Process with TWAIN-enabled Software ...
- Page 82 Printing from Applications ... 31 Printing Files ... 31 Scanning a Document ... 32 Using the Image Editor ... 33 SING RINTER WITH A Chapter 8: Installing Software for Macintosh ... 34 Setting Up the Printer ... 35 For a Network-connected Macintosh ... 35 For a USB-connected Macintosh ...
-
Page 83: Installing Printer Software In Windows
Installing Printer Software in Windows This chapter includes: • Installing Printer Software • Reinstalling Printer Software • Removing Printer Software Installing Printer Software All applications should be closed on your PC before beginning installation. : If the “New Hardware Wizard” window appears during the installation procedure, click the box to close the window, or click Cancel. - Page 84 If the test page prints out correctly, click Yes. If not, click No to reprint it. To register yourself as a user of Samsung Printers in order to receive information from Samsung, select the checkbox and click Finish. You are now sent to the Samsung web site.
-
Page 85: Reinstalling Printer Software
Reinstalling Printer Software You can reinstall the software if installation fails. Start Windows. From the Start menu select Programs or All Programs → your printer driver name → Maintenance. Or place the CD-ROM into the CD-ROM drive. Select Repair. You will see a component list so that you can reinstall any item individually. -
Page 86: Basic Printing
Basic Printing This chapter explains the printing options and common printing tasks in Windows. This chapter includes: • Printing a Document • Printer Settings - Layout Tab - Paper Tab - Graphics Tab - Extras Tab - About Tab - Printer Tab - Using a Favorite Setting - Using Help Printing a Document... -
Page 87: Printer Settings
Printer Settings You can use the printer properties window, which allows you to access all of the printer options you need when using your printer. When the printer properties are displayed, you can review and change the settings needed for your print job. Your printer properties window may differ, depending on your operating system. -
Page 88: Paper Tab
Paper Tab Use the following options to set the basic paper handling specifications when you access the printer properties. See “Printing a Document” on page 7 for more information on accessing printer properties. Click the Paper tab to access various paper properties. Copies Copies allows you to choose the number of copies to be printed. -
Page 89: Graphics Tab
Graphics Tab Use the following Graphic options to adjust the print quality for your specific printing needs. See “Printing a Document” on page 7 for more information on accessing printer properties. Click the Graphics tab to display the properties shown below.. Resolution The Resolution options you can select may vary depending on your printer model. -
Page 90: Extras Tab
Extras Tab You can select output options for your document. See “Printing a Document” on page 7 for more information about accessing the printer properties. Click the Extras tab to access the following feature: Watermark You can create a background text image to be printed on each page of your document. -
Page 91: Using A Favorite Setting
Using a Favorite Setting The Favorites option, which is visible on each properties tab, allows you to save the current properties settings for future use. To save a Favorites item: Change the settings as needed on each tab. Enter a name for the item in the Favorites input box. Click Save. -
Page 92: Advanced Printing
Advanced Printing This chapter explains printing options and advanced printing tasks. • Your printer driver Properties window that appears in this User’s Guide may differ depending on the printer in use. However the composition of the printer properties window is similar. -
Page 93: Printing Posters
Printing Posters This feature allows you to print a single-page document onto 4, 9, or 16 sheets of paper, for the purpose of pasting the sheets together to form one poster-size document. To change the print settings from your software application, access printer properties. -
Page 94: Fitting Your Document To A Selected Paper Size
Fitting Your Document to a Selected Paper Size This printer feature allows you to scale your print job to any selected paper size regardless of the digital document size. This can be useful when you want to check fine details on a small document. -
Page 95: Creating A Watermark
Creating a Watermark To change the print settings from your software application, access printer properties. See “Printing a Document” on page 7. Click the Extras tab, and click the Edit button in the Watermark section. The Edit Watermark window appears. Enter a text message in the Watermark Message box. -
Page 96: Using Overlays
Using Overlays What is an Overlay? An overlay is text and/or images stored in the computer hard disk drive (HDD) as a special file format that can be printed on Dear ABC any document. Overlays are often used to take the place of preprinted forms and letterhead paper. -
Page 97: Using A Page Overlay
Using a Page Overlay After an overlay has been created, it is ready to be printed with your document. To print an overlay with a document: Create or open the document you want to print. To change the print settings from your software application, access printer properties. -
Page 98: Sharing The Printer Locally
Sharing the Printer Locally You can connect the printer directly to a selected computer, which is called “host computer,” on the network. The following procedure is for Windows XP. For other Windows OS, refer to the corresponding Windows User's Guide or online help. -
Page 99: Using Printer Settings Utility
Using Printer Settings Utility This is automatically installed when you install the MFP (Multi Functional Printer) driver. Using Printer Settings Utility, you can create and edit Phonebook entries from your computer and configure the destination launches when you use the corresponding button on the control panel. -
Page 100: The Phonebook Tab (Fax Available Model Only)
The Phonebook Tab (fax available model only) Click the tab to create and edit Phonebook entries. Read Reads the Phonebook entries from the machine to the Printer Settings Utility. Write Downloads the Phonebook entries from the Printer Settings Utility to the machine. -
Page 101: Scanning
Then you can fax or e-mail the files, display them on your web site or use them to create projects that you can print using Samsung SmarThru software or the WIA driver. This chapter includes: •... -
Page 102: Uninstalling Samsung Smarthru
Place your photograph or page on the document glass or ADF. Once you have installed Samsung SmarThru, you will see the SmarThru 4 icon on your desktop. Double-click the SmarThru 4 icon. The SmarThru 4 window opens. -
Page 103: Using Onscreen Help File
Click Scan To. The Scan To menu bar appears on the SmarThru 4 window. Scan To lets you use the following services: •Application Scanning an image and placing it in an image editor application, such as Paint or Adobe Photoshop. •E-mail Scanning an image and emailing it. -
Page 104: Scanning Process With Twain-Enabled Software
Scanning Process with TWAIN- enabled Software If you want to scan documents using other software, you will need to use TWAIN-compliant software, such as Adobe PhotoDeluxe or Adobe Photoshop. The first time you scan with your machine, select it as your TWAIN source in the application you use. -
Page 105: Using Your Printer In Linux
• Printing a Document • Scanning a Document Getting Started The supplied CD-ROM provides you with Samsung’s MFP driver package for using your machine with a Linux computer. Samsung’s MFP driver package contains printer and scanner drivers, providing the ability to print documents and scan images. -
Page 106: Installing The Mfp Driver
When the installation is complete, click Finish. The installation program has added the MFP Configurator desktop icon and Samsung MFP group to the system menu for your convenience. If you have any difficulties, consult the onscreen help that is available through your... -
Page 107: Uninstalling The Mfp Driver
Opening the MFP Configurator Double-click MFP Configurator on the desktop. You can also click the Startup Menu icon and select Samsung MFP and then MFP Configurator. Press each button on the Modules pane to switch to the corresponding configuration window. -
Page 108: Printers Configuration
• Add Class... : Allows you to add a new printer class. • Remove Class : Removes the selected printer class. Scanners Configuration In this window, you can monitor the activity of scanner devices, view a list of installed Samsung MFP devices, change device properties, and scan images. Switches to Scanners configuration. -
Page 109: Mfp Ports Configuration
“consumer” applications to these devices via the single I/O port. The Samsung MFP driver package provides an appropriate port sharing mechanism that is used by Samsung printer and scanner drivers. The drivers address their devices via so-called MFP ports. -
Page 110: Printing A Document
To abort the current job, click Cancel. Printing Files You can print many different types of files on the Samsung MFP device using the standard CUPS way - directly from the command line interface. The CUPS lpr utility allows you do that. -
Page 111: Scanning A Document
Scanning a Document You can scan a document using the MFP Configurator window. Double-click the MFP Configurator on your desktop. Click the button to switch to Scanners Configuration. Select the scanner on the list. Click your scanner. When you have only one MFP device and it is connected to the computer and turned on, your scanner appears on the list and is automatically selected. -
Page 112: Using The Image Editor
When you are finished, click Save on the toolbar. Select the file directory where you want to save the image and enter the file name. Click Save. Adding Job Type Settings You can save your scan option settings to retrieve for a later scanning. -
Page 113: Using Your Printer With A Macintosh
Double-click the Printer folder. Double-click the Samsung SPL2 Installer icon. Enter the password and click OK. The Samsung SPL Installer window opens. Click Continue and then click Continue. Select Easy Install and click Install. After the installation is finished, click Quit. -
Page 114: Setting Up The Printer
Enter the queue name in the Queue Name field. If you cannot determine the queue name for your printer server, try using the default queue first. Select Samsung in Printer Model and your printer in Model Name. Click Add. Your printer’s IP address appears on the Printer List, and is set as the default printer. -
Page 115: Printing
Printing OTES • The Macintosh printer’s properties window that appears in this User’s Guide may differ depending on the printer in use. However the composition of the printer properties window is similar. • You can check your printer name in the supplied CD- ROM. -
Page 116: Printing Multiple Pages On One Sheet Of Paper
Printer Features Setting The Printer Features tab provides options for selecting the paper type and adjusting print quality. Select Printer Features from the Presets drop-down list to access the following features: ▲ Mac OS 10.3 Paper Type Make sure that Paper Type is set to Printer Default. If you load a different type of print material, select the corresponding paper type. -
Page 117: Scanning
Scanning If you want to scan documents using other software, you will need to use TWAIN-compliant software, such as Adobe PhotoDeluxe or Adobe Photoshop. The first time you scan with your machine, select it as your TWAIN source in the application you use. - Page 118 NDEX advanced printing, use 13 canceling scan 25 document, print Macintosh 36 Windows 7 Extras properties, set 11 favorites settings, use 12 Graphics properties, set 10 help, use 12 install printer driver Macintosh 34 Windows 4 installing Linux software 26 Layout properties, set Macintosh 36 Windows 8...
- Page 119 resolution Macintosh 37 Windows 10 toner save 10 true-type option 10 software install Macintosh 34 Windows 4 reinstall Windows 6 system requirements Macintosh 34 uninstall Macintosh 34 Windows 6 system requirements Linux 26 Macintosh 34 toner save, set 10 TWAIN, scan 25 uninstall, software Macintosh 34 Windows 6...
- Page 120 Rev.4.00 www.samsungprinter.com...