Table of Contents
Advertisement
Quick Links
Advertisement
Table of Contents

Related Manuals for Boss AC-2


Summary of Contents for Boss AC-2
- Page 1 Owner's Manual AC & BATTERY POWERED...
- Page 2 Thank you, and congratulations on your choice of BOSS AC-2 Acoustic Simulator. Before using this unit, carefully read the sections entitled: “USING THE UNIT SAFELY” and “IMPORTANT NOTES” (separate sheet). These sections provide important information concerning the proper operation of the unit. Additionally, in order to feel assured that you have gained a good grasp of every feature provided by your new unit, this manual should be read in its entirety.
- Page 3 FEATURES • This is an effect unit that transforms an electric guitar sound into an acoustic sound. • Any of the four different sounds can be selected by changing the position of the Mode switch. • You can output the acoustic sound and electric guitar sound separately. •...
-
Page 4: Important Notes
IMPORTANT NOTES In addition to the items listed under “USING THE UNIT SAFELY” on page 20, please read and observe the following: Power Supply • Do not use this unit on the same power circuit with any device that will generate line noise (such as an electric motor or variable lighting system). -
Page 5: Maintenance
Maintenance • For everyday cleaning wipe the unit with a soft, dry cloth or one that has been slightly dampened with water. To remove stubborn dirt, use a cloth impregnated with a mild, non- abrasive detergent. Afterwards, be sure to wipe the unit thoroughly with a soft, dry cloth. -
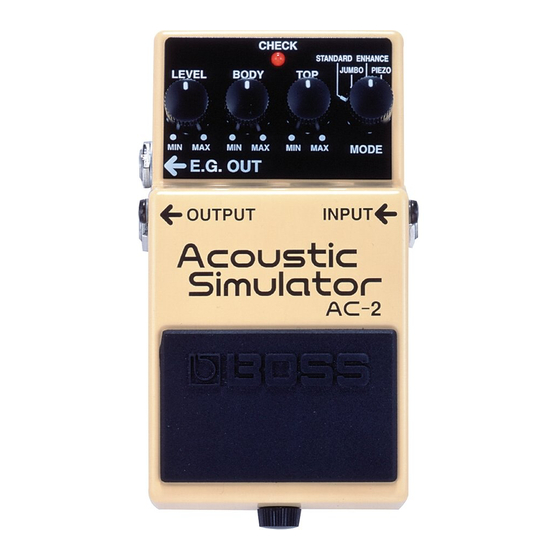
Page 6: Panel Descriptions
PANEL DESCRIPTIONS AC Adaptor Jack Accepts connection of an AC Adaptor (op- tionally available BOSS PSA-Series). By using an AC Adaptor, you can play without being concerned about how much battery power you have left. * If there are batteries in the unit while an AC adaptor is being used, normal operation will continue should the line voltage be inter- rupted (power blackout or power cord dis-... -
Page 7: Pedal Switch
CHECK Indicator This indicator shows whether an effect is ON/OFF, and also doubles as the Battery Check indicator. The indicator lights when an effect is ON. If this indicator goes dim or no longer lights while an effect is ON, the battery is near exhaustion and should be replaced imme- diately. - Page 8 Thumbscrew This thumbscrew is loosened to open the pedal, allowing battery replacement. For instructions on how to replace the battery, please refer to “CHANGING THE BAT- TERY (p.16).” INPUT Jack This jack accepts input signals (coming from a guitar, some other musical instru- ment, or another effects unit).
- Page 9 LEVEL Knob This knob adjusts the level of the effect sounds. BODY Knob This adjusts the resonance of the sound caused by the body, controlling the soft- ness and fatness of an acoustic guitar. TOP Knob This adjusts the treble, controlling the at- tack and harmonic contents.
-
Page 10: Operating The Unit
OPERATING THE UNIT 1 When you have made the necessary connec- tions, set the knobs as shown in the illustra- tion. 2 Depress the pedal switch to turn the effect on. (Make sure the CHECK indicator lights.) 3 Select a sound with the MODE switch. - Page 11 5 Adjust the fatness of the sound with the BODY knob. 6 Adjust the LEVEL knob so that the level of the sound obtained when the effect is on is equal to that obtained when it is off. 7 If the higher frequency ranges get distorted, ro- tate the TOP knob counterclockwise.
-
Page 12: Making The Connections
* To prevent malfunction and/or damage to speakers or other devices, always turn down the volume, and turn off the power on all devices before making any connections. Connecting the AC-2 to a single amplifier AC Adaptor ( PSA-Series; Optional ) OUT DC 9V / 200 mA... - Page 13 Setup for changing the destination of the direct and effect sounds Connect the units as shown below, and you can change the destinations to which the direct and effect sounds are output. Amplifier 1 Amplifier 2 Electric Guitar...
- Page 14 When the effect is switched on The Check indicator lights and amplifier 1 is muted, while the effect sound is output through amplifier 2. (Mute) Amplifier 1 Effect sound Amplifier 2 Electric Guitar...
- Page 15 When the effect is switched off The Check indicator remains dark and the guitar’s direct sound is output through amplifier 1, while amplifier 2 is muted. Direct sound Amplifier 1 (Mute) Amplifier 2 OUTPUT Electric Guitar...
-
Page 16: Changing The Battery
CHANGING THE BATTERY When the indicator goes dim or no longer lights while an effect is on, it means that the battery is nearly dead and must be re- placed. Replace the battery following the steps below. Battery Snap Cord Battery Snap 9V Battery Loosen the thumbscrew at the front of the... -
Page 17: Setting Examples
SETTING EXAMPLES Single Coil Pickup Humbucking Pickup at the Front Position at the Rear Position Single Coil Pickup at the Rear Position... -
Page 18: Specifications
SPECIFICATIONS AC-2: Acoustic Simulator Nominal Input Level ... -20 dBu Input Impedance ... 1 M Nominal Output Level ... -20 dBu Output Impedance ... 1 k Residual Noise Level ... -80 dBu (IHF-A Weighted, Typ.) Controls ... Pedal Switch, MODE Switch, BODY Knob, TOP Knob, LEVEL Knob Indicator ... - Page 19 Dimensions ... 73 (W) x 129 (D) x 59 (H) mm Weight ... 440 g/ 1 lb (including battery) Accessories ... Owner's Manual, Dry Battery; 6F22/ 9 V (Carbon), Options ... AC Adaptor PSA-Series * 0 dBu = 0.775 Vrms * In the interest of product improvement, the specifications and/or appearance of this unit are subject to change without prior notice.
-
Page 20: Using The Unit Safely
Used for instructions intended to alert the user to the risk of death or severe WARNING injury should improperly. Used for instructions intended to alert the user to the risk of injury or material damage should the unit be used improperly. - Page 21 (except when this manual provides specific instruc- tions directing you to do so). Refer all servicing to your dealer, or qualified Roland service personnel. • Never use or store the unit in places that are: • Subject to temperature extremes (e.g., direct sunlight in an enclosed...
- Page 22 • Use only the specified AC adaptor (PSA-Series), and make sure the line voltage at the installation matches the input voltage specified on the AC adaptor's body. Other AC adaptors may use a different polarity, or be designed for a different voltage, so their use could result in damage, malfunction, or electric shock.
- Page 23 • Immediately turn the power off, remove the AC adaptor from the out- let, and request servicing by your dealer or qualified Roland service personnel when: • The AC adaptor or the power-sup- ply cord has been damaged; or • Objects have fallen into, or liquid has been spilled onto the unit;...
- Page 24 • Batteries must never be recharged, heated, taken apart, or thrown into fire or water. CAUTION • The unit and the AC adaptor should be located so their location or posi- tion does not interfere with their proper ventilation. • Always grasp only the plug or the body of the AC adaptor when plug- ging into, or unplugging from, an outlet or this unit.
- Page 25 • Try to prevent cords and cables from becoming entangled. Also, all cords and cables should be placed so they are out of the reach of children. • Never climb on top of, nor place heavy objects on the unit. •...
- Page 26 • If used improperly, batteries may explode or leak and cause damage or injury. In the interest of safety, please read and observe the following pre- cautions (page 16). • Carefully follow the installation instructions for batteries, and make sure you observe the correct polar- ity.
- Page 27 For EU Countries This product complies with the requirements of European Directive 89/336/EEC.
- Page 28 G601726103...