Table of Contents
Advertisement
Quick Links
Advertisement
Table of Contents

Related Manuals for Milnor MCT27E5


Summary of Contents for Milnor MCT27E5
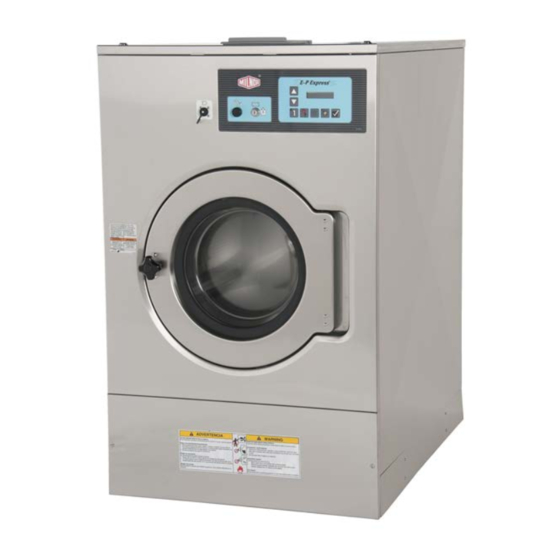
- Page 1 Published Manual Number/ECN: MPIMWT27AE/2023262A • Publishing System: TPAS2 • Access date: 07/12/2023 • Document ECNs: NOT latest Installation and Service MCT27E5 MWT27E/X/J5 PELLERIN MILNOR CORPORATION POST OFFICE BOX 400, KENNER, LOUISIANA 70063-0400, U.S.A.
- Page 3 MWR18E4, MWR18X4, MWR18J4, MWR27E5, MWR36J4, MWT12E5, MWT16E5, MWT18E4, MWT18X4, MWT18J4, MWT27E5 BMP050050/2018484A Guards and Covers BMP160042/2016533A About the Forces Transmitted by Milnor® Washer-extractors BIWUUI02/20001108 Installation Tag Guidelines - MCR12E5, MCR36E4, MCT16E5, MCT18E4, MCT27E5 BNWCAI01/2022376A Installation Tag Guidelines - MWR & MWT Series Machines...
-
Page 4: Table Of Contents
Soap Chute for E-P Express® and E-P Plus ® Controllers BMP060056/2016533A 7. Water and Drain Water Inlets BMP090021/2018484A Drain Installation BMP090025/2019423A 8. Dimensional Drawings Dimensional Drawing - MCT27E5, MWT27E5, MWT27X5, MWT27J5 BDMWT27X5AE/2023262D Dimensional Drawing - BDMWT27X5AB/2023262D Dimensional Drawing - Pedestal for (1) MCR/MWT27E5,X5,J5 BDMCRBM1AE/2017244D... - Page 5 Important Safety Instructions INSTALLERS / OWNER GROUNDING INSTRUCTIONS: This appliance must be connected to a grounded metal, permanent wiring system, or an equipment-grounding conductor must be run with the circuit conductors and connected to the equipment-grounding terminal or lead on the appliance. GENERAL INSTRUCTIONS: 1) Before the appliance is removed from service or discarded, remove the door.
- Page 6 The owner/user must familiarize himself with the contents of all machine instruction manuals. The owner/user should direct any questions about these instructions to a Milnor® dealer or the Milnor® Service department.
- Page 7 The Safety Guide and other machine manuals must be available at all times to the appropriate personnel. See the machine service manual for safety placard part numbers. Contact the Milnor Parts department for replacement placards or manuals. Maintenance —Ensure the machine is inspected and serviced in accordance with the norms of 1.5.
- Page 8 Processing can cause solvent-containing goods to give off flammable vapors. • Do not use flammable solvents in processing. • Do not process goods containing flammable substances. Consult with your local fire department/public safety office and all insurance providers. PELLERIN MILNOR CORPORATION...
- Page 9 This will over-speed the motor and pulleys and can cause them to rip apart, discharging metal fragments at high speed. • Stop the machine immediately if any of these conditions occur: • abnormal whining sound during extract • skidding sound as extract ends • clutches remain engaged or re-engage during extract PELLERIN MILNOR CORPORATION...
- Page 10 Hazards include but are not limited to panic, burns, poisoning, suffocation, heat prostration, biological contamination, electrocution, and crushing. • Do not enter the cylinder until it has been thoroughly purged, flushed, drained, cooled, and immobilized. — End of BIUUUS27 — PELLERIN MILNOR CORPORATION...
- Page 11 (unless the time period is specifically extended for certain parts pursuant to a specific MILNOR published extended warranty) from our factory with no operating hour limitation. This warranty is contingent upon the equipment being installed, operated and serviced as specified in the operating manual supplied with the equipment, and operated under normal conditions by competent operators.
- Page 12 • If the component is an electrical component, give the schematic number if known. • If the component is a motor or an electrical control, give the nameplate data from the used component. To write to the Milnor factory: Pellerin Milnor Corporation Post Office Box 400...
- Page 13 BNUUUU02 / 2021104A BNUUUU02 0000158094 3/3/21 9:47 AM Released Trademarks BNUUUU02.R01 0000158093 F.2 E.2 3/3/21 9:47 AM Released ® These words are trademarks of Pellerin Milnor Corporation and other entities: Table 1. Trademarks AutoSpot™ GreenFlex™ MilMetrix ® PulseFlow ® ®...
- Page 14 BMP050019/2018484A Page (1 / 2) Safety Placard Use and Placement MCR12E5, MCR16E5, MCR18E4, MCR27E5, MCT12E5, MCT16E5, MCT18E4, MCT27E5, MCR36E4 Notes: 1. Replace placard immediately, if removed or unreadable. 2. Approximate locations of placards are shown. Mounting holes are provided on machine.
- Page 15 Page (2 / 2) Safety Placard Use and Placement MCR12E5, MCR16E5, MCR18E4, MCR27E5, MCT12E5, MCT16E5, MCT18E4, MCT27E5, MCR36E4 Parts List—Safety Placard Use and Placement Find the correct assembly first, then find the needed components. The item letters (A, B, C, etc.) assigned to assemblies are referred to in the "Used In"...
- Page 16 MWT12E5, MWT16E5, MWT18E4, MWT18X4, MWT18J4, MWT27E5 Notes: 1. Replace placard immediately, if removed or unreadable. 2. Approximate locations of placards are shown. Mounting holes are provided on machine. If aluminum placard, use #8 Self-tapping screws. PLAN VIEW FRONT VIEW REAR VIEW PELLERIN MILNOR CORPORATION...
- Page 17 01 10708B NPLT:REAR WARNINGS MW COIN 01 10375D NPLT:ELEC HAZARD MW-TCATA 01 10092E NPLT:SPEC PLT-MD IN CHINA-ENG MWR12,16,18 MWT12,16,18 01 10093E NPLT:SPEC PLT+CODE-ENGLISH MWR27, MWT27 MWR36J4 01 10709B NPLT:DOOR ILOC INST MCR 01 10710A NPLT:CAUTION CHEMICAL SYSTEM PELLERIN MILNOR CORPORATION...
- Page 18 BMP160042/2016533A Page (1 / 2) Covers MCT12E5, MCT16E5, MCT18E4, MCT27E5 MWT12E/X/J5, MWT16E/X/J5, MWT18E/X4, MWT18J6, MWT27E/X/J5 PELLERIN MILNOR CORPORATION PELLERIN MILNOR CORPORATION...
- Page 19 BMP160042/2016533A Page (2 / 2) Covers MCT12E5, MCT16E5, MCT18E4, MCT27E5 MWT12E/X/J5, MWT16E/X/J5, MWT18E/X4, MWT18J6, MWT27E/X/J5 Parts List—Covers Find the correct assembly first, then find the needed components. The item letters (A, B, C, etc.) assigned to assemblies are referred to in the "Used In"...
- Page 20 • the liquor level and chemical conditions in the bath preceding extraction, and • other miscellaneous factors. ® Estimates of the maximum force normally encountered are available for each Milnor model and ® size upon request. Floor or foundation sizes shown on any Milnor...
- Page 21 All data is subject to change without notice and may have changed since last printed. It is the sole responsibility of every potential owner to obtain written ® confirmation that any data furnished by Milnor applies for the model(s) and serial number(s) of the specific machines.
- Page 22 Read the manuals before proceeding. This symbol appears on most tags. The machine ships with safety, operator, and routine maintenance guides for customer use. Milnor dealer manuals for installing, commissioning, and servicing the machine are also available from the Milnor Parts department.
- Page 23 B2T2006001: Remove restraints inside. Your machine requires ei- ther one or two anchor bolts on each corner of the base, as shown. (Not used on MCR36E4.) B2T2006002: Remove this restraint from the vibration switch. Pellerin Milnor Corporation...
- Page 24 Maintain incoming water pressure between 10 and 75 psi (between 0.7 and 5.1 bar). Pressures outside this range can damage the water valves in this machine. B2T2018004: Install 8 anchor bolts. Remove vibration switch re- straint. (Only used on MCR36E4.) End of document: BNWCAI01 Pellerin Milnor Corporation...
- Page 25 Read the manuals before proceeding. This symbol appears on most tags. The machine ships with safety, operator, and routine maintenance guides for customer use. Milnor dealer manuals for installing, commissioning, and servicing the machine are also available from the Milnor Parts department.
- Page 26 B2T2004027: Steam connection. (Optional) (Not used on MWT18_ models.) B2T2006001: Remove restraints inside. Your machine requires ei- ther one or two anchor bolts on each corner of the base, as shown. (Not used on MWR36J4.) Pellerin Milnor Corporation...
- Page 27 Maintain incoming water pressure between 10 and 75 psi (between 0.7 and 5.1 bar). Pressures outside this range can damage the water valves in this machine. B2T2018004: Install 8 anchor bolts. Remove vibration switch re- straint. (Used only on MWR36J4.) End of document: BNWCAI02 Pellerin Milnor Corporation...
- Page 28 The company that does these procedures must make sure that these procedures do not cause dam- age. Pellerin Milnor Corporation accepts no responsibility for chemical damage to the ma- chines it makes or to the goods in a machine.
- Page 29 Figure 1. Incorrect Configurations That Let the Chemical Supply Go In the Machine by a Siphon Schematic Views Legend P... Pump T... Chemical tank S... The siphon occurs above here. Liquid in the gray parts of the chemical tube and tank can go in the machine. Pellerin Milnor Corporation...
- Page 30 — There is a manifold on the machine to at- tach chemical tubes from a chemical pump system. The manifold has a source of water to flush the chemical supplies with water. Figure 3. Examples of Manifolds for Chemical Tubes. Your equipment can look different. Pellerin Milnor Corporation...
- Page 31 — When you do maintenance on the chemical pump system: • Use the correct components. • Make sure that all connections are the correct fit. • Make sure that all connections are tight. End of document: BNUUUR02 Pellerin Milnor Corporation...
- Page 32 Do not hesitate to file a claim with the carrier if the machine is damaged in any way during shipment. Milnor® will be glad to assist you in filing your claim, but is not responsible for any shipping damage to the machine once it has been delivered to the carrier in good condition.
- Page 33 Foundation templates are available for some machines. Consult Milnor if any obstruction prevents the installation of any anchor bolt. Properly install anchor bolts at ALL anchor bolt holes on the machine. Anchor bolts cannot be indiscriminately omitted.
- Page 34 2. Tighten all fasteners evenly, using only one-quarter turn on each fastener before moving to the next one. While tightening, frequently skip from front to back and right to left to insure uniform tension. After tightening all fasteners, check each fastener at least twice. — End of BIRUUI01 — PELLERIN MILNOR CORPORATION...
- Page 35 3/4" garden hose thread @ 10 - 75 psi (69 - 531 kPa) Hot water inlet Pipe material per plumbing code Flush water inlet 3/4" garden hose thread with 1/2" hose @ 10 - 75 psi (69 - 531 kPa) PELLERIN MILNOR CORPORATION...
- Page 36 6. Machines ordered for 208/240 volt operation are shipped set for 240 volt operation from the factory (Figure 2). If the supply voltage is 208 volts, then remove the top, and place the line voltage switch in the 208 volt position. PELLERIN MILNOR CORPORATION...
- Page 37 (Figure 3) restraint, motor mount blocking (Figure Check Cylinder Surface Check the perforated cylinder for smoothness. Milnor will not accept responsibility for the cylinder finish after the machine is placed in service. — End of BIRQVI01 — PELLERIN MILNOR CORPORATION...
- Page 39 Service and Maintenance...
- Page 40 • Use special caution when this instruction tells you to do work with electrical power on. Remove power from the machine for all other maintenance. Obey safety codes. • Replace guards and covers that you remove for maintenance. PELLERIN MILNOR CORPORATION...
- Page 41 CAUTION 3 : Risk of damage—Spilled chemical supplies can cause corrosion damage to the machine and the goods. • Remove chemical supplies from machine surfaces. • Stop leaks. Do not let remaining chemical supplies go into the machine when it does not operate. PELLERIN MILNOR CORPORATION...
- Page 42 Preventive Maintenance • Speak to your Milnor dealer or the Milnor factory if you see corrosion damage. CAUTION 4 : Risk of damage—The inverter will burn out without sufficient airflow. • Keep fans, filter, and vents clean (see Figure Put streamers in front of the fan to make sure the fan operates.
- Page 43 Make sure that the regulator for the pressure to the flush water inlet is set to 28 psi.(193 kPa). Figure 2: Optional flush water pressure regulator and gage Steam Strainer WARNING 7 : Risk of severe injury—You can accidentally release pressurized steam. • Close the external shutoff valve before you remove the steam strainer plug. PELLERIN MILNOR CORPORATION...
- Page 44 • Keep the air tube free of obstructions and leaks. • Keep the hose clamps tight. Figure 4: Air Tube View of Typical Air Tube Legend Air tube Hose clamps — End of BIIFUM02 — PELLERIN MILNOR CORPORATION...
- Page 45 This document uses Simplified Technical English. Learn more at http://www.asd-ste100.org. ® This document is for motors used on Milnor machines that have grease fittings. If the motor manufacturer supplies maintenance instructions, use them. If not, use this document. NOTICE P1: "Remove power from the machine" means use the necessary safety procedure for your location.
- Page 46 5. Find the quantity of grease for the frame code for your motor in Table 3. You can use the bearing data in the table to do maintenance. Do not use this data to adjust the quantity of grease. Example: grease volume = 0.16 ounces (4.7 grams) grease gun cycles = 2.5 PELLERIN MILNOR CORPORATION...
- Page 47 6307 0.16 254 to 286 (160 - 180) 6311 0.32 324 to 365 (200 - 225) 6313 0.43 12.2 404 to 5000 (280 - 315) NU322 1.11 31.5 * This is the quantity for the two bearings. PELLERIN MILNOR CORPORATION...
- Page 48 4. Add the recommended quantity of grease (See Item 5). Stop immediately if you see new grease around the motor shaft, wires or the grease outlet plug. 5. If the motor has a grease outlet plug, replace it. — End of BIUUUM03 — PELLERIN MILNOR CORPORATION...
- Page 49 These tables give the standard dimension, grade, threadlocker, and torque requirements for ® fasteners frequently used on Milnor equipment. ® Note 1: Data from the Pellerin Milnor Corporation “Bolt Torque Specification” (bolt_torque_milnor.xls/2002096). Fasteners Made of Carbon Steel 1.1. Without a Threadlocker 1.1.1.
- Page 50 Table 3: Torque Values for Plated Fasteners with Maximum 5/16-inch Diameters and No Lubricant The Grade of the Bolt Grade 2 Grade 5 Grade 8 Grade BC Dimension Pound-Inches Pound-Inches Pound-Inches Pound-Inches 1/4 x 20 1/4 x 28 5/16 x 18 5/16 x 24 PELLERIN MILNOR CORPORATION...
- Page 51 Specific applications sometime require that a LocTite product is applied to a bolt size outside the ranges shown here. For example, Milnor specifies LocTite 242 for use on certain 1" bolt applications and has confirmed this usage with the LocTite manufacturer. You may see variances such as this in the documentation for specific machine assemblies.
- Page 52 Table 8: Torque Values if You Apply LocTite 262 The Grade of the Bolt Grade 2 Grade 5 Grade 8 Grade BC Dimension Pound-feet Pound-feet Pound-feet Pound-feet 3/4 x 10 3/4 x 16 7/8 x 9 7/8 x 14 PELLERIN MILNOR CORPORATION...
- Page 53 1.2. Table 11: Torque Values for Stainless Steel Fasteners 5/16-inch and Smaller 18-8 Stainless with 316 Stainless 18-8 Stainless Loctite 767 Pound-Inc Pound-Inc Pound-Inc Dimension 1/4 x 20 1/4 x 28 5/16 x 18 5/16 x 24 PELLERIN MILNOR CORPORATION...
- Page 54 CAUTION 3 : Malfunction Hazard—Heat, vibration, or mechanical shocks can let the fasteners loosen if you do not apply the threadlocker correctly. Loose fasteners can cause malfunctions of the equipment. • Read the threadlocker manufacturer's instructions and warnings. Obey these instructions. PELLERIN MILNOR CORPORATION...
- Page 55 No threadlocker here Apply the threadlocker to this area Nut depth Disassembly —For high-strength threadlocker, apply heat for five minutes. Disassemble with 3.3. hand tools while the parts are hot. For low-strength and moderate-strength threadlocker, disassemble with hand tools. PELLERIN MILNOR CORPORATION...
- Page 56 Torque Requirements for Fasteners Figure 4: Disassembly Apply Heat to a Small Area Legend How to apply heat to a small fastener How to apply heat to a large fastener — End of BIUUUM04 — PELLERIN MILNOR CORPORATION...
- Page 57 Drive Assemblies...
- Page 58 BMP090016/2017015A Page (1 / 3) Drive Chart MCR27E5, MWR27E/X/J5 MCT27E5, MWT27E/X/J5 Figure 1: Drive Components See page 2 and Detail A for “How to Tighten the Pulley Bushing Against the Motor Shaft”. PELLERIN MILNOR CORPORATION PELLERIN MILNOR CORPORATION...
- Page 59 BMP090016/2017015A Page (2 / 3) Drive Chart MCR27E5, MWR27E/X/J5 MCT27E5, MWT27E/X/J5 Figure 2: How to Tighten the Pulley Bushing Against the Motor Shaft Motor Pulley Bushing How to Tighten the Pulley Bushing Against the Motor Shaft It is necessary to use both bolt torque and careful hammer blows with a brass or rubber hammer to fully tighten the motor pulley bushing.
- Page 60 Page (3 / 3) Drive Chart MCR27E5, MWR27E/X/J5 MCT27E5, MWT27E/X/J5 Parts List—Drive Chart Find the correct assembly first, then find the needed components. The item letters (A, B, C, etc.) assigned to assemblies are referred to in the "Used In" column to identify which components belong to an assembly. The item numbers (1, 2, 3, etc.) assigned to components relate the parts list to the illustration.
- Page 61 BMP090017/2017015A Page (1 / 2) Motor Mount MCR27E5, MWR27E/X/J5 MCT27E5, MWT27E/X/J5 (4 PLACES) View A-A 7,8 (4 PLACES) PELLERIN MILNOR CORPORATION PELLERIN MILNOR CORPORATION...
- Page 62 Page (2 / 2) Motor Mount MCR27E5, MWR27E/X/J5 MCT27E5, MWT27E/X/J5 Parts List—Motor Mount Find the correct assembly first, then find the needed components. The item letters (A, B, C, etc.) assigned to assemblies are referred to in the "Used In" column to identify which components belong to an assembly. The item numbers (1, 2, 3, etc.) assigned to components relate the parts list to the illustration.
- Page 63 Bearing Assemblies...
- Page 64 BMP090018/2017043A Page (1 / 2) Bearing Assembly & Installation MCR27E5, MWR27E/X/J5 MCT27E5, MWT27E/X/J5 SHELL BACK WATER SEAL HOLDER VIEW A-A SHELL BACK CYLINDER Lubricate the O-rings with the BACK approved grease before installation PLATE WATER BEARING SEAL HOLDER SEALED BALL...
- Page 65 Page (2 / 2) Bearing Assembly & Installation MCR27E5, MWR27E/X/J5 MCT27E5, MWT27E/X/J5 Parts List—Bearing Assembly & Installation Find the correct assembly first, then find the needed components. The item letters (A, B, C, etc.) assigned to assemblies are referred to in the "Used In"...
- Page 67 Shell and Door Assemblies...
- Page 68 Hold one hand or a cup under the handle to catch the contents, then remove your finger, allowing the spring and ball to fall out, as in Figure 2. Shake the handle if necessary, to work the components free. PELLERIN MILNOR CORPORATION...
- Page 69 The spring can stretch and be damaged if it does not separate from the shaft cam. • Be prepared to work the end of the spring out of the hole in the shaft cam as the door is opened. PELLERIN MILNOR CORPORATION...
- Page 70 2. Using a screwdriver, push down the door lock slider pin (Figure 6) and rotate the shaft (Figure 7) counterclockwise to remove it from the lock mechanism. Figure 6: Door Lock Slider Pin in the Door Lock Figure 7: Removing the Shaft from the Lock Mechanism Mechanism PELLERIN MILNOR CORPORATION...
- Page 71 Tighten the set screw until the set screw is flush with the handle. This will provide roughly the correct spring tension. c. Rotate door handle counterclockwise 90 degrees to ratchet it to the next position (with the next spoke on top). PELLERIN MILNOR CORPORATION...
- Page 72 Make 1/4 turn adjustments to all four set screws if necessary to achieve the proper tension. 9. Install the black plastic cap over the center of the handle. — End of BIRH3M02 — PELLERIN MILNOR CORPORATION...
- Page 73 BPWCDD02 / 2023216 BPWCDD02 0000423419 5/30/23, 1:15 PM Released Door Assembly and Installation 1 of 4 MCT12E5, MWT12E/X/J5; MCT16E5, MWT16E/X/J5; MCT18E4, MWT18E/X4/J6; MCT27E5, MWT27E5 Legend A—A . . See detail. B—B . . See detail. E... See BPWOAD03. F... 6 instances G...
- Page 74 Door Assembly and Installation 2 of 4 MCT12E5, MWT12E/X/J5; MCT16E5, MWT16E/X/J5; MCT18E4, MWT18E/X4/J6; MCT27E5, MWT27E5 Legend A-A . . Detail view B-B . . Detail view E... See BPWOAD03 Pellerin Milnor Corporation...
- Page 75 Door Assembly and Installation 3 of 4 MCT12E5, MWT12E/X/J5; MCT16E5, MWT16E/X/J5; MCT18E4, MWT18E/X4/J6; MCT27E5, MWT27E5 Legend Door Assembly C-C . . Detail view D-D . . Detail view J... Ensure that the gasket joint is at the top-dead-center. K... See BPWOAD01 Door Glass Installation Steps S1..
- Page 76 Door Assembly and Installation 4 of 4 MCT12E5, MWT12E/X/J5; MCT16E5, MWT16E/X/J5; MCT18E4, MWT18E/X4/J6; MCT27E5, MWT27E5 Parts List— (cont'd.) Find the assembly for your machine and the letter shown in the "Item" column. The components for your machine will show this letter or the word "all"...
- Page 77 BMP160043/2018474A Page (1 / 3) Door Lock Mechanism MCT12E5, MCT16E5, MCT18E4, MCT27E5, MCR36E4, MWR36J4 MWT12E/X/J5, MWT16E/X/J5, MWT18E/X4, MWT18J6, MWT27E/X/J5 Figure 1: Components DOOR LOCK SOLENOID DOOR LOCK SWITCH DETAILS A & B DETAIL C DOOR CLOSED SWITCH PELLERIN MILNOR CORPORATION...
- Page 78 BMP160043/2018474A Page (2 / 3) Door Lock Mechanism MCT12E5, MCT16E5, MCT18E4, MCT27E5, MCR36E4, MWR36J4 MWT12E/X/J5, MWT16E/X/J5, MWT18E/X4, MWT18J6, MWT27E/X/J5 Figure 2: Slider and Settings INSERT ITEM 2. INSERT ITEM ADJUST THE 2. ADJUST THE SWITCH TO BE SWITCH TO BE “OFF”.
- Page 79 MCT18, MCT 27 MWT18, MWT 27 MCR36E4, MWR36J4 --------------------------------------------------------------------------------------------------COMPONENTS------------------------------------------------------------------------------ 98CMCR1206 DOOR INTERLOCK ASSY MCT12 98CMCR1205 DOOR INTERLOCK ASSY MWT12 98CMCR0978 DOOR INTERLOCK ASSY MCT18 98CMCR0971 DOOR INTERLOCK ASSY V8Z VRJ MILNOR A33 03226B X2 03306A MACH=GAGE DR LOCK SWITCH,MCR PELLERIN MILNOR CORPORATION...
- Page 80 BMP070030/2016533A Page (1 / 3) Door Handle and Lock Actuator MCR12E5, MCR16E5, MCR18E4, MCR27E5 MCT12E5, MCT16E5, MCT18E4, MCT27E5 MWR12E/X/J5, MWR16E/X/J5, MWR18E/X4, MWR18J6, MWR27E/X/J5 MWT12E/X/J5, MWT16E/X/J5, MWT18E/X4, MWT18J6, MWT27E/X/J5 SHIMS 3,3A DETAIL D DETAIL B DETAIL A DETAIL C Apply Locktite 222 when inserting the bushing.
- Page 81 BMP070030/2016533A Page (2 / 3) Door Handle and Lock Actuator MCR12E5, MCR16E5, MCR18E4, MCR27E5 MCT12E5, MCT16E5, MCT18E4, MCT27E5 MWR12E/X/J5, MWR16E/X/J5, MWR18E/X4, MWR18J6, MWR27E/X/J5 MWT12E/X/J5, MWT16E/X/J5, MWT18E/X4, MWT18J6, MWT27E/X/J5 Do not open the ring more than necessary to get it on the shaft.
- Page 82 BMP070030/2016533A Page (x / x) Page (3 / 3) Door Handle and Lock Actuator MCR12E5, MCR16E5, MCR18E4, MCR27E5 MCT12E5, MCT16E5, MCT18E4, MCT27E5 MWR12E/X/J5, MWR16E/X/J5, MWR18E/X4, MWR18J6, MWR27E/X/J5 MWT12E/X/J5, MWT16E/X/J5, MWT18E/X4, MWT18J6, MWT27E/X/J5 SHIMS 3,3A DETAIL D Insert the machine screw. Hook the eye of the torsion spring onto the screw.
-
Page 83: Control And Sensing
Control and Sensing... -
Page 84: Coin Acceptor & Vault
BMP040093/2018484A Page (1 / 2) Coin Acceptor & Vault MCR12E5, MCT16E5, MCT18E4, MCTR27E5, MCR36E4 PELLERIN MILNOR CORPORATION PELLERIN MILNOR CORPORATION... - Page 85 Comments -----------------------------------------------------------------------------ASSEMBLIES--------------------------------------------------------------- GCM33002 COIN ASSY INSTALL 2314MCR09 ----------------------------------------------------------------------------COMPONENTS------------------------------------------------------------- 38C085 REJ.W/LOCK-MECH 230V CASTIC W3 40029 2314MCR09 COIN VAULT WELD 38C152KI COIN LOC BX KEY-INDV.#71942-XD KEYED INDIVIDUALLY 38C152KA COIN LOC BX#71942-XD KEY-ALIKE KEYED ALIKE 03 40029B BEZZLE COIN VAULT PELLERIN MILNOR CORPORATION...
-
Page 86: Level Switch
BMP050006/2016533A Page (1 / 2) Level Switch MCR12E5, MCR16E5, MCR18E4, MWR12E/X/J5, MWR16E/X/J5, MWR18E/X4, MWR18J6 MCT12E5, MCT16E5, MCT18E4, MCT27E5 MWT12E/X/J5, MWT16E/X/J5, MWT18E/X4, MWT18J6, MWT27E/X/J5 Single Level Switch Used Two Level Switches Used (A) MCR12E5/MCT12X5 (C) MCR18E4/MCT18X4 (D) MWR12E5/MWT12X5 (F) MCR18E4/MCT18X4 (B) MCR16E5/MCT16X5... - Page 87 Page (2 / 2) Level Switch MCR12E5, MCR16E5, MCR18E4, MWR12E/X/J5, MWR16E/X/J5, MWR18E/X4, MWR18J6 MCT12E5, MCT16E5, MCT18E4, MCT27E5 MWT12E/X/J5, MWT16E/X/J5, MWT18E/X4, MWT18J6, MWT27E/X/J5 Parts List—Level Switch Find the correct assembly first, then find the needed components. The item letters (A, B, C, etc.) assigned to assemblies are referred to in the "Used In"...
-
Page 88: Vibration Safety Switch Adjustments
Ê A djustments ® When the machine leaves Milnor , the actuator arm is tie-wrapped to prevent damage (except on 30015, 30020, and 30022 models). This tie wrap must be removed after the machine is set into position but before the machine is op- erated. - Page 89 that it has reset. In the released position the arm should rest lightly but definitely against the stop on the micro-switch case that prevents any further arm movement to the left. For machines with rigid mounted shells, where the machine is bolted to a very substantial foundation, very little machine movement will occur for a given degree of out-of-balance.
-
Page 90: Vibration Safety Switch
Page (1 / 1) Vibration Safety Switch MCR27E5, MWR27E/X/J5 MCT27E5, MWT27E/X/J5 Parts List—Vibration Safety Switch Find the correct assembly first, then find the needed components. The item letters (A, B, C, etc.) assigned to assemblies are referred to in the "Used In"... -
Page 91: Chemical Supply
Chemical Supply... - Page 92 BMP060004/2018484A Page (1 / 3) Soap Chute MCR12E5, MCT16E5, MCT18E4, MCT27E5, MCR36E4 COSMETIC COVER GASKET APPLY SILICONE BETWEEN COVER SOAP CHUTE BODY AND COVER FRONT COSMETIC LIQUID SOFTENER POWDERED DETERGENT (CLIP 4 POWDERED PLACES) BLEACH POWDERED DETERGENT BODY 9,10 MCR12...
- Page 93 BMP060004/2018484A Page (2 / 3) Soap Chute MCR12E5, MCT16E5, MCT18E4, MCT27E5, MCR36E4 APPLY SILICONE BETWEEN COVER SOAP CHUTE BODY AND COVER BODY (CLIP 4 PLACES) MCT18 INSTALLATION SHOWN PELLERIN MILNOR CORPORATION PELLERIN MILNOR CORPORATION...
- Page 94 BMP060004/2018484A Page (3 / 3) Soap Chute MCR12E5, MCT16E5, MCT18E4, MCT27E5, MCR36E4 Parts List Find the correct assembly first, then find the needed components. The item letters (A, B, C, etc.) assigned to assemblies are referred to in the "Used In" column to identify which components belong to an assembly. The item numbers (1, 2, 3, etc.) assigned to components relate the parts list to the illustration.
-
Page 95: Soap Chute For E-P One-Touch
SOAP CHUTE BODY AND COVER (4 PLACES) CHEMICAL MWR18E4, MWR18X4, MWR18J6, MWR27E5, MWR27X5, MWR27J5 MWT18E4, MWT18X4, MWT18J6, MWT27E5, MWT27X5, MWT27J5 HOT WATER PERISTALTIC BODY TO FLUSH CHEMICAL SOAP CHUTE INLETS TO SOAP CHUTE 10,11 WATER LINES PELLERIN MILNOR CORPORATION PELLERIN MILNOR CORPORATION... - Page 96 FLEXIBLE TUBE=SOAP CHUTE 4.25" 27A065 HOSECLAMP 1.56"-2.5"SSSCR#32 03 40043 INLET LIQUID SUPPLY W3 40039D WELD HINGE COVER SOAP CHUTE 20C040B SUPERFLEX CLR RTV SIL 10.2OZ 12P015D CABLE CLIP TINN#C23214-017 60E006C PVC TUBING NYL.REINF.5IDX.75OD 27A044 HOSECLAMP 5/8"ID BREEZE#6706SS PELLERIN MILNOR CORPORATION...
- Page 97 COVER Soap Chute Installation HOT WATER TO FLUSH SOAP CHUTE GASKET (NOT SHOWN) FRONT CHEMICAL COSMETIC PERISTALTIC CHEMICAL INLETS TO SOAP CHUTE MWR18X4 WATER MWT12X MWT16X MWT18X MWR27X MWT12J MWT16J MWT18J MWT27J 10,11 TYPICAL PELLERIN MILNOR CORPORATION PELLERIN MILNOR CORPORATION...
- Page 98 03 40039H FLEXIBLE TUBE=SOAP CHUTE 4.25" 27A065 HOSECLAMP 1.56"-2.5"SSSCR#32 03 40043B INLET SIX LIQUID SUPPLY W3 40039D HINGE COVER SOAP CHUTE 20C040B SUPERFLEX CLR RTV SIL 10.2OZ 12P015D CABLE CLIP TINN#C23214-017 60E006C PVC TUBING NYL.REINF.5IDX.75OD 27A044S HOSECLAMP 11/16-1.25SSCR#64012 PELLERIN MILNOR CORPORATION...
-
Page 99: Water And Drain
Water and Drain... -
Page 100: Water Inlets
BMP090021/2018484A Page (1 / 2) Water Inlets MCR27E5, MWR27E /X/J , MCR36E4, MWR36J4 MCT27E5, MWT27E/X/J5 Hot Water to Flush Soap Chute Hot & Cold Fill Water Vacuum Breaker PELLERIN MILNOR CORPORATION PELLERIN MILNOR CORPORATION... - Page 101 Water Inlets MCR27E5, MWR27E /X/J , MCR36E4, MWR36J4 MCT27E5, MWT27E/X/J5 Parts List—Water Inlets Find the correct assembly first, then find the needed components. The item letters (A, B, C, etc.) assigned to assemblies are referred to in the "Used In" column to identify which components belong to an assembly. The item numbers (1, 2, 3, etc.) assigned to components relate the parts list to the illustration.
-
Page 102: Drain Installation
BMP090025/2019423A Page (1 / 2) Drain Installation MCR27E5, MWR27E/X/J5 MCT27E5, MWT27E/X/J5 PELLERIN MILNOR CORPORATION PELLERIN MILNOR CORPORATION... - Page 103 Page (2 / 2) Drain Installation MCR27E5, MWR27E/X/J5 MCT27E5, MWT27E/X/J5 Parts List—Drain Installation Find the correct assembly first, then find the needed components. The item letters (A, B, C, etc.) assigned to assemblies are referred to in the "Used In" column to identify which components belong to an assembly. The item numbers (1, 2, 3, etc.) assigned to components relate the parts list to the illustration.
-
Page 105: Dimensional Drawings
Dimensional Drawings...